This page may contain affiliate links. Click to learn more. As an Amazon Associate I earn from qualifying purchases.

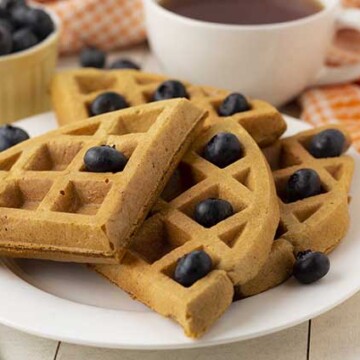
Easy, homemade vegan waffles you’ll want to make over and over again for breakfast (or brunch!). The batter is quick and easy to make, so in no time, you’ll have the most delicious vegan buttermilk waffles—crispy on the outside, yet fluffy on the inside.

Save This Recipe!
In a hurry? Drop your email below, and this recipe will be sent straight to your inbox for later. You'll also get fresh recipes every week! You can unsubscribe anytime.
Waffles for breakfast are always a treat around here! Whenever I pull out the waffle maker, it's going to be a good morning.
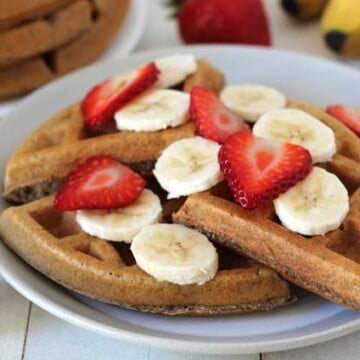
These particular waffles are, of course, completely dairy-free and eggless, but everyone you serve them to will have no idea. They're fluffy, light, and airy on the inside with a crispy, golden-brown exterior. They're easy to make, and the fun part is deciding how to top them, I share plenty of ideas below!
And if pancakes are more your thing, then be sure to check out my Vegan Buttermilk Pancakes!
NOTE: I mentioned having these waffles for breakfast but they can also be served at brunch or even as part of breakfast for dinner, there are no rules for when waffles can be enjoyed!
Ingredients You'll Need

Ingredient and Substitution Notes
Flour - You will need all-purpose white flour.
For vegan gluten-free buttermilk waffles: Make my easy vegan gluten-free waffles but replace the dairy-free milk in that recipe with vegan buttermilk. Make the buttermilk using the method outlined in this recipe and use 4 teaspoons of lemon juice instead of 5.
Dairy-Free Milk - This will be the base for your vegan buttermilk. In my testing, I found that using soy milk will make buttermilk with a thick consistency most like regular buttermilk. That thickness will make extra fluffy waffles. If you prefer or need an alternative, use almond milk and as a last alternative, oat milk. You can check out my full post on vegan buttermilk for more details. Whichever milk you choose, make sure it’s unsweetened and unflavoured.
Lemon Juice - This ingredient, combined with dairy-free milk will make the vegan buttermilk needed for this recipe. If you don't have lemon juice you can replace it with apple cider vinegar or plain white vinegar.
Sugar - Just a small amount is needed to help with browning and for a hint of sweetness. I use organic granulated cane sugar but brown sugar or coconut sugar can be used instead. The waffles on their own are not sweet, sweetness will come from whatever you top them with.
Oil - This ingredient contributes to the tender, fluffy texture and it also plays a big role in the crispiness of the waffle. In my testing, when oil was substituted, the waffles were soft and not very crisp on the outside.
Baking Powder and Baking Soda - Make sure these ingredients are fresh and active, they’re essential for the waffles to be fluffy and light on the inside. Neither of them can be substituted or left out since they both play separate roles in the recipe.
Vanilla Extract and Salt - Both add flavour and balance to the waffles, don't leave either of them out.
Looking for more breakfast ideas? Browse through all of my vegan breakfast recipes to find something to make next!
How to Make Them
(Note: I’ve outlined the step-by-step on how to make this recipe here, but find the full recipe, ingredients, and directions in the recipe card at the end of this post.)
Make the Vegan Buttermilk
Start by stirring the dairy-free milk and lemon juice together, then let it rest. During this time, it will curdle and become homemade vegan buttermilk! It will also become thick and tangy, just like regular buttermilk.

Prepare the Waffle Batter

Whisk the dry ingredients together. Stir the oil and vanilla extract into the rested buttermilk and then pour the buttermilk mixture into the dry ingredients.

Mix until you have a thick batter, but make sure not to over-mix. You still want some remaining lumps, so don't mix until it's perfectly smooth. The mixture will hydrate while resting, so some of the lumps will be absorbed naturally during this time. Rest the batter for 5-10 minutes and preheat the waffle maker.
IMPORTANT: Prepare the batter just before you plan to make the waffles, don’t make it in advance. If you'd like to prep ahead, mix the dry ingredients and store them in an airtight container. When you're ready, simply mix the wet ingredients, and combine them with the dry mix, and you'll be ready to go.

Tips to Keep in Mind Before Starting
- All waffle makers are different, some have a setting to control how brown you want your waffles to be, and some don't. Some beep when the waffles are finished, some don't. Because of this, please read through the manufacturer's user manual to familiarize yourself with your waffle maker before making this recipe.
- If your waffle maker is not non-stick, to avoid sticking, use a pastry brush to oil the cooking surfaces and then re-oil them in between waffles. Also, make sure the waffle maker has reheated properly in between waffles before adding more batter.
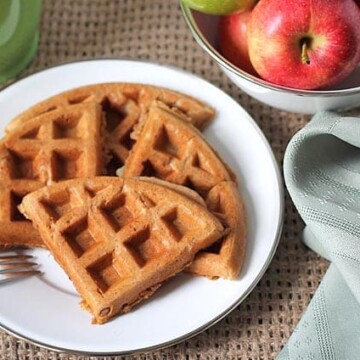
- I use a Belgian waffle maker, so this recipe makes 4 large round waffles, but any type of waffle maker can be used. If you don't have one, I recommend this waffle maker.
Cook the Waffles
Add the waffle batter to the waffle maker (I use a ladle to do this) and close it. Remove the waffle when the indicator beeps but if yours doesn't have a timer setting, you'll know the waffle is ready when steam stops coming out of the sides and top of the waffle maker.
TIP: After each waffle finishes, set it aside in a single layer (don't stack them!) on a cooling rack in a warm oven (200°F (93°C)) so they remain crisp while you cook the rest of them. See my post about How to Keep Homemade Waffles Crisp for more info.

Serving Ideas
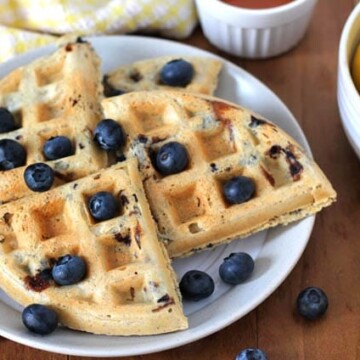
Serve your waffles with maple syrup and fresh berries or fruits, vegan whipped cream, maple caramel sauce, lemon curd, a dusting of powdered sugar, or a fruit sauce, like one of these:
Storing Leftovers
Fully cool them and place them in an airtight container or freezer bag. Keep them in the refrigerator for up to three days.
Freezing
Freeze them for later by placing the fully cooled waffles in a freezer bag or an airtight container. They will last in the freezer for up to two months. Reheat from frozen in your oven, microwave, air fryer, or toaster oven.

Tips for Success
- Follow the recipe exactly as it’s written for the very best results.
- Measure and have all your ingredients ready to go before starting. This will make the process run smoothly, quickly, and easily.
- Measure your ingredients correctly. I highly recommend using a scale to measure your flour (this is the scale I have and recommend) and my weight measurements. Too much flour will make your waffles dense and dry, too little will make a runny batter and the waffles will be chewy, gummy, and not fluffy. Please read my article about how to measure flour correctly. This tip also applies to all other ingredients, make sure to measure them accurately to get the best results.
- Make sure your baking powder and baking soda are fresh. These are important ingredients that work with the buttermilk to give the waffles the perfect fluffy texture.
- DO NOT overmix the batter! Overmixing will develop the gluten which will result in tough, dense waffles, so gently combine the wet and dry ingredients and remember that any remaining small clumps of flour are okay.
- If you'd like to use an add-in, stir it into the batter before adding it to the waffle maker. And again, don't over-mix.
- Don't overfill the waffle maker! Follow the manufacturer's directions for the amount of batter your waffle maker can take at a time to avoid a mess.
- Don't open the waffle maker to take a peek! If opened too early, the waffle will split in two, and be raw in the middle and if you close it and continue to cook it, the texture will not be right. As long as steam is coming out of the waffle maker, it's still cooking, only open it when the steam has stopped.
- Read this post from top to bottom before you start. I’ve included many tips and tricks to get things right. Also, read through the actual recipe before getting started.

If You Make This Recipe...
Please tell me all about it! Did you like this recipe? What did you top your waffles with? Let me know by leaving a comment and star rating below and you can also post a picture to Instagram and tag me so I can see your remake! (I’m @delightfuladventures on Instagram)
If You Like This Recipe...
Then you may like these other vegan breakfast recipes:

Fluffy Vegan Waffles with Buttermilk
Suggested Equipment:
Ingredients:
- 1 ¾ cups (438ml) unsweetened dairy-free milk (see note below)
- 5 teaspoons lemon juice (see note below)
- 2 cups (250g) all-purpose flour
- 3 tablespoons (38g) granulated sugar
- 1 tablespoon baking powder
- ½ teaspoon baking soda
- ¼ teaspoon salt
- 3 tablespoons oil
- 2 teaspoons vanilla extract
Instructions:
Make Vegan Buttermilk:
- Pour the dairy-free milk into a measuring cup or bowl.
- Add the lemon juice to the milk and stir. Set aside for 10 minutes.
Make Waffle Batter:
- Whisk flour, sugar, baking powder, baking soda, and salt together in a large bowl.
- Add the oil and vanilla to the rested vegan buttermilk. The buttermilk will be curdled, stir until everything has combined and the mixture is smooth.
- Slowly add the buttermilk mixture to the dry ingredients, and mix until all ingredients have combined, don't over-mix. Set aside to rest.
Cook the Waffles:
- Turn on the waffle maker and allow it to preheat.
- If your waffle maker is not non-stick, using a pastry brush, lightly coat both sides with a small amount of oil.
- Ladle the waffle batter into the center of one side of the waffle maker. Close, and cook until the machine beeps to indicate that the waffle is done. If your maker does not have this function, you'll know it's done when there is no more steam coming from the waffle maker.
- Carefully open the waffle maker, remove the waffle, and set it on a cooling rack.
- Repeat until the batter is done.
- Serve with maple syrup or other toppings of your choice. (Lots of suggestions above!)
Recipe Notes:
- Please read all of the information above, as well as the notes below before making this recipe.
- Soy milk is highly recommended because it will make vegan buttermilk with the best and thickest consistency that will be the most similar to regular buttermilk. Almond milk is the next best choice. Make sure what you use is both unsweetened and unflavoured.
- Apple cider vinegar or plain white vinegar can be used instead of lemon juice.
- Make sure the waffle maker has reheated properly in between waffles before adding batter to make another one.
- Store fully cooled leftovers for up to three days in an airtight container or freezer bag in the refrigerator. To freeze, cool them completely and freeze them for up to two months. Reheat in your oven, microwave, air fryer, or toaster oven.
- To make a vegan gluten-free version: Make my Easy Vegan Gluten Free Waffles but replace the dairy-free milk in that recipe with vegan buttermilk. Follow the method in the recipe above to make it and use 4 teaspoons of lemon juice instead of 5.
- Nutrition information is based on 1 of 4 waffles made in a Belgian waffle maker without toppings, or add-ins, and the recipe is prepared as written using soy milk. Nutrition info is only to be used as a rough guide. Click to learn how nutrition info is calculated on this website.
Janene says
This recipe looks easy and is healthier than some waffle recipes. Thank you for sharing.
Gwen Leron says
You're welcome, I hope you like them!