This page may contain affiliate links. Click to learn more. As an Amazon Associate I earn from qualifying purchases.
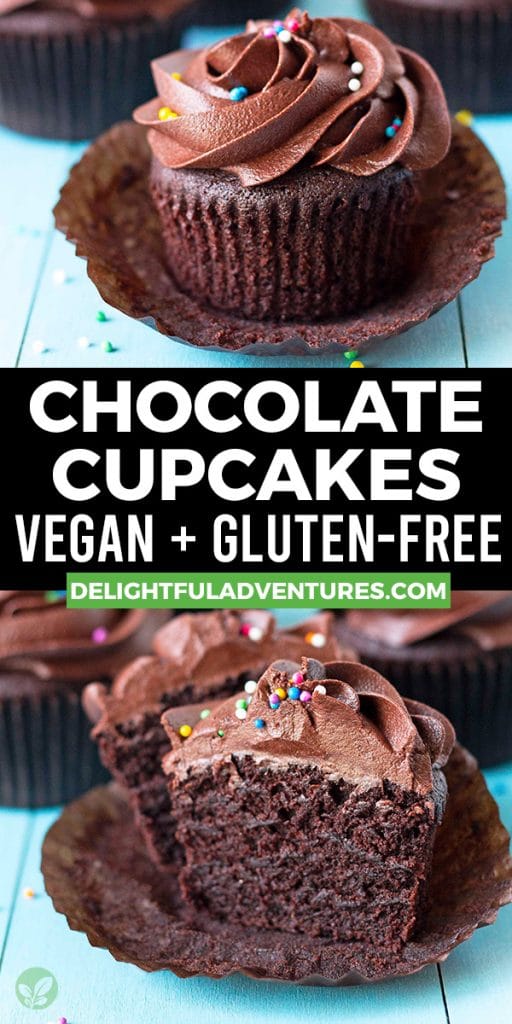
A recipe for moist, fluffy, and super chocolaty vegan gluten-free chocolate cupcakes that are easy to make and perfect for your next celebration (or just for when you're craving chocolate!). These simple homemade gf cupcakes are the best, especially when topped with chocolate frosting and sprinkles!
 These simple homemade gf cupcakes are the best, especially when topped with chocolate frosting and sprinkles!")
Save This Recipe!
In a hurry? Drop your email below, and this recipe will be sent straight to your inbox for later. You'll also get fresh recipes every week! You can unsubscribe anytime.
When I shared my vegan chocolate buttercream frosting recipe, I told you that I had a whole bunch of fun recipes to share with you over the next while. Well here's the first one: Vegan Gluten-Free Chocolate Cupcakes!
It took me SIX tries to perfect this recipe. I can't say my family was too upset; these are chocolate cupcakes, after all! The taste was always 100%, it was the texture I kept failing on (very similar to how my chocolate doughnuts testing process went!).
The cupcakes kept turning out dense, more like a brownie. Dense is a great texture for brownies, cupcakes? Not so much.
It all had to do with the leaveners and the quantities of those leaveners. Once I made a few adjustments, perfection was achieved!
So let's go through everything so you can make your own batch of amazing nut-free, egg-free, dairy-free chocolate cupcakes from scratch.
Ingredients You'll Need
10 simple ingredients is all you're going to need:
- 1:1 Gluten-Free Flour Blend (I use Bob's Red Mill brand, the one in the BLUE bag) (NOTE: If you don't need your cupcakes to be gluten-free, try out my super moist vegan chocolate cupcakes recipe.)
- Unsweetened Cocoa Powder (Dutch-process cocoa is needed for this recipe and make sure you sift it to get all the lumps out.) This recipe was developed using Dutch process cocoa. Natural cocoa powder / cacao powder and Dutch process cocoa work differently in baked recipes, and since I have not experimented to know how it will react in this particular recipe and how to adjust the other ingredients accordingly, I recommend sticking with Dutch process for the best results.
- Baking Powder and Baking Soda (Make sure these are both fresh, they're both very important to achieving the ideal rise and texture)
- Cane or Granulated Sugar (not sure if you’re sugar is vegan? Buy organic, it will be 100% vegan)
- Hot Water (to help "bloom" the cocoa powder wich is a fancy way of saying "enhance" the chocolate flavour to make it even deeper, richer, and chocolaty tasting. It also helps to break down any cocoa powder clumps)
- Oil (to add moisture to the cupcakes)
- Apple Cider Vinegar (or white vinegar, this is being used so it reacts with the baking soda to provide even more air bubbles to provide more lift while baking, and don't worry, you won't taste it!)
- Vanilla Extract (to add even more amazing flavour)
- Salt (to balance the sweetness)
TIP: If you want to bring out the chocolate flavour, even more, try substituting the hot water with hot brewed coffee. The coffee flavour will not be there but it will work to enhance the chocolate flavour even better than hot water.
Are you new to vegan gluten-free baking? If so, be sure to read all of my vegan gluten free baking tips!
 These simple homemade gf cupcakes are the best, especially when topped with chocolate frosting and sprinkles!")
How to Make Them
(Note: I’ve outlined the step-by-step on how to make this recipe here, but find the full recipe, ingredients, and directions at the end of this post.)
When I say this recipe is simple, quick, and easy, I'm not exaggerating in any way. All you have to do is whisk all the dry ingredients together (make sure to sift your cocoa powder!), then stir all the wet ingredients, plus the sugar, together and then combine the two.
Back in elementary school, you may have done the volcano science project or see someone do it. It's the one that combined baking soda and vinegar to provide a reaction. Remember that?
This is what you're doing with this recipe, you're combining those two ingredients to replicate that same reaction to make the cupcakes rise nicely. Have a look at the last picture in this collage to see the reaction taking place:
 These simple homemade gf cupcakes are the best, especially when topped with chocolate frosting and sprinkles!")
After you add the wet ingredients to the dry, stir until there are no lumps or pockets of dry ingredients left. Don't over mix, though, since this will pop all of those bubbles that we need!
After I have everything mixed nicely, since this batter is a little more runny than others, I like to pour it into a large measuring cup and then pour the batter into the cupcake liners.
You need to fill each cupcake liner ⅔ of the way up (see the top right image below). If you add too little, your cupcake will be too "short," and if you add too much, your cupcakes can sink and not bake properly, or bubble over making a mess in your oven.
 These simple homemade gf cupcakes are the best, especially when topped with chocolate frosting and sprinkles!")
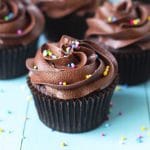
And now you have 12 perfectly moist gluten free chocolate cupcakes, almost ready to be decorated! The image directly above this text is a finished cupcake.
As you see, they only rise a little higher than the cupcake liner and have fairly flat tops, which is exactly what you want since this makes them perfect for decorating. Be sure to allow them to cool completely before frosting or your frosting will melt and make a mess.
If you prefer a cake instead of cupcakes, make my vegan gluten-free chocolate cake instead.
Decorating Them
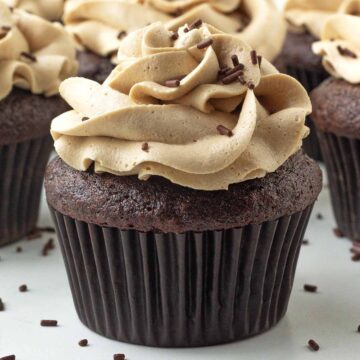
My preferred way to top these cupcakes is with any of these:
- vegan chocolate buttercream
- vegan peanut butter frosting
- vegan strawberry frosting
- vegan raspberry frosting
- vegan coffee frosting
- vegan vanilla buttercream frosting
- vegan peppermint buttercream frosting
And when decorating, you can get as fancy as you'd like, or keep it simple by just using a butter knife to smear on some icing. They're going to taste good either way!
TIP: If you're new to cupcake decorating, I highly recommend this inexpensive cupcake decorating kit (Amazon Link) that comes with four of the most popular decorating tips as well as eight disposable decorating bags. I also recommend adding a 12" reusable piping bag to your collection.
I used a Wilton 1M tip (it comes in the kit I link to above) to decorate the cupcakes in the pictures on this page, and vegan gluten-free round sprinkles (rainbow nonpareils). Find a list of vegan sprinkles to look for in this article: "Are Sprinkles Vegan?"
To make them pretty, start at the outer edge of your cupcake and move the tip around in a continuous circular motion (don't stop!) while applying pressure to the bag, moving towards the center.
 These simple homemade gf cupcakes are the best, especially when topped with chocolate frosting and sprinkles!")
Tips for Success
- Always sift your cocoa powder to get rid of the lumps. The hot water helps to dissolve them, but to be safe, it's best to give it a good sift before adding to the mixing bowl.
- Make sure your baking powder and baking soda are fresh, these are two of the ingredients that help the cupcakes to rise and become fluffy. And don't leave out the vinegar, it also plays an important role in the rising.
- Measure your ingredients properly. I recommend using a scale (this is one I have (Amazon Link)) and my weight measurements, but if you don't have a scale, lightly spoon the flour and cocoa powder into your measuring cup until it is overflowing and then drag the flat edge of a butter knife across the top to level it off. (NEVER dunk the measuring cup into the flour to fill your measuring cup because this will guarantee an incorrect measurement of up to 1.5x more flour and a recipe fail.)
- Don't overfill the cupcake liners.
- Follow the recipe exactly as it’s written for the very best results, and don’t reduce the amount of sugar, oil or any of the other ingredients.
 These simple homemade gf cupcakes are the best, especially when topped with chocolate frosting and sprinkles!")
What's the Texture Like?
Exactly like I said, moist and fluffy! Have a look at the two following images to see.
But in order to get this texture, you must follow the recipe exactly as it's written. Any substitutions or changes and you run the risk of things not turning out as expected.
 These simple homemade gf cupcakes are the best, especially when topped with chocolate frosting and sprinkles!")
Storing Leftovers
Store leftovers in an airtight container. They will keep at room temperature for up to 2 days. After that, place the container in the refrigerator for another 3-4 days. You can also freeze unfrosted cupcakes by storing them in an airtight container for up to three months. Defrost at room temperature when you're ready to serve them.
 These simple homemade gf cupcakes are the best, especially when topped with chocolate frosting and sprinkles!")
If You Make This Recipe...
I hope you loved it! Please tell me about it by leaving a rating and comment below OR you can post a pic to Instagram and tag me so I can see, I'm @delightfuladventures over there!
And If You Like This Recipe...
...you may also like these other vegan chocolate recipes:
- Chocolate Doughnuts
- Chocolate Tart
- Chocolate Brownies
- Chocolate Mousse
- Double Chocolate Chip Cookies
And check out these other v + gf cupcake recipes:
Vegan Gluten Free Chocolate Cupcakes
Suggested Equipment:
Ingredients:
- 1 ½ cups (222g) gluten free flour **see important note about flour below**
- ½ cup (42g) Dutch-process cocoa powder sifted
- 1 teaspoon baking powder
- ½ teaspoon baking soda
- ½ teaspoon salt
- 1 cup (200g) cane sugar (or granulated sugar)
- 1 cup (240ml) hot water (boiled)
- ⅓ cup (80ml) oil
- 1 tablespoon (15ml) vanilla extract
- 1 tablespoon (15ml) apple cider vinegar (or white vinegar)
For the Frosting:
- 1 recipe vegan chocolate buttercream frosting
Instructions:
- Preheat oven to 350° F (177° C).
- Add cupcake liners to your pan and set aside.
- In a medium bowl, whisk together the flour, cocoa, baking powder, baking soda, and salt.
- In a small bowl, mix the sugar, hot water, oil, vanilla extract, and vinegar together until blended.
- Slowly add the wet mixture to the dry mixture and stir until combined. Mix until there aren't any lumps but don't over mix and get rid of all the bubbles forming from the reaction between the vinegar and baking soda.
- Pour batter into cupcake liners. (Since this is a runny batter, you can make it easier by transferring the batter to a large measuring cup and pouring the batter into the cupcake liners.)
- Bake for 18-20 minutes or until a toothpick inserted in the middle of the largest cupcake comes out clean.
- Remove from oven and allow cupcakes to cool in the pan for a few minutes, remove them, and place them onto a cooling rack.
- Allow cupcakes to fully cool and then use this chocolate buttercream frosting to frost them.
Watch How to Make It:
Recipe Notes:
- Please read all of the information above and below before making this recipe.
- It’s important to know that different gluten-free flour blends use different ingredients and ratios, so results may vary if you substitute. I have never used any other brand of gf flour to make this recipe (other than Bob’s Red Mill Gluten Free 1 to 1 Baking Flour (Amazon link) in the blue package, NOT the red package), so please know that your results may not be the same as mine if you substitute with another gluten-free flour blend. The weight listed above is for this specific brand of flour.
- If you cannot use the flour I use, be sure to use a rice based gluten-free flour blend and if the brand you're using doesn't contain xanthan gum in the ingredient list, add ¾ teaspoon to the dry ingredients.
- Dutch process cocoa powder is needed for this recipe. Natural cocoa powder (cacao powder) cannot be used without altering the other ingredients. If used, your cupcakes may not turn out the same as mine do.
- This recipe will NOT work with coconut flour or any other single gluten-free flour, it must be made with a blend.
- Make sure your baking powder and baking soda are fresh before using, these are very important ingredients that contribute to the cupcakes rising properly.
- Any type of oil can be used in this recipe, such as avocado, vegetable, or safflower. Unrefined or refined coconut oil can be used as well, but if unrefined is used, there may be a slight hint of coconut flavour.
- Organic cane sugar or granulated sugar works best for this recipe and works with the rest of the ingredients to give the final cupcakes their moistness and texture. Don't reduce the amount of sugar called for or substitute with a different type of sugar or use a liquid sweetener.
- Store leftovers in an airtight container. They will keep at room temperature for up to 2 days. After that, place the container in the refrigerator for another 3-4 days. You can also freeze unfrosted cupcakes by storing them in an airtight container for up to three months. Defrost at room temperature when you're ready to serve them.
- Nutrition info is based on 1 cupcake without frosting. Nutrition info is only to be used as a rough guide. Click here to learn how nutrition info is calculated on this website.

Ashrielle kent says
Can this be made in a cake pan too?
Gwen Leron says
Hi Ashrielle, I have not tried baking this cupcake batter into a cake, but rather than changing this recipe, I have 2 other chocolate cake recipes you may like. The first is my vegan gluten-free chocolate layer cake, and the second is my vegan chocolate sheet cake. Check the recipe notes on that one for the gluten-free version. Let me know if you have any questions!
leya says
has anyone tried this recipe with the freee gluten free flour/self raising flour. would i need to make any changes?
Gwen Leron says
Hi Leya, I have not tried this recipe with Freee gluten-free flour. I don't have access to it (I'm in Canada, I believe this is a product only available in the UK), so I can't say how well it will work. I would compare the ingredients in the flour I recommend with the one you want to use and if they are similar, I'd give it a shot if you can't get the flour I recommend. If you do end up trying it, please come back and let me know how things went, I'd love to hear!
Shay says
Yes I made it with 1/1 flour Bob Mills came out perfect 🫶
Gwen Leron says
Wonderful! I'm happy you like them, Shay! We love them here, too 🙂
Bhadra Domadia says
Pplease canyou tell me is it self rising flour or plain flour both gluten free
Gwen Leron says
Hi Bhadra, it's a regular gluten-free flour blend with xantham gum as an ingredient that you need, not self-raising flour, the recipe calls for its own leaveners. This is the specific one you need to get the same results I do: Bob's Red Mill Gluten-Free 1 to 1 Baking Flour. Please let me know if you have any further questions!