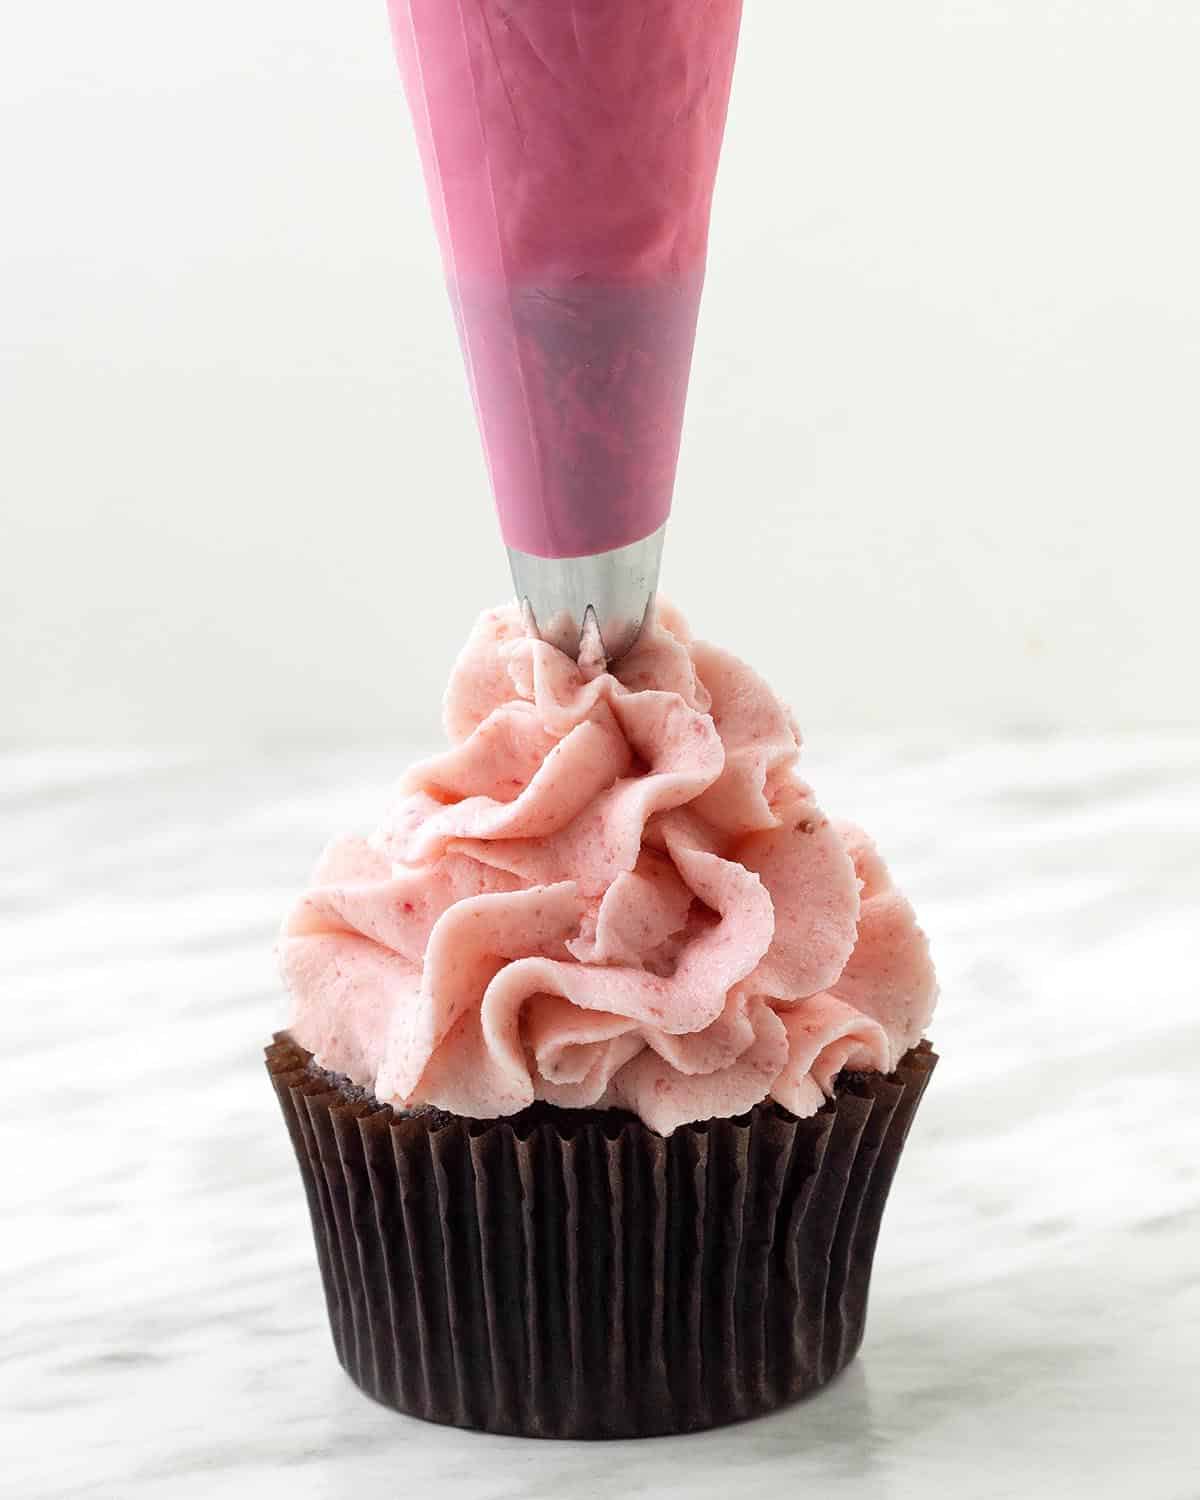
A recipe for easy vegan strawberry frosting that’s creamy, light, fluffy, and SO delicious! It’s the perfect topping or filling for many desserts like cake, cupcakes, cookies, donuts, whoopie pies, and more!
This simple, summery, gluten-free, dairy-free strawberry buttercream is flavoured and coloured naturally with either fresh, frozen, OR freeze-dried strawberries (all of the methods are covered!).
Save This Recipe!
In a rush? Don't have time to scroll through this page right now? Enter your email below and this recipe/article will be sent straight to your inbox so you can come back to it when you're ready. Plus, you'll receive delicious recipes every week! You may unsubscribe at any time.
I've added a new buttercream recipe to my growing collection, this time since it's strawberry season, it's vegan strawberry frosting!
I used my plain vegan buttercream frosting as the base and I give you three options for the type of strawberries to use. All of the versions are delicious, you decide which one to go with based on the season and what's easily available to you.
For more creamy, delicious vegan buttercream recipes, check these out:
Ingredients You'll Need
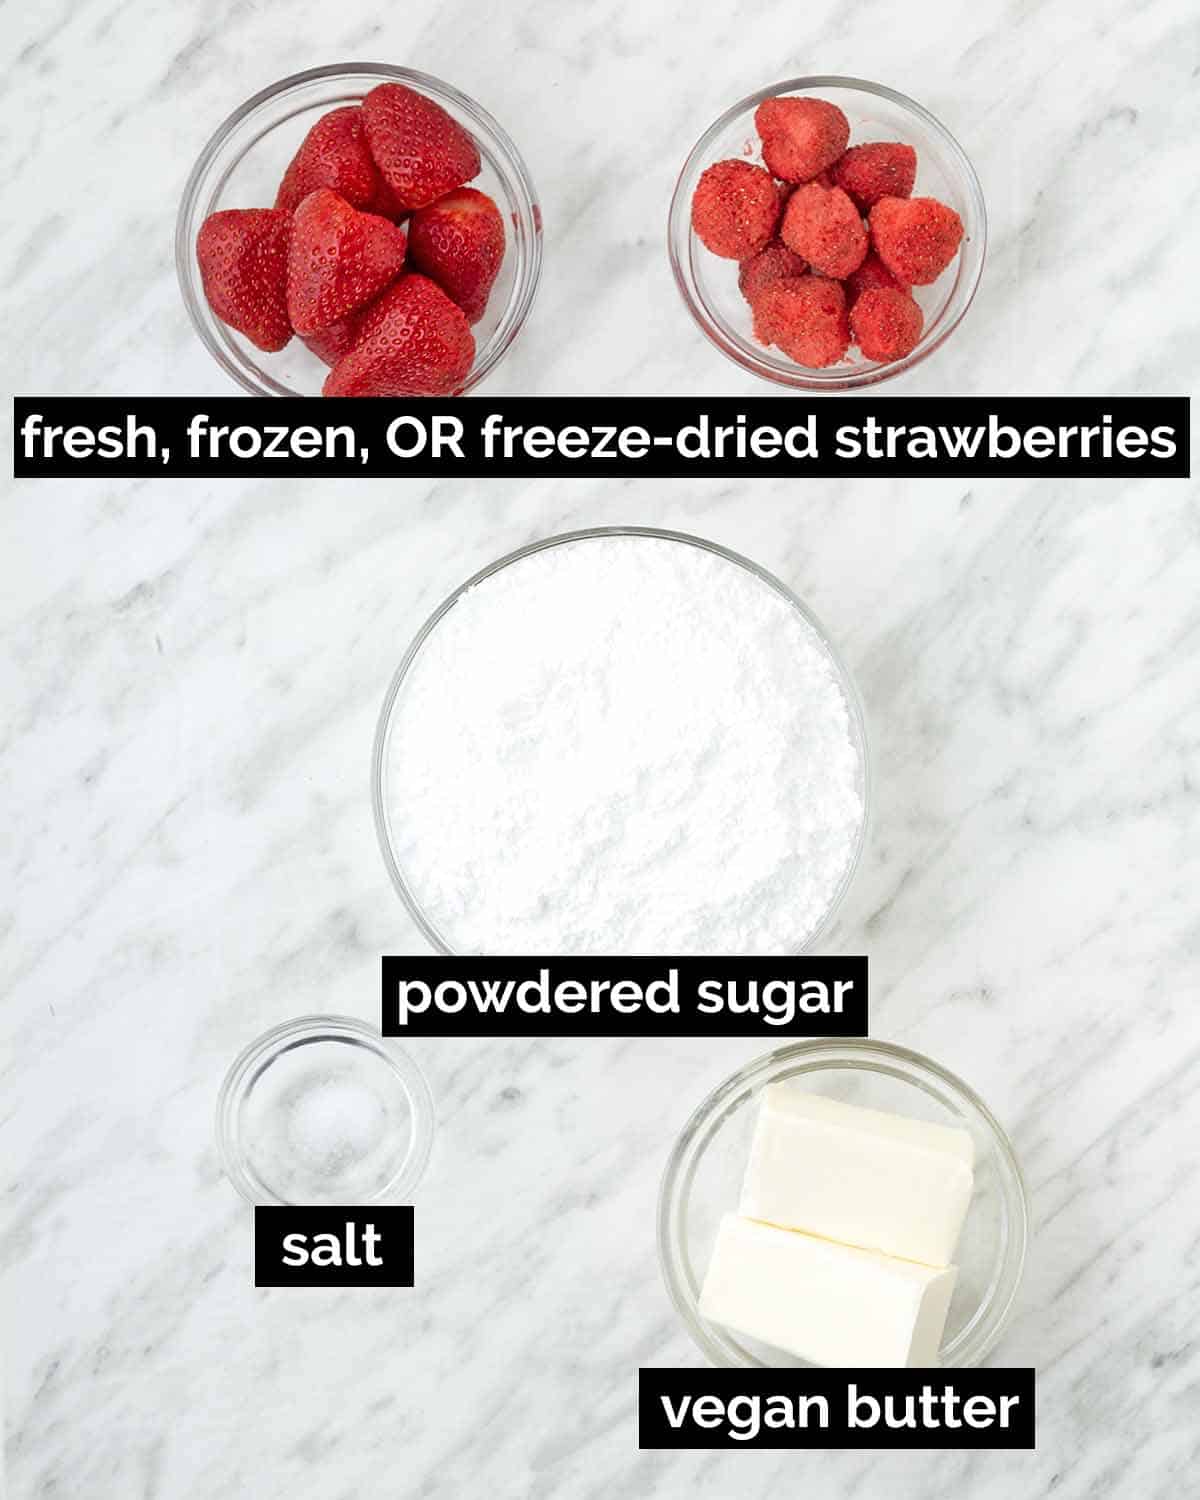
Just 4 simple ingredients are needed to make this easy, from-scratch frosting. There are also a couple of optional ingredients that are not pictured. I’ve added all the details with some notes about each of them below.
Ingredient and Substitution Notes
Strawberries - The type of strawberries you use is up to you and what's easiest for you to access, I provide the difference between all three lower down so check that out before you decide.
- Fresh Strawberries - Fresh, in-season strawberries will give your frosting the best possible flavour. Look for bright red undamaged berries.
- Frozen Strawberries - If strawberries are not in season, then frozen berries will also work, but you won't get the same bright, fresh flavour as when fresh is used.
- Freeze-Dried Strawberries - These berries have been dehydrated to remove all of the moisture from them, and yes, they are real strawberries! You can either buy them whole, sliced, or already in powdered form. Make sure you buy FREEZE-DRIED strawberries and not dried strawberries (dried strawberries still have moisture and are chewy, like raisins and dates). Also, make sure that the only ingredient listed on the package is strawberries and that there's no added sugar. Something else important to know is that some brands have a strong flavour and some are weaker. This has to do with the strawberries that were used and what state they were in. Feel free to adjust the amount of powder you add to the frosting if the flavour is not strong enough for you.
Powdered Sugar – The powdered sugar in this recipe is needed to provide structure and firmness for piping and frosting your desserts with ease and cannot be replaced with liquid sweeteners or any type of granulated sugar. I have not tried using any alternative sugars.
As you may already know, not all sugar is vegan, see the FAQ section below for some brand recommendations.
Salt – Just a little is needed to balance the sweetness and flavours.
Dairy-Free Milk (optional, not shown above, ONLY for frosting made with freeze-dried strawberries) - Any type of dairy-free milk will work (almond milk, soy milk, oat milk, etc.), just make sure it's not flavoured and / or sweetened. (Note: you can leave the milk out if you want it to be very firm and stiff for piping and decorating).
Vanilla Extract (optional, not shown above) – This ingredient is optional. When I tested with vanilla, I found that it took away some of the strawberry flavour. I recommend that you make the frosting without it, taste it, and then if you feel it's needed, add it. If you are happy with the flavour the way it is, leave it out.
Unsalted Vegan Butter – You’ll need to use firm sticks, not the spreadable type that you get in containers / tubs, they’ll make your frosting too soft and it won't firm up (see the FAQ section below for brand recommendations).
IMPORTANT: Always make sure that your vegan butter is slightly softened before starting, NOT melted or TOO soft. To make sure your butter is at the ideal softness, lightly press your finger into it. If it leaves a shallow indent, it's the perfect temperature. If your finger sinks into the butter with barely any effort, it's too soft. Refrigerate it until it has firmed up and then test it again.
What's the Difference Between Using Fresh, Frozen, and Freeze-Dried Strawberries?
The two major differences are the flavour and colour.
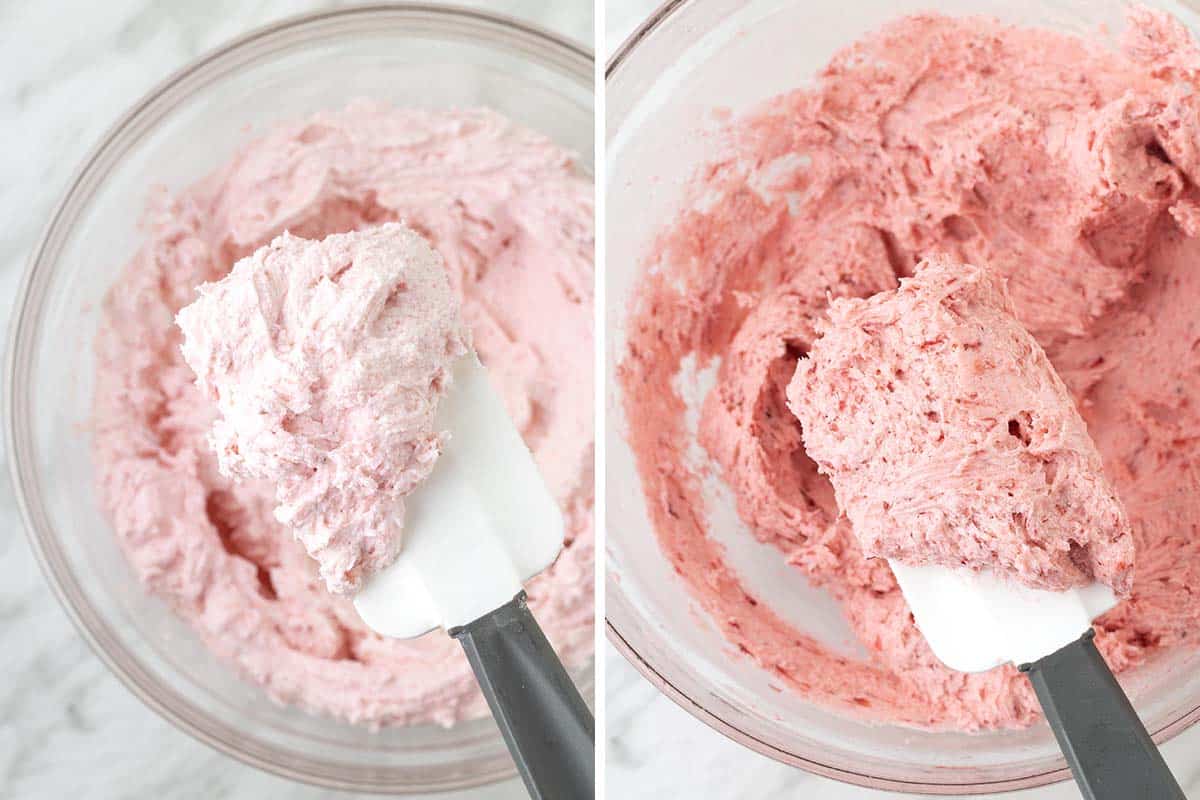
- Fresh strawberries provide the boldest, strongest strawberry flavour and the colour is pinker and more vibrant.
- Freeze-dried strawberries also have a strong berry flavour but the colour is a lighter pink as you can see in the images below.
There are some other things to consider when deciding which type of berries to use:
Freeze-dried strawberries...
- can be hard to find and/or expensive, depending on where you live. Look for them in the dried fruit section of your grocery store, they can also be found online.
- have flavour strength that isn't consistent among brands. You may need more than what the recipe below calls for to give your frosting the amount of strawberry flavour you like.
- make a frosting that comes together quickly, it's the easiest to make.
- produce a firm frosting that can stay out on warm days a little longer than frosting made with fresh or frozen berries (but it's still very sensitive to warmth like all buttercream).
Fresh strawberries...
- in my opinion, using fresh fruit provides the best-flavoured frosting.
- will make a frosting with little pieces of berries that add great flavour but they can block the openings of small piping tips. If you plan on using a small tip, make a strawberry purée by blending the berries in a blender before adding them to the pot, and omit the water.
- take a while longer to cook down, so this version takes longer to make than if you were using freeze-dried strawberries.
- produce a softer frosting that will need constant refrigeration in warm temperatures, whereas, the version made with freeze-dried strawberries can stay out for a short time during a warm day but must also be refrigerated after a while. (No buttercream that will hold up in warm weather!).
Frozen strawberries...
- are a great choice when strawberries are out of season.
- will make a frosting with little pieces of berries that add great flavour but they can block the openings of small piping tips. If you plan on using a small tip, thaw and purée the berries in a blender before adding them to the pot, and omit the water.
- will require a longer cooking time since they contain more moisture than fresh berries.
- will give your frosting flavour that is not as bright as using fresh berries (but it still tastes really good!).
- produce a softer frosting that will need constant refrigeration in warm temperatures, whereas, the version made with freeze-dried strawberries can stay out for a short time during a warm day but must also be refrigerated after a while.
How to Make It
(Note: I’ve outlined the step-by-step on how to make this recipe here, but find the full recipe, ingredients, and directions in the recipe card at the end of this post.)
I highly recommend making your vegan strawberry buttercream with an electric hand mixer or a stand mixer. If you don't have either, you can still make it by hand, but you'll need to beat it for quite a while to reach a creamy, fluffy consistency.
With Freeze-Dried Strawberries
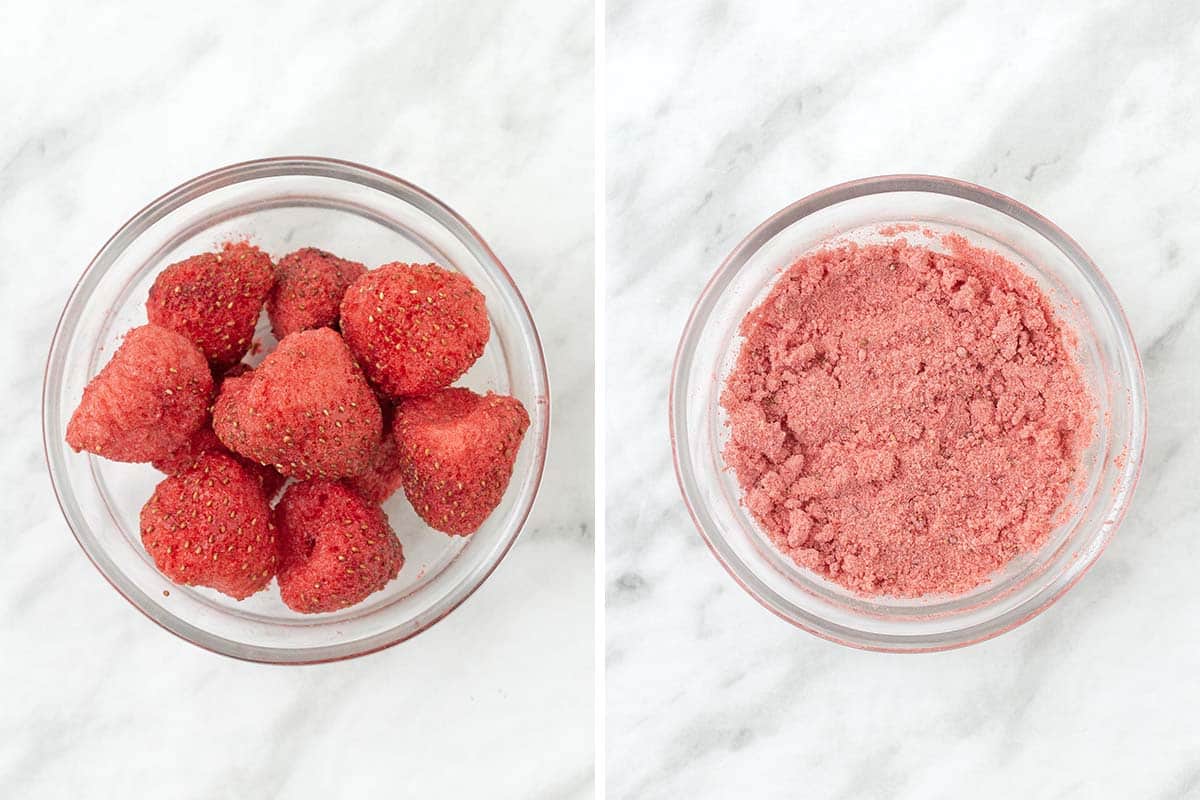
If your freeze-dried strawberries were bought already in powdered form, you can skip this step.
If you have whole or sliced freeze-dried strawberries, you will need to place them in a food processor or a high-speed blender and process them until they break down into a powder.
There may still be small bits of strawberry after processing, I keep these pieces in if they aren't too large, but if you don't want them, you can run the powder through a sieve. If the bits are too large and they just aren't breaking down, you can put the powder in a freezer bag and using a rolling pin, roll it over the bag to break the pieces down.
Freeze-dried strawberries are very sensitive to heat and humidity (one of my tests was done on a day that was humid and our a/c was not working, so I experienced this firsthand!). The strawberries will soften and become very sticky making them hard to process. If you do manage to process them into a powder, the powder will clump up making it difficult to blend into the butter and sugar. So, either work quickly to process the strawberries and get them into the frosting or wait for a cooler day.
1. Cream the butter, powdered sugar, and salt together in a large bowl.
2. Next, add the freeze-dried strawberry powder and mix at low speed.
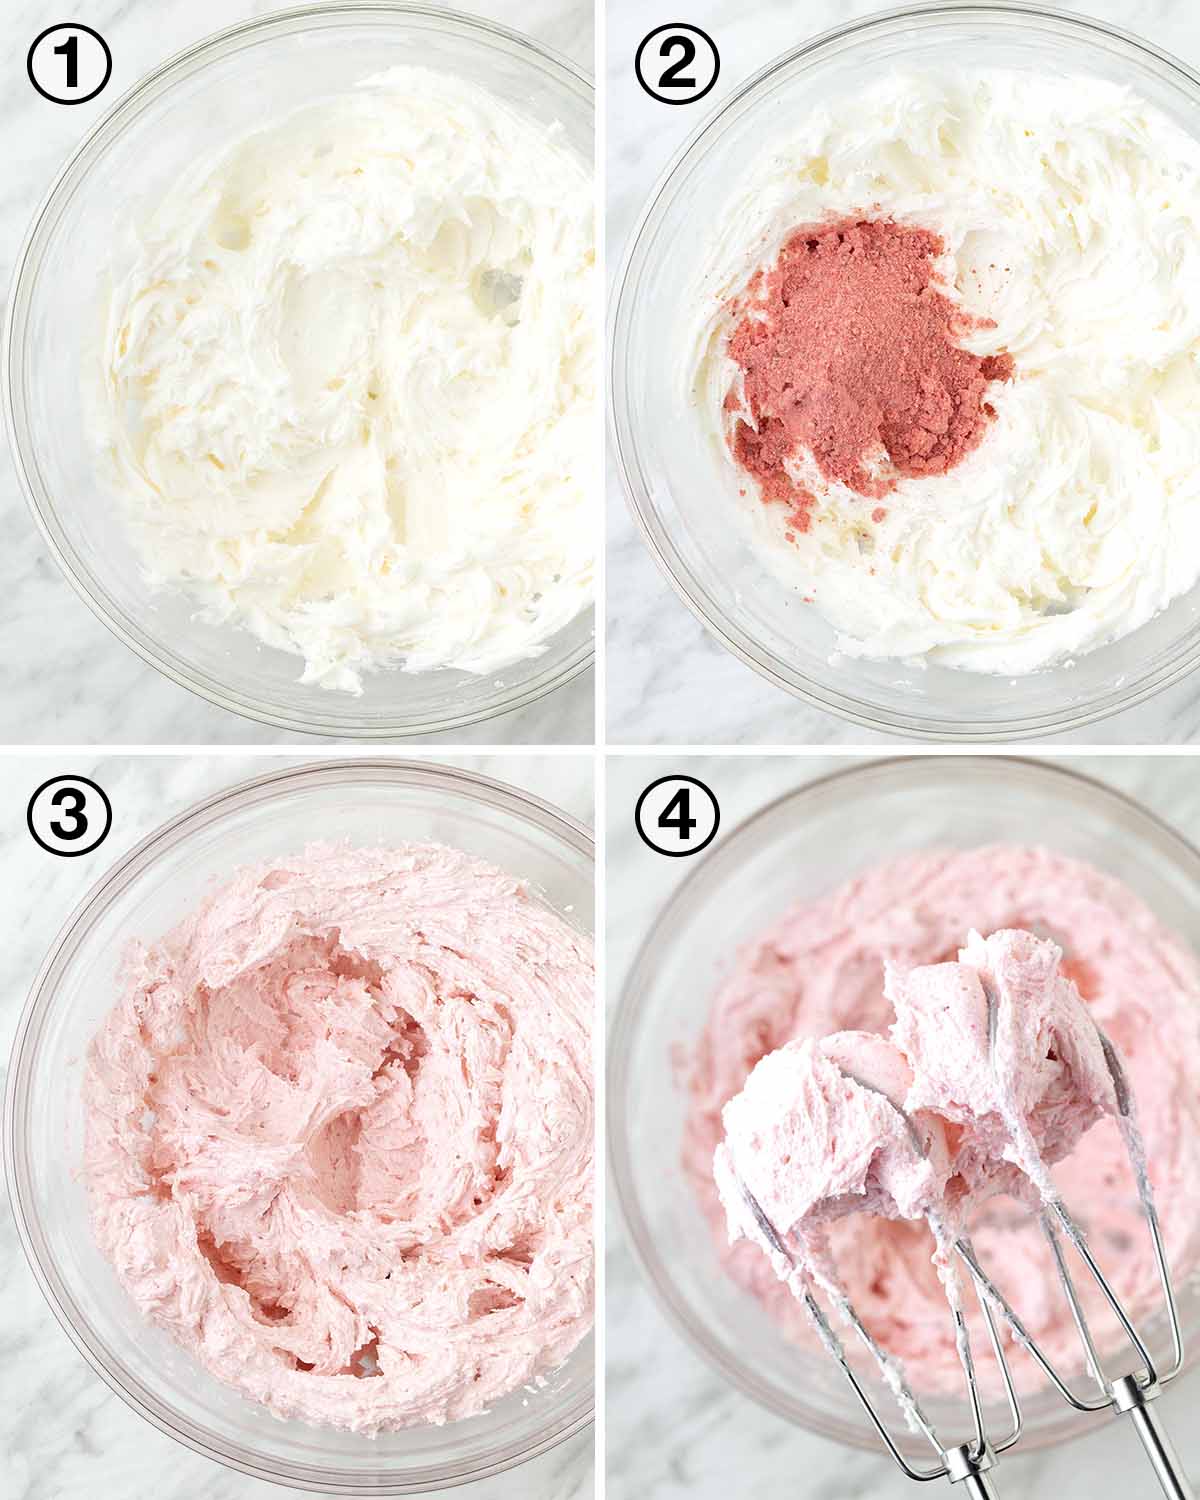
3. Gradually add the non-dairy milk, if using, until the desired consistency is met. Stop occasionally to scrape down the sides of the bowl with a rubber spatula. If using, add the vanilla and continue mixing until everything has fully combined.
4. Continue mixing until it's light and fluffy, about 2-3 minutes.
Use immediately, or refrigerate / freeze until needed. (Refrigeration and freezing instructions can be found below)
With Fresh or Frozen Strawberries
This step cannot be skipped when using fresh or frozen berries. Early in my testing for this recipe, I tried chopping, mashing, and adding the berries directly to the butter/sugar mix and it became a separated, curdled mess.
There is too much liquid in fresh and frozen berries to simply chop them up and use them as-is which is why you need to cook them to remove the excess moisture.
1. Wash, hull, and chop the strawberries.
2. Add them to a small pot along with a little water.
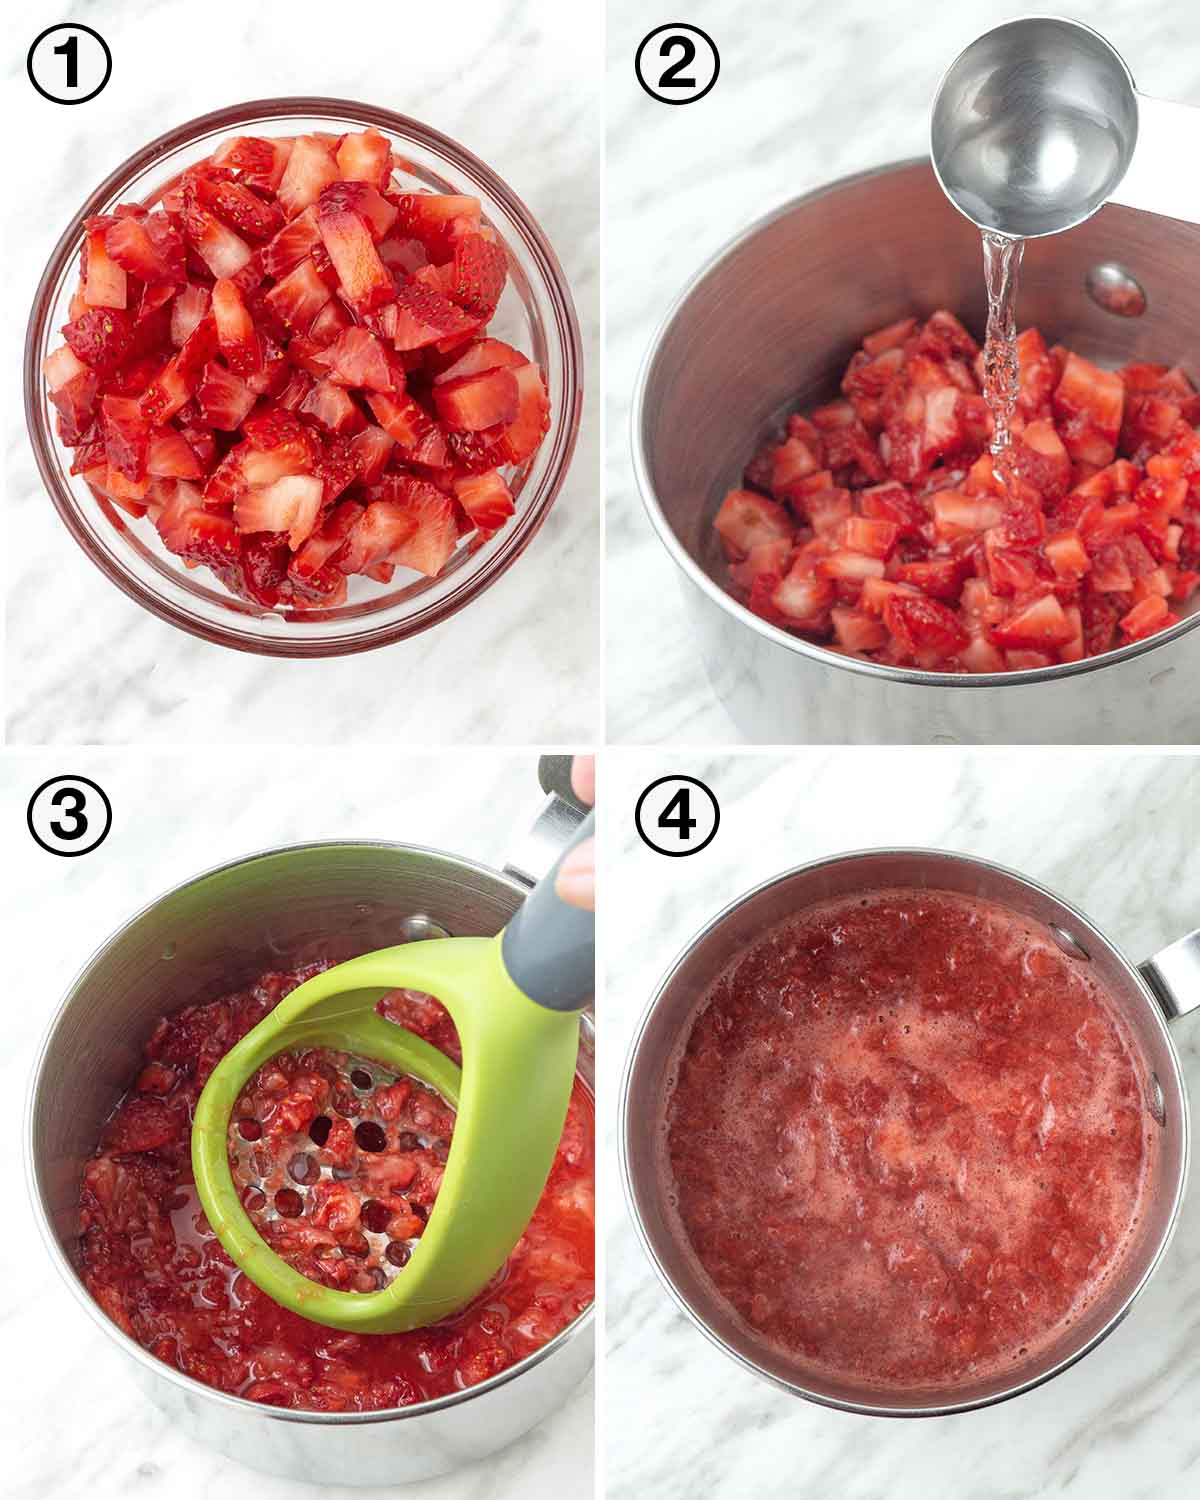
3. Using a potato masher or a fork, mash the strawberries until no large pieces remain. If you are using frozen berries, you will have to wait until they have been on the heat for a while and have fully thawed before mashing, or you can thaw them before adding them to the pot and then mash.
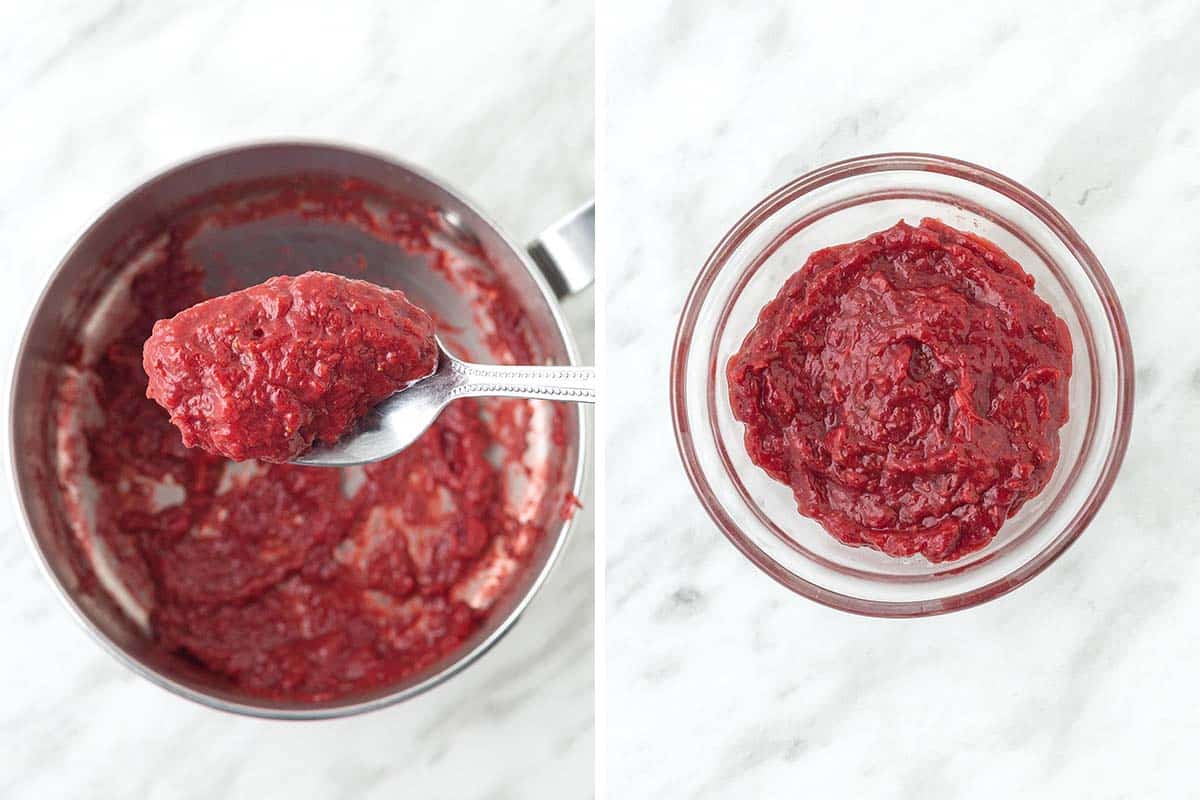
4. Heat until all of the liquid from the strawberries has been cooked out and all you are left with is a very thick paste. Keep a close eye on it and stir it often so it does not burn. Allow the reduced strawberries to fully cool before proceeding.
The final consistency will be very thick, similar to tomato paste, miso paste, or canned pumpkin that you would use for making pumpkin pie. It should not be runny and should not have any visible liquid floating around.
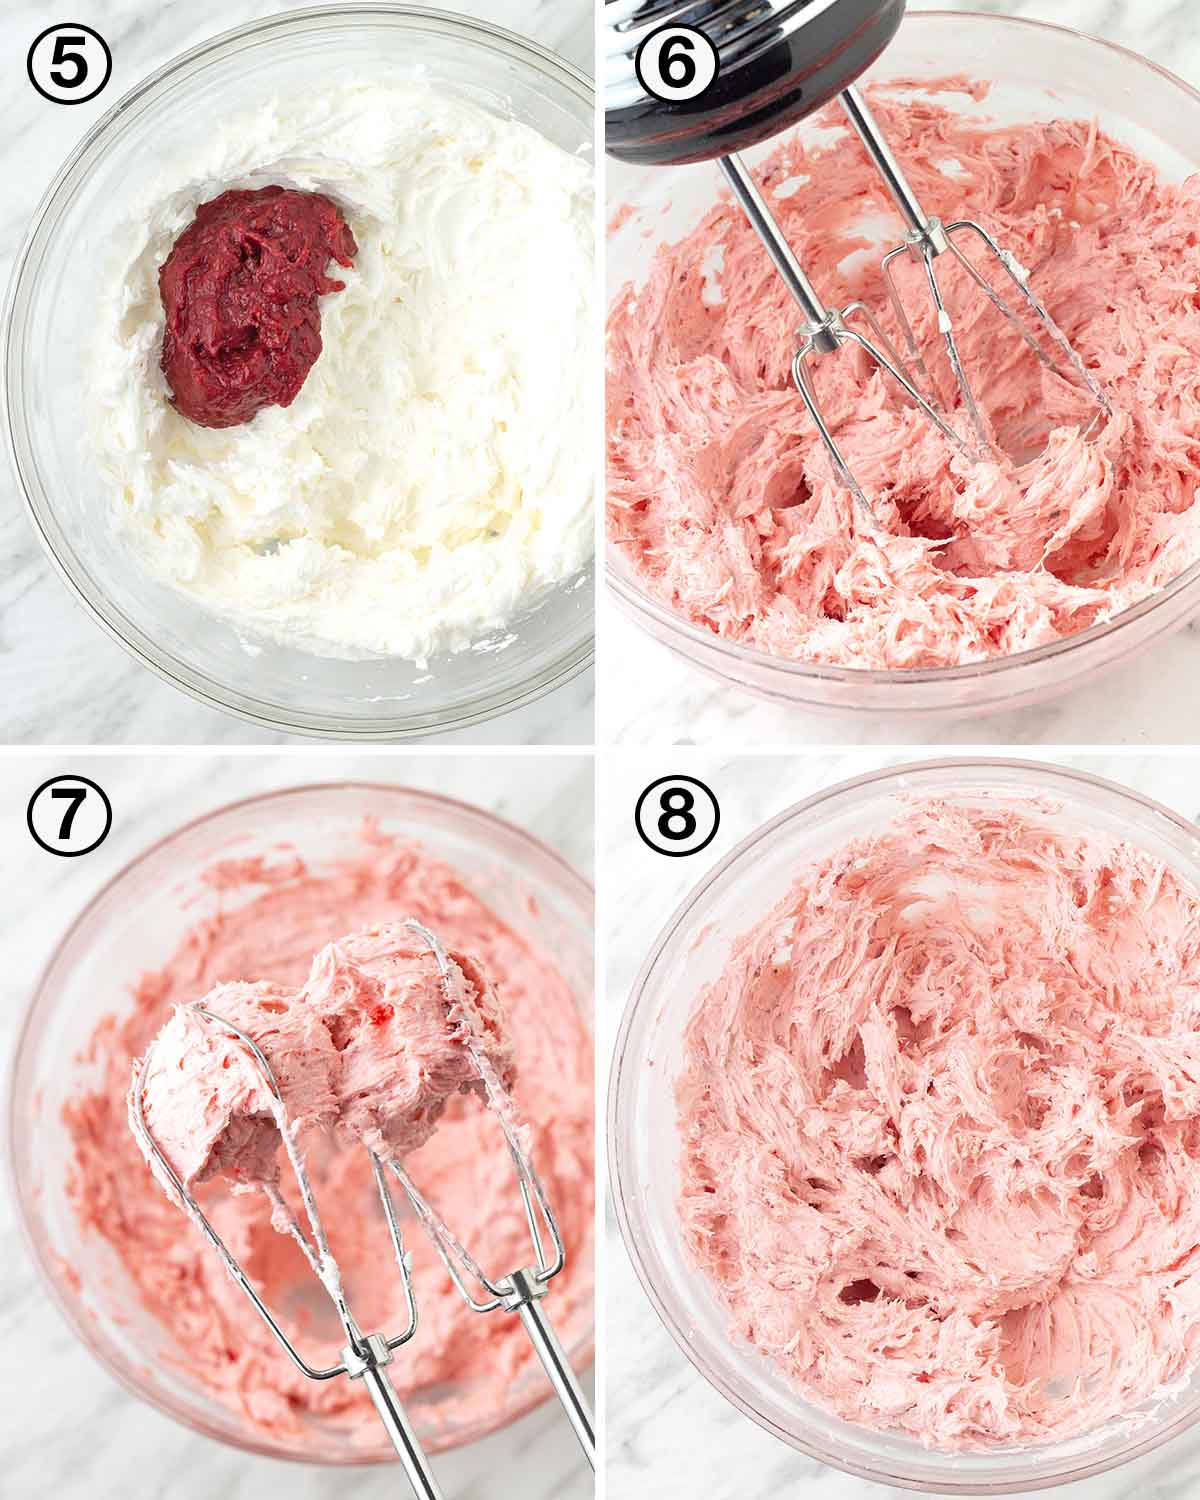
5. Cream the butter, powdered sugar, and salt together. Add the fully cool strawberry paste to the mixture.
6. Mix until the strawberries have been fully incorporated into the butter/sugar mixture.
7. Continue mixing until it's light and fluffy, about 2-3 minutes.
8. Use immediately, or refrigerate / freeze until needed. (Refrigeration and freezing instructions can be found below).
Troubleshooting
If you notice that your frosting has split (it looks lumpy and a little separated) either your butter was too warm, your butter was too cold, you added too much milk (freeze-dried strawberries) or your strawberries were not reduced enough (fresh or frozen berries).
- To fix buttercream made with butter that was too warm: Put the bowl into the refrigerator for 15-20 minutes so it can cool down. Remove it from the refrigerator and start mixing it again.
- To fix buttercream made with butter that was too cold: Let the bowl sit at room temperature to warm it up a little before moving forward.
- To fix buttercream that has too much milk: Add more powdered sugar, a little at a time, until it firms back up and no longer looks separated.
- To fix buttercream that has strawberries that weren't reduced enough: Add a little more powdered sugar, a little at a time, until it firms up and no longer looks separated. This is a tricky one because depending on how much extra liquid remained in the strawberries, you may need a lot of powdered sugar to fix it making the buttercream too sweet.
- To fix buttercream that is too thick: Add dairy-free milk, one teaspoon at a time until you get the consistency you want.
- To fix buttercream that is too thin: Refrigerate it for 15-20 minutes. Check the thickness after that and if it's still too thin, add more powdered sugar, a few tablespoons at a time, until it reaches the thickness you want.
Variations: For strawberry lemon buttercream, add a teaspoon of lemon zest and mix into the frosting. For peanut butter and strawberry jelly flavoured swirled frosting, make my vegan peanut butter frosting and add it to a piping bag with the strawberry frosting (using this method) to make a peanut butter and jelly frosting mixture.
What to Put It On
Use your dairy-free strawberry frosting to top vegan strawberry cake, vegan strawberry cupcakes or other cake and cupcake flavours, like vanilla, chocolate, lemon, and more! You can also use it for filling macarons, whoopie pies, vegan strawberry cookies, and sandwich cookies.
It's also great on my vegan gluten-free cinnamon rolls and my vegan cinnamon rolls.
If you’re decorating with sprinkles or anything else that needs to stick to the icing, add it immediately after piping because the icing crusts a little when exposed to air and your decorations will not stick.
TIP: If you're new to cupcake decorating, I highly recommend this inexpensive cupcake decorating kit (Amazon Link) that comes with four of the most popular decorating tips as well as eight disposable decorating bags. I also recommend adding a 12" reusable piping bag to your collection.
Storage
Refrigerating
Store in an airtight container and refrigerate frosting made with freeze-dried strawberries for up to one week. For frosting made with fresh or frozen strawberries, store for 5 days.
When you are ready to use it, remove it from the fridge, add to a bowl, and give it a quick stir, OR add it directly to a piping bag. Decorate your dessert while the frosting is still cold.
Freezing
Store it in an airtight, freezer-safe container and freeze it for up to 3 months. When ready to use, thaw it in the refrigerator overnight. When you are ready to use it, remove it from the fridge, give it a quick stir, or add it directly to a piping bag, and decorate your dessert while the frosting is still cold.
Tips for Success
- Measure and have all your ingredients ready to go before starting. This will make the process run smoothly, quickly, and easily.
- Measure your ingredients correctly. I highly recommend using a scale and my weight measurements when making this recipe. (This is the scale I have (Amazon Link)
- Always make sure your butter is slightly softened before starting. To make sure it's at the right temperature, lightly press your finger into it. If it leaves a shallow indent, it's at the perfect temperature. If your finger sinks into it with barely any effort, it's too soft. Refrigerate it until it has firmed up.
- You can sift the powdered sugar if you’d like, but I usually don’t, I find that if there are any small clumps, they get taken care of during the mixing process. However, if you find that your powdered sugar is very dry and lumpy, sift it before starting.
- When adding the powdered sugar to the mixing bowl, start the mixer at the slowest speed and add it gradually so it doesn’t fly everywhere.
- Don't reduce the powdered sugar, the amount stated in the recipe is needed to provide proper structure to the buttercream.
Want more delicious American buttercream style flavours? Check out all of my easy vegan frosting recipes.
Tips for Success (Continued)
- If you are piping the frosting or using it for decorations, chill it well before using it, especially if you are making the frosting with fresh or frozen berries, since this version will give you a slightly softer result.
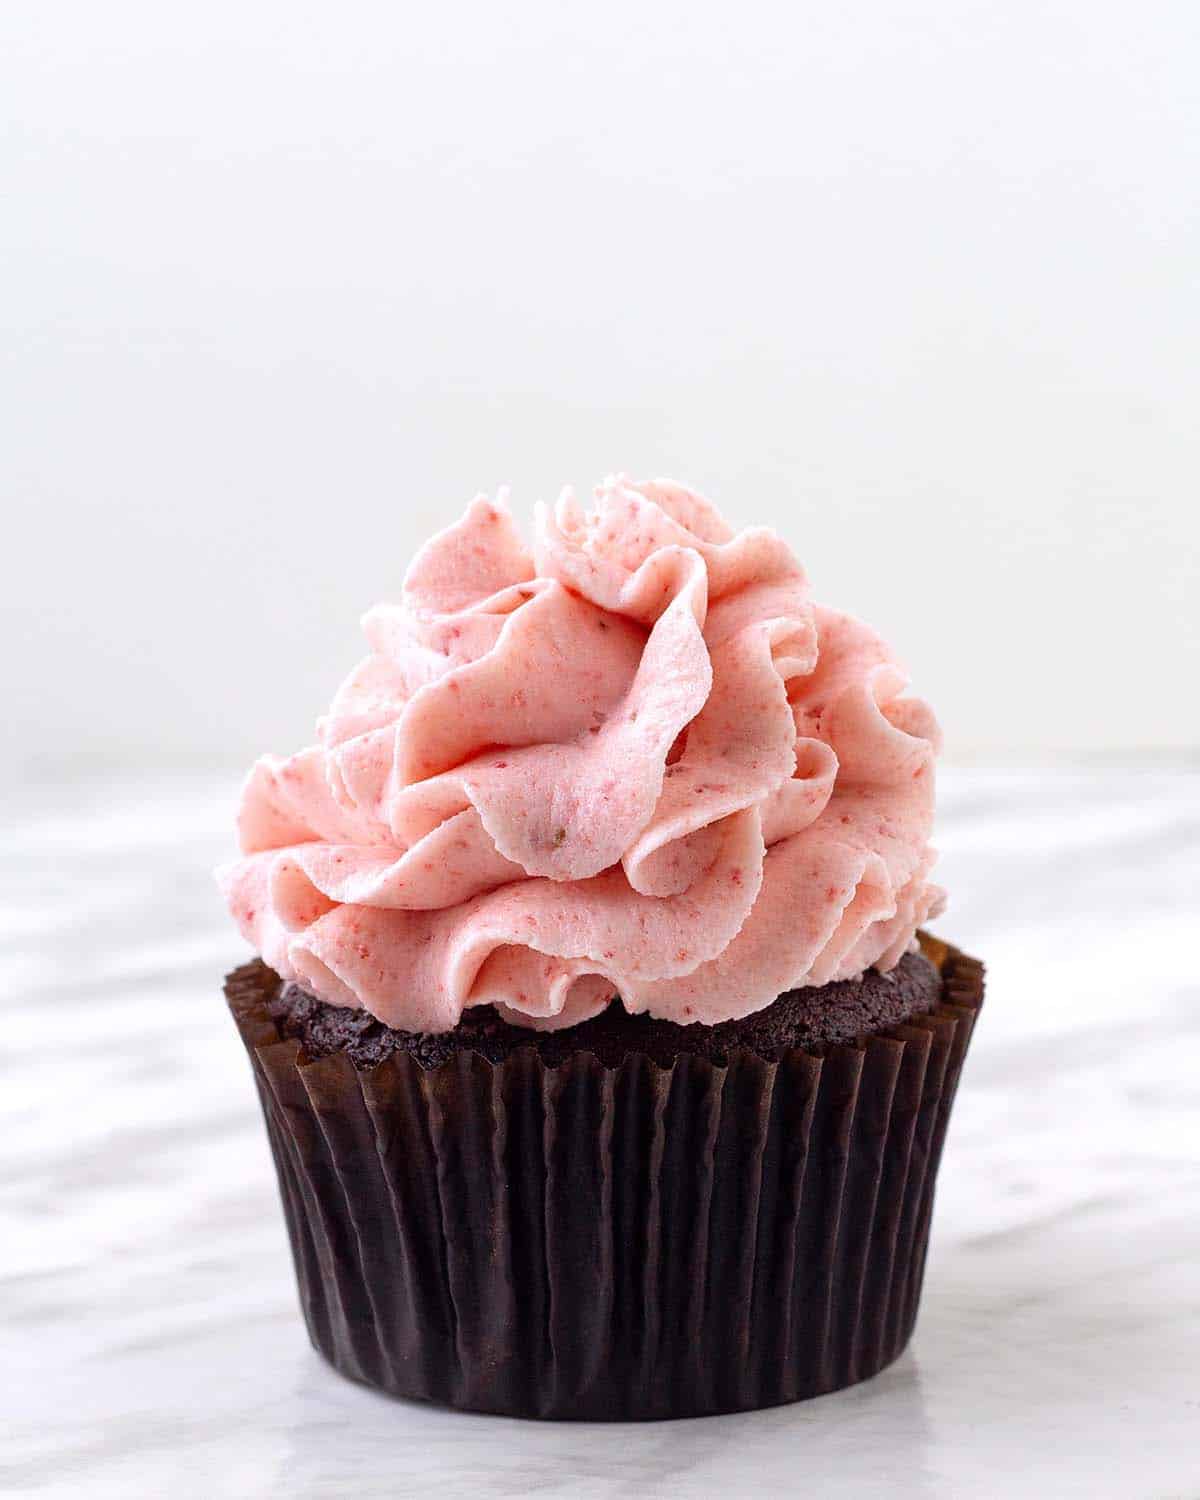
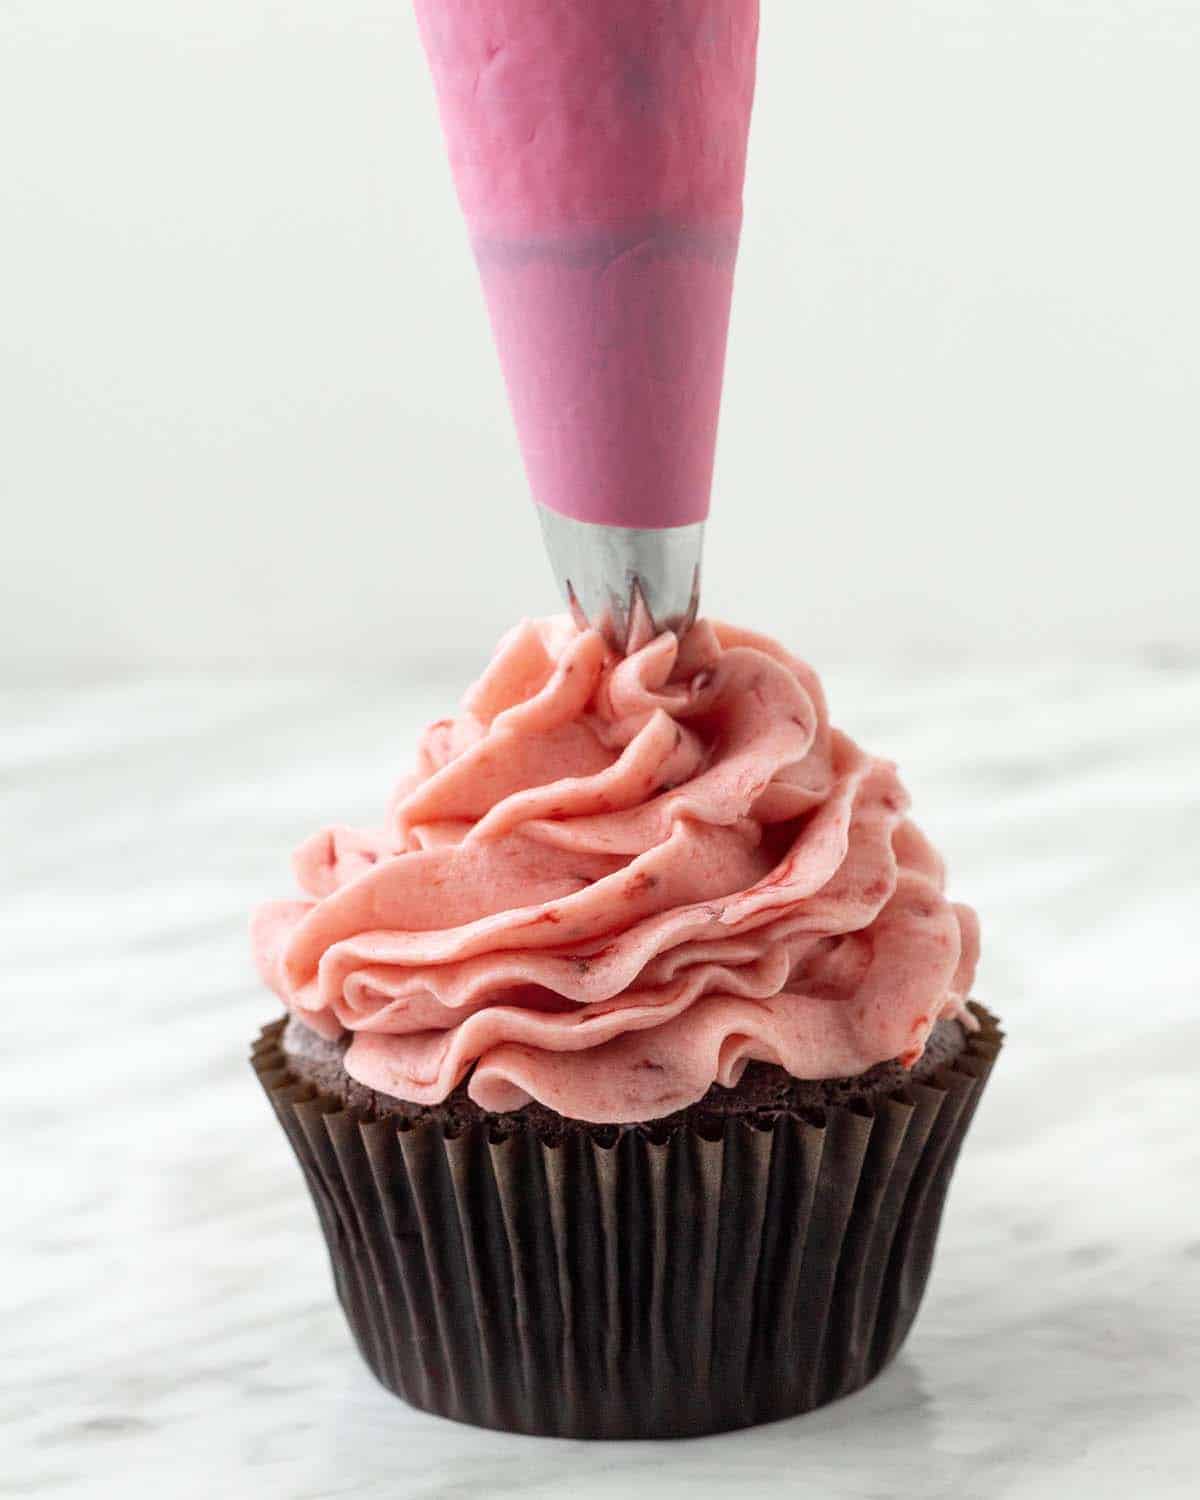
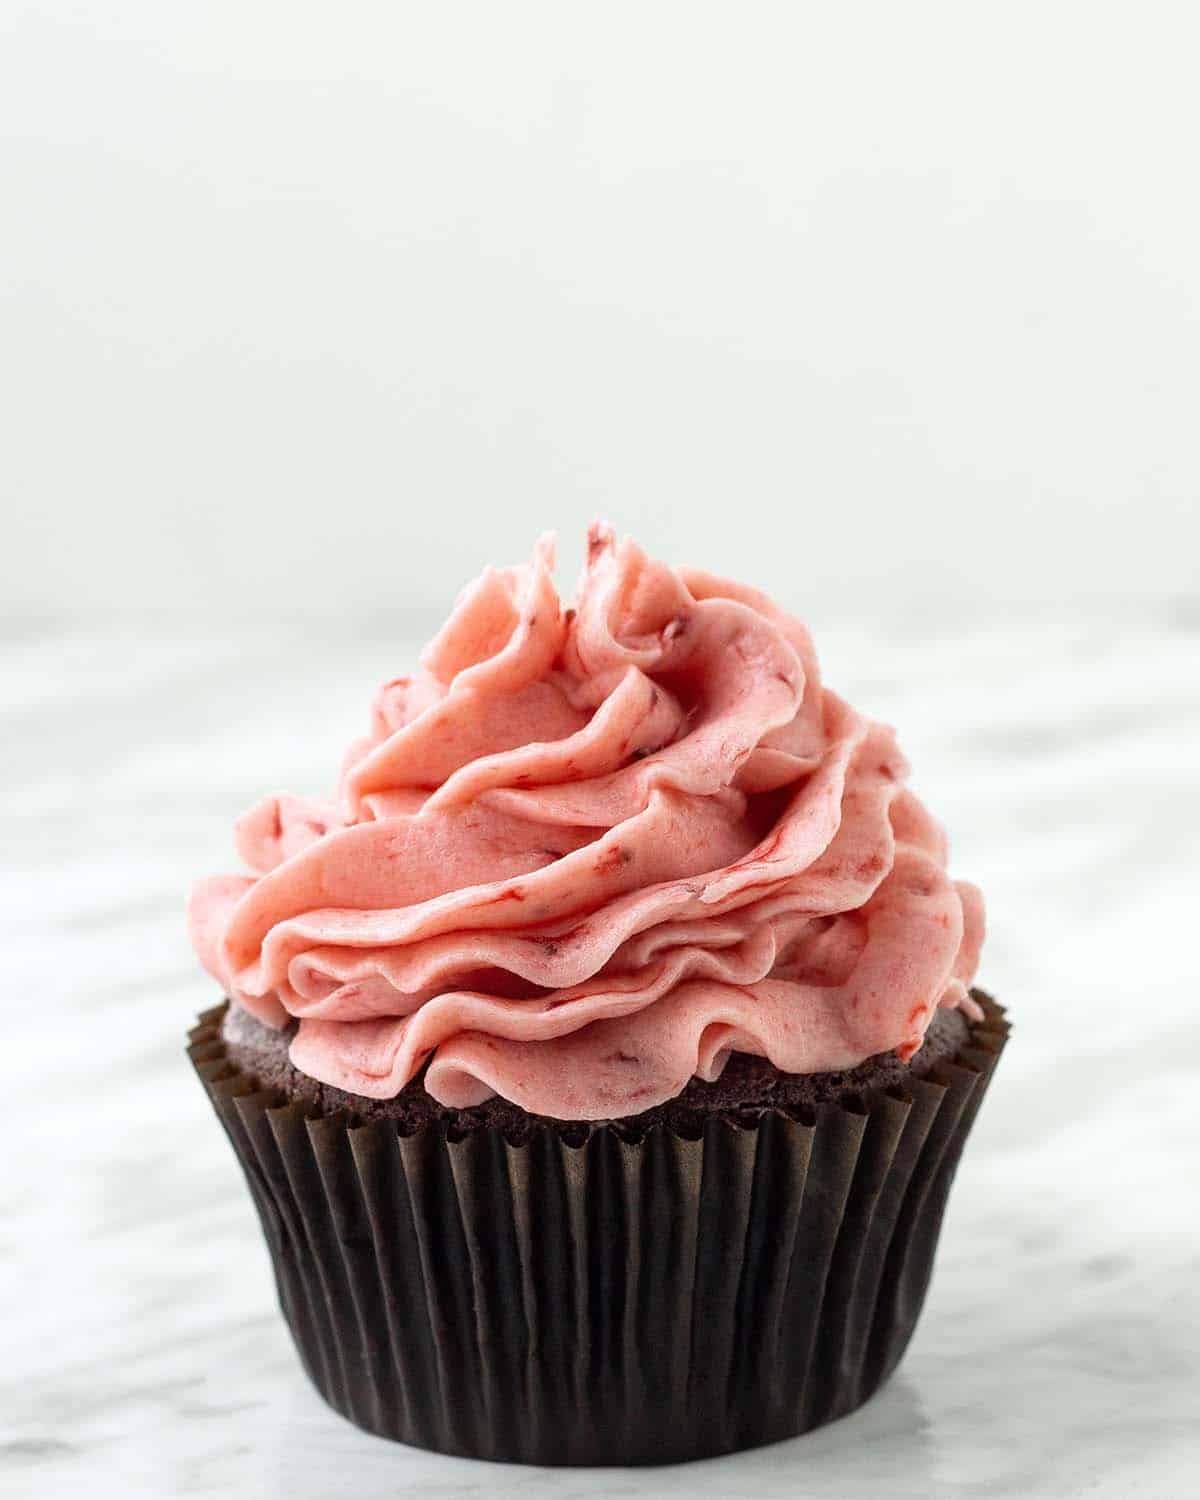
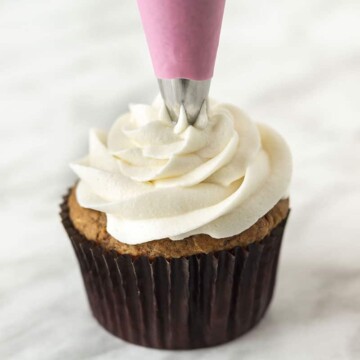
- Don’t be afraid to use a piping bag and tips to decorate your dessert. They may seem intimidating, but they aren’t difficult to use. I used a Wilton 2C piping tip to decorate the cupcakes you see in the images on this page. I recommend investing in this inexpensive cupcake decorating kit (Amazon Link) (the 2C tip comes with it!)
- Stop and refrigerate any time you feel the frosting has gotten too soft, it will get too soft if it sits out for too long. Don't be afraid to place the bowl or piping bag into the fridge for 20-30 minutes to firm it back up.
- Keep your frosted dessert in the fridge until you're ready to serve if it's a very warm day. Return leftovers to the fridge after serving.
- Read this post from beginning to end before making the recipe, it contains lots of tips and tricks on how to make the perfect vegan strawberry icing, every single time!
- For the very best results, follow the recipe exactly as it’s written!
Love vegan desserts? Have a look through all of my vegan dessert recipes for something new to make this week!
Recipe FAQ
I was going to test this but ran out of time. I think it would work, my only worry would be that because jam has added sugar, it could make the frosting much too sweet. I will update once I give it a try.
Yes, but a specific process must be followed. Fresh strawberries have a high water content so if added as-is to frosting, they will not emulsify with the butter mixture resulting in the frosting splitting/curdling. To use fresh strawberries, the moisture must be cooked out, the process to do that is outlined in this recipe.
Yes. You will end up with a pretty pink frosting no matter what type of strawberries you use, but if you want an even brighter pink colour, feel free to add a drop or two of gel food colour (I don't recommend using a water-based food colour because it will thin the frosting too much).
Use your favourite firm vegan butter, but make sure you buy the type that comes in sticks or a block, not a container since that type is too soft. If you can, buy the unsalted version so you control the salt. If you can't find unsalted butter, simply omit the salt from the recipe. I like Melt Sticks and Becel Plant-Based Sticks, but other brands that make sticks like Country Crock, Flora, Earth Balance, and Miyokos will also work well.
Some brands use bone char to process their sugar, making them not vegan, but luckily, some brands like Wholesome Sweeteners, Trader Joe's brand, Whole Foods' 365 brand, and Redpath (Canadian brand) don't use this process. If you can't find any of these, your best bet is to look for organic powdered sugar which will always be vegan. And note that "powdered sugar," "confectioner's sugar," and "icing sugar" are all the same thing.
Yes! But you may need more or less, depending on the fruit. Blueberry, mango, peach, and raspberry are all good options.
If You Make This Recipe...
Please let me know how things went by leaving a comment and star rating below. If you’re on Instagram, I’d love to see what you topped with your vegan strawberry buttercream frosting! Share a pic over there and tag me (@delightfuladventures).
If You Like This Recipe...
You may also like these other easy vegan strawberry recipes:
Vegan Strawberry Frosting
Suggested Equipment:
Ingredients:
- 20 g freeze-dried strawberries OR 4oz (113g) fresh strawberries or frozen strawberries that have been thawed (see note below)
- 1 tablespoon water (ONLY if using fresh strawberries)
- ½ cup (113g) / 1 stick) unsalted vegan butter (slightly softened, see note below)
- ⅛ teaspoon salt
- 2 cups (240g) powdered sugar
- 1-3 teaspoons unsweetened dairy-free milk (ONLY if using freeze-dried strawberries, see note below)
- ½ teaspoon vanilla extract (optional)
Instructions:
To Make it with Freeze-Dried Strawberries:
- Place freeze-dried strawberries into a food processor or a high-speed blender and blend until they have been broken down into a fine powder. Set aside.
- Add butter and salt to a mixing bowl and with an electric hand mixer, mix for 1 to 2 minutes until soft and creamy.
- Add 1 cup of powdered sugar to the butter mixture and mix on low speed. Once there are no more spots of dry powdered sugar, add the second cup and mix again on low speed. Stop occasionally to scrape down the sides of your bowl.
- Add the freeze-dried strawberries and mix on low speed.
- If using, add the vanilla and mix on low speed. Slowly add milk, 1 teaspoon at a time, continuing to mix. Add additional teaspoons until the desired consistency is met.
- Turn the mixer up to medium speed and mix until light and fluffy, about 2-3 minutes. Mix for a couple more minutes if you want a creamier, fluffier frosting.
- Use immediately, or refrigerate / freeze until needed. (Refrigeration and freezing instructions can be found above and below)
To Make it with Fresh or Frozen Strawberries:
- Wash, hull, and chop the strawberries. If you are using frozen strawberries, skip this step.
- Place the strawberries into a small pot and add 1 tablespoon of water. Using a potato masher, mash the strawberries until there are no large pieces left. (If using frozen strawberries, omit water.)
- Place the pot over medium-high heat. Once the strawberries start to bubble, turn the heat down to medium-low.
- Continue to cook, stirring occasionally so nothing sticks to the bottom of the pot. Cook until the strawberries have reduced to a thick paste and is no longer runny. This will take roughly 18-20 minutes, a few minutes longer if you used frozen berries. Once the strawberries thicken, mix almost continuously for the remaining cooking time so it does not burn.
- Remove the pot from the heat and allow the reduced strawberries to cool completely. You can leave the strawberries in the pot or you can transfer it to a bowl. Set aside.
- Add butter and salt to a mixing bowl and with an electric hand mixer, mix for 1 to 2 minutes until soft and creamy.
- Add 1 cup of powdered sugar to the butter mixture and mix on low speed. Once there are no more spots of dry powdered sugar, add the second cup and mix again on low speed. Stop occasionally to scrape down the sides of your bowl with a rubber spatula.
- Add the fully cooled reduced strawberries to the bowl and mix on low speed.
- If using, add the vanilla and mix again.
- Turn the mixer up to medium speed and mix until light and fluffy, about 2-3 minutes. Mix for a couple more minutes if you want a creamier, fluffier frosting.
- Use immediately, or refrigerate / freeze until needed. (Refrigeration and freezing instructions can be found above and below)
Recipe Notes:
- Please read all of the information, tips, and FAQ info above, as well as the notes below before making this recipe.
- If you bought freeze-dried strawberries that are already in powdered form, 20g is roughly 6.5 teaspoons. Flavour strength varies between brands, so feel free to add a little more if needed.
- Make sure that your butter is slightly softened before starting. If it's too soft, refrigerate it until it has firmed up.
- This recipe makes enough buttercream to frost 12-16 cupcakes (depending on how much or how little you add to each one), OR one 9 x 13 cake, OR a single layer 8 or 9-inch round cake, OR a double layer 8″ or 9″ cake using a very thin layer of icing. The recipe can be doubled if you want a thicker layer of buttercream on your 2-layer cake or for a double batch of cupcakes. You can also triple the recipe for a triple-layer cake or a triple batch of cupcakes.
- If you have a scale, I recommend weighing your powdered sugar for accuracy. This is the scale I own.
- Sift your powdered sugar before starting if it is lumpy.
- Be sure you are using vegan butter that comes in sticks, not the type that comes in containers / tubs, since they will be too soft and will result in a very soft frosting. See above for brand recommendations.
- Vanilla extract is optional, I recommend making the frosting without it, taste it, and if you feel that it's needed, then add it. If you are happy with the flavour the way it is, leave it out. Vanilla bean paste can be used instead of vanilla extract.
- If the final frosting is too thick for your liking, add a little more milk. If you want it to be a little thicker, add a little more powdered sugar, a little at a time until you get to the consistency you like. Don't add too much more sugar or the frosting will be way too sweet.
- If using a stand mixer, my preference is to use the paddle attachment. Follow the same directions above.
- If refrigerating for later use, store in an airtight container and refrigerate for up to one week for frosting made with freeze-dried strawberries and 5 days for frosting made with fresh or frozen strawberries. When ready to use, bring it to room temperature, add it to a bowl and mix it with your electric mixer or stand mixer to freshen it up before using.
- If freezing for later use, store in an airtight, freezer-safe container and freeze for up to 3 months. When ready to use, thaw the frozen frosting in the refrigerator overnight. Once thawed, bring it to room temperature, add it to a bowl and mix with your electric mixer or stand mixer to freshen it up before using.
- Once you frost your cake or cupcakes, you can leave them out at room temperature for a day or two if you used freeze-dried strawberries, if you used fresh or frozen strawberries, refrigerate right away until you are ready to serve and refrigerate any leftovers immediately.
- Nutrition info is based on 1/12th of this recipe, made with freeze-dried strawberries, on its own with no cake or cupcakes. The calorie count for 1/12th of the frosting (41g) made with fresh or frozen strawberries is 150. Nutrition info is only to be used as a rough guide. Learn how nutrition info is calculated on this website.


Leave a Reply