This page may contain affiliate links. Click to learn more. As an Amazon Associate I earn from qualifying purchases.
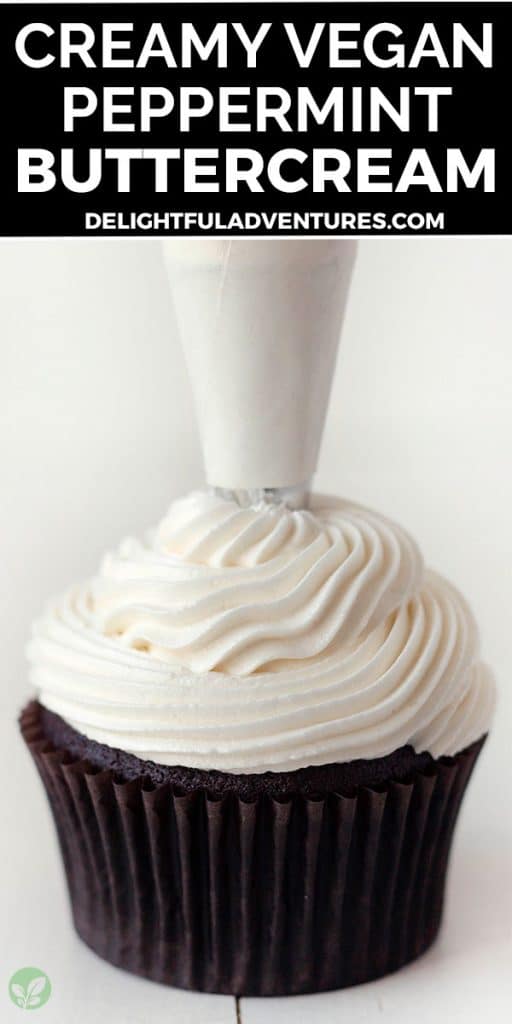
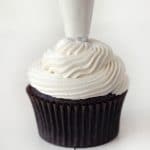
An easy recipe for peppermint buttercream frosting that’s really the best because it’s so creamy, smooth, DELICIOUS, and perfect for holiday cakes, cupcakes, and cookies! This recipe can be made vegan / dairy-free, or it can be made with regular butter.
You can even customize your peppermint buttercream by topping it with crushed candy canes or by adding a few drops of colour to make it stand out even more.

Save This Recipe!
In a hurry? Drop your email below, and this recipe will be sent straight to your inbox for later. You'll also get fresh recipes every week! You can unsubscribe anytime.
If you've been around here for a while, you know that I always share a chocolate mint recipe to celebrate the "birthday" of my website. This recipe is a prequel to the "big" recipe, because they go hand in hand.
And you probably already know what that big recipe is, but you'll have to check back on December 1st to see if you're right 🙂
So let's talk quickly about this minty, delicious buttercream that's VERY QUICK to make and has an AMAZING flavour you'll love.
Along with the mint, it has a little vanilla in it as well, so in a way, it's a vanilla mint buttercream frosting but the mint flavour definitely takes centre stage and is the true star.
This is a very easy, simple recipe to make but I'll walk you through the steps so you can make it perfectly on your first try and every time after that.
Ingredients You'll Need
Gather up these six ingredients and you'll be on your way to pillowy clouds of creamy vegan peppermint frosting.
- Vegan Powdered Sugar - If you're not sure if your powdered sugar is vegan, buy a brand that's organic, it will be 100% vegan. However, there are some brands that are not organic, but vegan.
- Peppermint / Mint Extract - Make sure you're using peppermint or mint extract to achieve the correct flavour.
- Vanilla Extract - To complement the mint.
- Salt - To balance out the sweetness.
- Unsweetened non-dairy milk - To make your icing smooth and soft, any type of milk will work. (Note: This ingredient can be omitted if you're looking for a firm/stiff frosting for piping decorations).
- Unsalted Vegan Butter - Use the sticks, not the type that comes in containers / tubs, they'll be too soft and will result in a frosting that's too soft.
IMPORTANT: Always make sure that your butter is slightly softened before starting, NOT melted or TOO soft. To make sure your butter is at the ideal softness, lightly press your finger into it. If it leaves a shallow indent, your butter is at the perfect temperature. If your finger sinks into the butter with barely any effort, your butter is too soft. Refrigerate it until it has firmed up and then test it again.

How to Make It
(Note: I’ve outlined the step-by-step on how to make this recipe here, but find the full recipe, ingredients, and directions at the end of this post.)
A stand mixer with the paddle attachment or an electric mixer are both suitable to make buttercream and will give you the best texture and consistency. If you don't have either, you can still make it by hand, just use a wooden spoon, and keep in mind that you'll need to beat it longer to get the proper texture and consistency.
You'll start off by adding the room temperature butter and salt to a bowl and mixing until it's smooth and creamy.
Next, gradually add the powdered sugar, making sure you have your mixer on low speed to avoid a mess. Stop occasionally to scrape down the sides of the bowl.
Once the butter and all of the powdered sugar have been mixed together thoroughly, add the vanilla and mint extracts and mix again at low speed. Again, stop occasionally to scrape down the sides of your bowl.

At this point, your frosting will be very thick, so now is the time to gradually add your milk if you want a softer icing.
If you'll be using the frosting to pipe decorations onto your cake, it's best to make your buttercream a little more firm by either omitting the milk or by adding very little.
After each milk addition, keep mixing until the buttercream reaches the consistency you want. It will get fluffier the more you mix it.
Make it green! I prefer to use food colour gels rather than water based food colours. Gel colours are more vibrant, so you'll use less to achieve the same colour you would by using way more water based food colour. Using gels also prevents your buttercream from thinning out. Two vegan gluten-free brands to check out are AmeriColor and Chefmaster.
What to Put It On
This frosting pairs up perfectly with my chocolate peppermint cupcakes (my homemade chocolate cupcakes, too!), chocolate mint cake chocolate cake, brownies, cookie sandwiches, macarons, whoopie pies, sugar cookies, sandwich cookies, and more. It's a great addition to holiday treats.
And if you don't feel like baking something from scratch, but you really want to enjoy this frosting, feel free to use your favourite boxed cake mix to make a cake or cupcakes.
TIP: If you're new to cupcake decorating, I highly recommend this inexpensive cupcake decorating kit (Amazon Link) that comes with four of the most popular decorating tips as well as eight disposable decorating bags. I also recommend adding a 12" reusable piping bag to your collection.
How to Make In Advance and Store for Later
- If refrigerating for later use, store in an airtight container and refrigerate for up to one week. When ready to use, bring it to room temperature, add to a bowl, and mix with your electric mixer or stand mixer for a couple minutes to fluff it up before using.
- If freezing for later use, store in an airtight, freezer safe container and freeze for up to 3 months. When ready to use, thaw in the refrigerator overnight. Once thawed, bring it to room temperature, add to a bowl, and mix with your electric mixer or stand mixer for a couple minutes to fluff it up before using.

Tips for Success
- Always make sure your butter is slightly softened before starting. To make sure your butter is at the right temperature, lightly press your finger into it. If it leaves a shallow indent, your butter is at the perfect temperature. If your finger sinks into the butter with barely any effort, your butter is too soft. Refrigerate it until it has firmed up.
- Because of the brand of vegan butter I use, I find that at least a few teaspoons of non-dairy milk are needed to get the frosting to the consistency I like, but if you find that after you add all the ingredients (except the milk) and mix for about 3-4 minutes that the consistency is good, then no need to add any milk. Milk makes the buttercream smoother and softer, so if a stiff, more firm buttercream is what you want, then feel free to omit the milk.
- If you prefer a more light and fluffy frosting, after adding the milk, mix for about 5-6 minutes.
- If you find that you’ve whipped too long and the icing is too fluffy for your liking, give it a few good stirs with a wooden spoon to knock out some of the air pockets and make it a little less fluffy.
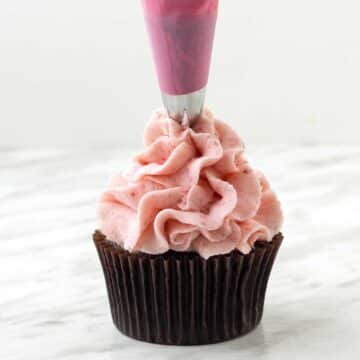
- Don't be afraid to use a piping bag and tips to decorate your dessert. They may seem intimidating, but they aren't difficult to use. I used a Wilton piping tip 2A to decorate the cupcakes you see in the images on this page. I recommend investing in this inexpensive cupcake decorating kit (Amazon Link).
- Read this post from beginning to end before making the recipe, it contains lots of tips and tricks on how to make the perfect lemon buttercream frosting, every single time!
- For the very best results, follow the recipe exactly as it’s written and don’t reduce the amount of powdered sugar or butter called for. The recipe can be halved if you need just a very small amount, or doubled if you need more.

If You Make This Recipe…
Please leave a comment and star rating below and if you’re on Instagram, I’d love to what you topped with your peppermint buttercream frosting! Share a pic over there and tag me (@delightfuladventures).
And If You Like This Recipe…
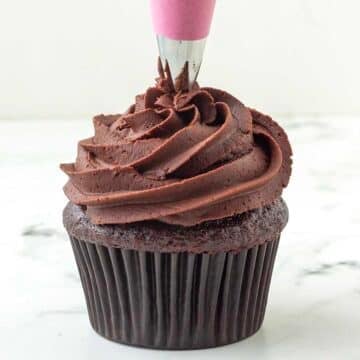
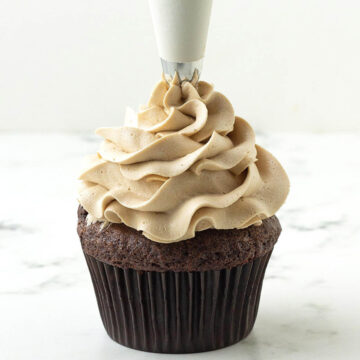
…you may also like these!
Peppermint Buttercream Frosting
Suggested Equipment:
Ingredients:
- ½ cup (113g) / 1 stick) unsalted vegan butter (slightly softened, see note below)
- ⅛ teaspoon salt
- 2 cups (240g) powdered sugar
- ¼ teaspoons vanilla extract
- 3-4 teaspoons unsweetened dairy-free milk
- ½ - ¾ teaspoon peppermint extract (see note below)
- gel food colour (optional, see note below)
Instructions:
- Add butter and salt to mixing bowl and mix with electric mixer for 1 to 2 minutes until soft and creamy.
- Add 1 cup of the powdered sugar and mix on low speed. Once there are no more spots of dry powdered sugar, add the second cup and mix again on low speed. Stop occasionally to scrape down the sides of your bowl.
- Add vanilla and peppermint extract and mix on low speed. Slowly add milk, 1 teaspoon at a time, continuing to mix. Add additional teaspoons, if needed, until the desired consistency is met. Stop occasionally to scrape down the sides of the bowl with a rubber spatula.
- Turn mixer up to medium speed and mix until light and fluffy, about 2-3 minutes. Stop occasionally to scrape down the sides of the bowl with a rubber spatula. Mix for a couple more minutes if you want a creamier, fluffier frosting.
- If using, add your gel food colour at this point, one drop at a time, mixing after each addition until you get to the colour you like.
- Use immediately, or refrigerate / freeze until needed. (Refrigeration and freezing instructions can be found above and below)
Recipe Notes:
- Please read all of the information above, as well as the notes below before making this recipe.
- Make sure that your butter is slightly softened before starting, NOT melted or TOO soft. To make sure your butter is at the ideal softness, lightly press your finger into it. If it leaves a shallow indent, your butter is at the perfect temperature. If your finger sinks into the butter with barely any effort, your butter is too soft. Refrigerate it until it has firmed up and then test it again.
- This recipe makes enough buttercream to frost 12-16 cupcakes (depending on how much or how little you add to each one), OR one 9 x 13 cake, OR a single layer 8 or 9-inch round cake, OR a double layer 8" or 9" cake using a very thin layer of icing. The recipe can be doubled if you want a thicker layer of buttercream on your 2-layer cake or for a double batch of cupcakes. You can also triple the recipe for a triple layer cake or a triple batch of cupcakes.
- Be sure you are using vegan butter that comes in sticks, not the type that comes in containers / tubs, since they will be too soft and will result in a very soft frosting. See above for brand recommendations. If you are not vegan, regular butter can be used.
- Different peppermint extract brands are stronger than others. Start out by adding ½ teaspoon and then taste. If you like the strength of the mint flavour, stop there. If you'd like it a bit stronger, continue adding by a ¼ teaspoon at a time, mixing and tasting until you get to where you like the flavour.
- If you will be adding colour to your buttercream, gel food colours are recommended since the colours are more vibrant and water based food colour will thin out your buttercream.
- If you have a scale, I recommend weighing your powdered sugar for accuracy. This is the scale I own.
- Sift your powdered sugar before starting if it is lumpy.
- If the final frosting is too thick for your liking, add a little more milk. If you want it to be a little thicker, add a little more powdered sugar, a little at a time until you get to the consistency you like.
- If using a stand mixer, my preference is to use the paddle attachment. Follow the same directions above.
- If refrigerating for later use, store in an airtight container and refrigerate for up to one week. When ready to use, bring it to room temperature, add to a bowl, and mix with your electric mixer or stand mixer for a couple minutes to fluff it up before using.
- If freezing for later use, store in an airtight, freezer safe container and freeze for up to 3 months. When ready to use, thaw frozen frosting in the refrigerator overnight. Once thawed, bring it to room temperature, add to a bowl, and mix with your electric mixer or stand mixer for a couple minutes to fluff it up before using.
- Nutrition info is based on 1/12th of this recipe, made as written, on its own with no cake or cupcakes. Nutrition info is only to be used as a rough guide. Click to learn how nutrition info is calculated on this website.

Robin says
Made this to frost a carob cake for our anniversary. Came out perfect! Thank you!
Gwen Leron says
You're welcome, Robin! I'm glad you enjoyed it!