This page may contain affiliate links. Click to learn more. As an Amazon Associate I earn from qualifying purchases.
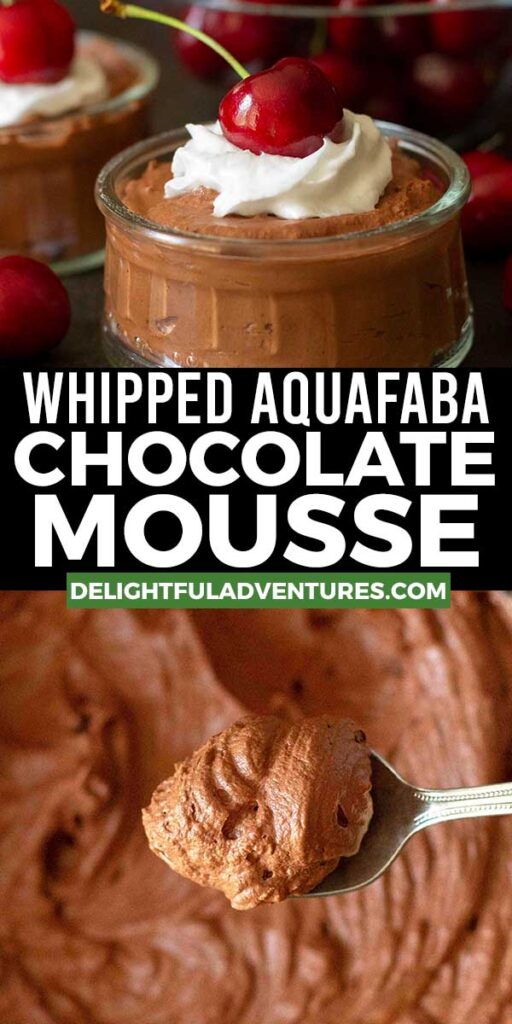
One of the best things about this aquafaba chocolate mousse is that NO ONE will know it's made with chickpea water (unless you tell them!). It's rich, creamy, and I think you're going to want to make it quite often once you try it!
")
Save This Recipe!
In a hurry? Drop your email below, and this recipe will be sent straight to your inbox for later. You'll also get fresh recipes every week! You can unsubscribe anytime.
This is one of those "happy accident" mistake recipes. No, I didn't invent aquafaba chocolate mousse, but I was trying to make it by following a recipe and expected it to turn out the way you would expect a vegan chocolate mousse to turn out:
Light, fluffy, airy, creamy, melt-in-your-mouth, and lots of bubbles.
But I made an error when measuring the chocolate, and what I ended up with was actually better than what I had originally set out to make.
My version is still fluffy, it has lots of bubbles, it's creamy, and definitely melts in your mouth, but it doesn't have the same light airy texture that regular mousse does.
This one is thicker and a little denser, and that may sound less than ideal, but you're going to have to trust me when I say that this is one of the best chocolate vegan desserts you will ever make.
It contains NO coconut, NO avocado, NO tofu, and definitely NO eggs and NO dairy. This 4-ingredient vegan chocolate mousse recipe is THE dessert to make if you want to impress everyone!
I've made this recipe countless times, and when I first started, I had many mishaps, but I've ironed them out over the past year of testing (yes, it took that long!), and I now get perfect results every time. I'm sharing all of my tips below.
So let's go, let's discuss how to make chocolate mousse with aquafaba so you can also dig in and enjoy this rich, chocolaty beauty of a dessert. You'll soon see why it's one of those vegan desserts you’ll want to make again and again!
A Peek at the Ingredients
")
Important Ingredient Notes and Swap Info
(NOTE: Only ingredients with special notes are listed below. The full ingredient list can be found in the recipe card.)
Aquafaba - You can make your own aquafaba or get it from a can of unsalted chickpeas. If using canned, run it through a sieve to get rid of any chickpea pieces and skin before starting. Make sure it's at room temperature because cold aquafaba will seize the chocolate, and the recipe will either not work, or you'll end up with a grainy mousse.
If you've never made an aquafaba recipe before, I go through everything you need to know about it in my post: how to whip and use aquafaba. It's a great resource if it's a new ingredient to you.
Apple Cider Vinegar - This acts as a stabilizer so the aquafaba whips faster and holds its structure without deflating. Don't worry, the vinegar taste won’t come through in the final mousse. If you don’t have apple cider vinegar, you can use white vinegar or lemon juice instead.
Melted Chocolate Chips - Use a good quality dairy-free semi-sweet chocolate with a 50 to 55% cacao percentage for the best balance of sweetness and texture. You can use a higher cacao percentage if you prefer, but it may change the texture. Read my article about vegan chocolate chip brands so you can find some to look for.
Aquafaba Tip
The next time you use a can of chickpeas, save the aquafaba in an airtight container in the refrigerator for a recipe like this one. I have other recipes that also show how to use up aquafaba, like vegan lemon meringue pie, vegan royal icing, and vegan coconut macaroons.
Whip It Up
(Note: I’ve outlined the step-by-step on how to make this recipe here, but find the full recipe, ingredients, and directions at the end of this post.)
Read This Before You Start!
- Make sure all tools that will come into contact with the aquafaba are free of oil residue.
- I highly recommend using an electric hand mixer to make this recipe; a stand mixer can also be used, but an electric hand mixer is my preferred tool because I find that it whips faster, and because I'm controlling it, I have a better feel for when I reach the soft and stiff peak stages.
The first step in making this recipe is melting the chocolate chips. Once melted, set aside to cool.
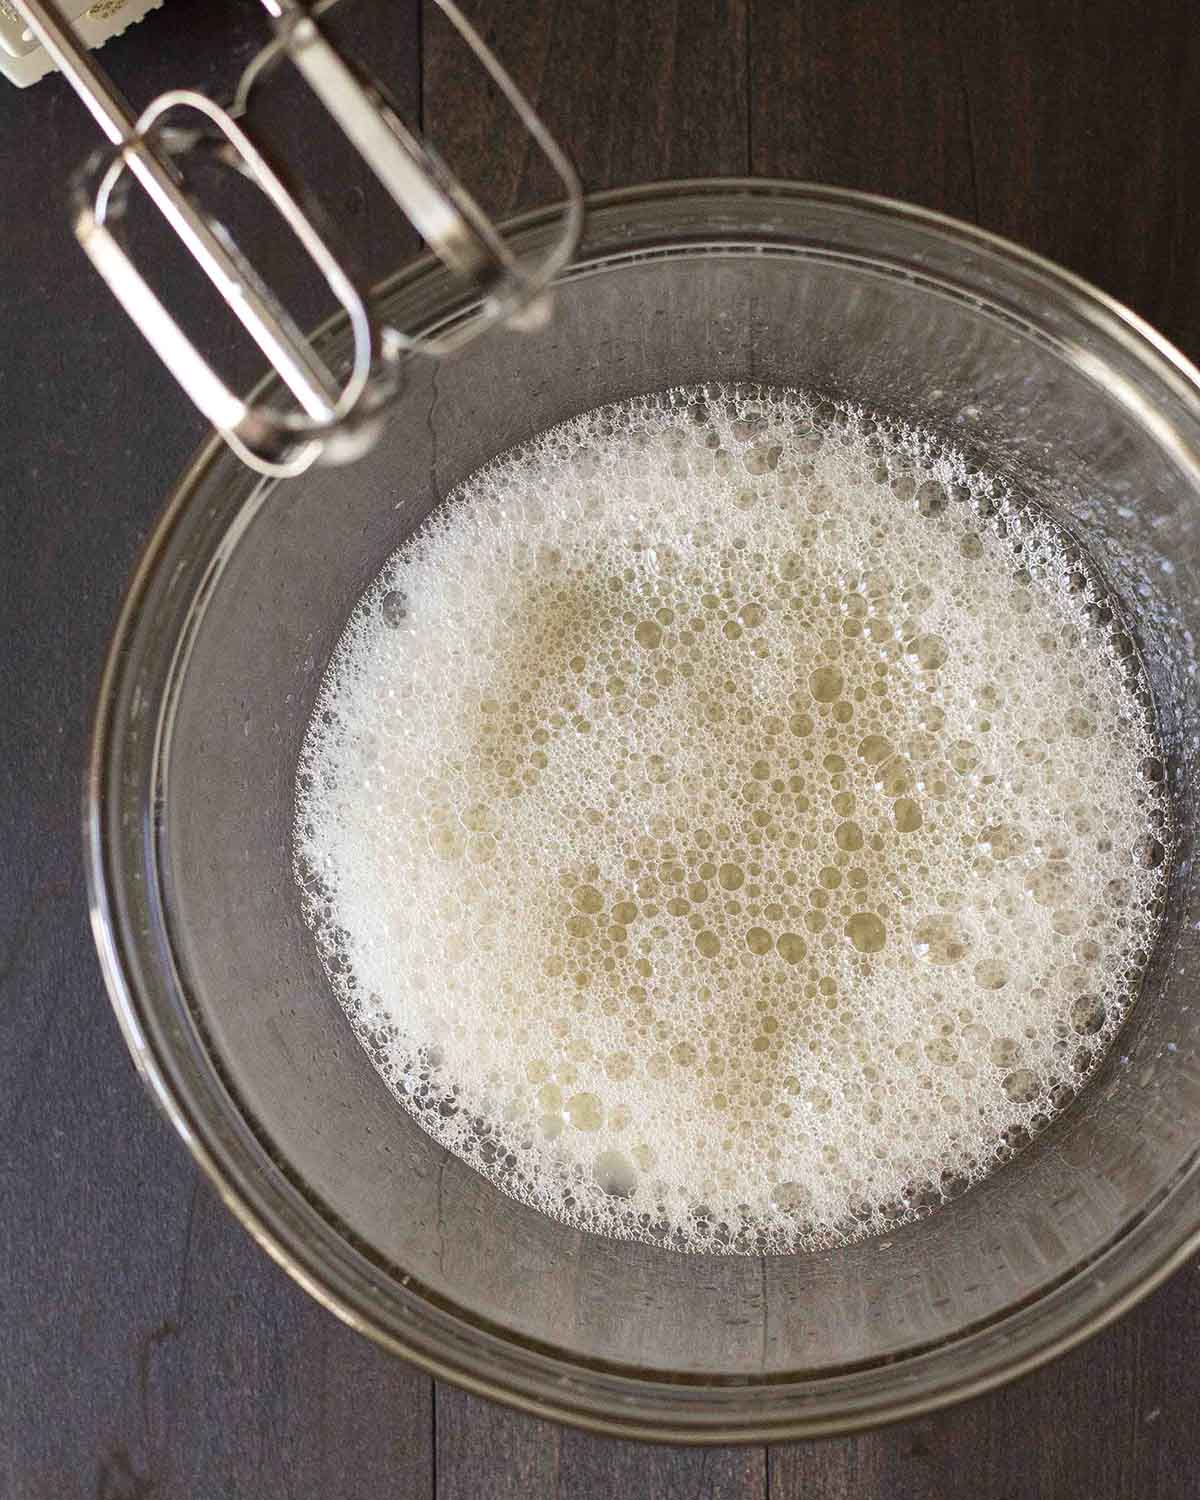
Add the aquafaba and vinegar to a bowl and begin whipping. Bubbles will start to form on the surface.
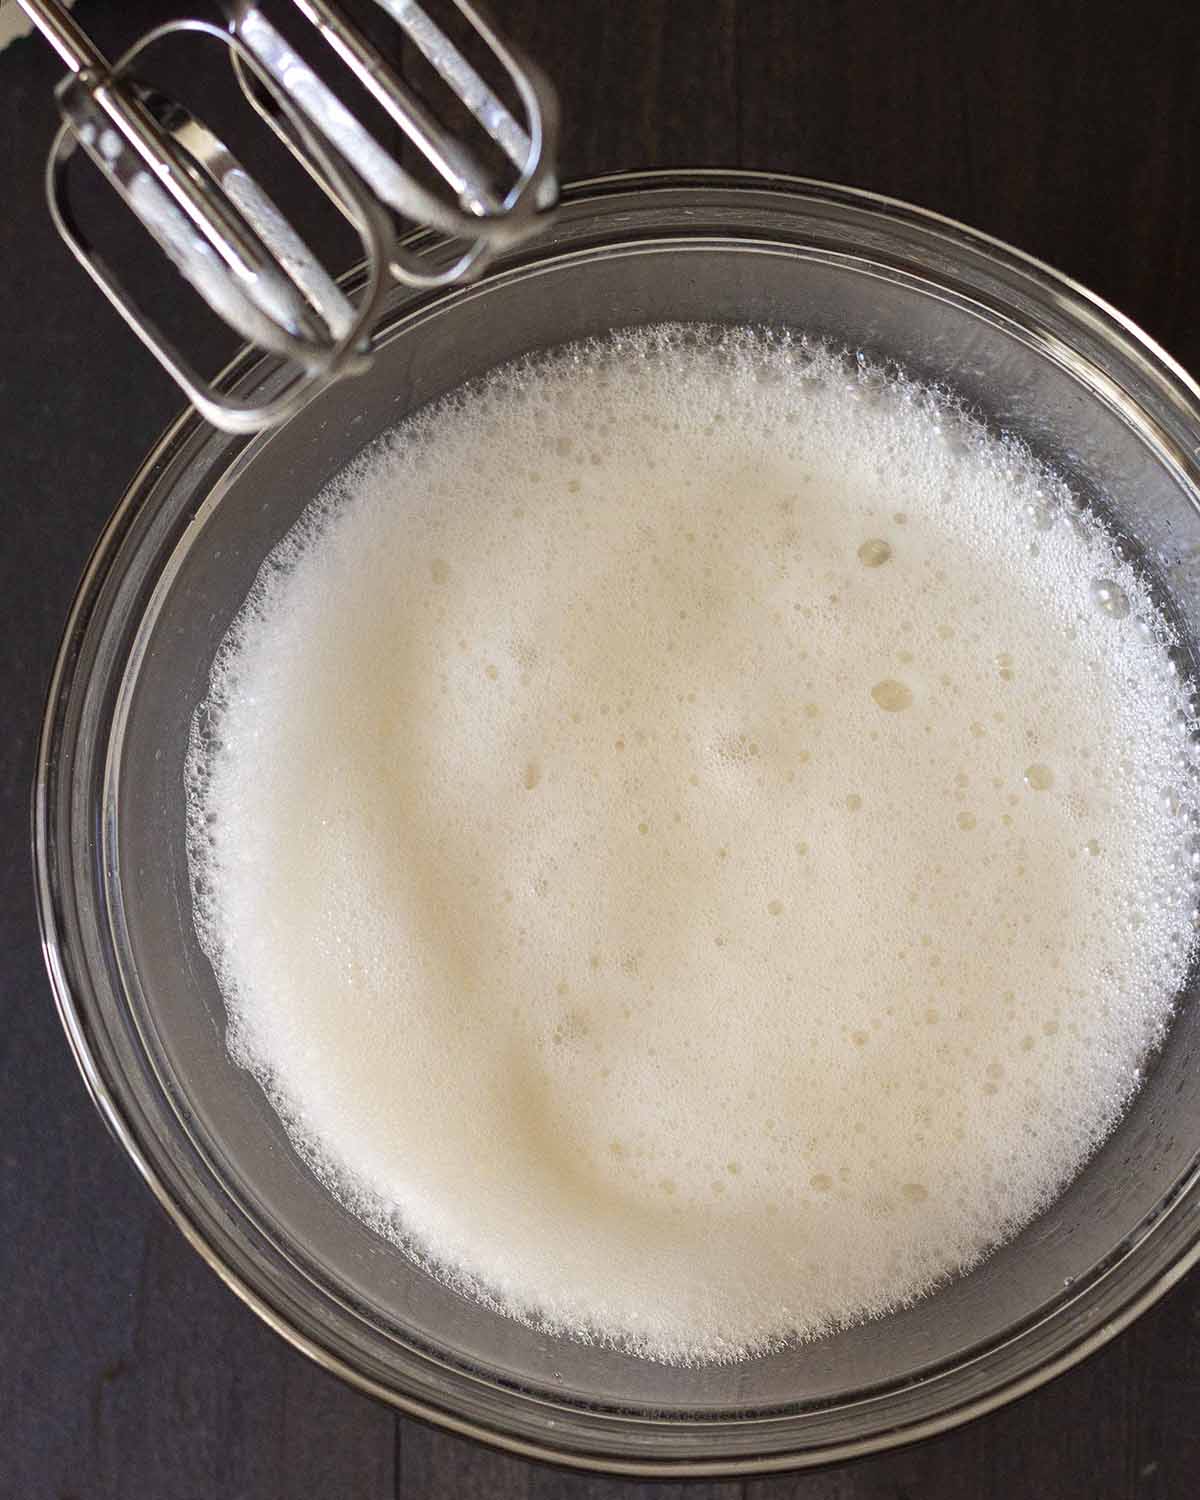
The aquafaba will start getting foamy, and then, after a little while, all of it will become foamy.
Quick Tip: Whipping Aquafaba
The timing provided in the recipe may vary depending on your mixer, speed, and the state of your aquafaba. I use an electric hand mixer on the highest speed. Whipping by hand isn’t recommended since it takes much longer and may not reach stable, stiff peaks.
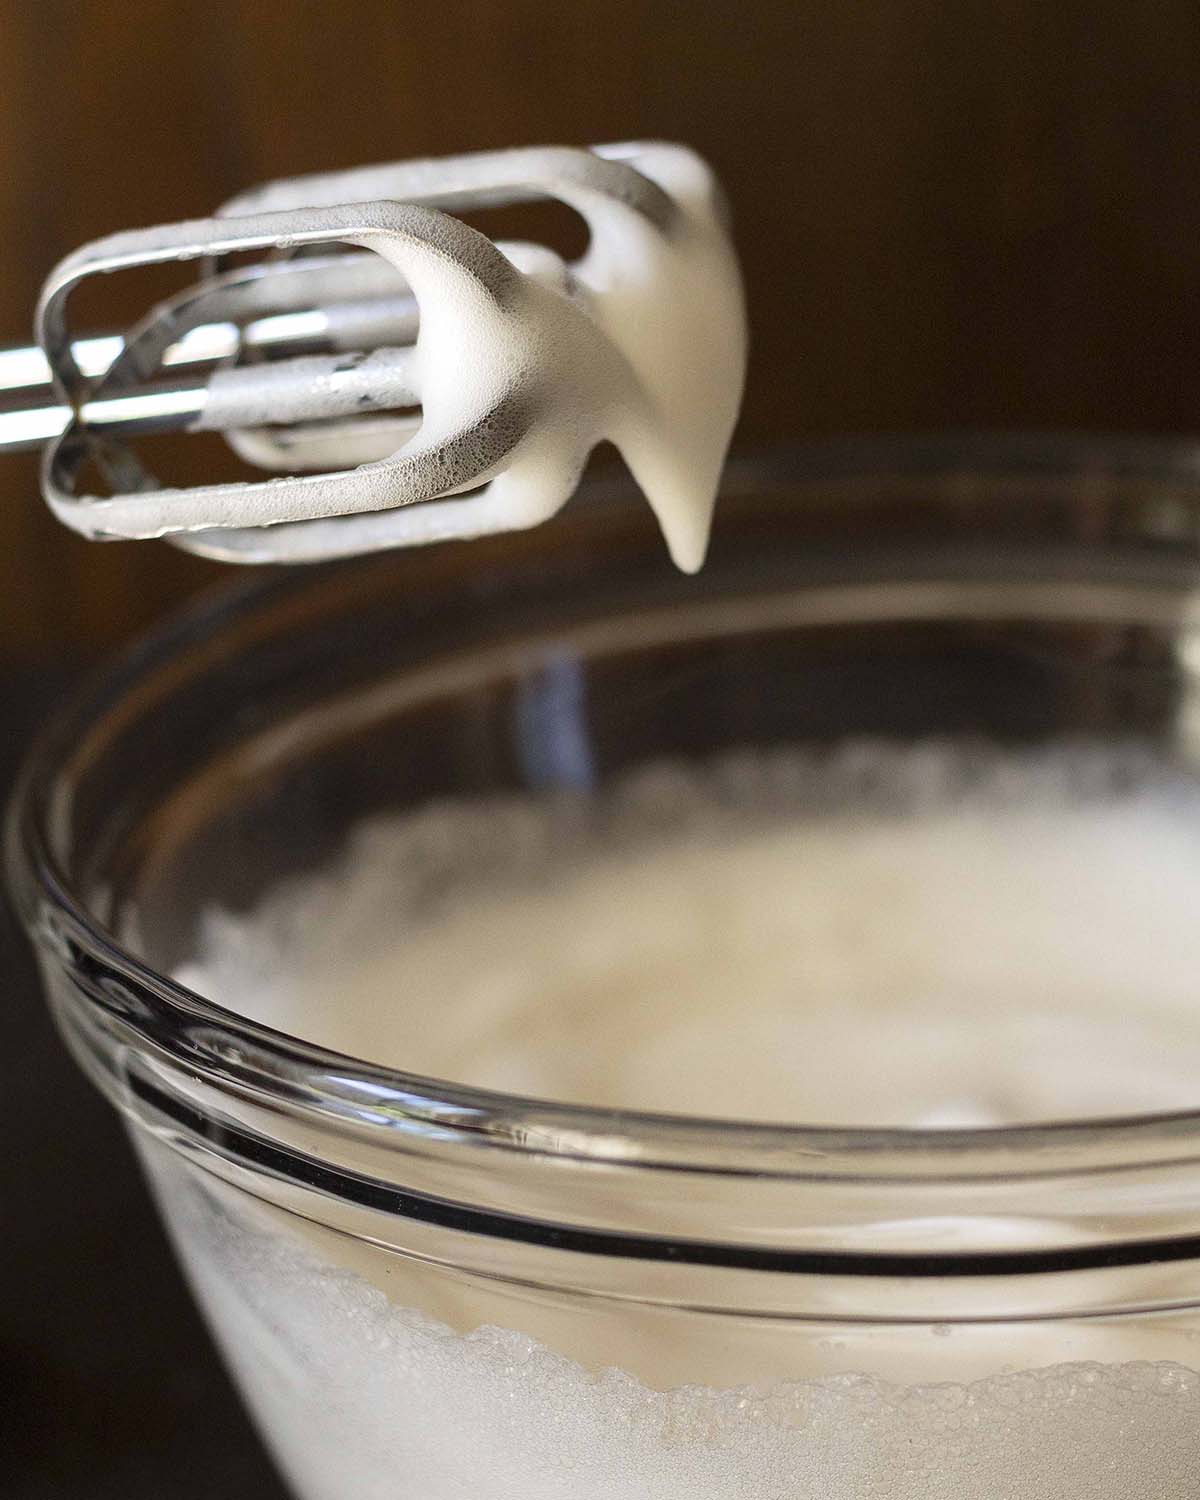
When you get to the soft peaks stage (when the aquafaba sticks to the beaters, but flops down when the mixer is held up), add the vanilla.
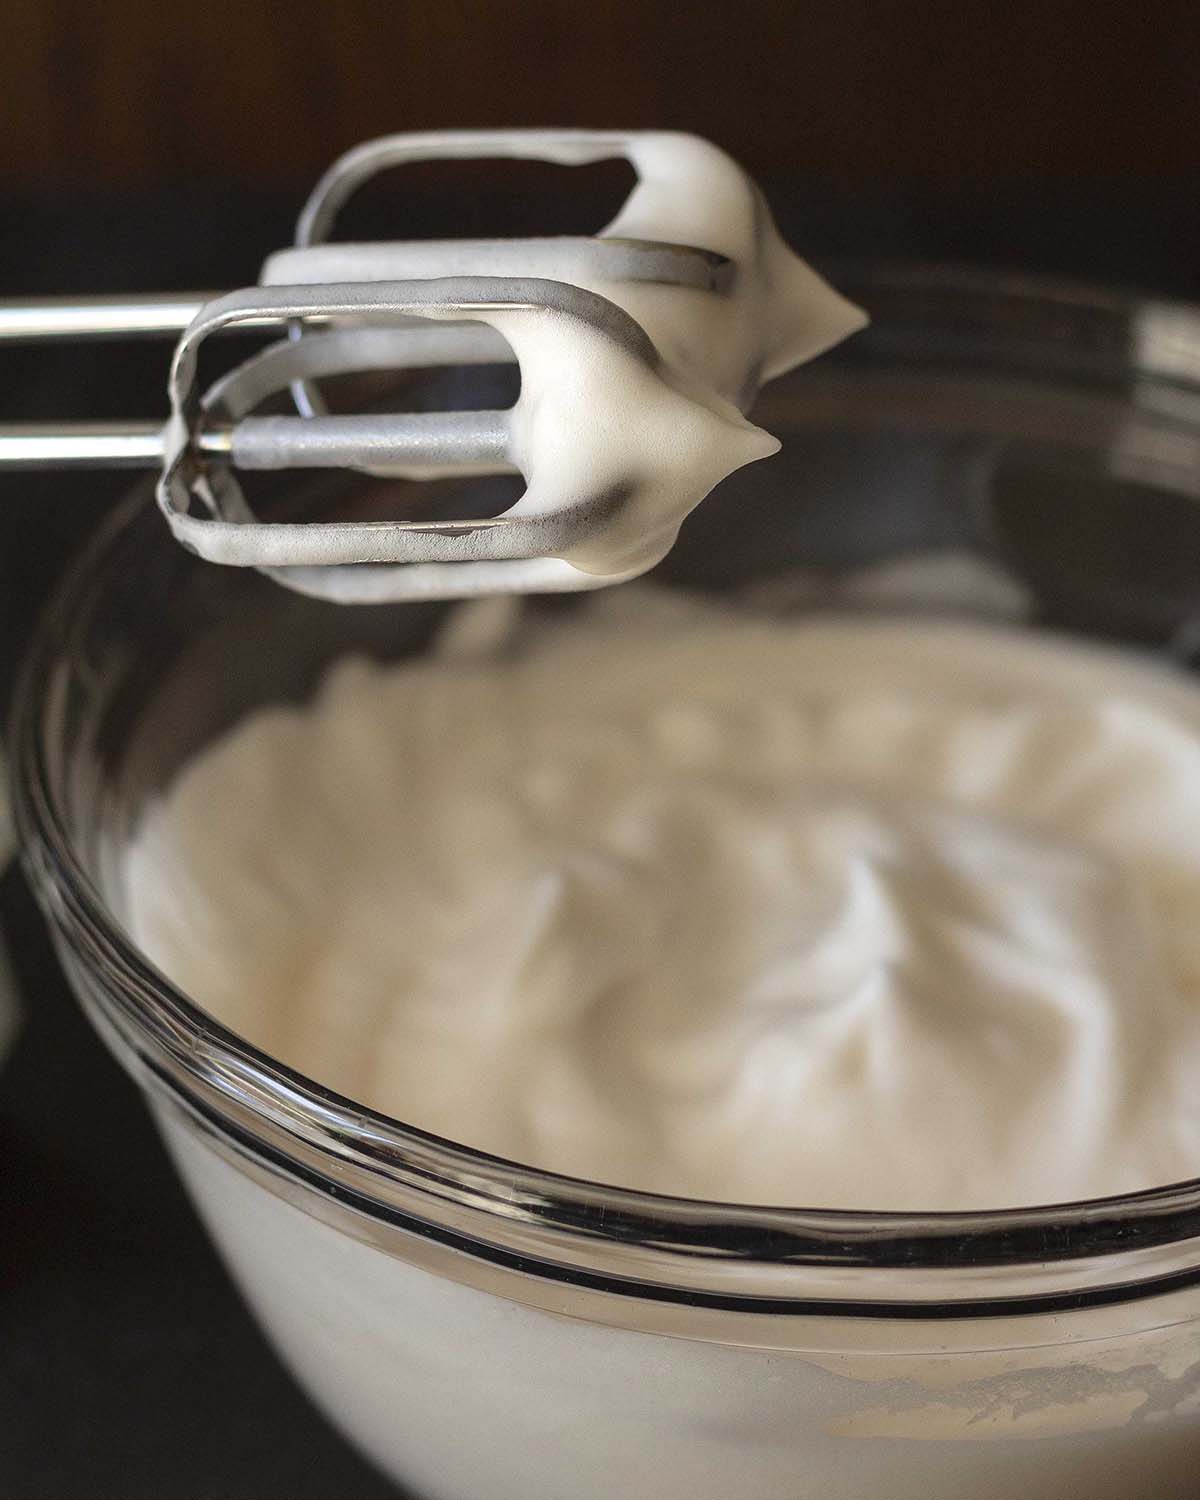
Continue whipping until you reach the stiff peaks stage (when the aquafaba is stiff, and it sticks straight out from the beaters when the mixer is held up).
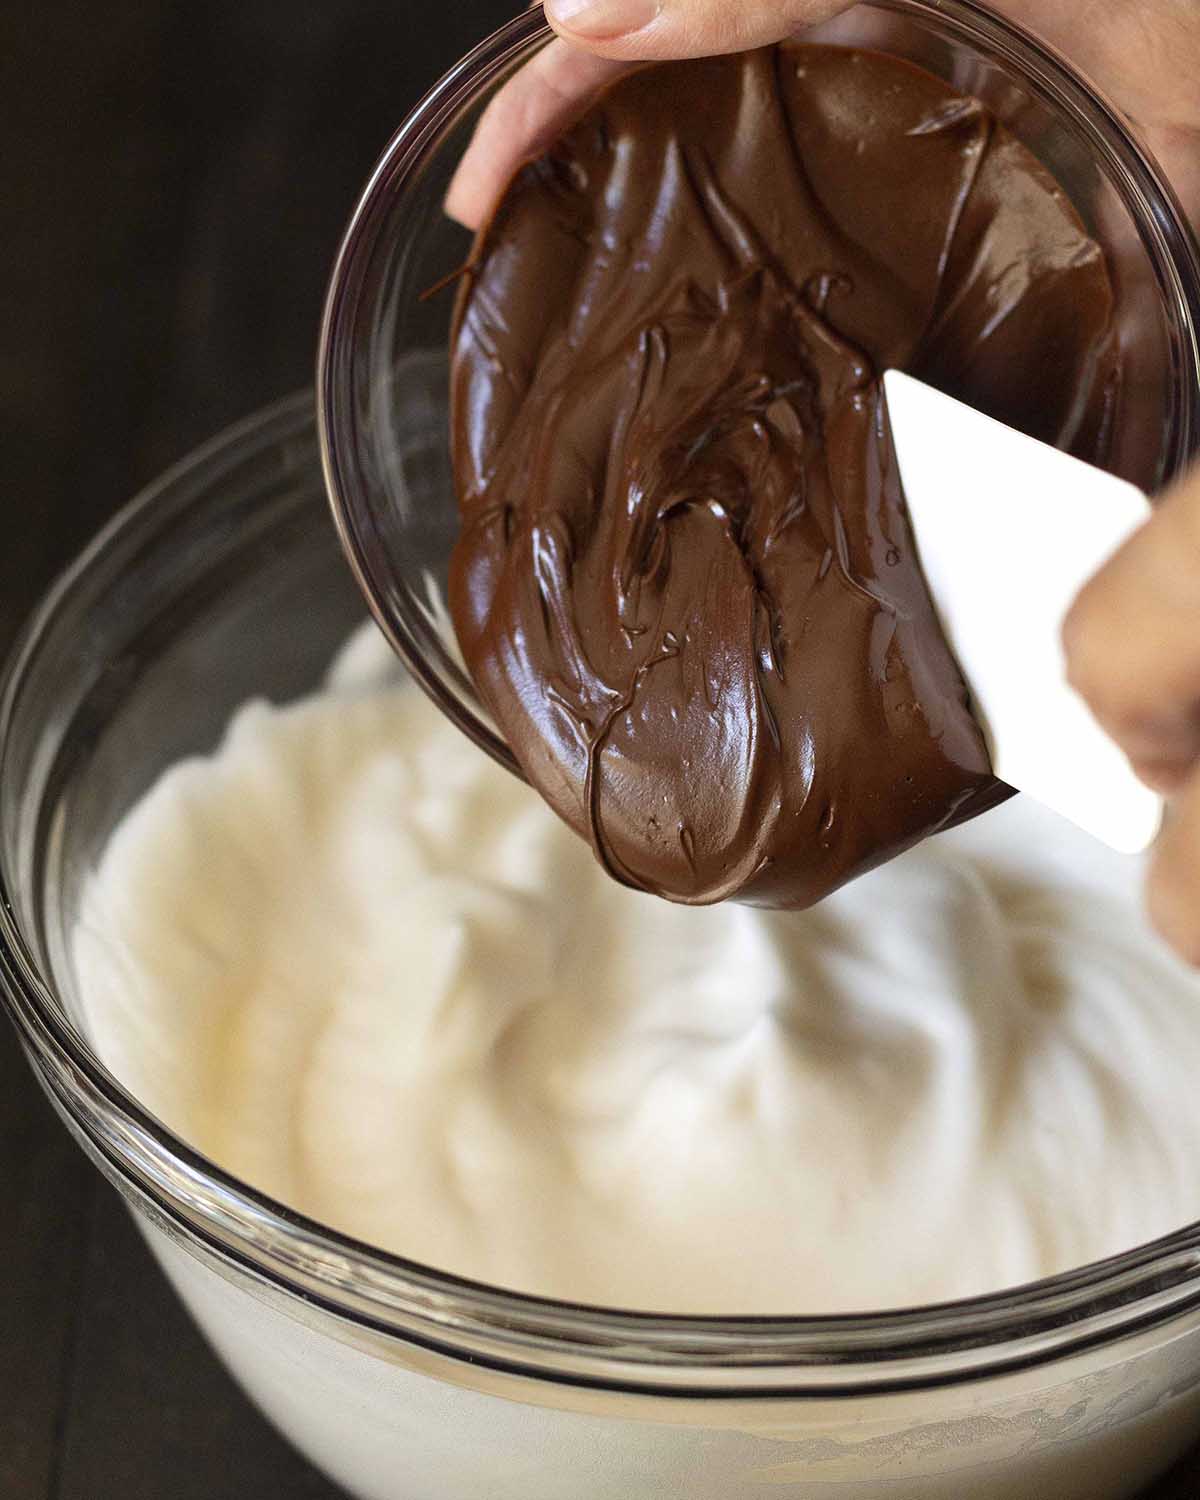
Add the melted, cooled chocolate to the whipped aquafaba and continue whipping.
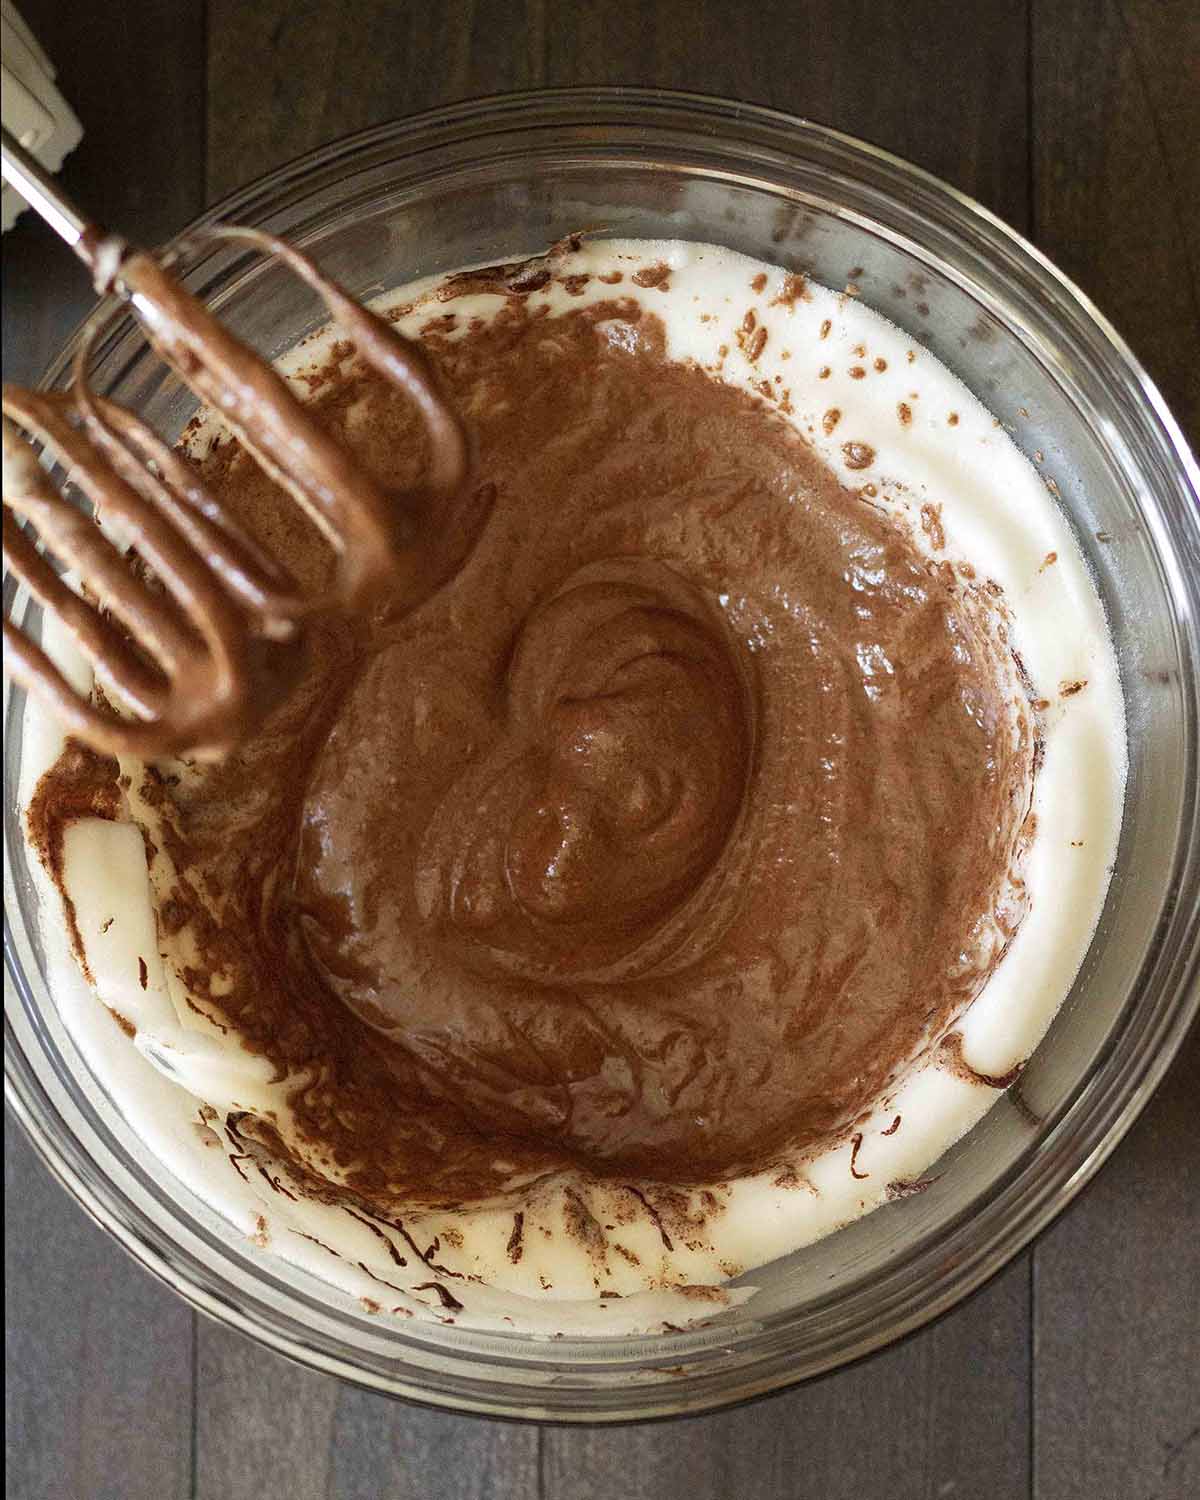
The aquafaba will deflate and become watery, but while continuously whipping, the mixture will start to thicken.
When it thickens, stop whipping.
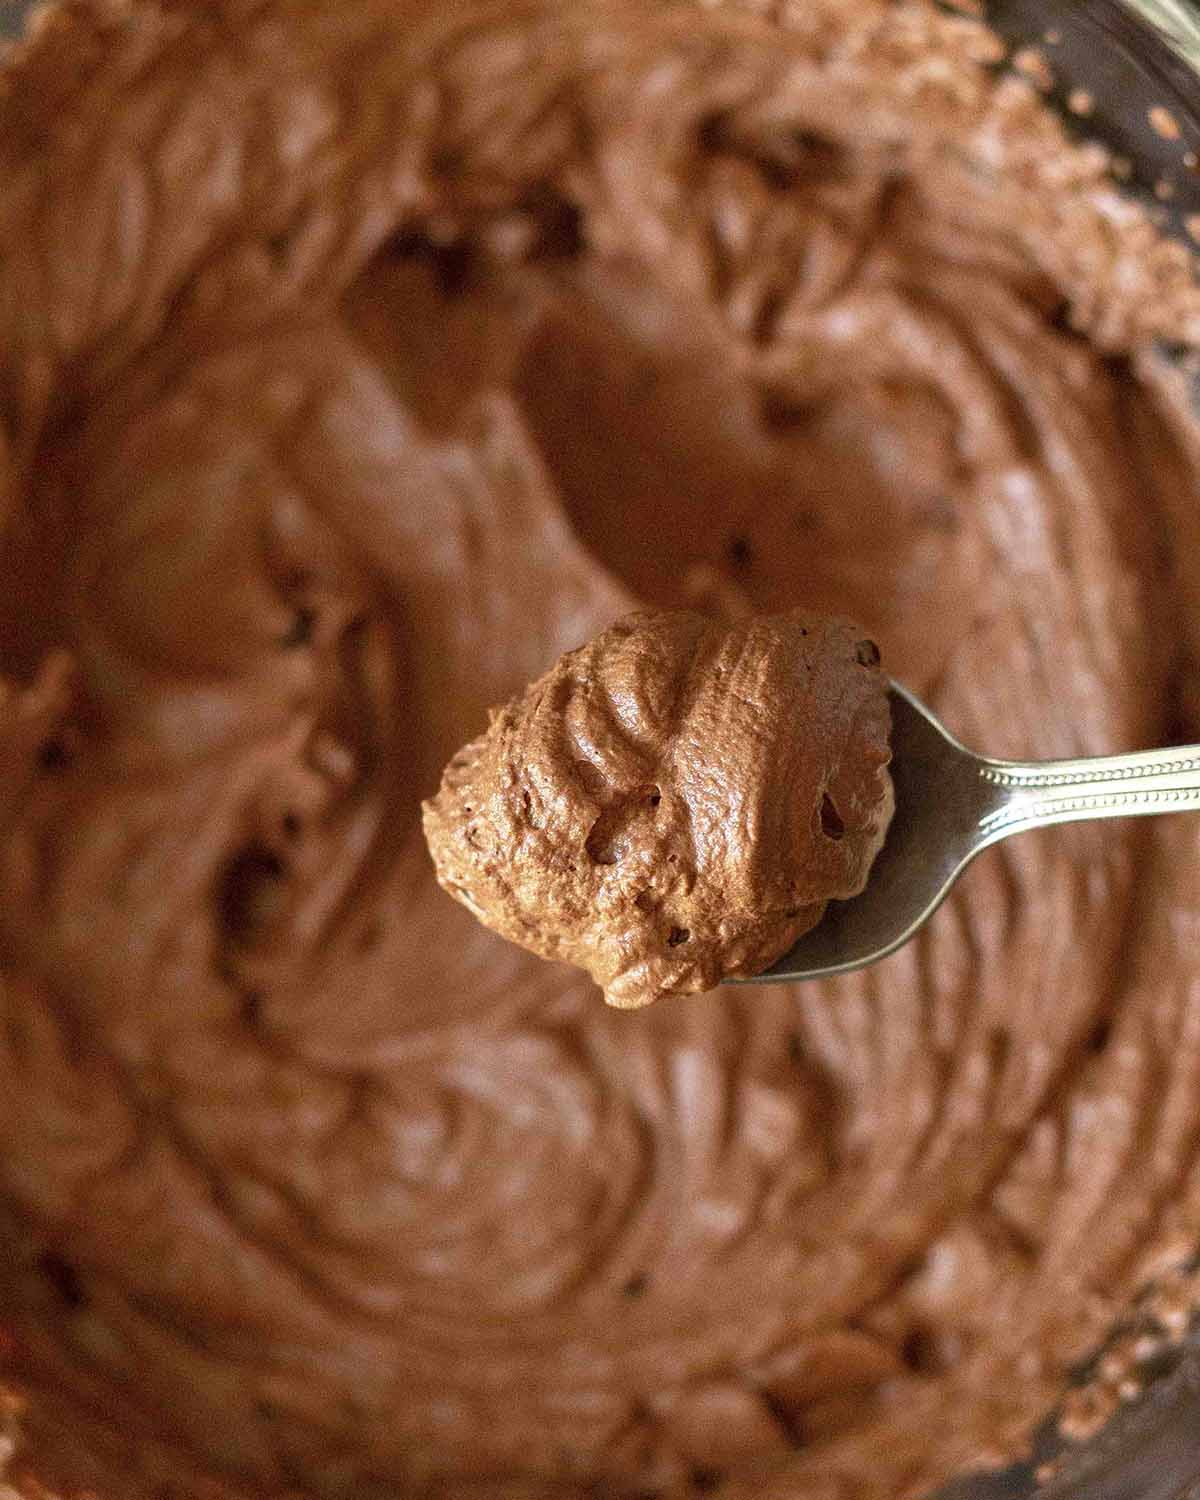
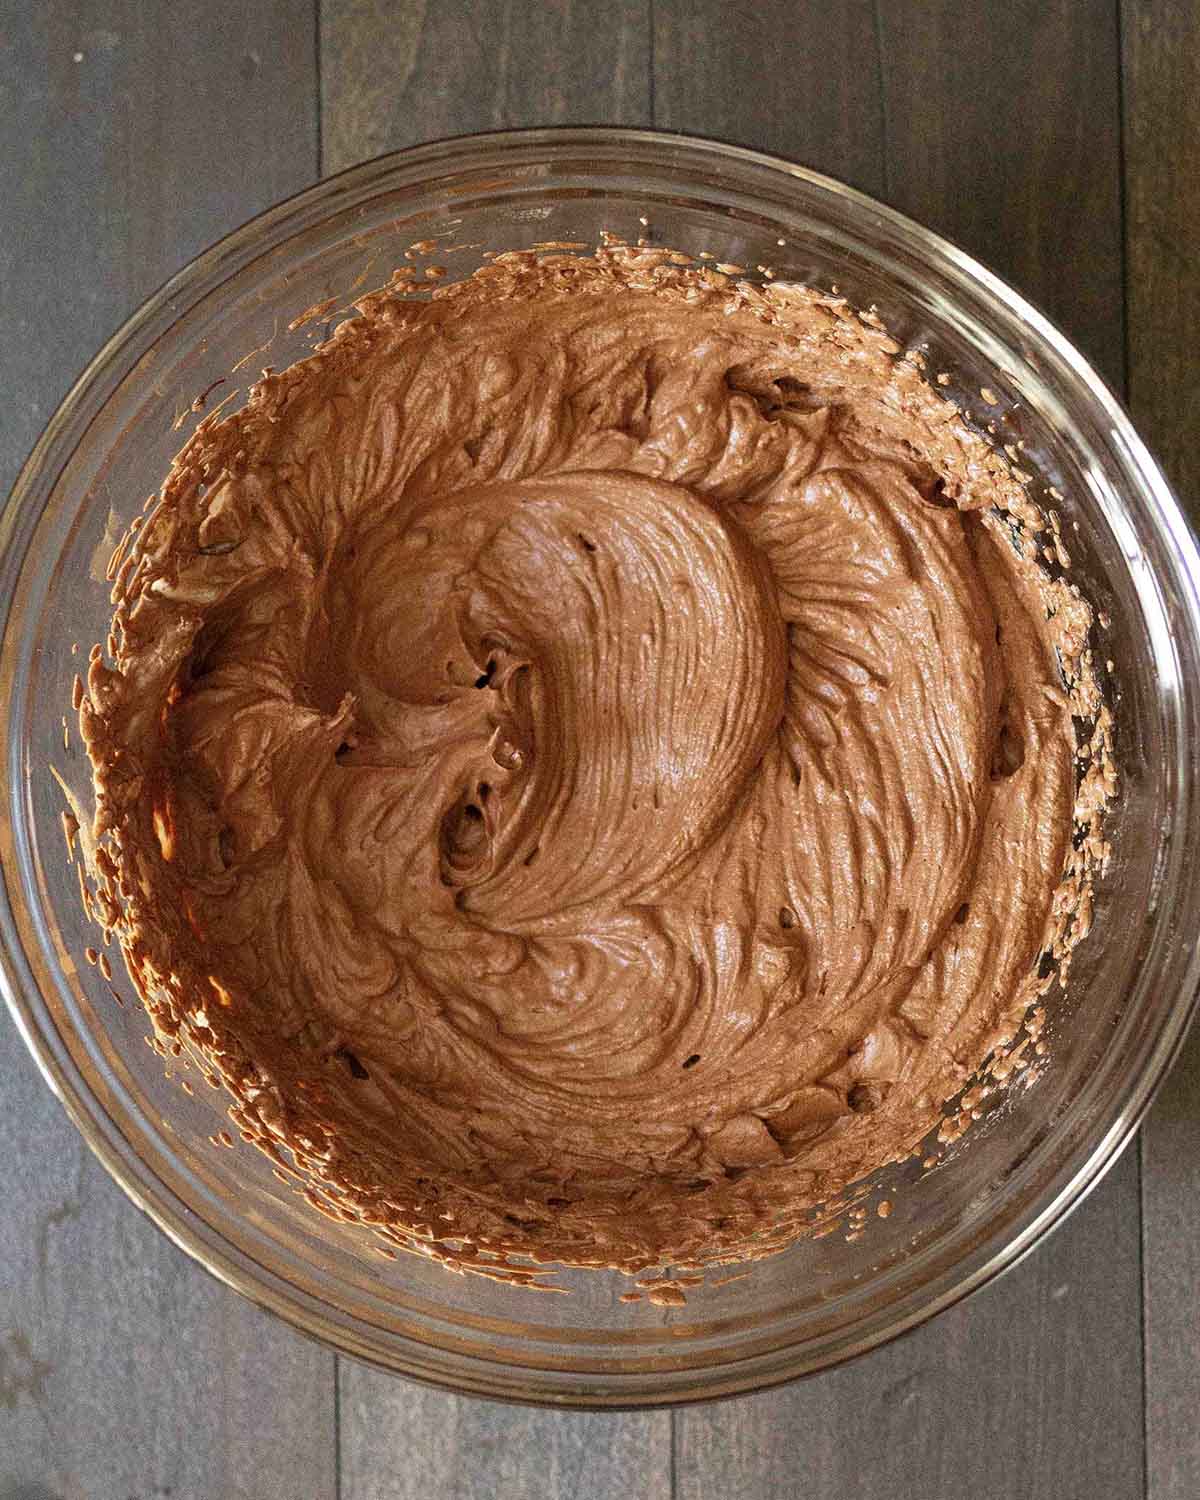
The mousse will be thick, similar to the consistency of buttercream.
")
Serve It Up
Divide your mousse into separate serving bowls and serve immediately or refrigerate for later. (I usually split it into four servings, but it can be stretched out to six if you want smaller portions.)
When you refrigerate it, it will firm up a little. If you want it to be less firm, remove the bowls from the fridge well before serving time and let them come to room temperature.
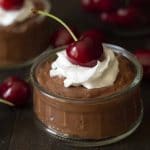
Serve it plain, or you can dress it up with dairy-free whipped cream like coconut whipped cream, or with fresh fruit or berries, cherry sauce, or strawberry sauce.
Switch it Up: Vegan Black Forest Chocolate Mousse
When I have the time and some frozen cherries in my freezer, I like to make my cherry sauce recipe to layer with the mousse to make an even more decadent, fancy treat.
")
Expert Tips Before You Start
Follow these tips to make sure your mousse turns out perfectly every single time:
- Measure and have all your ingredients ready to go before starting. This will make the process run smoothly, quickly, and easily.
- Measure your ingredients correctly. I highly recommend using a scale and my weight measurements to make this recipe. (See the "Suggested Equipment" section in the recipe card for the scale I use and recommend.)
- Use a glass or metal bowl to whip the aquafaba. Plastic can hold on to oil residue, which will cause your aquafaba to not whip properly.
- After you melt the chocolate, wait until it cools almost all the way down before adding it to the whipped aquafaba. You don't want it to be too hot, but you don't want it to get so cold that it hardens; it needs to be almost room temperature.
- If you plan on making this recipe for a special occasion, give it a test run beforehand, so you're comfortable making it.
- Read this post from top to bottom before you start. I’ve included plenty of tips to help things turn out well, and be sure to read through the full recipe before getting started.
- Follow the recipe exactly as it’s written for the very best results.
")
If Things Don’t Turn Out Right
Aquafaba can be tricky to work with, so read the tips above before getting started, and if things still don't work out, read through the following to diagnose what went wrong.
My Aquafaba Didn't Whip
Several things could be going on for this to happen:
- There was oil on something that came into contact with the aquafaba.
- Your aquafaba was too watery.
- You didn't whip the aquafaba long enough, or your mixer's speed was not set high enough.
- You left out the apple cider vinegar stabilizer.
- You made ingredient substitutions or added something extra. It's important to follow this recipe exactly as it's written for it to work.
My Mousse Turned out Grainy
- Your chocolate was too warm, or your aquafaba was too cold.
- You let your melted chocolate get too cold.
My Mousse Turned Out Watery
- You added the chocolate too soon before the aquafaba reached stiff peaks.
- You didn't whip the aquafaba for long enough after it reached the stiff peaks stage.
There is a video on this page that shows me making this mousse. If you are able, watch it to see what things should look like at each stage.
When You Make It...
Please leave me a comment and rating below and/or post a picture of your aquafaba mousse on Instagram and tag me so I can see! (I’m @delightfuladventures on Instagram.)
Whipped Aquafaba Chocolate Mousse
Suggested Equipment:
Ingredients:
- 1 cup (180g) vegan chocolate chips
- ¾ cup (180ml) aquafaba (room temperature)
- ¾ teaspoon apple cider vinegar
- 1 teaspoon vanilla extract
Instructions:
Melt Chocolate:
- Place the chocolate chips in a microwave-safe bowl and microwave for 30 seconds. Remove and stir, scraping down the sides, then repeat in 30-second intervals until only a few small lumps remain. At this point, stop microwaving and continue stirring until the chocolate is fully melted and smooth. (You can also use the double-boiler method, see notes below.)
- Let the chocolate cool down to room temperature before proceeding. Stir every 10 minutes or so to help it cool faster.
Make the Mousse:
- Once the chocolate has cooled down and is no longer warm, add aquafaba and apple cider vinegar to a clean metal or glass bowl and begin whipping at high speed.
- When you reach the soft peaks stage (roughly a minute and a half or slightly longer), add the vanilla extract.
- Keep whipping until you get to the stiff peaks stage. This can take roughly 2.5 minutes or more. Once you reach the stiff peaks stage, continue whipping for another 2 minutes.
- Add the cooled chocolate and continue whipping. The mixture will deflate and become runny, but then it will start to thicken. Once it starts to get thick, stop whipping.
- Divide the mousse into separate serving bowls and serve immediately or place in the refrigerator to chill.
- Serve with a topping you like, such as dairy-free whipped cream.
Watch How to Make It:
Recipe Notes:
- Aquafaba can be tricky to work with, so before making this recipe, please read all of the expert tips and troubleshooting info above, as well as the notes below, to ensure the recipe result is successful for you.
- Chopped chocolate can be used in place of chocolate chips, but I recommend that you weigh it, since using cup measurements for chopped chocolate is not reliable, and an inaccurate amount can ruin your recipe.
- If using the double-boiler method to melt your chocolate, fill a medium pot ⅓ of the way with water and place it on the stove over medium-low heat. Place a tempered glass or stainless steel bowl on top of the pot and stir until the chocolate has fully melted. Be sure that no water makes its way into the bowl, or your chocolate will seize. See the double-boiler method in action.
- Nutrition info is for one ½ cup serving of the plain chocolate mousse with no toppings or cherry sauce, and is to be used only as a rough guide. Learn how nutrition info is calculated on this website.


Glory B says
Just tried this recipe and it is terrific! I used the Eden brand of chickpeas that is unsalted (so much better than the salted version for this dessert style recipe!). During the whipping steps, I just let it rip in the stand mixer. I used regular chocolate chips that I had in the 'frig, and I used the double boiler method to melt them.
Before adding the chocolate, the mixture was super fluffy and huge in the bowl. You're right about the mixture deflating after adding the chocolate. I just let it mix on high speed again for another couple minutes and it got thick again. Not as "big & fluffy" as prior to adding the chocolate. But thick enough to be an air-y mousse. It's refrigerating as I type to eat later.
I wondered if the taste would be sweet enough, and it is! Thank you for posting the recipe!
Gwen Leron says
It's my pleasure, Glory! It's one of my favourites, you can never go wrong with chocolate! I'm glad the recipe worked well for you and that you love it. Thanks so much for circling back to leave your kind review, I appreciate it very much. Enjoy!
Ptit Lu says
It was the same for me. Once I added my melted chocolate, cooled and smooth, it became soup. I could not bring it back.
Gwen Leron says
Sorry to hear it didn't work for you. Without knowing more details, I can't offer much help other than to suggest reading through both the tips and troubleshooting sections above. If you are able, please also watch the video above so you can see me making it and what everything should look like at each stage. Aquafaba can be quite tricky to work with, so it's important to follow everything exactly to get it right. Let me know if you have any questions, I hope you give it another try!
Katy Moss says
Could I use white wine vinegar please?
Gwen Leron says
Hi Katy, I only recommend white vinegar or lemon juice in place of the apple cider vinegar. I think that white wine vinegar, since it has a stronger flavour, would leave a taste in the mousse. I hope this helps!
Bee says
Fail - choc chips didn't melt via microwave nor double broiler 🙁
Gwen Leron says
Hi Bee, this is not an issue with the recipe, it's an issue with your chocolate chips. I have never come across chocolate chips that do not melt, so I'm not sure how to guide you best other than to ask you to check to make sure they are fresh and not old and expired. What brand did you use?
Amy Ludwig says
My mixture didn't thicken up again after I added the melted chocolate. Thoughts?
Gwen Leron says
Hi Amy, sorry to hear this. There are a few reasons why this could have happened (there is a troubleshooting section above that I included to help since working with aquafaba can be tricky!). The main reason for this happening is not whipping the aquafaba long enough before you added the melted chocolate. It could also happen if you didn't add the stabilizer (apple cider vinegar), this would also make the aquafaba not get stiff enough to take in the chocolate. Do you think it was either of these things? If not, let me know and I can help troubleshoot further.
KRosilio says
Thanks for thorough instructions and explanations! This turned out great even though I doubled the recipe to serve 8 and using somewhat thin homemade aquafaba from instant pot chick peas and mixing together enough chocolate from what I could find in the pantry (stevia chips and 95% dark bar!). The chocolate lovers enjoyed the richness of the dark choc, others wished for something a bit sweeter. Doubling the recipe required longer mixing times.
I was interested to see the comment that added chili and cinnamon and will try that next time. Yum!
It was my first time using aquafaba and your details encouraged me to try it, so glad I did! I’m not vegan, but I am trying to utilize everything and reduce the amount of animal-based foods.
Gwen Leron says
This is great news! I'm so glad you enjoyed it, it's one of my favourite recipes. This is a good one to make the first time you use aquafaba! Thanks for coming back to leave your comment, I appreciate it. Enjoy!
Natalie says
Hello,
I love chocolate mousse and was so looking forward to making it, unfortunately it turned runny, no mousse consistency. I mixed the chocolate at the beginning (by mistake) with the aquafaba and the vinegar, could that be the reason?
Thanks a lot,
Natalie
Gwen Leron says
Hi Natalie, sorry to hear it didn't work out but yes, adding the chocolate before the aquafaba has been whipped will cause the recipe to not work. The aquafaba needs to be foamy before adding it. If you are able, have a look at the video I've included on the page to see me making it, I've also included the process images above so you can view that way as well. I hope you give it another try, ti really is a delicious dessert! If you have any other questions, please feel free to ask.
Natalie says
Thanks for the quick reply and I will try again!
Gwen Leron says
I hope you love it!
Robin says
I made this the other night because I had some aquafaba and had never tried making anything with it. I was craving chocolate... so this was perfect. I have to say, it is awesome!! My brain keeps thinking it is tofu because I have made some tofu mousse recipes, but this is amazing. The first night I added a little peanut butter (didn't have cherries for the sauce) and then the next day added cinnamon, chili powder, and cayenne - OMG - it was amazing! The 2nd day was even better in terms of consistency and richness. I LOVED it. Thank you so much for your clear instructions and delicious recipe. Can't wait to try more.
Gwen Leron says
I'm so happy you found the recipe and gave it a try, Robin, I'm glad to know you love it. Adding peanut butter or spices to the finished mousse sounds delicious! Enjoy and thanks for circling back to leave your comment and rating, I appreciate it very much!
Amanda says
Can this be frozen?
Gwen Leron says
Hi Amanda, I was finally able to test this and yes, you can freeze the mousse after it has been prepared, the texture remains the same after it has been thawed. Thaw in the fridge overnight and then serve. Anything else, please let me know.
Phoebe says
Wonderful recipe and great explanations. I have made aqua faba meringues even on rainy days by using 1/4 tsp Xanthan gum after reaching the soft peaks stage. I really disliked the tang that cream of tartar added but with the X gum my meringues are more reliable than the egg white kind. ( I don’t have a problem with this “additive” because it is the natural product of a bacterial fermentation, but I imagine others might not like it). So my question is would Xanthan gum be a reasonable substitute for the vinegar in this recipe?
Gwen Leron says
Hi Phoebe! I haven't tried using xanthan gum in this recipe instead of the vinegar, but I do think it would work just fine as a stabilizer for the mousse. However, you'd have to use very little, too much and you will get a consistency similar to marshmallows. If it helps, I don't detect the vinegar taste in the final mousse if you're willing to give it a try that way. If you do experiment with the xanthan gum, please come back and let me know how things go! 🙂