This page may contain affiliate links. Click to learn more. As an Amazon Associate I earn from qualifying purchases.
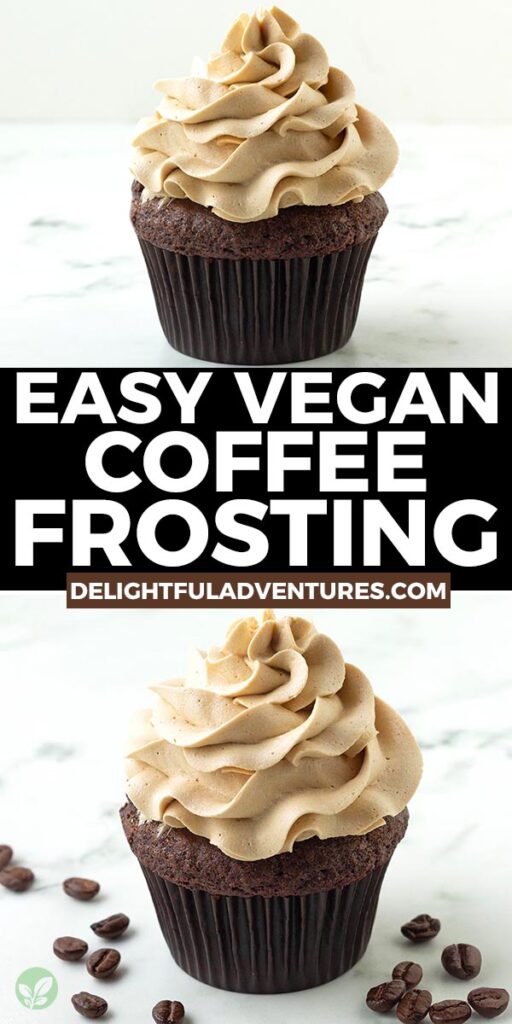
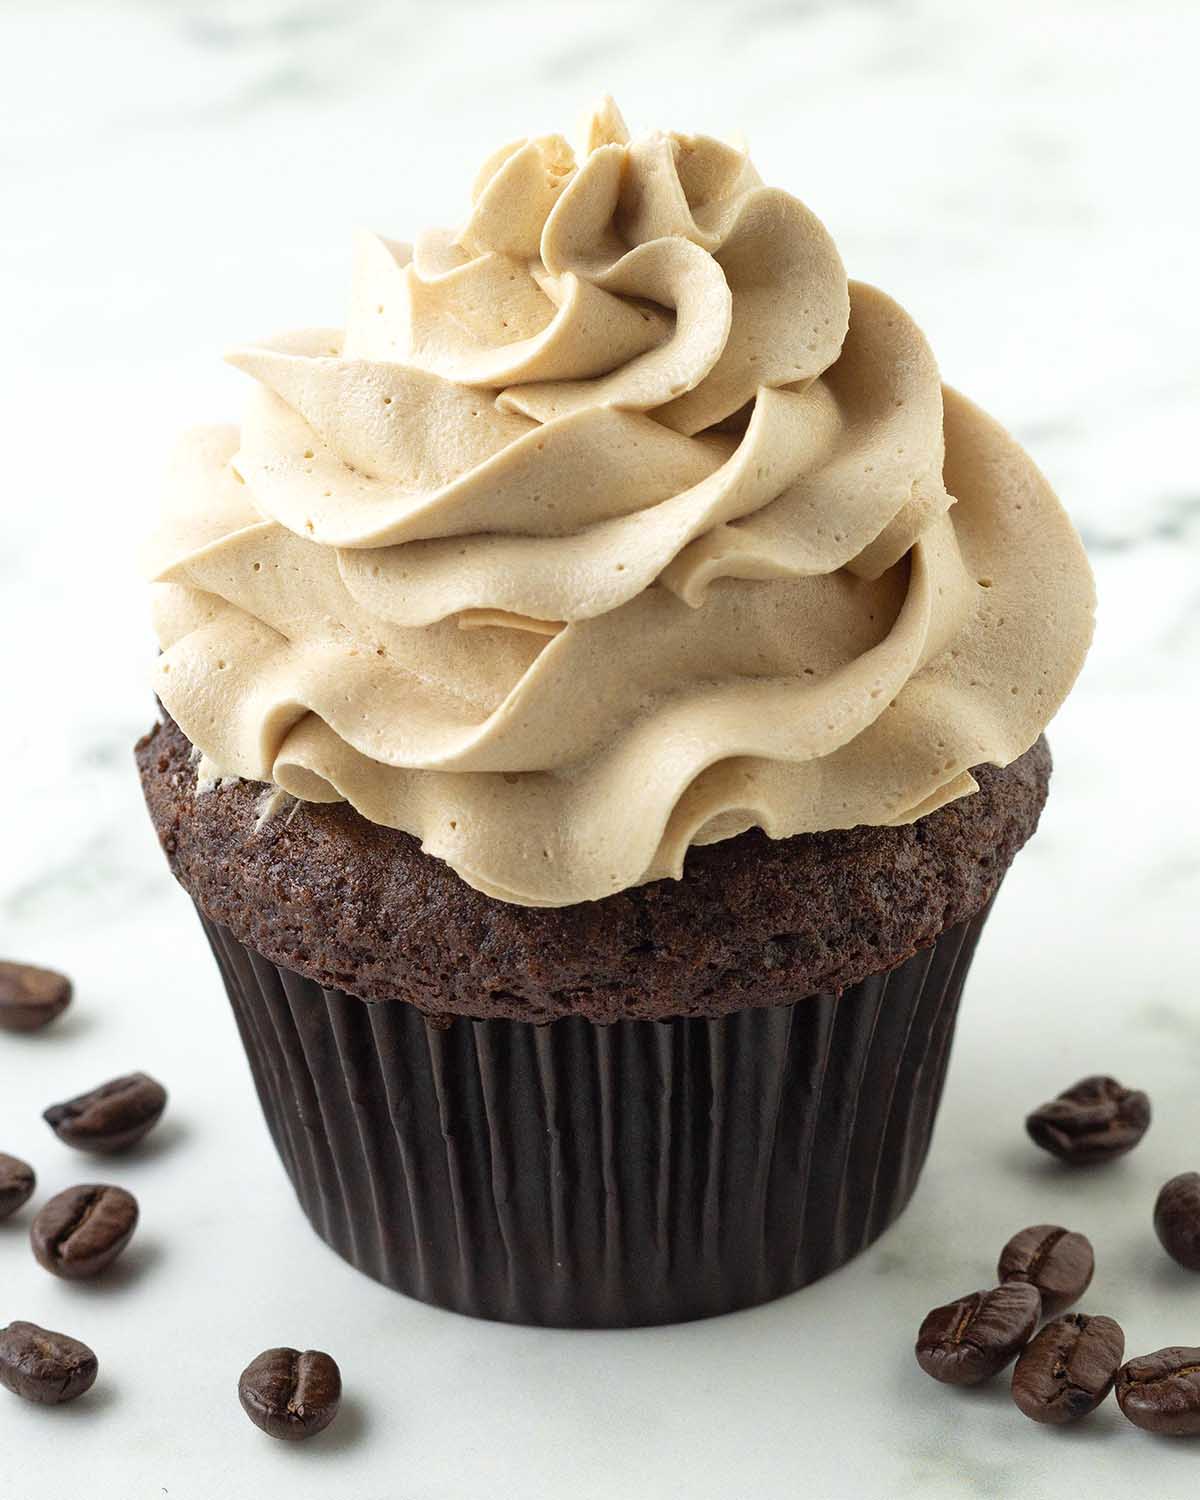
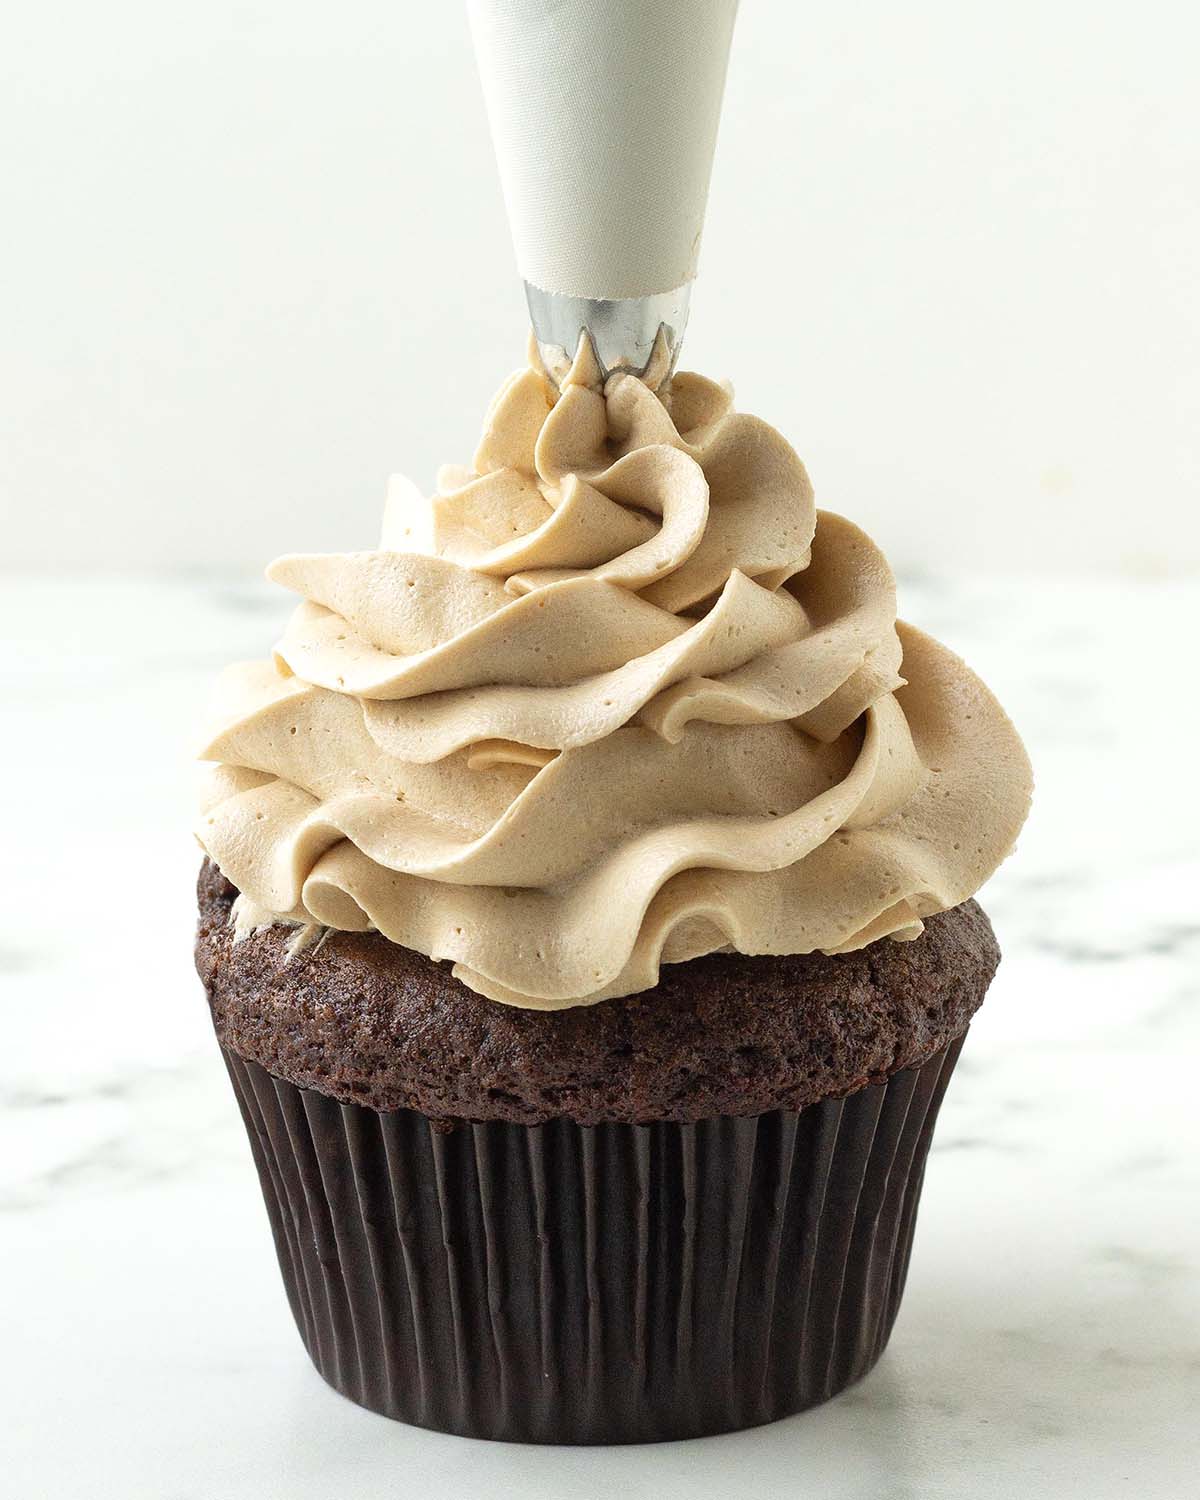
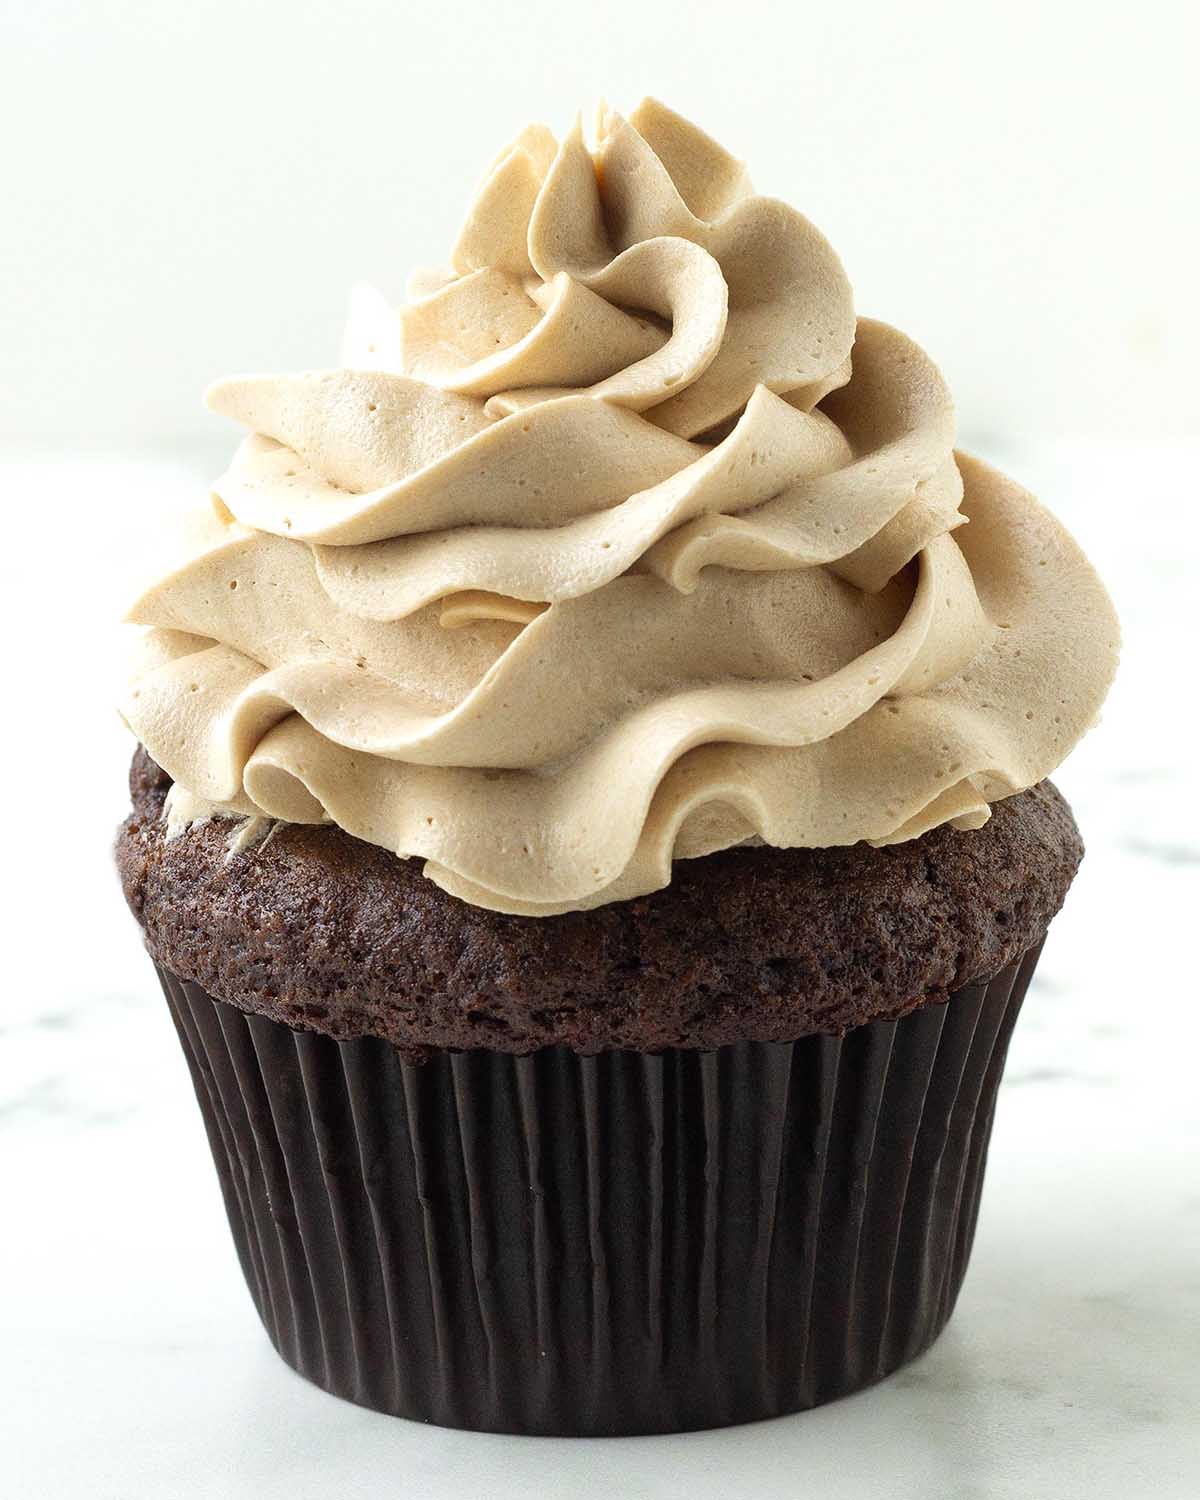
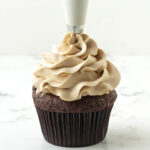
Smooth, creamy vegan coffee frosting made with instant coffee for a bold, aromatic flavour that pairs perfectly with chocolate desserts like cake, cupcakes, brownies, and more. This easy homemade buttercream is velvety, fluffy, rich, and completely dairy-free, with a silky texture that spreads and pipes beautifully.
It’s a little different from classic frosting flavours, but it’s one you’ll keep coming back to, and one everyone will keep asking for!
Save This Recipe!
In a hurry? Drop your email below, and this recipe will be sent straight to your inbox for later. You'll also get fresh recipes every week! You can unsubscribe anytime.
If you love coffee, this vegan coffee frosting will likely make it on your list of favourites!
I have plenty of vegan frosting recipes to choose from, and every time I add a new one to the collection, I always end up calling it a new favourite! This one has definitely earned its place on that growing list.
It's not too sweet, thanks to the natural bitterness from the instant coffee, which balances the sweetness buttercream is known for. It’s still sweet, but not as sugary as traditional buttercream. It’s also wonderfully smooth and silky, while still firm enough to pipe onto your favourite desserts.
Ready to make it? Good! Let's get started!
Grab These Ingredients
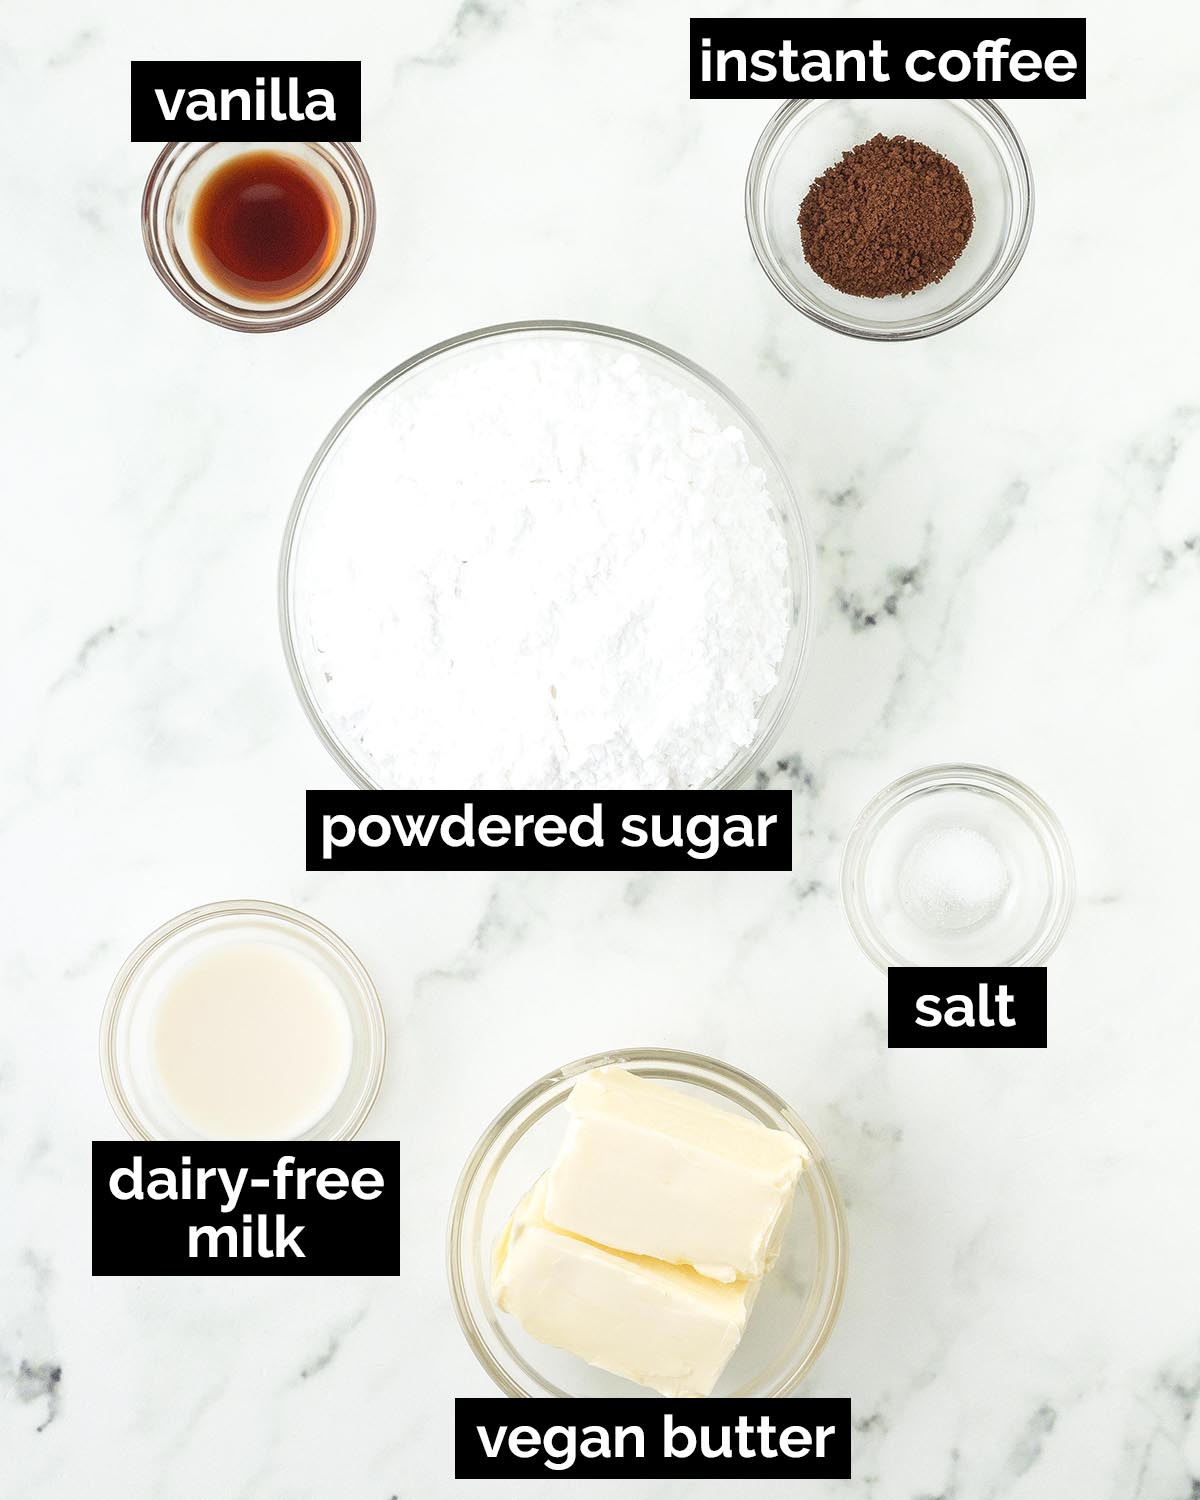
Some Ingredient Notes
(NOTE: Only ingredients with special notes are listed below. The full ingredient list can be found in the recipe card.)
Vegan Butter - You’ll need to use firm sticks, not the spreadable type that comes in containers/tubs, they’ll make your frosting too soft.
Your Butter Should Be Like This
It should be slightly softened, not super firm, overly soft, or melted. To test it, gently press your finger into it. It should leave a shallow indent. If your finger sinks in too easily, it’s too soft. Place it in the fridge to firm up.
Dairy-Free Milk - Make sure to use one that's unflavoured and unsweetened. It must also be at room temperature so the coffee granules fully dissolve.
Instant Coffee - I have not tested with any other type or form of coffee. I started with instant coffee and loved how well it worked, so I stuck with it. It will give your frosting a very coffee-forward, balanced flavour. Either decaffeinated or caffeinated will work.
How to Whip It Up
(Note: I’ve outlined the step-by-step here, but find the full recipe, ingredients, and directions in the recipe card at the end of this post.)
Start by combining the coffee granules and the milk. Stir well until all the granules have dissolved.

Make the base by whipping the butter, salt and powdered sugar together.
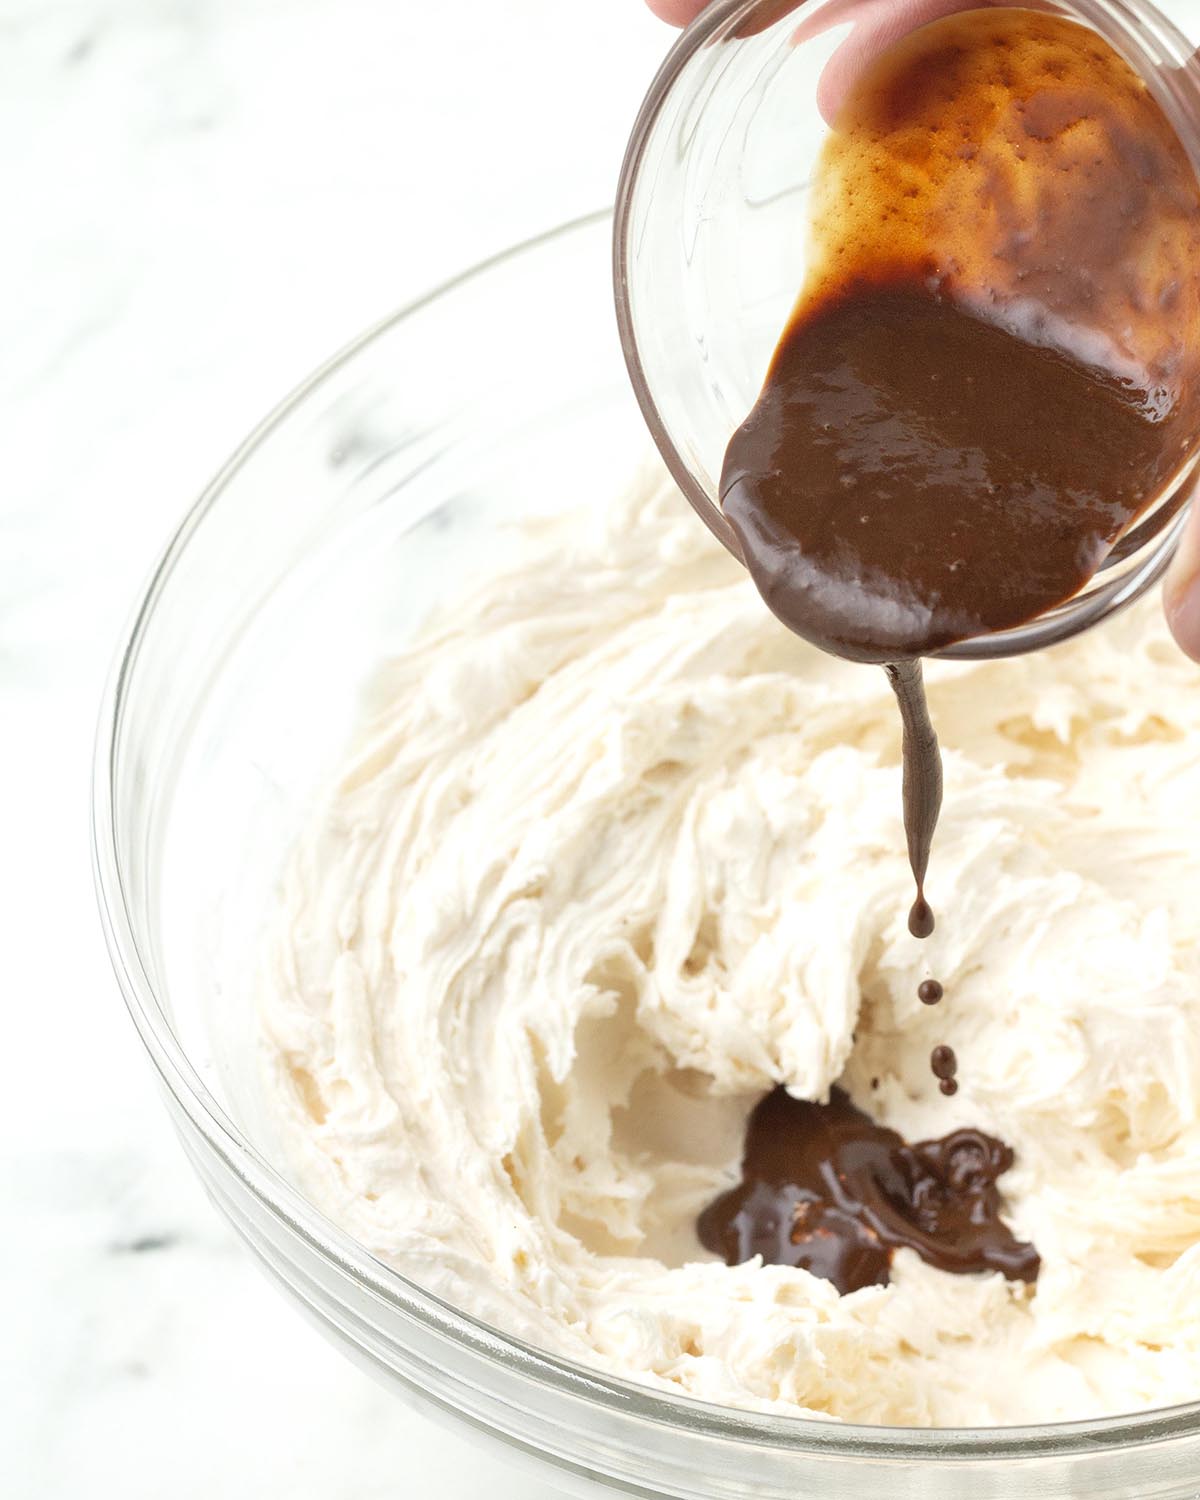
Add the coffee mixture.
Avoid a Cloud of Powdered Sugar
Add the powdered sugar gradually and start mixing on low speed. Once the powdered sugar has been mixed in, you can turn up the speed. It's tempting to add it all at once and to whip fast at first, but this helps keep everything in the bowl instead of ending up all over your counters!
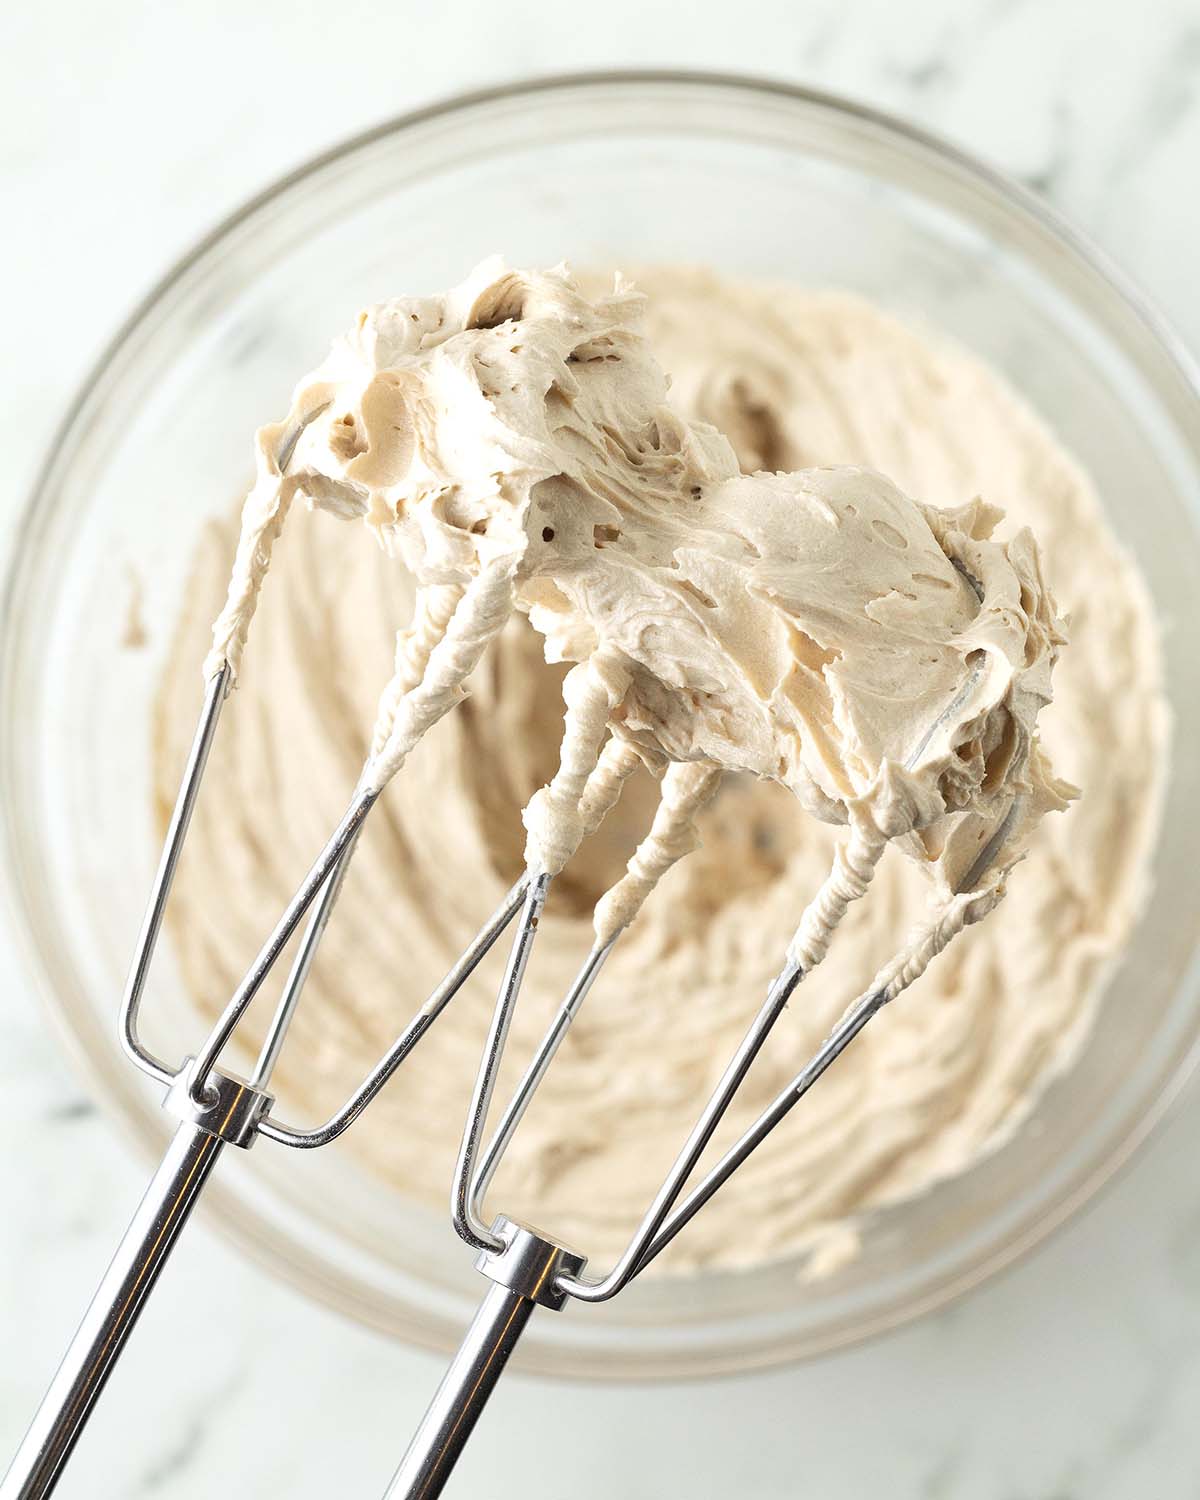
Whip the mixture until it's smooth and creamy.
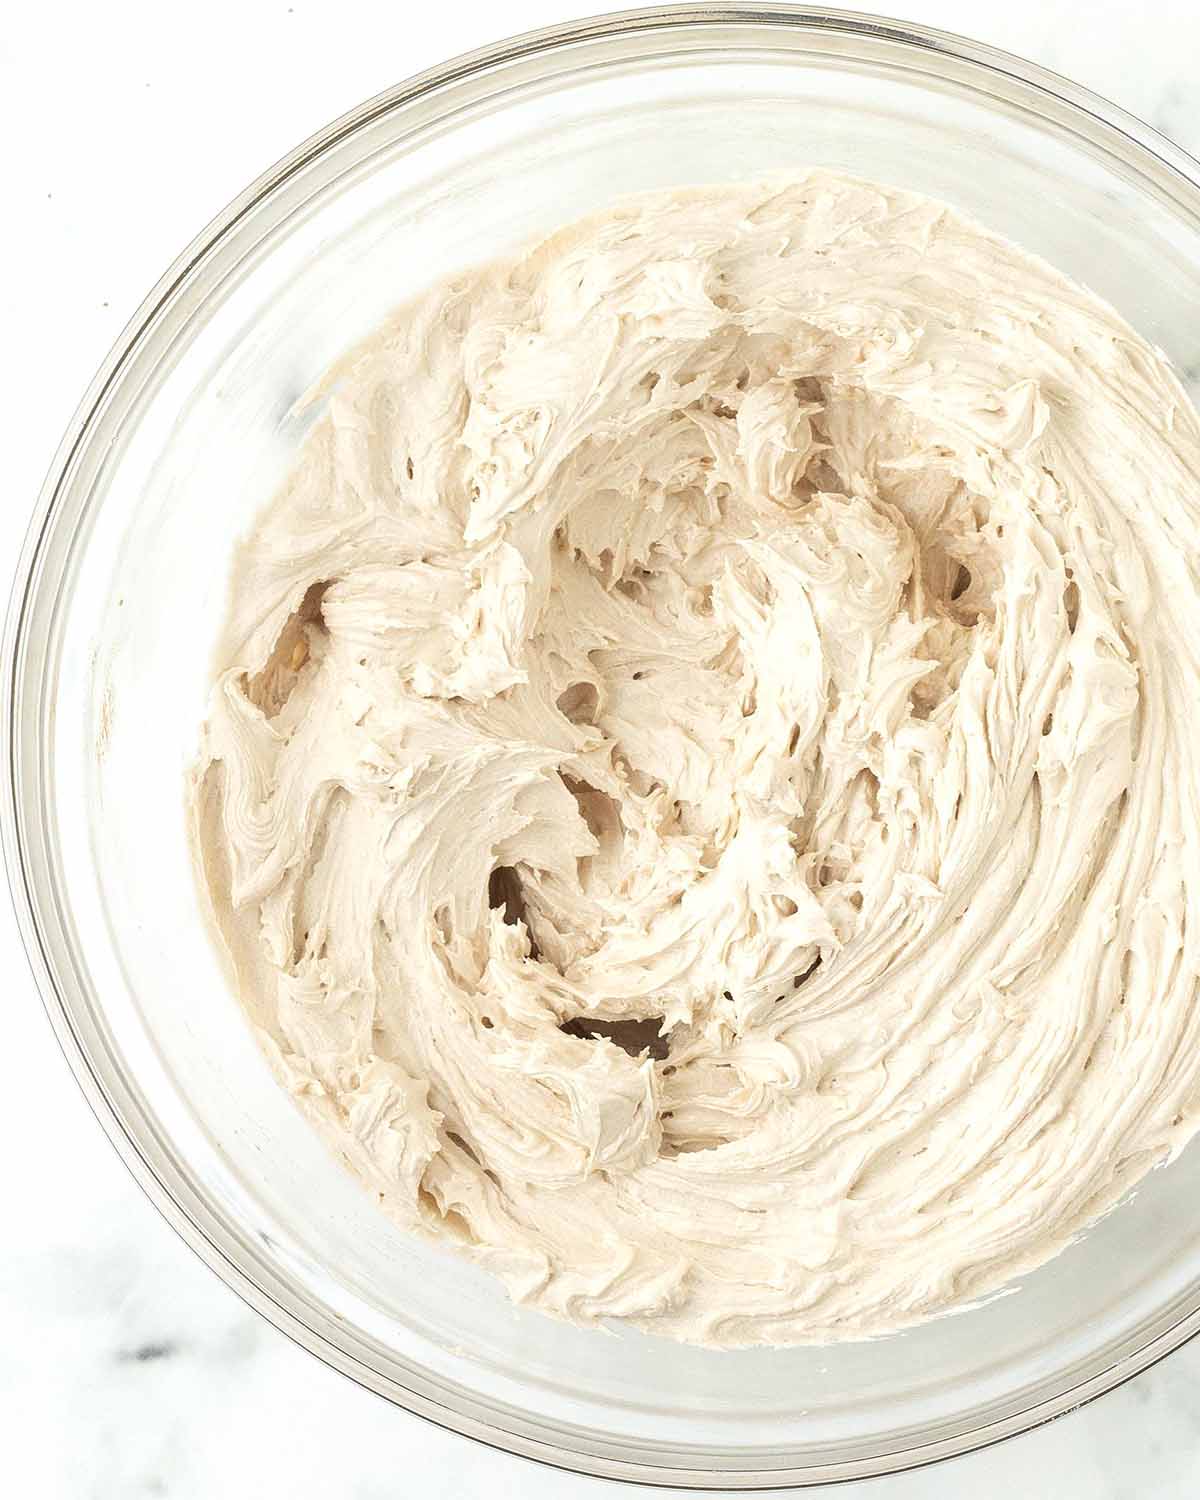
When done, the frosting should be firm enough for piping. Use right away or store for later.
Best Way to Enjoy It
Try it out with any dessert that pairs well with coffee flavour. Here are a few ideas:
- vegan chocolate sheet cake
- vegan chocolate cupcakes
- vegan gluten-free chocolate cake
- vegan gluten-free chocolate cupcakes
- chewy vegan gluten-free brownies
You can also use it for filling macarons, whoopie pies, and sandwich cookies.
Adding a Finishing Touch?
If you’ll be adding sprinkles, shaved chocolate, or any other toppings, add them right after you’ve spread or piped the frosting. The buttercream will form a light crust as it sits, which can stop toppings from sticking properly if you wait too long.
A Few More Tips Before You Start
- Measure and have all your ingredients ready to go before starting. This will make the process run smoothly, quickly, and easily.
- Measure your ingredients correctly. I highly recommend using a scale and my weight measurements. (See the "Suggested Equipment" section in the recipe card for the scale I use and recommend.)
- You can sift the powdered sugar if you’d like, but I usually don’t. I find that any small clumps are taken care of during mixing. However, if your powdered sugar is very dry and lumpy, definitely sift it before starting.
- Make sure the coffee granules have fully dissolved in the milk before adding the coffee mixture to the recipe.
- Read this post from beginning to end before making the recipe, it contains lots of tips and tricks to make your coffee buttercream perfect, every single time!
- For the very best results, follow the recipe exactly as it’s written.
Once You've Made It...
Tell me all about it! I’d love to hear how it turned out for you!
Share your thoughts with a comment and rating below, and I’d love to see what you put it on. Post a photo on Instagram and tag me, I love seeing your remakes! (I'm @delightfuladventures on Instagram).
Creamy Vegan Coffee Buttercream Frosting
Suggested Equipment:
Ingredients:
- 2 teaspoons unsweetened dairy-free milk (unflavoured, room temperature)
- 2 teaspoons (2g) instant coffee
- ½ cup (113g) unsalted vegan butter (slightly softened)
- ⅛ teaspoon salt
- 2 cups (240g) powdered sugar (sifted if lumpy)
- 1 teaspoon vanilla extract
Instructions:
- Add the milk and instant coffee to a small bowl and stir until the coffee has dissolved. If any granules remain, let the mixture sit for a minute, then stir again before setting aside.
- Add the butter and salt to a mixing bowl. Using an electric hand mixer, mix for 1 to 2 minutes until soft and creamy.
- Add 1 cup of the powdered sugar and mix at low speed. Once the powdered sugar is mostly incorporated, add the second cup. Mix again at low speed. Stop occasionally to scrape down the sides of your bowl.
- Add the coffee mixture and vanilla, then increase the mixer to medium speed and mix until light and fluffy, about 1-2 minutes. Stop occasionally to scrape down the sides of the bowl with a rubber spatula. Mix for another 1 to 2 minutes for an extra creamy, fluffy texture.
- Use immediately, or refrigerate / freeze until needed. (Refrigeration and freezing instructions can be found below.)
Recipe Notes:
- Please read all of the information above, as well as the notes below, before making this recipe.
- This recipe makes enough frosting for 12 cupcakes, OR one 9 x 13 cake, OR a single-layer 8 or 9-inch round cake, OR a double-layer 8″ or 9″ cake using a very thin layer of frosting. The recipe can be doubled if you want a thicker layer of frosting on your 2-layer cake or for a double batch of cupcakes.
- If it's a very warm day or the buttercream seems too soft for the piping design you have in mind, chill it for 15-20 minutes before piping.
- Once you frost your cake or cupcakes, you can leave them out at room temperature for a day or two, but after that, refrigerate them.
- If using a stand mixer, use the paddle attachment. Follow the same directions above.
- If refrigerating for later use, store in an airtight container and refrigerate for up to one week. When ready to use, bring it to room temperature, add it to a bowl and mix with your electric mixer or stand mixer to freshen it up before using.
- If freezing for later use, store in an airtight, freezer-safe container and freeze for up to 3 months. When ready to use, thaw in the refrigerator overnight. Once thawed, bring it to room temperature, add it to a bowl and mix with your electric mixer or stand mixer to freshen it up before using.
- Nutrition info is based on 1/12th of this recipe, made as written, on its own with no cake or cupcakes. Nutrition info is only to be used as a rough guide. Click to learn how nutrition info is calculated on this website.

Did You Make This Recipe or Have a Question About It?