A recipe for smooth, creamy, fluffy vegan chocolate buttercream frosting that’s perfect for icing your favourite cakes and cupcakes. This easy recipe is dairy-free, egg-free, and very simple to make, plus, all you need is SIX ingredients and ten minutes from start to finish. (Oh, and try your best to resist eating it straight from the bowl!)
Save This Recipe!
In a rush? Don't have time to scroll through this page right now? Enter your email below and this recipe/article will be sent straight to your inbox so you can come back to it when you're ready. Plus, you'll receive delicious recipes every week! You may unsubscribe at any time.
After almost six years of creating recipes for this website, I don't have any for buttercream frosting, cupcakes, or even celebration cakes. This is VERY confusing to me since cake, cupcakes, and frosting are some of my favourite things! (I hope you love them as much as I do!)
While I have plenty of recipes for cookies, doughnuts, and muffins, icing, cupcakes, and cakes are nowhere to be found, until now.
Starting with this recipe, I'm going to fix that, and this ridiculously simple, delicious, from-scratch vegan chocolate buttercream frosting (aka chocolate American buttercream) is just the beginning!
So let's get started! I've outlined everything below that you'll need to know to make this recipe perfectly, every single time. You're going to be a vegan chocolate icing making pro in no time!
Ingredients You'll Need
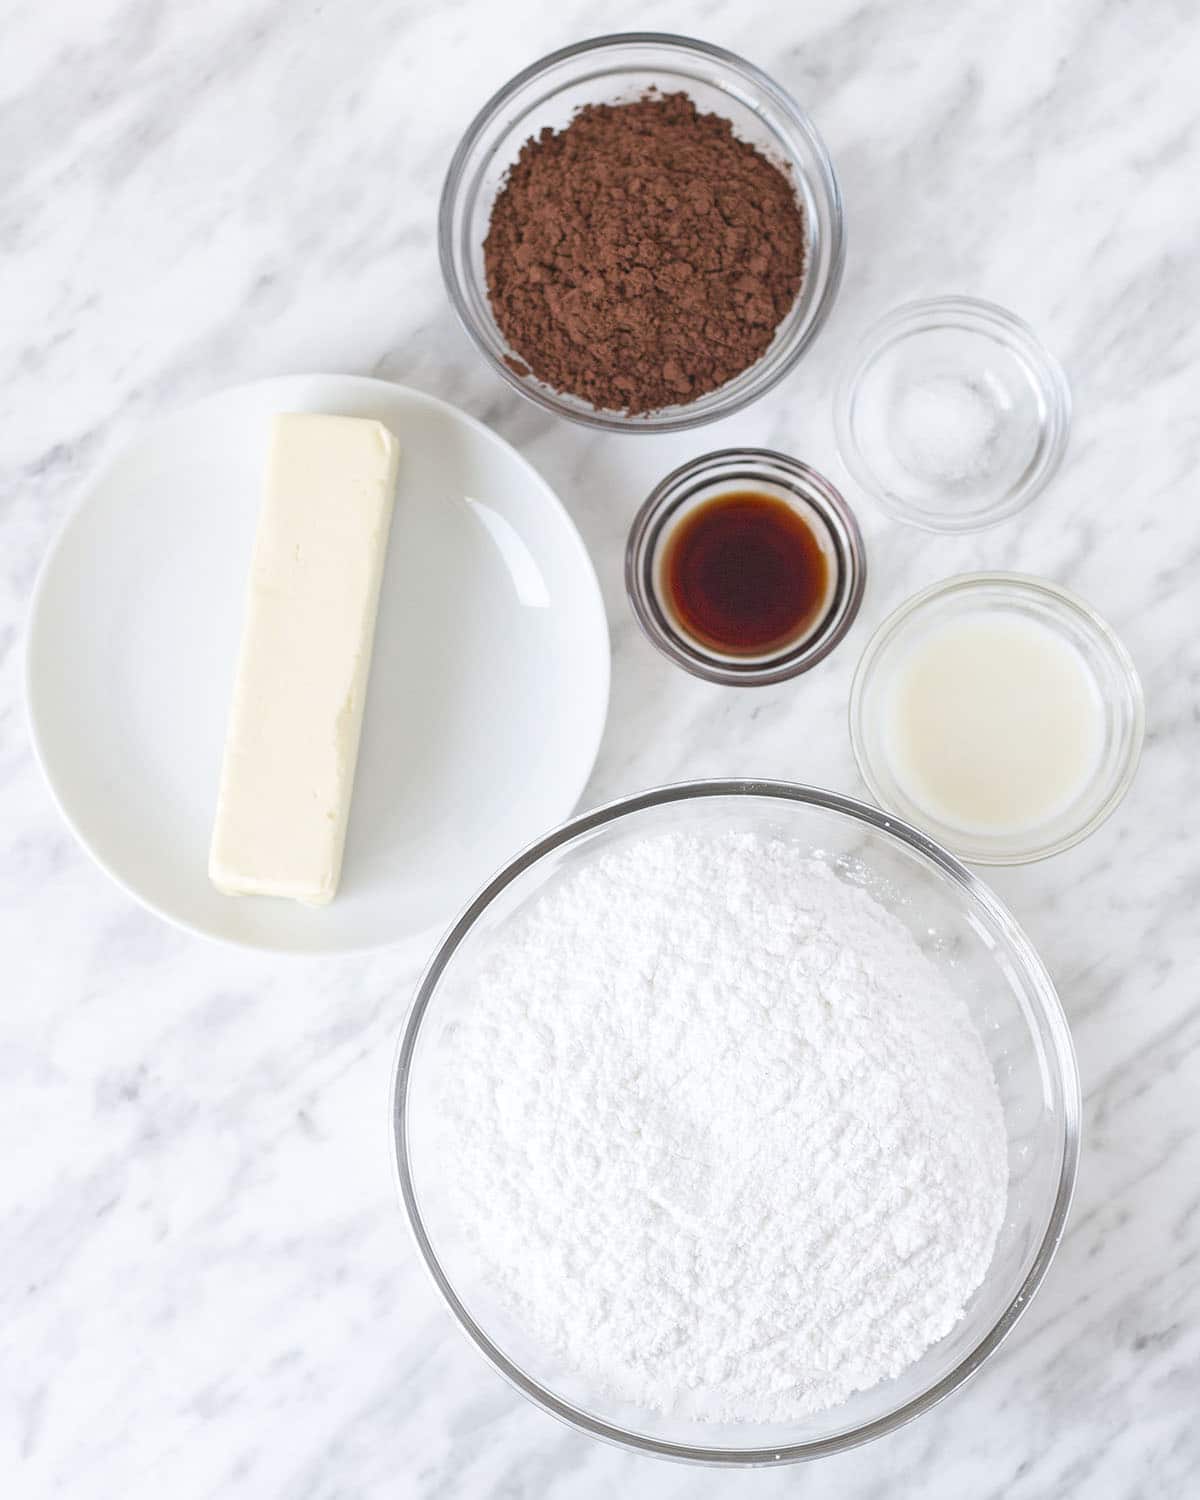
SIX ingredients is all you need to make this creamy frosting:
- Vegan Powdered Sugar (not sure if your powdered sugar is vegan? Buy organic, it will be 100% vegan. However, there are some brands that are not organic, but vegan. Confused? No need to be, see below for brand recommendations)
- Unsweetened Cocoa Powder (you'll need to sift it to get all the lumps out, don't skip this step! Dutch-processed or natural cocoa work best)
- Vanilla Extract (to add even more amazing flavour)
- Salt (to balance out the sweetness)
- Unsweetened non-dairy milk (to make your icing smooth and soft, any type of dairy-free milk will work)
- Unsalted Vegan Butter (the sticks, not vegan butter in containers / tubs, they will be too soft and will result in a very soft frosting. See the FAQ section below for brand recommendations.)
IMPORTANT: Always make sure that your butter is slightly softened before starting, NOT melted or TOO soft. To make sure your butter is at the ideal softness, lightly press your finger into it. If it leaves a shallow indent, your butter is at the perfect temperature. If your finger sinks into the butter with barely any effort, your butter is too soft. Refrigerate it until it has firmed up and then test it again.
How to Make It
(Note: I’ve outlined the step-by-step on how to make this recipe here, but find the full recipe, ingredients, and directions at the end of this post.)
I like to use my stand mixer with the paddle attachment to make my vegan buttercream icing, but I know everyone doesn't have a stand mixer, but most people have an electric mixer, so I'll be using that to show you how to make this recipe.
Using your mixer, mix the butter for a minute or two until it's soft and creamy.
Next, add the powdered sugar. Make sure that you use low speed or the sugar will fly everywhere and make a big mess! Stop occasionally to scrape down the sides of your bowl.
Once the butter and all of the powdered sugar have mixed together thoroughly, add the sifted cocoa powder, the salt, and the vanilla and mix again at low speed until there are no more spots of dry powdered sugar or cocoa powder left. Again, stop occasionally to scrape down the sides of your bowl.
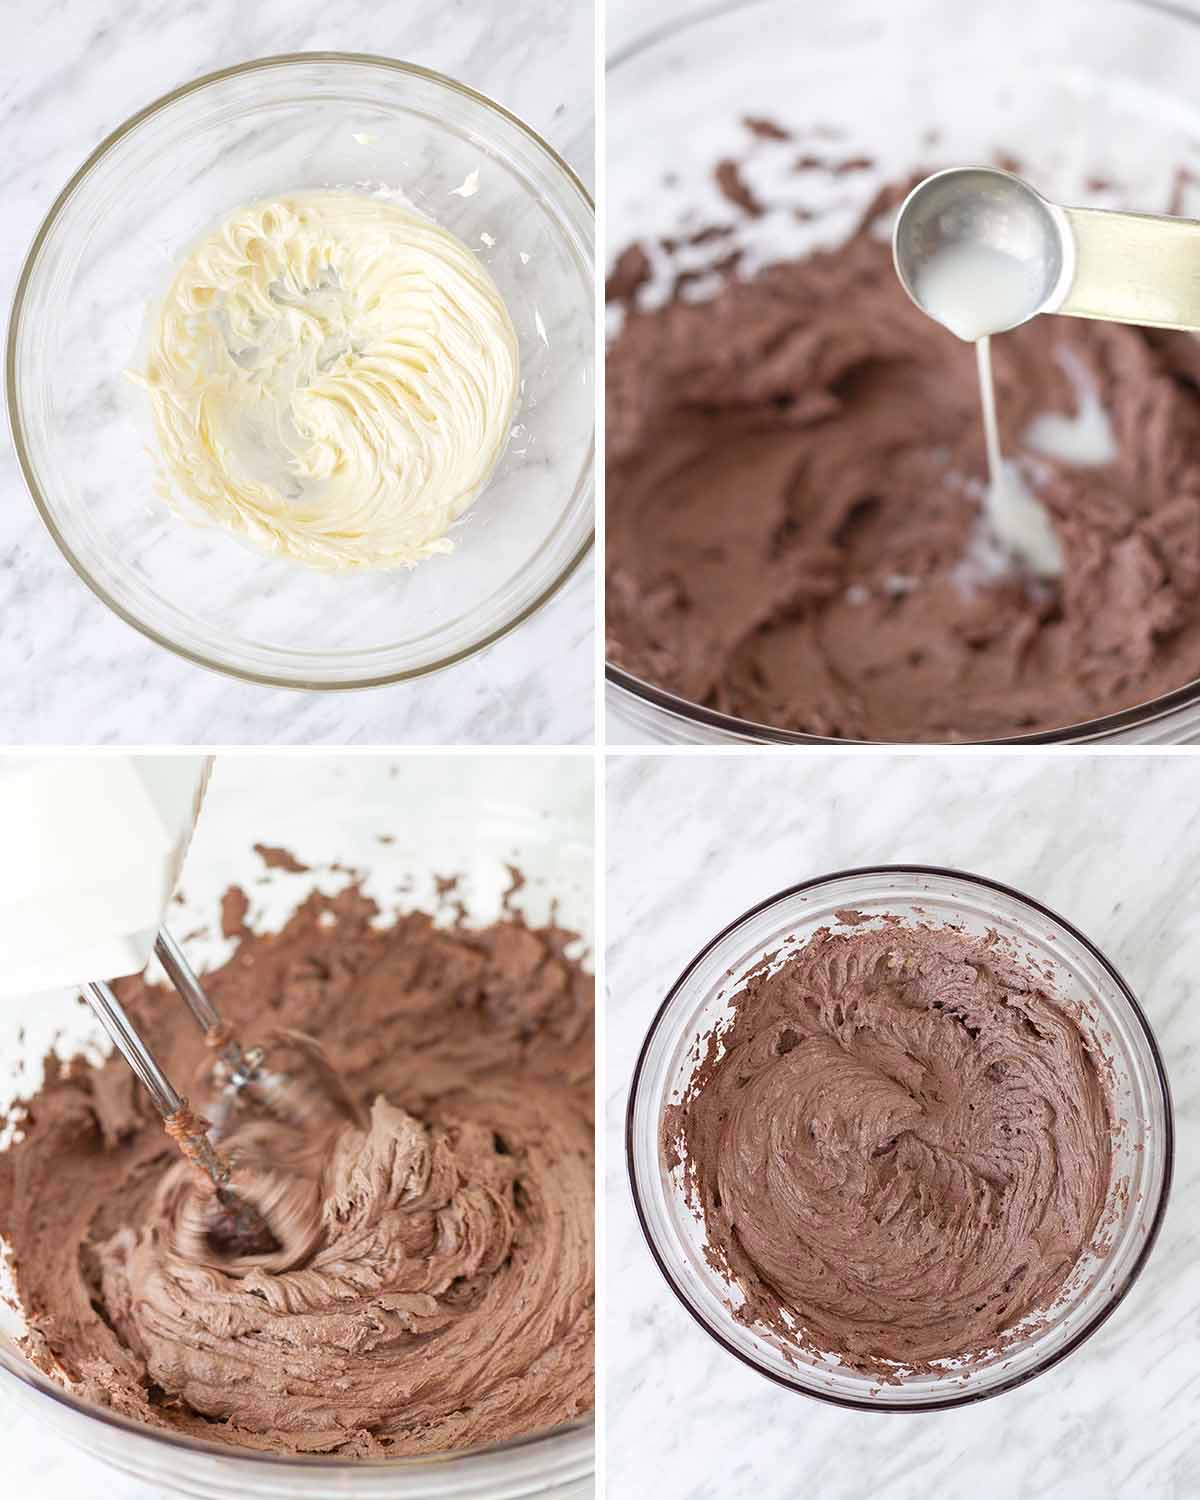
After everything has mixed together, it will be very thick, so it's time to gradually add your dairy-free milk if you want a softer icing.
If you use a butter brand that is very soft, you will need to use less milk, if it's more firm, you will use more. Add the milk, one teaspoon at a time.
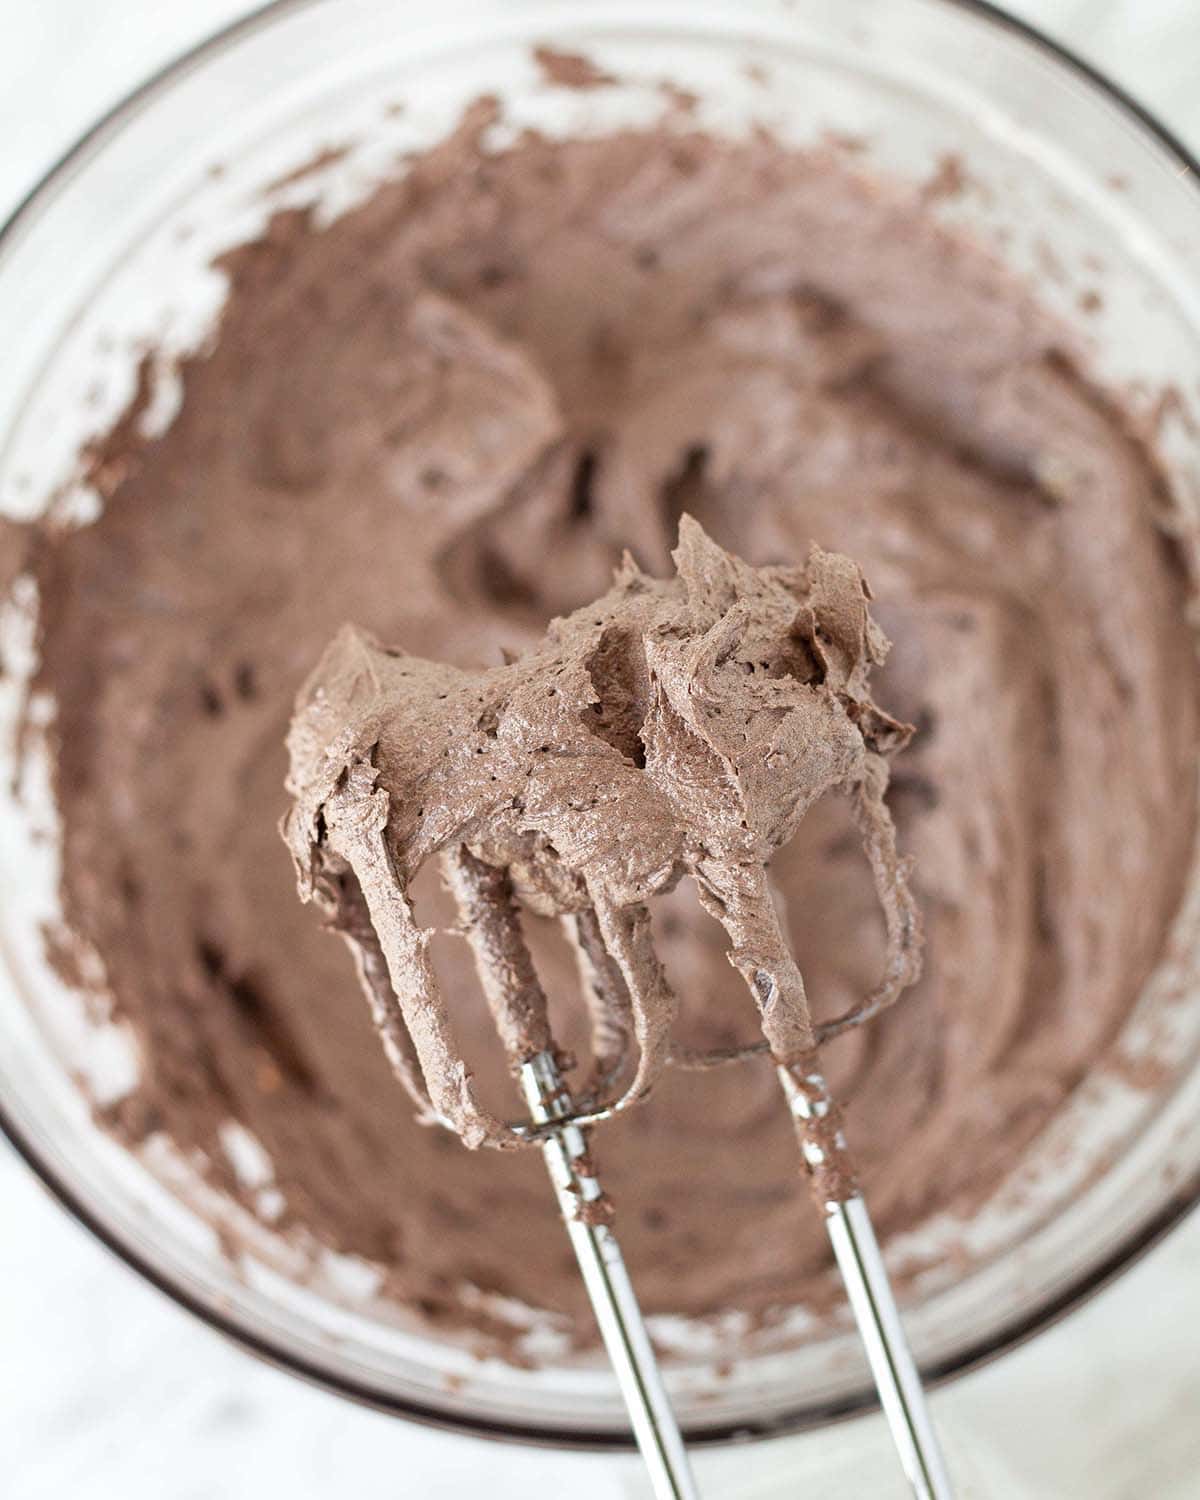
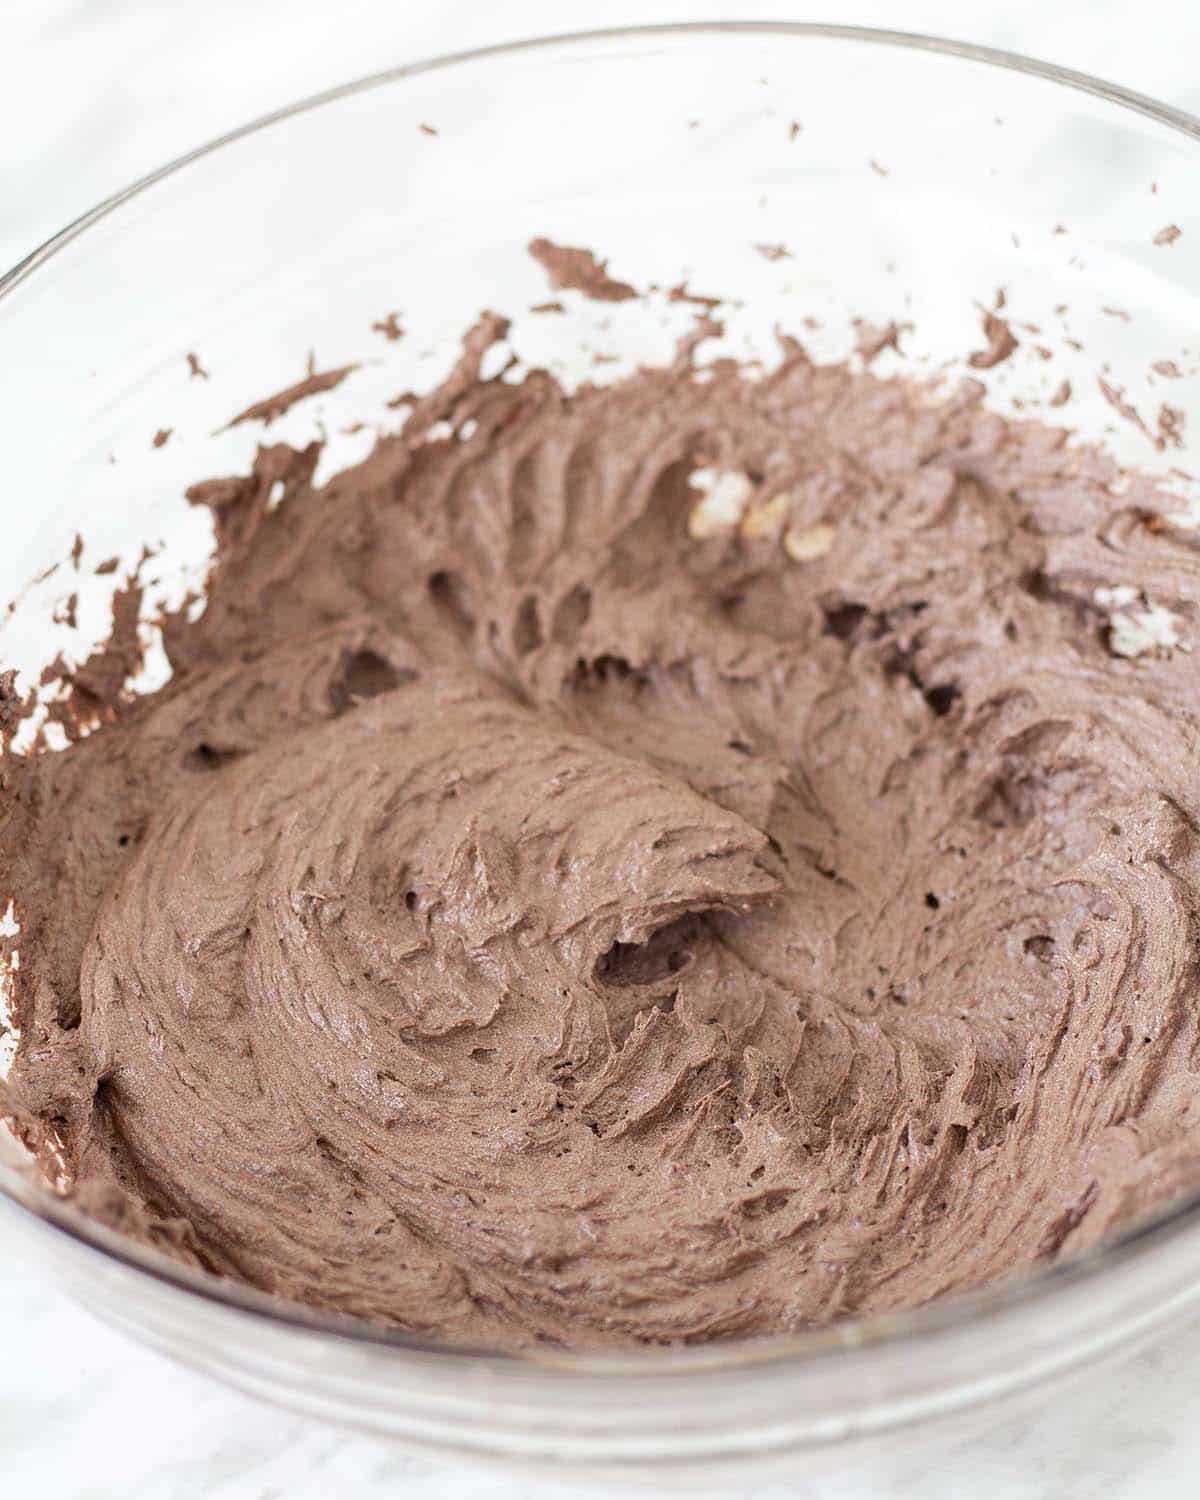
After each milk addition, keep mixing until the buttercream reaches the consistency you're going for. If you'll be using the frosting to pipe decorations onto your cake, it's best to make your buttercream a little more firm. The more you mix, the fluffier and more light in colour it will get.
Is There a Difference Between Making It with an Electric Mixer vs. a Stand Mixer?
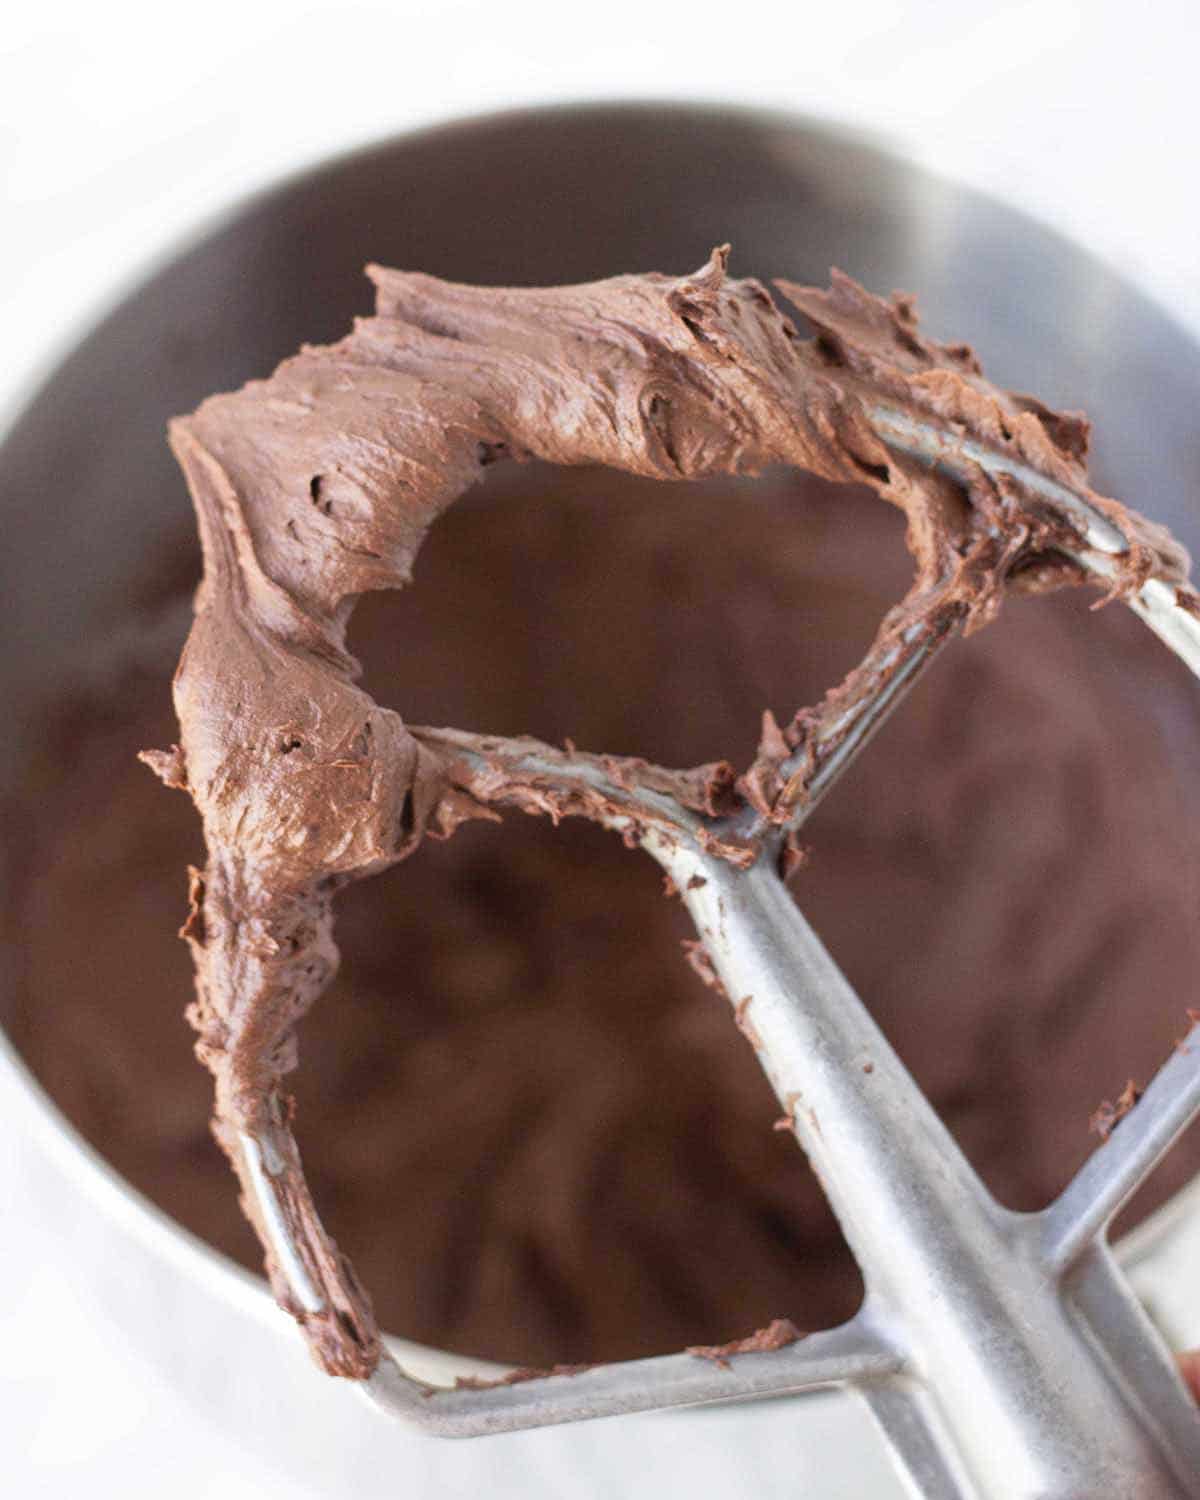
The main differences are that the stand mixer is, of course, hands free and the stand mixer gets the job done quicker and can result in a darker coloured buttercream, if you'd like, since it doesn't have to be mixed as long (see the image below).
If you want a lighter frosting and you're using a stand mixer, simply mix until it lightens up.
With an electric mixer, you'll be mixing a little longer than with a stand mixer so you will naturally end up with a lighter coloured frosting.
What to Put It On
Other than on a spoon for "sampling" (ha!) it pairs up perfectly with cupcakes (especially my chocolate cupcakes, chocolate cake, chocolate peppermint cupcakes, and even these pumpkin cupcakes), cakes, brownies, cookie sandwiches, sugar cookies, macarons, and more.
TIP: If you're new to cupcake decorating, I highly recommend this inexpensive cupcake decorating kit (Amazon Link) that comes with four of the most popular decorating tips as well as eight disposable decorating bags. I also recommend adding a 12" reusable piping bag to your collection.
Expert Tips for Success Every Time
- Always make sure your butter is slightly softened before starting. To make sure your butter is at the right temperature, lightly press your finger into it. If it leaves a shallow indent, your butter is at the perfect temperature. If your finger sinks into the butter with barely any effort, your butter is too soft. Refrigerate it until it has firmed up.
- Always sift your cocoa powder to get rid of the lumps, they will not go away on their own while preparing the frosting.
- Because of the butter I use, I find that at least a few teaspoons of non-dairy milk are needed to get it to the consistency I like, but if you find that after you add all the ingredients (except the milk) and mix for about 3-4 minutes that the consistency is good, then no need to add any milk. Milk makes the buttercream smoother and softer, so if a stiff, more firm buttercream is what you want, then feel free to omit the milk.
- If you prefer a more light and fluffy frosting, add a few teaspoons of milk and mix for about 5-6 minutes.
- If you find that you’ve whipped too long and the icing is too fluffy for your liking, give it a few good stirs with a spoon to knock out some of the air pockets and to make it a little less fluffy.
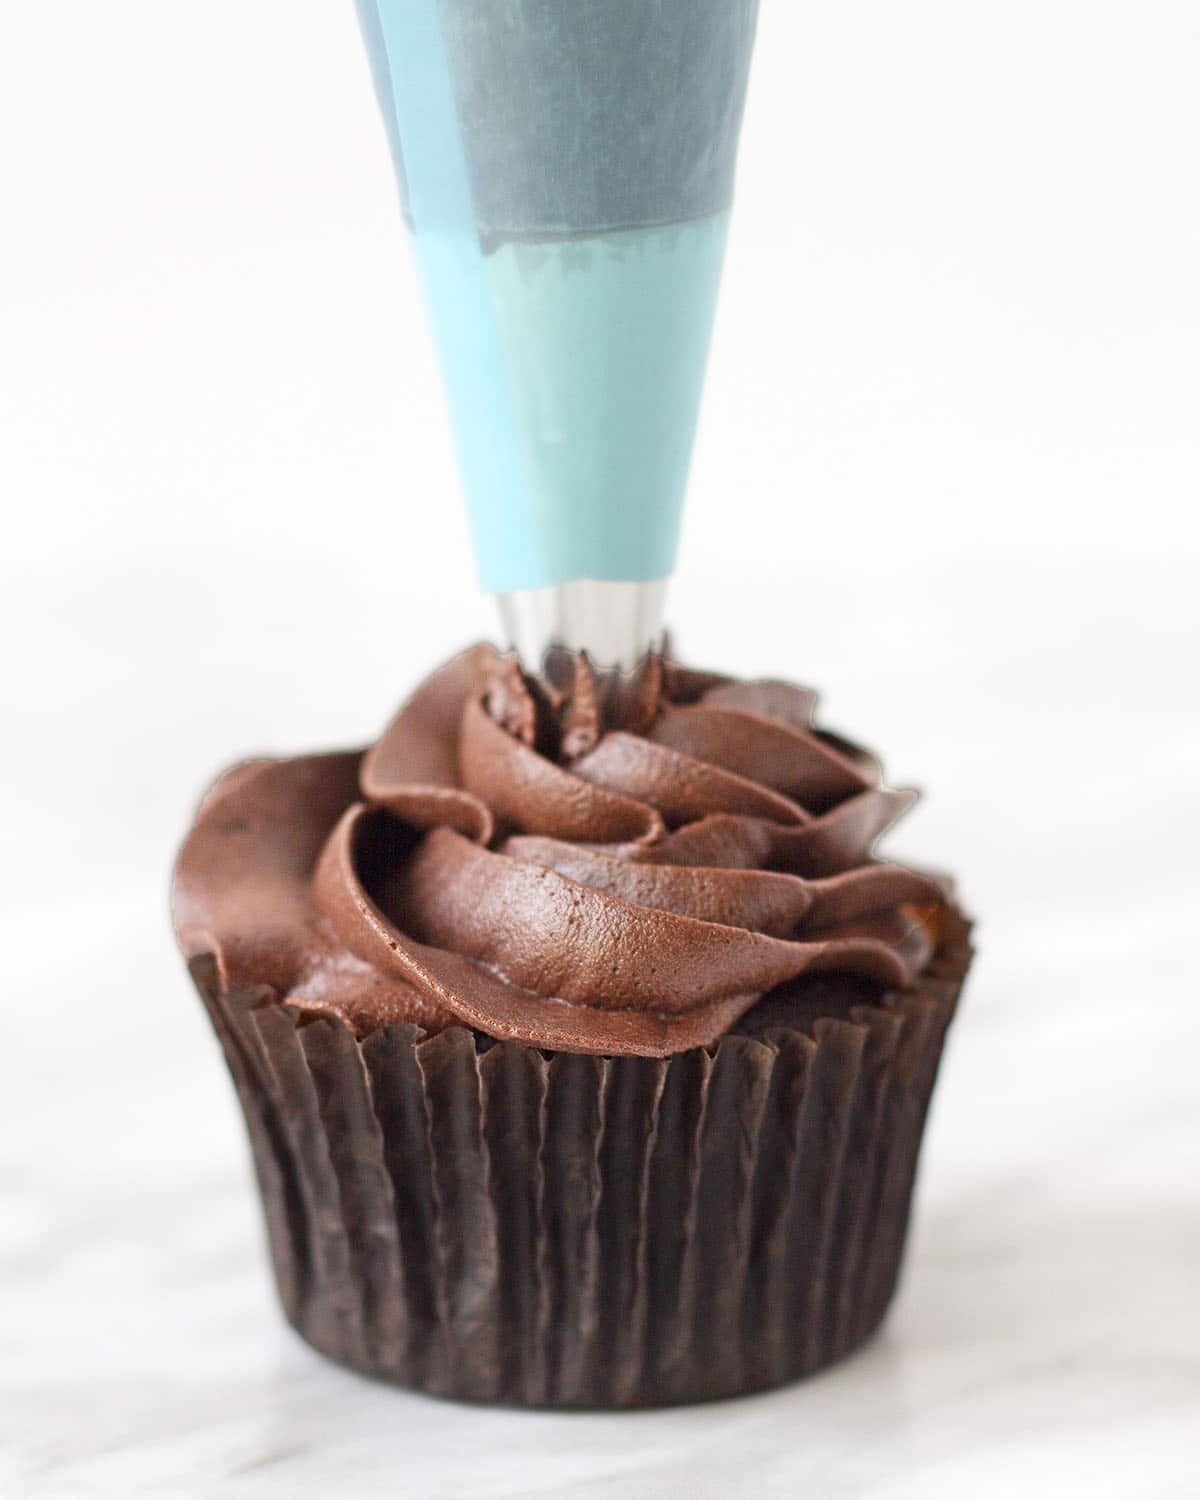
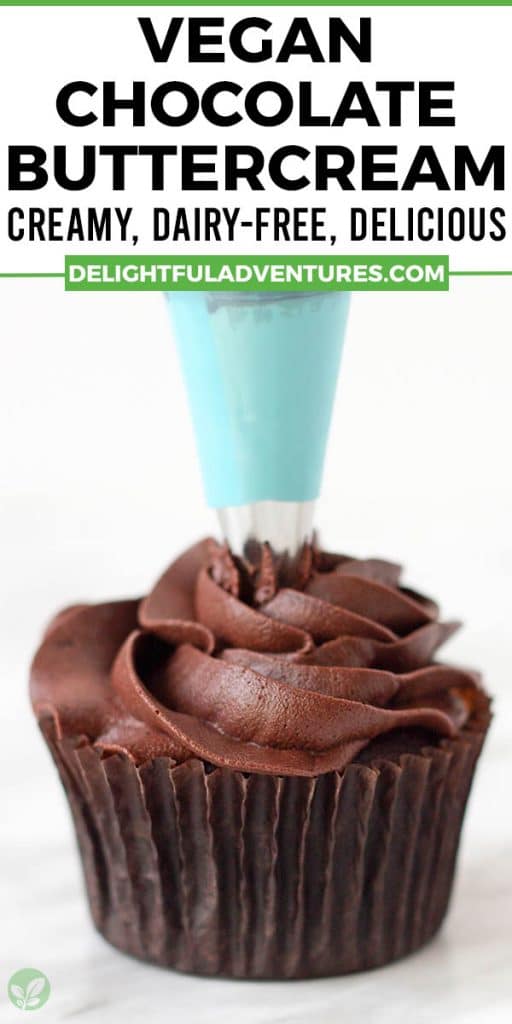
- Don't be afraid to use a piping bag and tips to decorate your dessert. They may seem intimidating, but they aren't difficult to use. I used a Wilton piping tip 2A to decorate the cupcakes you see in the images on this page. I recommend investing in this inexpensive cupcake decorating kit (Amazon Link).
- Read this post from beginning to end before making the recipe, it contains lots of tips and tricks on how to make the perfect lemon buttercream frosting, every single time!
- For the very best results, follow the recipe exactly as it's written and don't reduce the amount of powdered sugar or butter called for. The recipe can be halved if you need just a very small amount, or doubled if you need more.
FAQ
Use your favourite vegan butter for this recipe, but make sure you buy sticks, not butter in a container since that type is too soft. Also make sure that you buy the unsalted version so you control the salt. If you can't find unsalted butter, simply omit the salt from the recipe. Personally, I like Melt Sticks and Becel Plant-Based Sticks, but other brands like Earth Balance and Miyokos will also work well.
Some brands use bone char to process their sugars, making them not vegan, but luckily, there are some brands that don't use this process like Wholesome Sweeteners, Trader Joes brand, Whole Foods' 365 brand, and Redpath (Canadian brand). If you can't find any of these, your best bet is to look for an organic powdered sugar which will always be vegan. And note that "powdered sugar," "confectioner's sugar," and "icing sugar" are all the same thing.
If you don't have an electric mixer or a stand mixer, you can do this by hand, but you will need to beat it for quite a while, especially after all the ingredients have been added and you're whipping it to reach that creamy, fluffy consistency. You'll build a little muscle during the process 🙂
I have not tried making this recipe with either. Since coconut oil becomes solid when cold and becomes liquid when warm, I would not substitute it in this particular recipe since I don't think it would work well. I know that there are some coconut oil buttercream recipes out there, but most of them contain a blend of fats, for example, half butter, half coconut oil. I'm not aware of any that use 100% coconut oil. I have not tried making it with shortening.
The more you whip your buttercream, the more air will be added, so it will become fluffier, and it's possible that you make it so fluffy that you dislike the texture and that it won't pipe decorations as you like. If this happens, simply stop mixing with your mixer and give it a good vigorous stir with a wooden spoon to get rid of the extra pockets of air.
Powdered sugar is needed in this recipe to provide the structure and firmness needed for piping and for frosting your desserts with ease, so liquid sweeteners will not work. As for sugar alternative powdered sugars, I have not experimented with them, so I am unsure if they will work the same.
You can sift the powdered sugar if you'd like, but I don't, I find that any lumps get taken care of during the mixing. But you DEFINITELY NEED to sift the cocoa powder, don't skip that step! The cocoa powder lumps will not disappear during mixing and are very difficult to get rid of if you don't sift.
How to Make In Advance and Store for Later
- If refrigerating for later use, store in an airtight container and refrigerate for up to one week. When ready to use, bring it to room temperature, add to a bowl and mix with your electric mixer or stand mixer to freshen it up before frosting your cake or cupcakes.
- If freezing for later use, store in an airtight, freezer safe container and freeze for up to 3 months. When ready to use, thaw frozen frosting in the refrigerator overnight. Once thawed, bring it to room temperature, add to a bowl and mix with your electric mixer or stand mixer to freshen it up before frosting your cake or cupcakes.
If You Make This Recipe...
Please let me know how things went in the comments below or you can post a picture on Instagram and tag me (I'm @delightfuladventures) so I can see YOUR vegan chocolate buttercream!
And If You Like This Recipe...
You may also like these other buttercream recipes:
- Vegan Strawberry Frosting
- Peppermint Buttercream Frosting
- Vegan Buttercream Frosting
- Lemon Buttercream Frosting
- Peanut Butter Frosting
- Cream Cheese Frosting
And these vegan chocolate recipes:
- Chocolate Cupcakes
- Chocolate Mousse
- Double Chocolate Chip Cookies
- Chocolate Muffins
- Chocolate Tart
- Chocolate Doughnuts
You can help others to find this dairy free chocolate frosting recipe by pinning it to one of your food boards on Pinterest. Click here to pin it now!
Vegan Chocolate Buttercream Frosting
Suggested Equipment:
Ingredients:
- ½ cup (113g) / 1 stick) unsalted vegan butter (slightly softened, see note below)
- ⅛ teaspoon salt
- 2 cups (240g) powdered sugar
- ¼ cup + 3 tablespoons (37g) unsweetened cocoa powder, sifted (I use Dutch-processed)
- 1 ½ teaspoons vanilla extract
- 3-5 teaspoons unsweetened dairy-free milk
Instructions:
- Add butter and salt to mixing bowl and mix for 1 to 2 minutes until soft and creamy.
- Add 1 cup of the powdered sugar and mix on low speed. Once there are no more spots of dry powdered sugar, add the second cup and mix again on low speed. Stop occasionally to scrape down the sides of your bowl.
- Add the sifted cocoa powder and vanilla and mix on low speed. Slowly add milk, 1 teaspoon at a time, continuing to mix. Add additional teaspoons until the desired consistency is met. Stop occasionally to scrape down the sides of the bowl with a rubber spatula.
- Turn mixer up to medium speed and mix until light and fluffy, about 2-3 minutes. Stop occasionally to scrape down the sides of the bowl with a rubber spatula. Mix for a couple more minutes if you want a creamier, fluffier frosting.
- Use immediately, or refrigerate / freeze until needed. (Refrigeration and freezing instructions can be found above and below)
Recipe Notes:
- Please read all of the information, tips, and FAQ info above, as well as the notes below before making this recipe.
- Make sure that your butter is slightly softened before starting, NOT melted or TOO soft. To make sure your butter is at the ideal softness, lightly press your finger into it. If it leaves a shallow indent, your butter is at the perfect temperature. If your finger sinks into the butter with barely any effort, your butter is too soft. Refrigerate it until it has firmed up and then test it again.
- This recipe makes enough buttercream to frost 12-16 cupcakes (depending on how much or how little you add to each one), OR one 9 x 13 cake, OR a single layer 8 or 9-inch round cake, OR a double layer 8" or 9" cake using a very thin layer of icing. The recipe can be doubled if you want a thicker layer of buttercream on your 2-layer cake or for a double batch of cupcakes. You can also triple the recipe for a triple layer cake or a triple batch of cupcakes.
- If you have a scale, I recommend weighing your powdered sugar and cocoa powder for accuracy. This is the scale I own.
- Sift your powdered sugar before starting if it is lumpy.
- Be sure you are using vegan butter that comes in sticks, not the type that comes in containers / tubs, since they will be too soft and will result in a very soft frosting. See above for brand recommendations.
- If the final frosting is too thick for your liking, add a little more milk. If you want it to be a little thicker, add a little more powdered sugar, a little at a time until you get to the consistency you like.
- If using a stand mixer, my preference is to use the paddle attachment. Follow the same directions above.
- If refrigerating for later use, store in an airtight container and refrigerate for up to one week. When ready to use, bring it to room temperature, add to a bowl and mix with your electric mixer or stand mixer to freshen it up before using.
- If freezing for later use, store in an airtight, freezer safe container and freeze for up to 3 months. When ready to use, thaw frozen frosting in the refrigerator overnight. Once thawed, bring it to room temperature, add to a bowl and mix with your electric mixer or stand mixer to freshen it up before using.
- Nutrition info is based on 1/12th of this recipe, made as written, on its own with no cake or cupcakes. Nutrition info is only to be used as a rough guide. Click to learn how nutrition info is calculated on this website.

Hina says
This is such a magical thing to be able to create with my own hands! I keep adding too much milk because I assume it needs more, but don't let it trick you! I need to reduce that milk because it's always just a little runnier than I want every time! lol! Thank you so much for sharing!
Gwen Leron says
Hi Hina! Try adding less milk than you think it needs, then go up a little at a time from there. I am so glad you are enjoying the buttercream!
Dawn Willis says
I tried this for my daughter, who can’t have gluten, corn, or dairy. The only change I made to the recipe was I decreased the almond milk to 1 1/4 Tablespoons and added a bit more vanilla (2tsp total). My kitchen was 68 degrees, so the oil was the perfect consistency. I used corn-free confectionery sugar from Kroger. I sifted it and the cocoa powder (Trader Joe brand). It came out perfect! I transferred it into a glass storage bowl that was warm from being freshly washed and I could see the frosting break down around the edges of the bowl, so I’ll probably frost the cupcakes and store in the fridge until ready to serve. The flavor is amazing and as long as it stays cool, it has a perfect consistency!
Gwen Leron says
I'm glad you like it, Dawn! And yes, it is heat sensitive, so if it's warm, it's perfectly fine to store it in the refrigerator. Enjoy!
Pam B says
I have not seen unsalted vegan butter. Would it be too salty if you used salted ?
Gwen Leron says
Hi Pam, it should be fine, just omit the salt the recipe calls for. Enjoy!
Debbie says
Made my first vegan chocolate cake & vegan buttercream icing yesterday! Your recipes and advice given on both were amazing!! I am so proud of myself. Thank you for the assist!!!!! This icing is SUPREME!!!
Gwen Leron says
I am SO happy you gave the recipes a try and that you like them so much, Debbie! You should be very proud of yourself, glad to have helped out a little! Enjoy the rest of the cake and frosting!
Hannah says
Loved it!
Gwen Leron says
So happy to hear this, Hannah! Thanks for your note, I appreciate it.