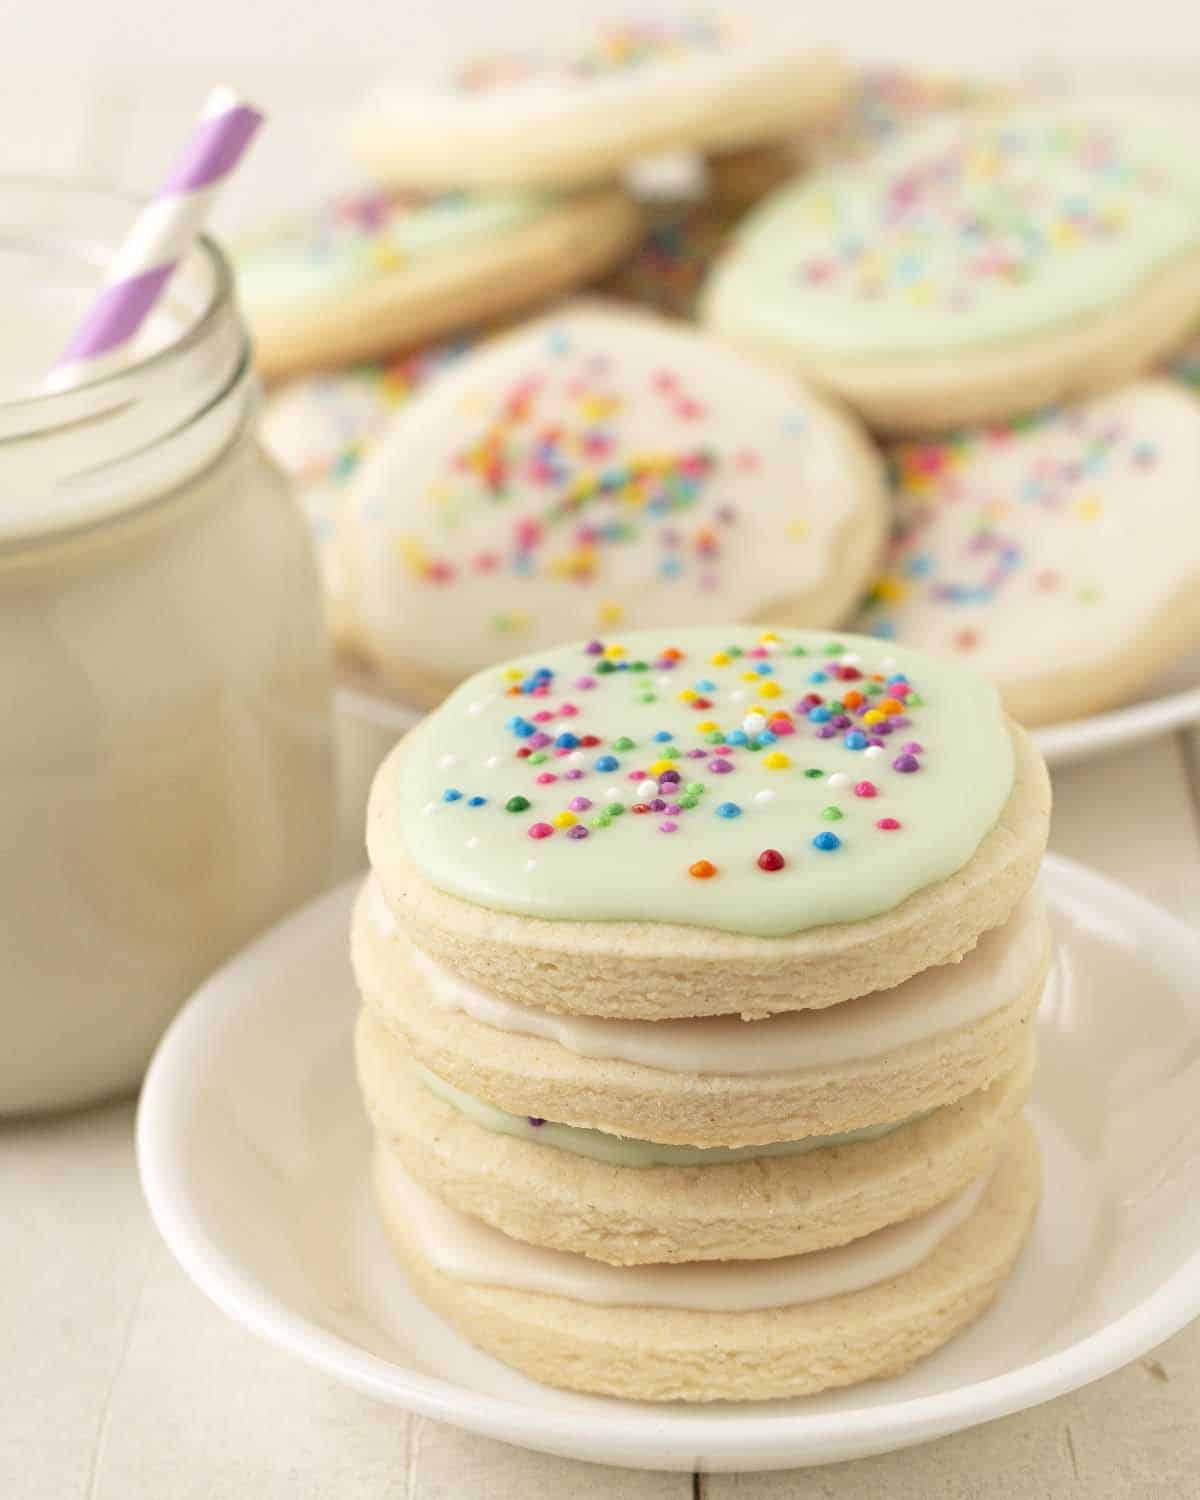
Easy homemade cut-out vegan gluten-free sugar cookies you can make for Christmas, Valentine’s Day, Easter, Halloween…they’re perfect for ANY occasion!
These cookies can be made soft or crispy, it’s up to you. Decorate simply with sanding sugar or buttercream frosting or get fancy with a simple vegan icing that hardens, recipes for both are included, keep reading!
Save This Recipe!
In a rush? Don't have time to scroll through this page right now? Enter your email below and this recipe/article will be sent straight to your inbox so you can come back to it when you're ready. Plus, you'll receive delicious recipes every week! You may unsubscribe at any time.
No matter what the event may be, a pretty, decorated sugar cookie to celebrate the occasion is always welcome.
These simple gluten-free sugar cookies are nut-free, dairy-free, egg-free, and of course, gluten-free. They're easy to make (just like all of my cookie recipes!), you can choose the texture you prefer (soft or crisp), and you can customize by cutting out fun shapes with your favourite cookie cutters.
You should also know that they don't spread while they're baking; they hold their shapes perfectly and have nice clean edges. Want to make them? Then read on for all the details!
Ingredients You'll Need
Yes! It's possible to make sugar cookies from scratch without eggs, dairy, and wheat. To do that, you'll need the following ingredients: Bob’s Red Mill 1 to 1 gluten-free flour blend, sugar, cornstarch (or arrowroot starch), vegan butter, baking powder, salt, vanilla, and a little dairy-free milk.
Are you new to vegan gluten-free baking? If so, be sure to read all of my vegan gluten-free baking tips!
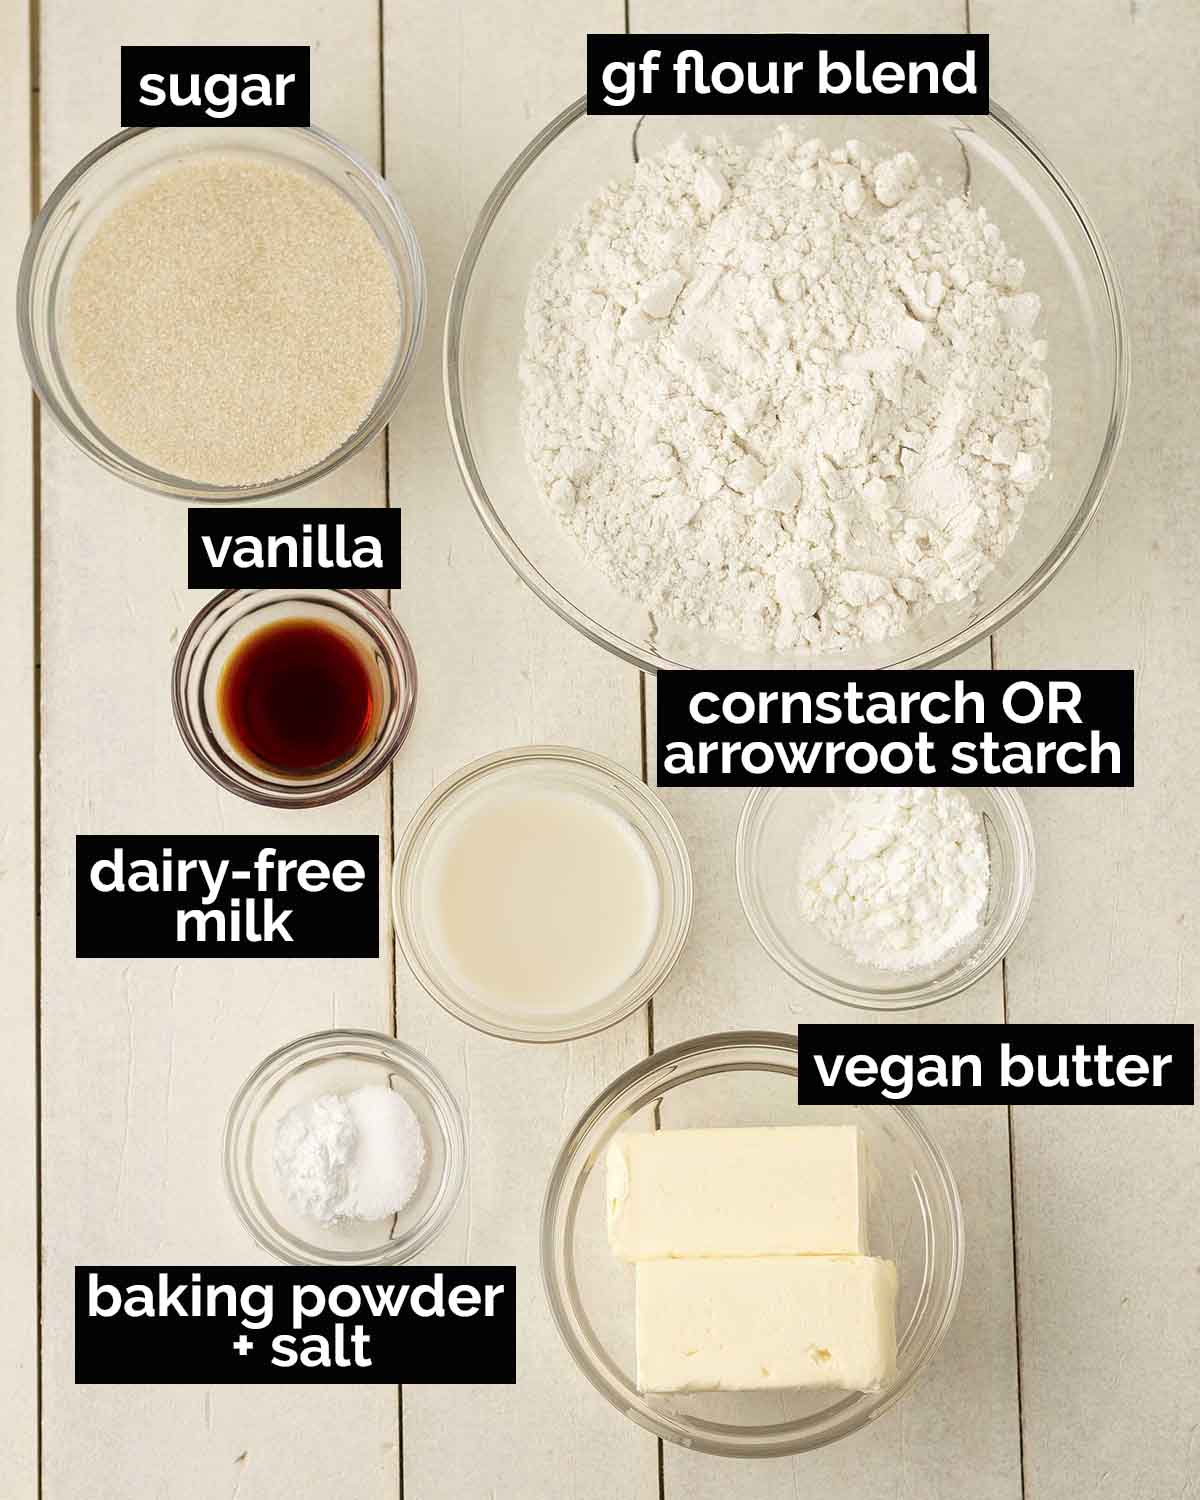
Ingredient Notes
Gluten-Free Flour Blend - I’ve only used Bob’s Red Mill 1 to 1 Baking Flour Blend (the one in the blue bag) for this recipe so I can't tell you how this recipe would work with any others. Results will vary and may not work with other blends since the blend ingredients and ratios will differ. This recipe will not work with any single gluten-free flour, like coconut, oat, etc.
Cornstarch - I've tested this recipe with both cornstarch and arrowroot starch and there was no difference in the final result, so use the one you have on hand. (Since these are eggless sugar cookies, this is the ingredient I'm using the replace the binding properties of an egg).
Sugars – I use organic cane sugar in this recipe, but you can use regular white granulated sugar if you don’t have organic cane sugar. Make sure that your sugar is labelled vegan or that it's organic (organic sugar is always vegan). Powdered sugar, turbinado sugar, brown sugar, and liquid sugar (like maple syrup or agave) will NOT work in this recipe. I have not tested with any sugar alternatives.
Dairy-Free Milk - Any type can be used, just make sure it's unsweetened and not flavoured.
Vanilla - Feel free to experiment with different extracts to flavour your cookies differently. Mint, almond, orange, lemon, coconut...there are so many different options!
NOTE: Always measure your flour correctly for the best results!
How to Make Them
(Note: I’ve outlined the step-by-step on how to make this recipe here, but find the full recipe, ingredients, and directions at the end of this post.)
The first step is to mix together the dry ingredients and set it aside.
Next, using an electric hand mixer, beat the butter and sugar together until it's light and fluffy, this will take about 3 minutes.
After that, gradually add the flour mixture to the butter mixture and mix. I usually switch over to mixing by hand at this point.
Continue mixing until everything has combined and you're able to form a ball with the dough.
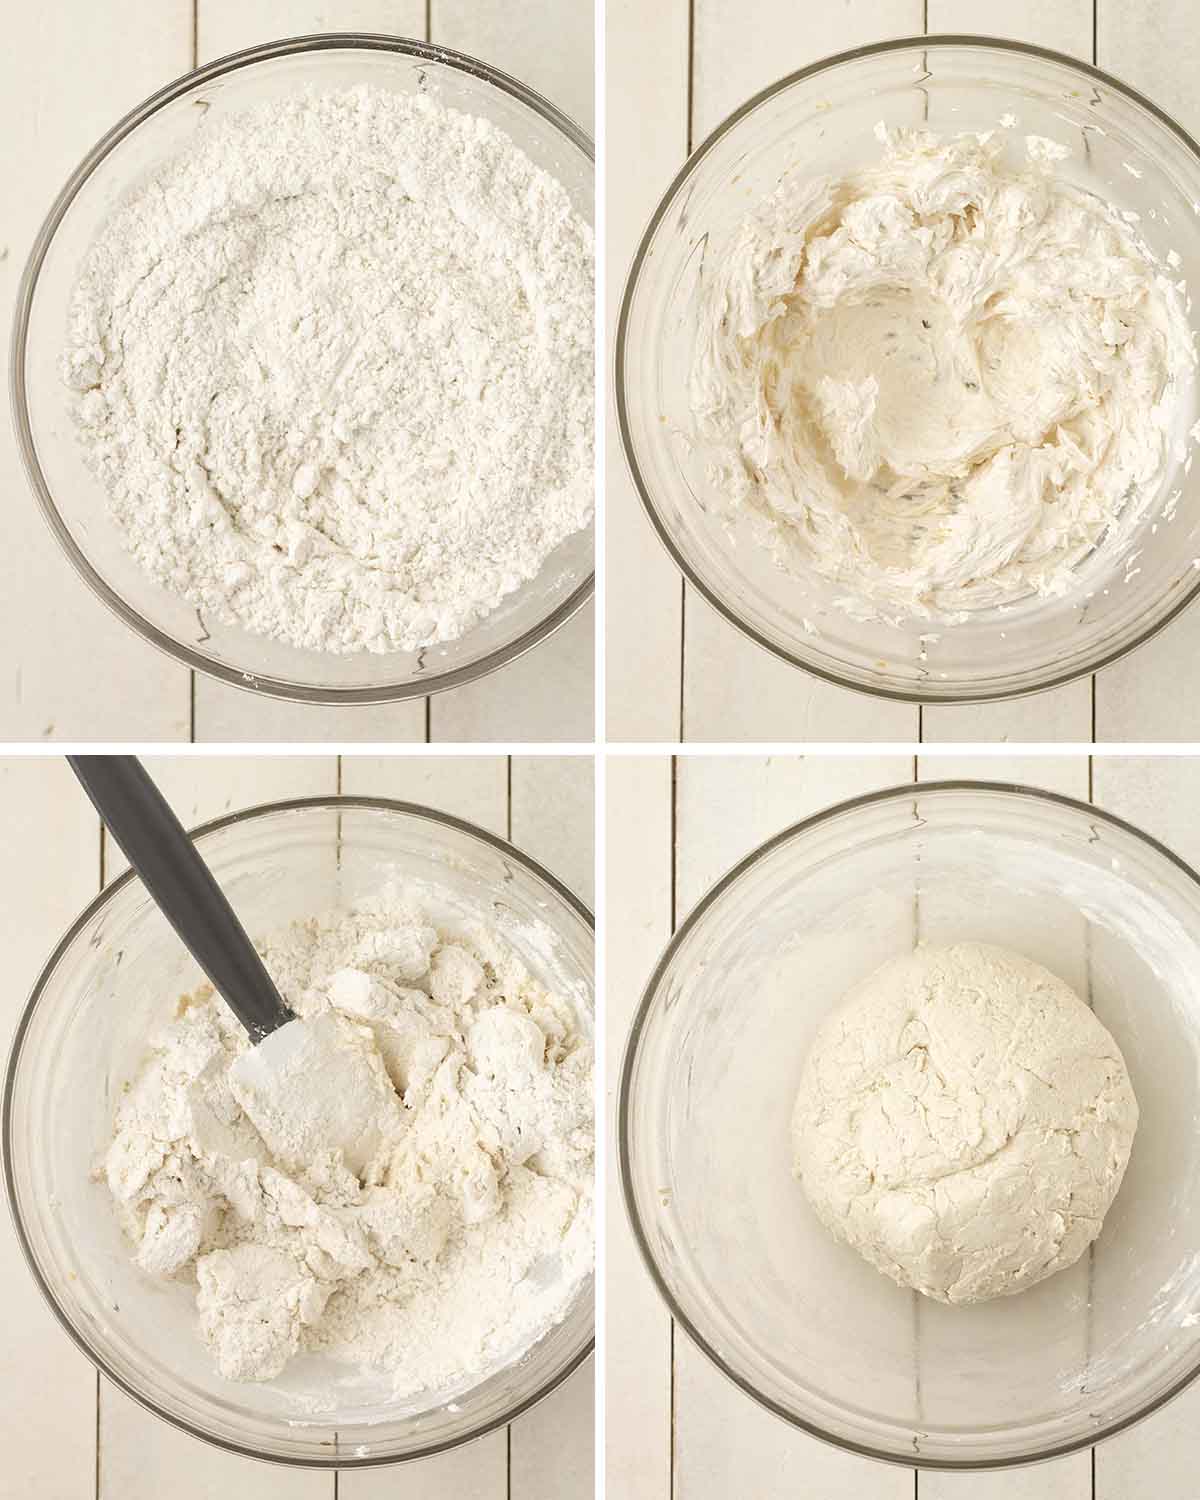
The dough will be very soft and sticky, and you may think that something is wrong with it, this is how it's supposed to be, so no need to worry!
Flatten the dough into a disk, wrap it tightly in plastic wrap, and place it in the refrigerator for at least three hours and up to three days.
Once the chilling time has passed, remove it from the refrigerator and let it sit at room temperature for a while before rolling.
IMPORTANT: DO NOT try to roll the dough right away. It will be too cold and will crumble apart. Let it sit at room temperature for 10-15 minutes.
After it sat for a while, unwrap the dough and place it on a large piece of parchment paper. Place another piece of parchment paper on top and using a rolling pin, roll until the dough is ¼ of an inch thick.
Cut into shapes, getting your shapes as close as possible to each other. Once done, use a spatula to transfer them to your baking sheet, then gather up the dough scraps, form them into a ball and repeat the rolling and cutting process.
If the dough gets too warm at any point and it's starting to stick to the parchment paper, refrigerate it for about 15 minutes so it gets a little chilled again.
NOTE: It's important for the cut-outs to be ¼ of an inch thick so the cookies are soft (if you are going for soft cookies) and for them to be able to hold up nicely when decorating.
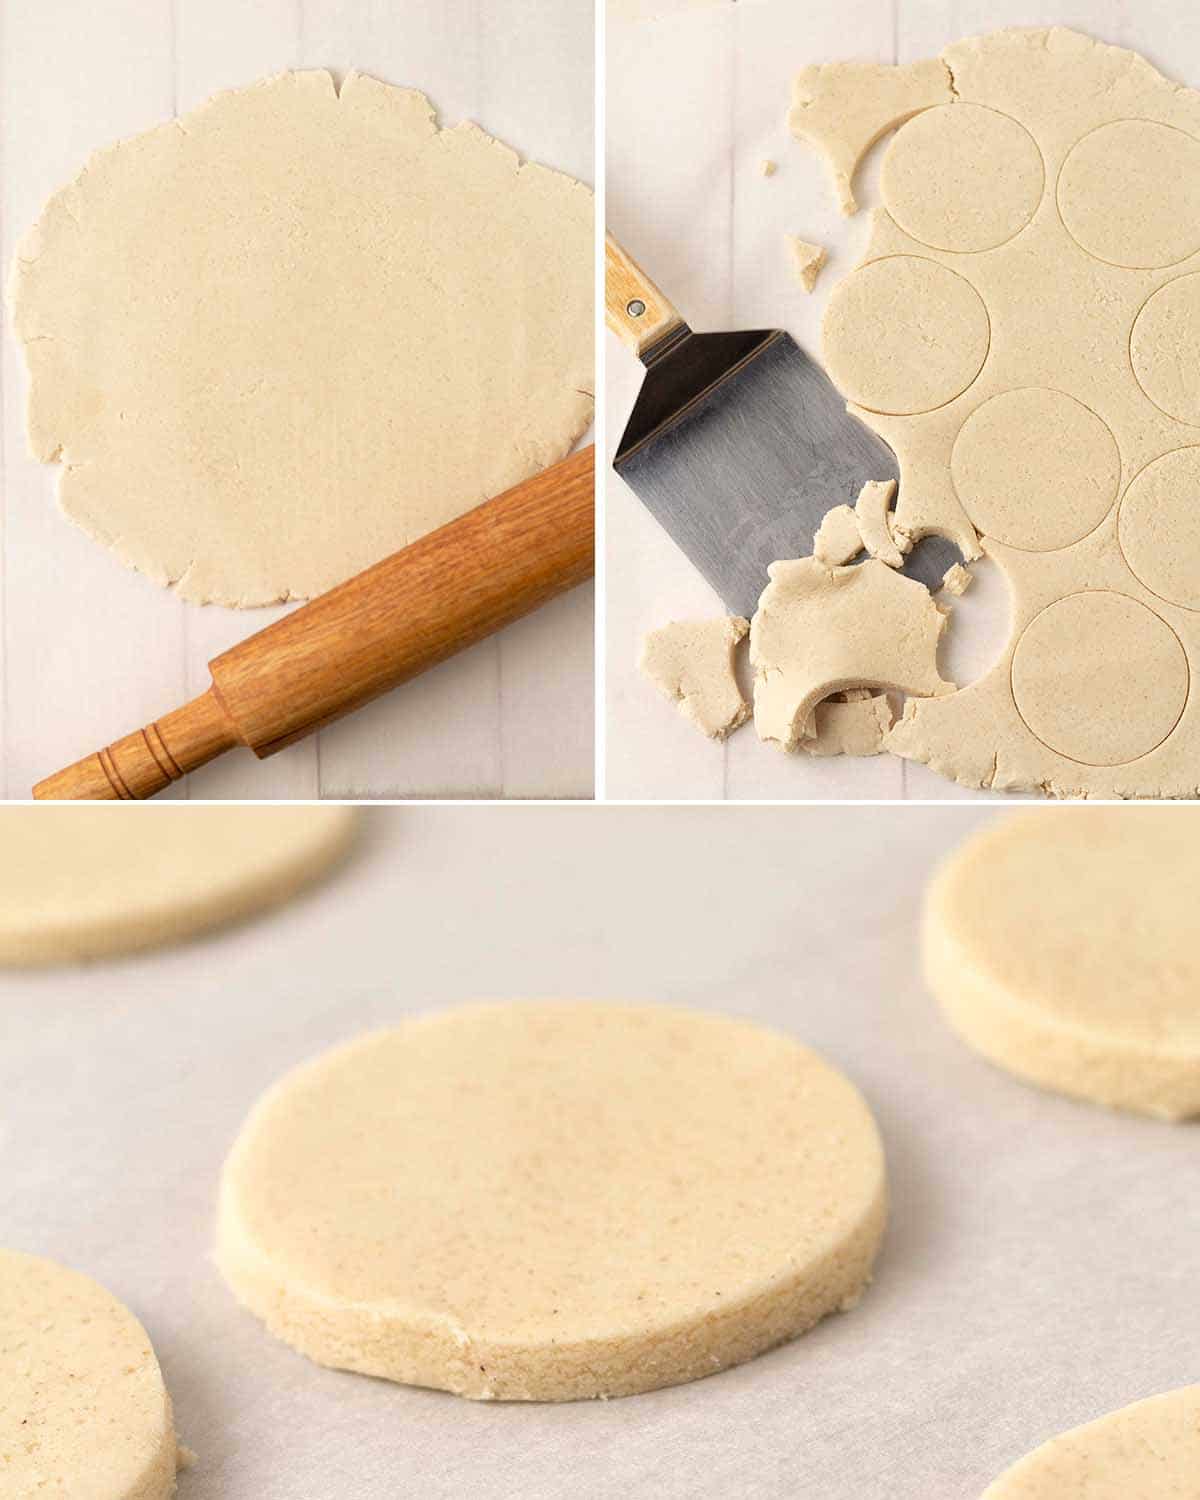
If you don't plan on decorating them with icing, then now is the time to sprinkle them with sanding sugar.
The next step is to bake them! These cookies don't brown too much, just a little on the bottom. Once they've finished baking, let them sit on the baking sheet for a minute or two and then transfer them to a cooling rack so they can fully cool before decorating (or eating!).
Soft? Or Crisp?
Personally, I prefer a crisp sugar cookie with a snap, but I know many prefer a softer cookie. So I've included specific timing info in the recipe below so you can get the result you prefer.
How to Decorate Them
You can go simple by sprinkling them with sanding sugar before baking, you can make a small batch of vegan buttercream or icing, or you can make a batch of vegan royal icing to customize them even more.
I'm still learning the art of cookie decorating, so mine are nowhere near fancy! But that's the fun in making these cookies, you can make them as plain or as extravagant as you want and the entire family can help.
Feel free to decorate your cookies the way I did in my pictures or you can check out this article about sugar cookie decorating ideas that will help with inspiration on how to decorate your cookies.
You can also check out this video on sugar cookie decorating techniques that will give you some helpful tips.
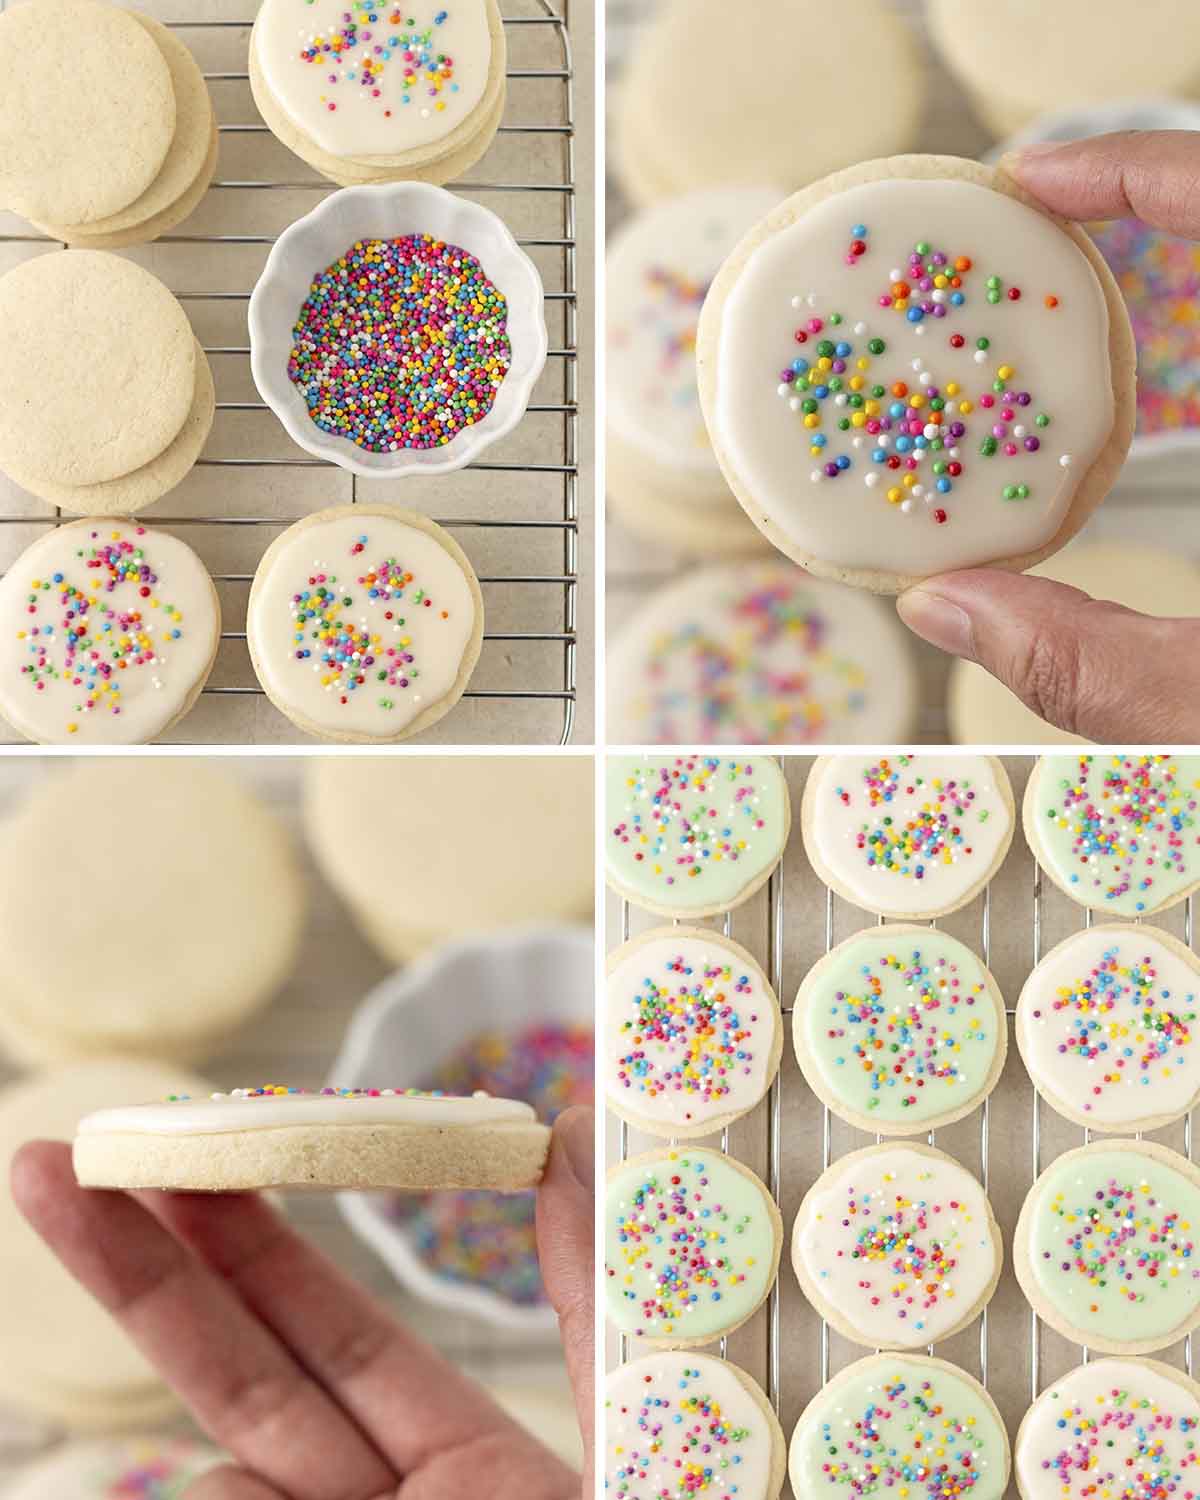
Sugar Cookies for Any Occasion
Baby showers, birthday parties, anniversaries, potlucks, you name it, there's a cookie perfect for it! This recipe can be made for all occasions, like:
Valentine's Day
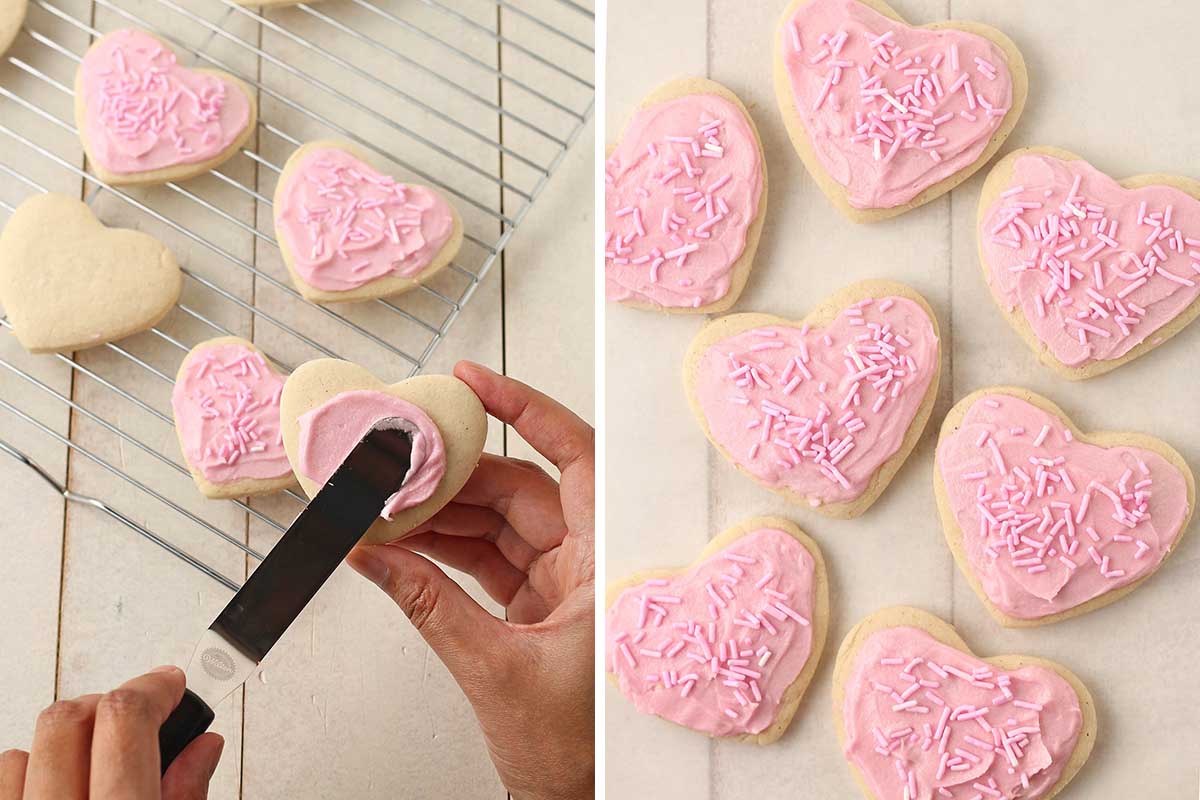
Cut out your cookies into hearts and colour your icing or buttercream with pink or red colour gel (or leave it white!) and top with Valentine's Day themed sprinkles.
Easter
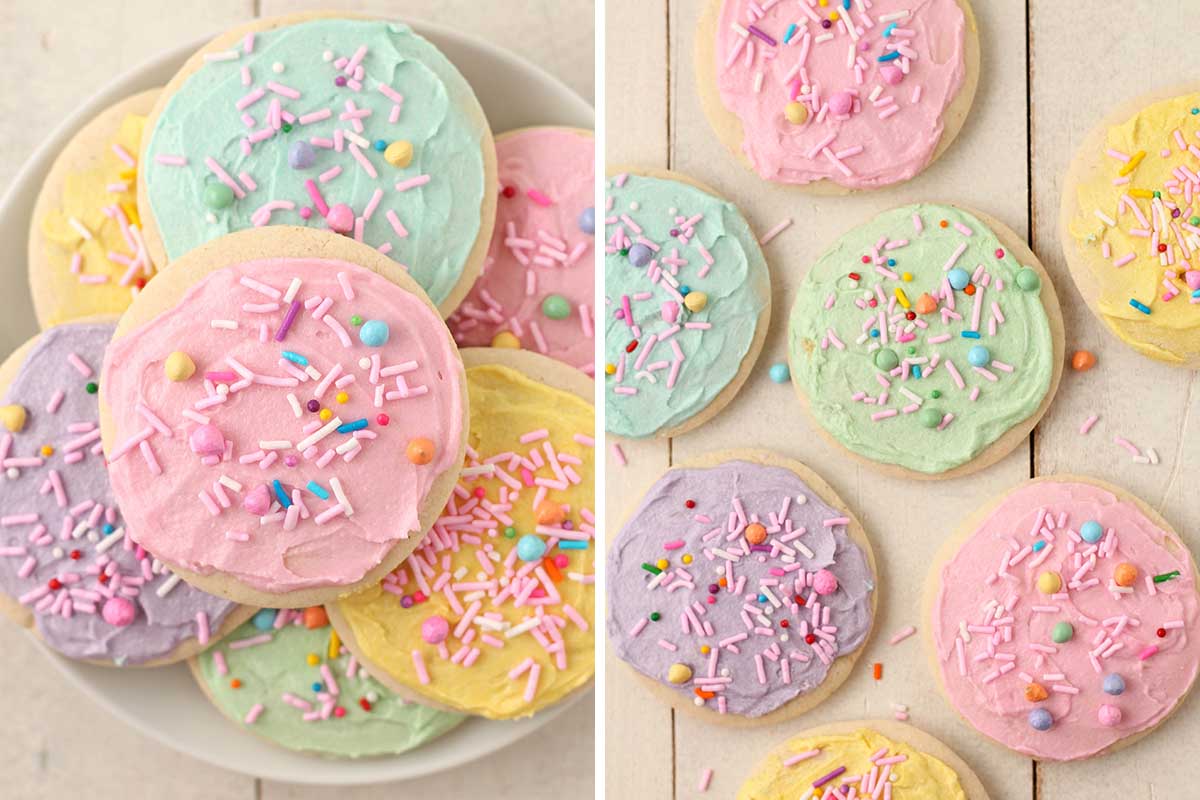
Cut your cookies out into Easter shapes or stick with circles like I did. Separate your icing or buttercream into small bowls and colour each batch so they're light pastel colours. Top with sprinkles!
Christmas
Cut out your cookies into all of your favourite Christmas shapes and decorate how you like. Don't forget the sprinkles!

Decorating Tools
You don't have to go out and buy a bunch of new tools to make cut-out cookies, you can probably make do with what you have in your kitchen (use a glass to cut out the cookies, use a plastic bag as a piping bag) but if you want to make things a little easier, I recommend the following:
Tips - To pipe borders and flood vegan icing onto your cookies, you'll need Wilton tips #1 round, #2 round, or #3 round, it all depends on your design.
Reusable Piping Bags - A small reusable piping bag (more than one, if you're making different colours) is a must if you're using the vegan icing (recipe below). The icing glaze is runny, so you need something to control it and piping bags are perfect for this.
Icing Bottles - You can use icing bottles instead of piping bags and tips.
Offset Spatula - To spread buttercream on the cookies, I use a small offset spatula (you can see it in the picture with the Valentine's cookies below) but you can use a butter knife if you don't have one.
Food Colour Gels - You can use food colour gels to add colour. I recommend gels since they will not thin out your icing or buttercream and the colours are way more vibrant, you'll only need a very small amount to get bright colours.
Sprinkles - There are several vegan sprinkles out there, one is Let's Do Organic, which makes vegan sprinkles that are coloured naturally. This article has a long list of other vegan sprinkles to check out: "Are Sprinkles Vegan?"

Storing Leftovers
If you will be icing your cookies or topping them with buttercream, they will soften more as they sit, so keep that in mind when storing.
After decorating, let them sit uncovered on racks for 3-4 hours so the icing or buttercream can harden and you can stack and store them without ruining your decorating work.
After the decorations have hardened, store the cookies in an airtight container for up to five days.
Freezing Baked Cookies - Freeze decorated or undecorated cookies in single layers in a freezer bag or airtight container, with parchment paper separating each layer, for up to 2 months. Thaw in the refrigerator or at room temperature.
Freezing Cookie Dough - Wrap the cookie dough tightly and place it in an airtight freezer-safe bag or container and freeze for up to 2 months. When you’re ready to bake them, remove the dough from the freezer and thaw overnight in the refrigerator. When ready, start back at step 5 in the recipe. If the dough is a little hard to roll out, let it sit at room temperature for 10 minutes.

Expert Tips for Success
- Measure your flour correctly. Too much flour in this recipe can make your dough dry and crumbly and you will have a hard time rolling it out. Please read my article about how to measure flour correctly.
- Always make sure that your butter is slightly softened before starting, NOT melted or TOO soft. To make sure your butter is at the ideal softness, lightly press your finger into it. If it leaves a shallow indent, your butter is at the perfect temperature. If your finger sinks into the butter with barely any effort, your butter is too soft. Refrigerate it until it has firmed up and then test it again. Soft butter will blend better and easier with the sugar.
- Don’t skip chilling the cookie dough. This step is VERY important for the cookies to turn out properly. If the dough is not chilled, your cookies will be hard to roll out and if you do somehow manage to roll and cut them out, they will spread while baking and not hold their shapes.
- If you're using smaller cookie cutters, those cookies will require less baking time than larger cookies. Keep similar-sized cookies on the same baking sheets so they can be pulled out at the same time.
- Make sure to fully cool the cookies before decorating. If you don't, the icing will warm up, run everywhere, and have a hard time setting.
- Follow the recipe exactly as it’s written for the very best results.
FAQ
I’ve only used Bob’s Red Mill 1 to 1 Baking Flour Blend (the one in the blue bag) for this recipe so I can’t speak for any others. Results will vary with other blends since the blend ingredients and ratios will differ.
Use your favourite brand. I like Melt Sticks and Becel Plant-Based Sticks, but other brands like Country Crock and Flora will also work. Earth Balance has been hit or miss for some readers, I have had a few say that their dough was dry when using Earth Balance and they had trouble rolling it out, so keep that in mind if you use that brand. If you can’t find unsalted butter, it’s okay to use salted, just omit the salt from the recipe.
Yes, make the dough and keep it wrapped tightly in the refrigerator for up to 3 days.
Some are and some aren't, you'll have to do a little research. I use Chefmaster food colour gels and they are both vegan and gluten-free. AmeriColor is another brand that makes vegan gluten-free colour gels. Note that these brands are not coloured naturally, I have yet to find colour gels that are coloured using natural sources.
EMAIL SIGN UP FORM
If You Make This Recipe...
Please let me know! You can leave a comment and star rating below. I'd also love to see how you decorated them! Upload a picture to Instagram and tag me, I'm @delightfuladventures.
And If You Like This Recipe...
Please check out my other vegan gluten-free cookie recipes and these other holiday cookies:
- Molasses Cookies
- Chocolate Crinkle Cookies
- Thumbprint Cookies
- Oatmeal Chocolate Chip Cranberry Cookies
- Coconut Macaroons
- Cut Out Gingerbread Cookies
- Soft & Chewy Gingerbread Cookies
You can help others to find this gluten-free vegan sugar cookie recipe by pinning it to one of your food boards on Pinterest. Click here to pin it now!
Vegan Gluten-Free Sugar Cookies
Suggested Equipment:
Ingredients:
- 1 ½ cups + 2 tablespoons (241g) gluten free flour **see important note about flour below**
- 1 tablespoon cornstarch or arrowroot starch
- ½ teaspoon baking powder
- ¼ teaspoon salt
- ½ cup / 1 stick (113g) unsalted vegan butter, (slightly softened, see note below)
- ½ cup (100g) granulated sugar (or organic cane sugar)
- 4 teaspoons unsweetened dairy-free milk
- 1 ½ teaspoon vanilla extract
- sanding sugar (optional)
Icing (Optional)
- 1 cup (120g) powdered sugar
- 1 tablespoon unsweetened dairy-free milk
- ⅛ teaspoon vanilla extract
- gel food colour (optional, see note below)
- sprinkles (optional)
Buttercream (Optional)
- ¼ cup (57g) / ½ stick) unsalted vegan butter (slightly softened, see note below)
- ⅛ teaspoon salt
- 1 cup (120g) powdered sugar
- 2 teaspoons unsweetened dairy-free milk
- ¼ teaspoon vanilla extract
- gel food colour (optional, see note below)
- sprinkles (optional)
Instructions:
- In a medium bowl, add the flour, cornstarch, baking powder, and salt. Whisk to combine and set aside.
- In a medium bowl, using an electric mixer, beat the butter and sugar until blended and creamy, about 3 minutes. Stop to scrape down the sides of your bowl when needed. Add milk and vanilla extract, blend again.
- Gradually add the flour mixture to the butter mixture and mix on low speed with your electric mixer or with a wooden spoon until a soft, sticky dough has formed. Form the dough into a ball.
- Place the dough ball on a piece of plastic wrap and pat down into a disk. Wrap the dough disk and place in the refrigerator to chill for at least 3 hours.
- Remove from the fridge and let it sit at room temperature for a few minutes (it may be too hard to roll out right away, especially if it has been in the fridge for longer than 3 hours).
- Preheat oven to 350°F (177°C).
- Line cookie sheet(s) with parchment paper.
- Dust a piece of parchment paper with a little gluten free flour and place the chilled dough on top of the flour. Place another piece of parchment paper on top of the dough and using a rolling pin, roll dough out until it is ¼-inch thick.
- Cut out shapes and place them on the prepared baking sheets, leaving at least 1-inch of space between the cookies.
- Gather dough scraps and repeat rolling and cutting until all of the dough has been used.
- If using, sprinkle the cookies with the sanding sugar.
- Bake cookies. For softer cookies, bake for 11-12 minutes, for crisp cookies, bake for 13 minutes.
- Remove from oven and let cookies cool on the cookie sheet for 1-2 minutes before transferring them to a cooling rack. Fully cool before decorating.
To Make Icing
- Add all icing ingredients to a small mixing bowl and mix together until smooth. If the icing is too thick, add more milk, ¼ teaspoon at a time.
- Add colour gel, if desired.
- Fill a piping bag with the icing and using a small tip, decorate cookies and top with sprinkles, if desired.
To Make Buttercream
- Add butter and salt to mixing bowl and mix with an electric mixer for 2 minutes until soft and creamy.
- Gradually add the powdered sugar and mix on low speed. Scrape down the sides of your bowl when needed.
- Add vanilla and slowly add milk, 1 teaspoon at a time, continuing to mix. Add additional teaspoons, if needed, until the desired consistency is met. Scrape down the sides of your bowl when needed.
- Turn mixer up to medium speed and mix until light and fluffy, about 2-3 minutes. Stop occasionally to scrape down the sides of the bowl with a rubber spatula. Mix for a couple more minutes if you want a creamier, fluffier frosting.
- If using, add your gel food colour at this point, mixing after each addition until you get to the colour you like.
- Decorate cookies and top with sprinkles, if desired.
Recipe Notes:
- Please read all of the information and FAQ info above, as well as the notes below before making this recipe.
- This recipe makes anywhere from 18-26 cookies, it all depends on the cookie cutter sizes you use. When I use a 3-inch circle cutter, I get 18 cookies, when I use a variety of cutters that are different shapes and sizes, I get anywhere from 20 - 26. This recipe can be doubled if needed. If doubling, separate the dough into two equal pieces and wrap them separately before chilling.
- It’s important to know that different gluten-free flour blends use different ingredients and ratios, so results may vary if you substitute. I have never used any other brand of gf flour to make this recipe other than Bob’s Red Mill Gluten Free 1 to 1 Baking Flour (Amazon link) in the blue package, NOT the red package, so please know that your results may not be the same as mine if you substitute with another gluten-free flour blend. The weight listed above is for this specific brand of flour.
- If the gluten-free flour blend you are using does not contain xanthan gum, add ¾ teaspoon to the dry ingredients.
- This recipe will NOT work with coconut flour or any other single gluten-free flour, it must be a blend, the one listed above for the intended and best results.
- Powdered sugar, turbinado sugar, brown sugar, and liquid sugar (like maple syrup or agave) will NOT work in this recipe. I have not tested with any sugar alternatives.
- Make sure to measure your flour correctly.
- Make sure that your butter is slightly softened before starting, NOT melted or TOO soft. To make sure your butter is at the ideal softness, lightly press your finger into it. If it leaves a shallow indent, your butter is at the perfect temperature. If your finger sinks into the butter with barely any effort, your butter is too soft. Refrigerate it until it has firmed up and then test it again.
- If your dough seems crumbly after adding the milk and you are having a hard time shaping it into a ball before chilling, add another teaspoon of dairy-free milk.
- If your cookie dough gets too warm while rolling and cutting, place it back in the refrigerator to cool down for about 15 minutes.
- If you're using smaller cookie cutters, those cookies will require less baking time than larger cookies. Keep similar-sized cookies on the same baking sheets so they can be pulled out at the same time.
- If you will be adding colour to your icing or buttercream, gel food colours are recommended since the colours are more vibrant and water-based food colour will thin out your icing and buttercream.
- Feel free to experiment with different extracts to flavour your cookies differently. You can either omit the vanilla extract and use a different one, or you can halve the amount of vanilla and add another one. Some ideas: mint, almond, orange, lemon, coconut.
- Store leftovers in an airtight container in a cool, dry spot for up to 5 days.
- Freezing Baked Cookies: Freeze the cookies in single layers in a freezer bag or airtight container, with parchment paper separating each layer, for up to 2 months. Thaw in the refrigerator or at room temperature and when you’re ready to serve, just place them on a plate, bring them to room temperature, and enjoy.
- To freeze the cookie dough for baking later: Wrap the cookie dough tightly and place it in an airtight freezer-safe bag or container and freeze for up to 2 months. When you’re ready to bake them, remove from the freezer and thaw overnight in the refrigerator. When ready, start back at step 5. If the dough is a little hard to roll out, let it sit at room temperature for 10 minutes.
- The dough can be made in advance and kept in the refrigerator, tightly wrapped, for up to 3 days.
- Nutrition info is based on 1 of 18 x 3-inch circle cookies cut ¼" thick without sanding sugar, icing, buttercream, or sprinkles and using the recipe as it is written and is only to be used as a rough guide. Click to learn how nutrition info is calculated on this website.



Marybeth Nicholson says
Brilliant recipe, made beautiful, perfect Easter cookies with zero oven spread. I did freeze cut out shapes for 15 minutes before baking. Lovely texture and flavour.
Gwen Leron says
Wonderful, Marybeth! Thank you for trying the recipe and for coming back to leave your comment, I'm so happy you liked it. Enjoy the cookies!
JCarol says
I'm a very experience cookie baker who made these for GF/V guests at my cookie decorating party. I made the dough precisely to the recipe, including weighing the Bob's blue package flour down to the half gram.
After chilling for several hours I went to roll these out. What an unholy crumbly mess! I rescued it by adding water a Tbsp at a time until the dough was at proper rolling consistency, but admit to being mystified by all the glowing reviews.
The cookies themselves looked good but their taste and texture were nowhere close to my standard sugar cookies, which contain regular flour and dairy ingredients.
Just keeping it real.
Gwen Leron says
I'm sorry you had difficulty with the recipe, I'm not sure what went wrong. Did you have a look at the process images throughout the post to see the texture of the dough after it had been rolled? You did the right thing by adding more liquid to the dough to make it come together.
I have had a couple of readers throughout the years say that they also ended up with a dry dough but they were able to figure out what went wrong after we did some troubleshooting.
These are a few things that caused their dough to be crumbly (and I know you said you are an experienced cookie baker, so I hope you don't take offense to my suggestions, just trying to help figure out what went wrong because I am very confident in this recipe as I, and many readers, have successfully made it over and over again).
1. Did you let it sit for a little while after taking it out of the fridge? If you try to roll it right away, it will be too cold and will crumble.
2. Did you use the Bob’s Red Mill flour in the blue bag? All gluten free flours are very different, using something different can cause the dough to not have the proper texture. Bob's Red Mill makes another gluten-free flour that will not work in this recipe and people confuse them when shopping.
3. Did you measure the flour (and all of the other dry ingredients) correctly? Too much of any of them will make the dough dry and crumbly.
4. Did you use sugar that has extra large grains? Like turbinado or demerara? This will make the dough hard to come together and it will fall apart.
5. Did you measure the butter and the milk correctly? Too little moisture will also result in a dry dough.
6. Did you make any changes to the recipe? As you know, baking has to be precise but especially when it comes to vegan gluten-free baking. Even a slight change that you think may not make a difference can cause the recipe to fail.
Those are just a few things that could have caused the issue. I'm not sure if you will make them again, but please let me know if I can help any further, I'm glad to help.
Take care, happy new year,
Gwen
Cheryl says
These turned out wonderful. We just needed gluten and egg free so I used regular butter. They don’t spread and tasted just like store bought. Used King Arthur cup for cup and pillsbury canned icing to make life easier
Gwen Leron says
I'm happy you like the recipe, Cheryl! Enjoy the cookies and thanks very much for coming back to leave a review, I appreciate it!
Allie B says
My son is allergic to eggs so I just needed an egg-free recipe - I used regular milk butter, flour etc. They turned out so good! This was the second recipe I tried because the first wasn't great, and it's a keeper!! They taste the same and have the same texture as the recipe I previously would have used with eggs. Thank you!!
Gwen Leron says
Wonderful! I'm glad you found this recipe and gave it a try, Allie! I'm also glad it worked so well with regular flour. Enjoy!
James says
I never comment on these but these were honestly perfect. I used a different gluten free flour as we don’t have the one you used in Australia but they turned out beautifully. I work in a child care centre and I often need to find dairy free gluten free options but I would honestly make these even if I wasn’t worried about it. Thanks 🙏
Gwen Leron says
Hi James, this comment truly made my day. Thank you so much. I spent a long time working on this recipe to make it perfect so no one, like the kids in your centre, has to miss out. I hope everyone loved them. Enjoy!
Stefanie says
I doubled the recipe, made my dough and let it sit in the fridge overnight, and then rolled out and baked this morning. They baked up beautifully, but unfortunately taste quite gritty, like raw flour. I measured the flour properly and used Bob's cup for cup baking blend. Could it be that there's too much flour when the recipe is doubled? I'll have to give it another shot with just a single batch.
Gwen Leron says
Hi Stefanie, I'm sorry to hear they turned out that way for you. I have doubled the recipe and did not have that result. A few things come to mind:
1. How did you measure the flour? Did you use cups or did you weigh it? Too much flour in the recipe will obviously cause the cookies to come out like how you describe. Weighing the flour is way more accurate, weighing by cups can give you inaccurate amounts. I talk about that in this article" How to Measure Flour Correctly
You said you used the Bob's Red Mill Flour, you used the one in the blue bag and not the red bag, right? And no changes were made to the recipe?
2. Did you bake the cookies long enough? Under-baking them too much will result in a cookie that has an incorrect texture and is "floury" tasting.
3. Did you make sure to double up ALL of the ingredients? An imbalance with the other ingredients can throw the recipe off. (I have made this mistake a few times, not doubling every ingredient when I double a recipe, so I thought this was worth asking 🙂 )
I hope this helps, but please let me know if you have any other questions, I hope your next batch is perfect!
Karissa says
They look great, but are not very sweet. They really require icing or frosting for them to taste good. I prefer my sugar cookies to taste great without added toppings.
Gwen Leron says
That's okay, Karissa, we all have different levels of sweetness that we prefer. If you give the recipe another try, feel free to add more sugar!
Sloane says
I can't have butter or dairy- free butter. Would Olive oil work? I can't have coconut oil
Gwen Leron says
Hi Sloane, I have not tried making this recipe with liquid oil. Since olive oil has a flavour, it will give the cookies a certain taste and since it does not harden like vegan butter when chilled, I'm not sure what the state of the dough would be after the chilling step and what the texture of the finished cookies would be like. I know there are sugar cookie recipes that call for liquid oil, but they are not cut-out cookies, they don't need to be rolled and cut. In this case, you would need to experiment a bit and possibly change the ratios of the oil and flour. I hope this helps a little, sorry I could not give you a more concrete answer. If you do decide to give it a try, please let me know how things went.
Alex says
My daughter has the same issue. Did you end up trying with oil? How did it go?
Janelle says
Has anyone used coconut sugar?
Gwen Leron says
Hi Janelle, I have not tried making the recipe with coconut sugar so I can't speak from experience to say how they would turn out. If you do give it a try, please come back and let me know how things went!
Paula Perry says
My husband can't eat wheat flour, soy, eggs and dairy.
He loves them. He puts lemon pie filling on them. Best one I've made for him so far!!
Gwen Leron says
Wonderful, Paula! I'm very happy to know they were a hit with him. If he likes lemon, you can try adding a little lemon zest to the cookie dough. Enjoy!
Maggie says
Would this dough stand up well to a cookie stamp?
Gwen Leron says
Hi Maggie, I think it would stand up well. Just make sure to chill it for the correct amount of time or longer and it should be fine.
Suze says
These turned out awesome. I was worried that I softened the butter a little too much but they still turned out well.
Gwen Leron says
I'm glad you enjoyed them, Suze!
Victoria says
Consistency and texture were pretty on point. Taste was a little dry in the mouth and not as sweet as I want a sugar cookie. But for a first attempt at this style I think they were decent. Hopefully next time I can figure out what I did wrong.
Gwen Leron says
I'm glad you gave the recipe a try, Victoria. Did you make any changes to the recipe?