This page may contain affiliate links. Click to learn more. As an Amazon Associate I earn from qualifying purchases.

Vegan royal icing?! YES! It's true! It's dairy-free and made without meringue powder or eggs. It's also made without corn syrup, and it's perfect for cookie decorating and using as gingerbread house icing.
The recipe, made as-is, works for both outlining and flooding cookies, but you can make it as thick or as thin as you'd like. All of the details are below, so keep reading and get ready to decorate some cookies!

Save This Recipe!
In a hurry? Drop your email below, and this recipe will be sent straight to your inbox for later. You'll also get fresh recipes every week! You can unsubscribe anytime.
So at this point, you're probably wondering what ingredient is being used to make this eggless royal icing that looks like the real thing, hardens like the real thing...but isn't made with the same ingredients as the "real" thing.
The secret ingredient is...aquafaba! Yes, chickpea water (sometimes referred to as bean water!), and no one will know the difference unless you tell them.
As you likely already know, regular royal icing is traditionally made with egg whites, but to take the place of the egg whites and to make it vegan, we'll be using an egg white substitute: aquafaba.
If you're not familiar with aquafaba, you can read all about it in these two posts:
This vegan icing can be used for cookies during any season or occasion. Christmas cookies in December, cookies for fall, Thanksgiving, Valentine's Day, Easter, baby showers, wedding showers, birthdays...the possibilities are endless!
And if you're looking for cookies to decorate with it, how about my vegan gluten-free sugar cookies or my vegan gluten-free gingerbread cookies?
Ingredients You'll Need
All you'll need is four simple ingredients to make this vegan cookie icing. I've included a few notes about each of them below.

Ingredient and Substitution Notes
Aquafaba - Either homemade aquafaba or canned aquafaba can be used for this recipe. If you are using aquafaba from a can of chickpeas, be sure to use unsalted chickpeas and pour the aquafaba through a sieve to catch any chickpea pieces and chickpea skin.
And in case you're wondering, there is no chickpea taste at all in the finished icing, it's 100% undetectable. No one will know what it's made of!
Lemon Juice - A little acid is needed to stabilize the aquafaba, so lemon juice plays this role. I usually use apple cider vinegar when whipping aquafaba, but during my testing, I found that the vinegar flavour and scent came through in the finished icing, which was not pleasant. When lemon juice is used, the flavour and scent remain undetectable. If you don't have lemon juice, you can use the same amount of cream of tartar instead.
Powdered Sugar - The powdered sugar in this recipe cannot be replaced with liquid sweeteners or any granulated sugars, and I have not tried any alternative sugars. As you may already know, not all sugar is vegan, some are processed using animal bone char. To be sure, buy an organic brand (organic sugar is not processed using bone char) or one that is labelled as vegan. Note that “powdered sugar,” “confectioner’s sugar,” and “icing sugar” are all the same thing.
Vanilla - Vanilla is added to the icing for a little flavour since royal icing doesn't have much of a flavour. You can experiment with different extracts if you'd like. Try using half vanilla extract and half almond extract or lemon extract. Other flavours like coconut or orange would also work well.
How to Make It
(Note: I’ve outlined the step-by-step on how to make this easy recipe here, but find the full recipe, ingredients, and directions at the end of this post.)
You can make this recipe with a stand mixer or with an electric hand mixer. If using a stand mixer, use the balloon whisk/whisk attachment.
1. Add the aquafaba to a bowl and whip until it's foamy. If you're using your stand mixer, depending on the model, it's possible that the attachment may not be able to reach down far enough in the bowl to whip the aquafaba properly. If that's the case, for this step, whip it with a hand whisk until it's foamy.
2. Next, add the icing sugar and vanilla to the bowl.
3. Whip the mixture at medium speed for six minutes.
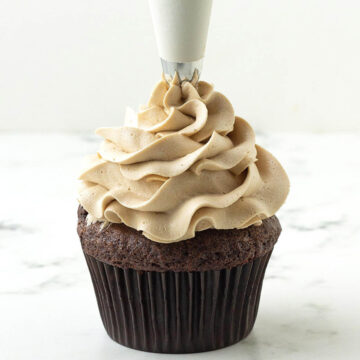
4. After the mixing time, the icing will look glossy and will have the consistency of white school glue.

Testing for Consistency
At this point, the icing should be at a consistency that's suitable to use as outline icing for your cookies AND as flooding icing. Two in one!
To be 100% sure your icing is at this stage, check the consistency of the icing by doing a simple viscosity test. If it needs to be thicker or thinner, it can be adjusted very easily.
Fill a spoon with icing and drizzle it back into the bowl.
The ribbons that the drizzled icing forms should take about 12 seconds to disappear/re-incorporate back into the icing.

Some people like to have two separate versions of this icing for outlining and flooding, but I like to make royal icing that can do both, which is exactly what this recipe will give you.
However, if you would like to have them separate and at different consistencies, you can do that very easily, all the info is below and in the recipe card.
Adjusting the Icing to be Thicker or Thinner
If it takes longer than 12 seconds to reincorporate, you can make a thinner icing by adding a little water or more lemon juice. Add ½ teaspoon at a time, mixing and testing in between each addition.
If it re-incorporates quicker than 12 seconds, you can make a thicker icing by adding a little more powdered sugar to thicken it up. Add 2 tablespoons at a time, mixing and testing in between each addition.
If you want stiffer icing for a more solid outline icing, special designs, or very intricate details, make the icing thicker and give it 15 seconds to disappear back into the icing bowl.
For gingerbread house icing, you will need the icing to be stiffer, so go for 20 seconds when doing this test.
Don't make your icing too runny, or it will be messy, it will seep into your cookies and make them soggy, it will also bleed into other colours (if you're using them), and it will take extra long to dry.
On the other side of things, the thicker you make the icing, the harder it will be to pipe through a piping tip.

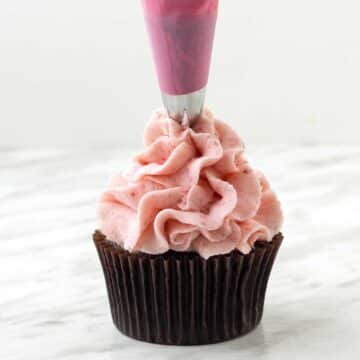
Adding Colour
Note: The finished icing is slightly off-white when it's wet, but it dries white.
Before you start decorating, you may want to add some fun colours to your icing. To do this, I highly recommend food colour gels.
Gel colours are more vibrant, so you’ll use less than if you were to use water-based food colour to achieve the same result. Using gels also prevents your icing from thinning out.
Two vegan gluten-free brands to check out are AmeriColor and Chefmaster.
If you prefer natural food colouring, check out these powdered food colours from ColorKitchen.
If you do add gel colour, add a VERY small amount to start, they are very vibrant, and a little goes a long way. Too much added colour can affect drying time, and it can also cause the colour to bleed into other colours on your cookies if you are doing multiple colour designs.
Decorating
Now it's time for the really fun part...making your cookies pretty! I am not a skilled cookie decorator at all, so the cookies you see below aren't the fanciest. But this goes to show that you can have fun with it, get creative, and enjoy the process.
This is also a fun activity for kids, so get them involved, too. You can even throw them a cookie decorating party!
When decorating, you need to work with fully cooled cookies. My vegan gluten-free sugar cookies are perfect for decorating with royal icing, and gingerbread cookies are ideal, as well.
For decorating inspiration, you can have a look at the cookies below, or you can browse through Pinterest for some ideas. If you want to get extra fancy with your design, YouTube has some great tutorials.
Recipe Note
Royal icing starts to dry and will form a crust on the top when it's exposed to air, so to avoid this, if you have your icing in bowls, place a clean, damp cloth over the bowls. Cover the tips of your pastry bag with a damp cloth as well to avoid having the tips clog up with dry icing.
Decorating Tools
If you don't have any tools, you can use a spoon for decorating cookies, but there are also some tools you can purchase to make your decorating sessions easier. I recommend the following:
Cookie Decorating Kit - This 12-piece kit is perfect for beginners, it contains four different tips for cookie decorating, as well as 8 disposable piping bags.
Frosting Bottles - These are great for kids to use, and they take away the need for piping bags. Each bottle comes with one piping tip.
Cookie Decorating Tips - If you already have piping bags and you just need tips, this is a good set to get started with.
Piping Bags - When decorating cookies, you'll need to use multiple piping bags if you're working with multiple colours. These are disposable piping bags, but you can also build up a collection of reusable piping bags over time, as I have done.
You can also make your own small piping bag cornets out of parchment paper or use Ziplock bags. Add the icing into the piping bag, close it, and snip a very small piece off the corner of the bag, and you're ready to go!

Outlining and Flooding
Outlining is not necessary for all designs. If you are doing simple designs, you can go without, but it's important to know that if you are working with outlines, you need to flood your cookies quickly so they can join together with the outline because the icing dries fast!
If you wait too long, the border will be visible (like it is in that blue snowflake cookie in the picture below!).
You'll then need to flood the cookies. To do that, pipe the icing onto the cookies starting from the outside and working your way into the middle.
To cover up any spots that weren't filled in, use a cookie scriber if you have one, or a toothpick. Drag it through the icing to cover the bare spots.
Adding Sprinkles
If you'll be adding sprinkles or any type of decoration that needs to stick to the cookie, be sure to sprinkle it on right after adding the royal icing because it dries fast! If you wait too long, they will bounce off the cookies and won't stick.
Drying Time
Just like traditional royal icing, this one hardens as it dries, and it also dries with a shine. Thinner piping will fully harden, and thicker designs will harden but not be extremely hard.
You will need to leave your decorated cookies out in the open on a rack for at least 6-8 hours (or even overnight) so the icing hardens enough for them to be stacked on top of each other. Any sooner and you run the risk of your designs getting dented and ruined.
Drying time will be affected by how thick your icing is, the climate you are in, humidity, etc. You can speed up drying time by placing the decorated cookies in front of a fan for a short time.

Storing Leftovers
Refrigerating: Put your leftover royal icing in an airtight container and place it in the refrigerator for up to 1 week. When you are ready to use it, bring it to room temperature, give it a good mix, and it will be ready to go.
Freezing: You can also freeze it by placing it in an airtight container and freezing it for up to 2 months. When you are ready to use it, thaw it in the refrigerator overnight, bring it to room temperature, give it a good mix, and it will be ready to go.

Tips for Success
- Measure and have all your ingredients ready to go before starting. This will make the process run smoothly, quickly, and easily.
- Use room-temperature aquafaba. I find that chilled aquafaba whips up differently, and I prefer the results I get when it's at room temperature.
- Don't overmix the icing. This can add too much air, which will create air bubbles that are annoying when piping the icing.
- Make sure to fully cool your cookies before decorating them. If you don’t, the icing will not hold on to the cookie, and you will end up with a mess.
- Work quickly. Royal icing dries quickly, so after outlining, flood right away and after flooding, add sprinkles right away.
- While decorating, cover your piping tips and bowls of icing with a damp cloth. This will prevent the icing from hardening and forming a crust on the top.
- Give your decorated cookies adequate time to dry before storing them. If you stack and store them too quickly, the icing will be too soft and will get ruined.
- Read this post from top to bottom before you start. I’ve included a lot of tips and tricks so you get things right. Also, read through the actual recipe before getting started.
- Follow the recipe exactly as it’s written for the very best results.

If You Make This Recipe...
Please leave me a review and star rating, and tell me what you decorated with it in the comments below! You can also share a picture with me over on Instagram and tag me so I can see it. (I'm @delightfuladventures).
And If You Like This Recipe...
You may like these other vegan buttercream frostings (you can use these to decorate cookies, too!)
- Vegan Buttercream Frosting
- Vegan Strawberry Buttercream Frosting
- Vegan Lemon Buttercream Frosting
- Vegan Peanut Butter Frosting
- Peppermint Buttercream Frosting
- Vegan Chocolate Buttercream Frosting
- Vegan Cream Cheese Frosting
And these other recipes you can make with aquafaba:

Vegan Royal Icing
Suggested Equipment:
Ingredients:
- ⅓ cup (80ml) aquafaba (room temperature)
- ½ teaspoon fresh lemon juice
- 3 ½ cups (420g) powdered sugar
- 1 teaspoon vanilla extract
Instructions:
- Add aquafaba and lemon juice to a medium bowl or into the bowl of a stand mixer and whip at low speed for 30-45 seconds until the aquafaba is foamy. Use either an electric hand mixer or a stand mixer with the balloon whisk to do this.
- Stop the mixer and add powdered sugar and vanilla. Start the mixer on low and mix until the powdered sugar and aquafaba have combined, then turn the mixer up to medium speed and whip for 6 minutes until royal icing is shiny, thick, and has the consistency of thick white school glue. While whipping, stop to scrape down the sides of the bowl when necessary.
- Test for Consistency: Fill a spoon with icing and drizzle it back into the bowl. The ribbons that the drizzled icing form should take about 12 seconds to disappear/re-incorporate back into the icing. (For gingerbread houses, it should re-incorporate in about 20 seconds)
- To make the royal icing thicker: Add more powdered sugar, 2 tablespoons at a time, whip and repeat until desired consistency is met.
- To make the royal icing thinner: Add water or more lemon juice, ½ of a teaspoon at a time, whip and repeat until the desired consistency is met.
Recipe Notes:
- Before making this recipe, please read all of the helpful tips above, as well as the notes below.
- This recipe makes 1 and ¾ cups of royal icing.
- It is important that all tools you will be using be free from any oil and oil residue. Oil will prevent your aquafaba from whipping properly.
- Either homemade aquafaba or canned aquafaba can be used for this recipe. If you are using canned, use unsalted chickpeas and pour the aquafaba through a sieve to catch any chickpea pieces and chickpea skin.
- If you don't have lemon juice, you can use ½ teaspoon of cream of tartar as a substitute. Don't use vinegar, the scent and flavour will come through in the finished icing.
- If you are using your stand mixer, depending on the model, it's possible that the attachment may not be able to reach down far enough in the bowl to whip the aquafaba properly, if that's the case, for step 1, whip it with a hand whisk until it's foamy and then proceed to step 2 using the stand mixer.
- To thin out your royal icing, add a little water or more lemon juice. Add ½ teaspoon at a time, mixing and testing in between each addition.
- To thicken your royal icing, add a little more powdered sugar to thicken it up. Add 2 tablespoons at a time, mixing and testing in between each addition.
- Refrigerating leftovers: Put leftover royal icing in an airtight container and place it in the refrigerator for up to 1 week. When you're ready to use it, bring it to room temperature, give it a good mix and it will be ready to go.
- Freezing leftovers: Place it in an airtight container and freeze for up to 2 months. When you're ready to use it, thaw it in the refrigerator overnight, bring it to room temperature, give it a good mix and it will be ready to go.
- Nutrition info is based on a 1 teaspoon serving of royal icing made as the recipe is written and is to be used only as a rough guide. Click here to learn how nutrition info is calculated on this website.


Becky says
This Royal icing worked beautifully! I’m so impressed- it hardened and colored perfectly, and tastes just like an egg based icing. I’m thrilled I found this and tried it as I have ever been able to make decorated cookies for my daughter who is allergic to eggs. Thank you!!!
Gwen Leron says
You're welcome, Becky! I'm glad you found the recipe and gave it a try. Enjoy!
Nin says
YESSSSS!!! This is third Aquafaba recipe
I’ve tried, and the only one that worked! My niece is allergic to eggs, and this is just perfect! I’m so relieved. Thank you, thank you, thank you!
*to any other people who want to try this, it is IMPERATIVE that you use Organic, NO salt, canned chickpeas* (I’ve tried all the chickpeas- only salt free will work)
Gwen Leron says
Yay! I am so glad this is the recipe that finally worked for you, Nin. Thank you for coming back to let me know. I hope you and your niece enjoy decorating your treats!