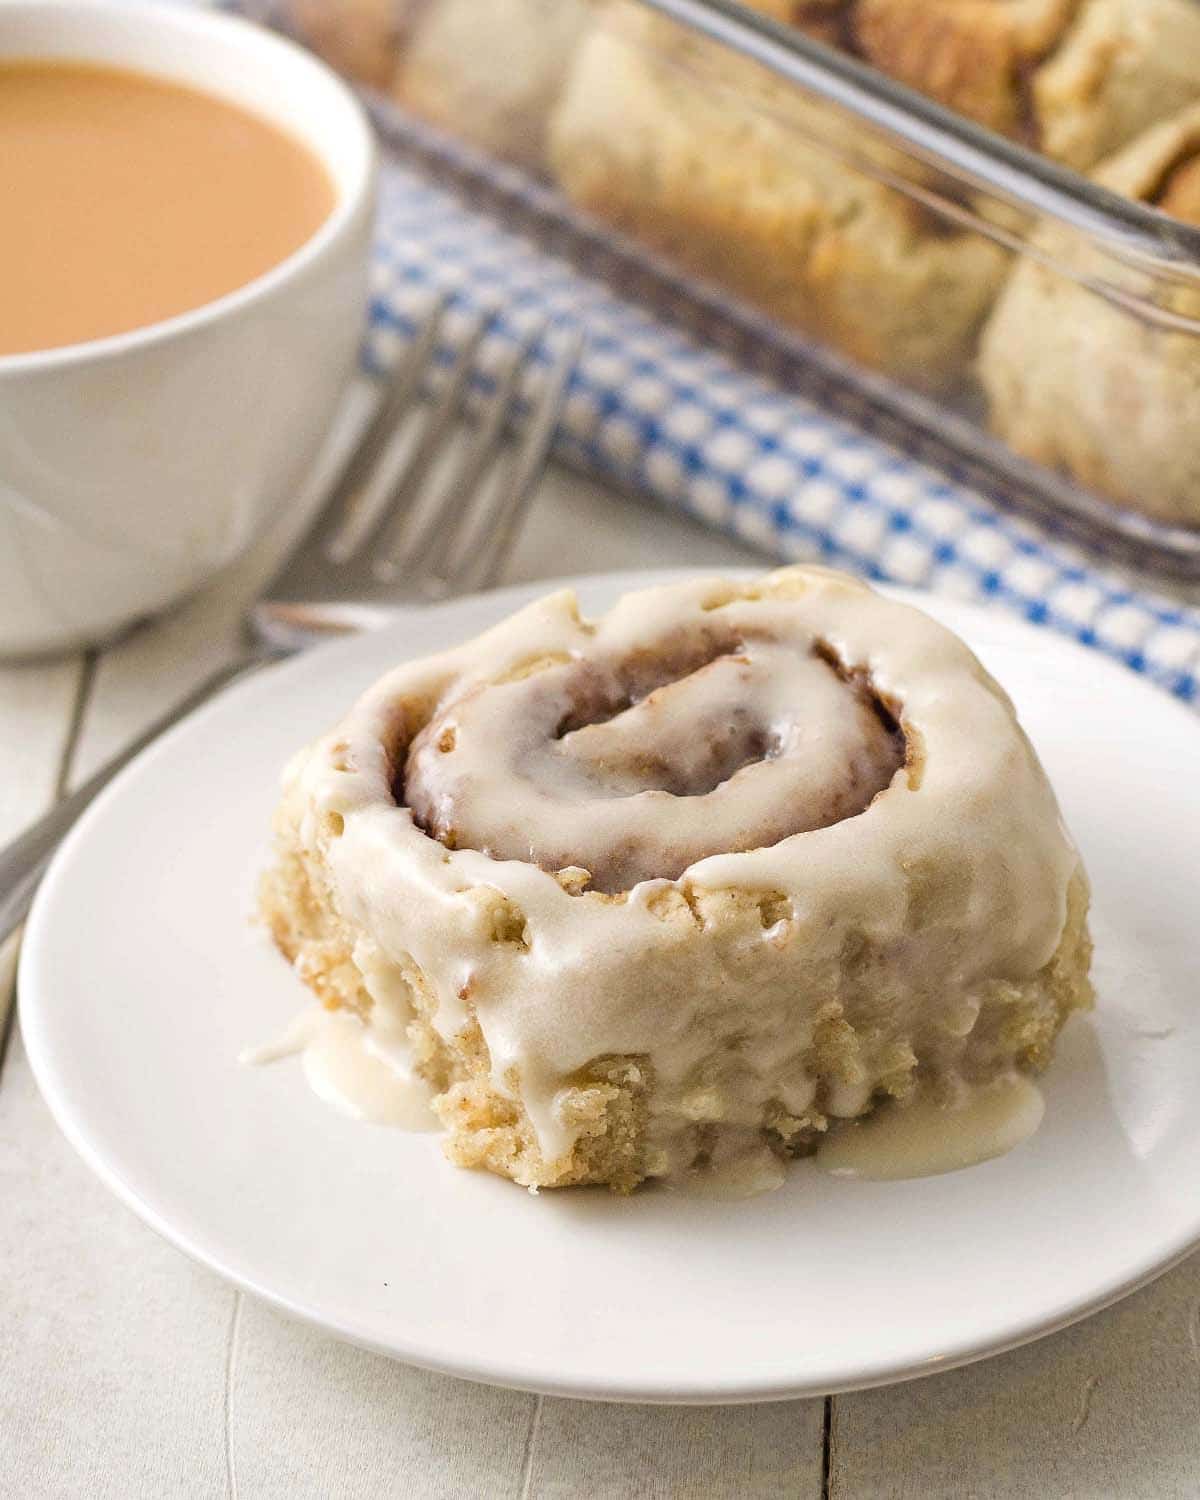
Soft and fluffy homemade vegan gluten-free cinnamon rolls you can serve at breakfast, brunch, on Christmas morning, or for dessert! Yes, they're 100% dairy-free, egg-free, and nut-free, plus to make them even more special, they’re topped with gooey vegan icing.
Step-by-step images are included to show you how to make and bake them, plus, you can refrigerate these rolls overnight and bake them the next morning. Read on for all of the details!
Save This Recipe!
In a rush? Don't have time to scroll through this page right now? Enter your email below and this recipe/article will be sent straight to your inbox so you can come back to it when you're ready. Plus, you'll receive delicious recipes every week! You may unsubscribe at any time.
This recipe is one that I've been testing for quite a while because who doesn't love cinnamon rolls?! I started over a year ago and decided to shelve my efforts because I wasn't getting the results I wanted.
I decided to pick it back up this fall and after a few more tries, building from where I left off, I finally have a winner. Persistence pays off!
I won't bore you with all of the details about my trials and (big) errors, but I can tell you that I ended up with rock hard rolls on more than one occasion.
Rock hard rolls are what some may think of when they hear "vegan gluten free cinnamon rolls," but you'll be happy to know that this is not the case with this recipe.
These rolls are soft, tender, fluffy, and they have that drool-inducing gooey center that we all love in a cinnamon roll. Plus, they're topped with a delicious, easy-to-make icing.
This recipe has a few more steps than my regular recipes, but don't let that intimidate you, they're simple to make and when done, you're going to end up with the most delicious gluten-free vegan cinnamon buns (rolls, buns, or scrolls...whatever YOU call them!) you've ever had.
So let's get to it. I have pictures for every step to help you through, as well as tips and pointers throughout, so make sure you read EVERYTHING before you make the recipe. Let's go!
Before You Get Started
There are a few things to keep in mind as you make these rolls, especially if you've made wheat rolls in the past; this recipe is very different because of the following:
- If you’ve made cinnamon rolls with wheat flour, you’ll know that there are two rises. That’s not necessary with this gluten free vegan cinnamon rolls recipe, there’s just one single rise which means they’ll be ready quicker!
- Wheat rolls double in size before they bake but these do not. They will rise and expand slightly, but they will not rise the same as wheat rolls. They will also rise and expand a little more as they bake.
- The dough for these rolls is different from wheat dough. Wheat flour cinnamon roll dough is stretchy and pliable, this dough is the opposite, it’s very soft and fragile, so keep that in mind as you prepare and work with the dough.
- Kneading this dough is not necessary since there is no gluten to develop.
- The final texture of these rolls is different from wheat based rolls. These rolls are soft and fluffy, but not like wheat flour rolls, so know that going in, you’re not going to get the exact texture as regular cinnamon rolls.
Are you new to vegan gluten-free baking? If so, be sure to read all of my vegan gluten-free baking tips!
Ingredients + How to Make Them
(Note: I’ve outlined the step-by-step on how to make this recipe here, but find the full recipe, ingredients, and directions at the end of this post.)
There are four groups of ingredients for this recipe, I'm going to walk through each group and show you how to prepare them and how to do each step.
Step 1 - Prepare the Yeast
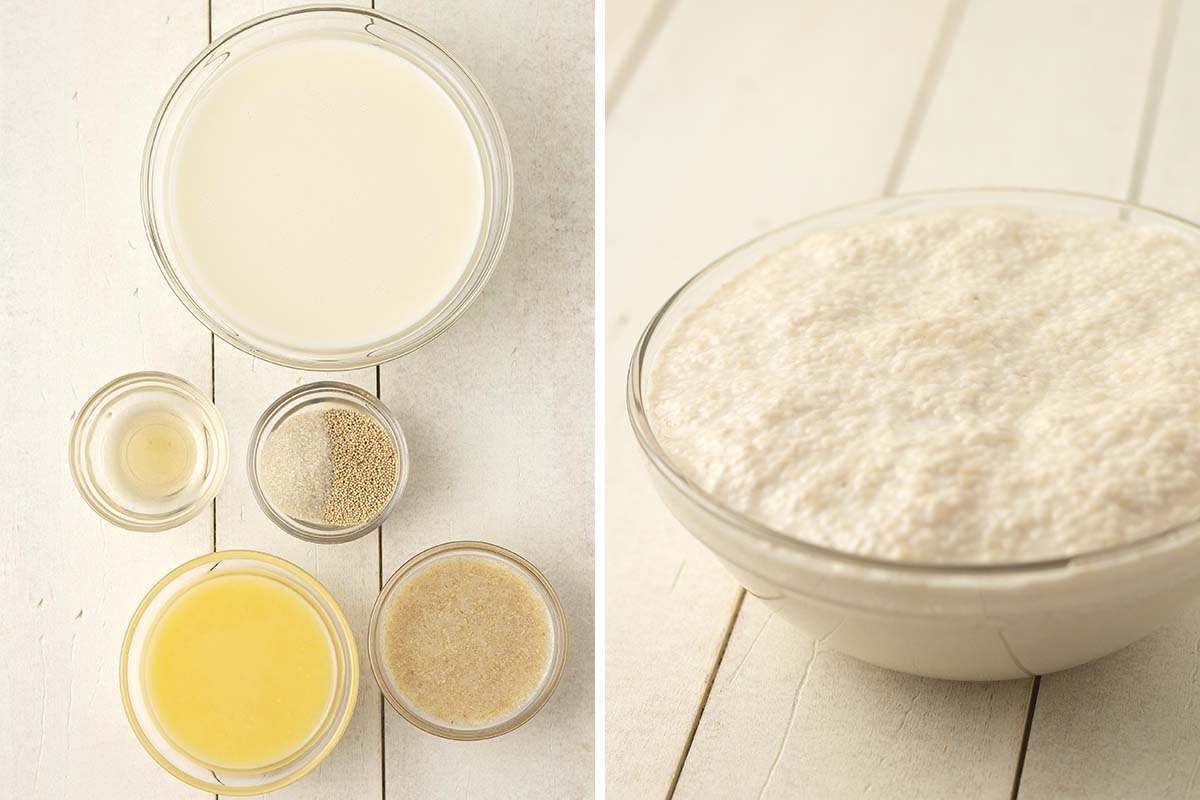
You'll need six ingredients for this step, warm non-dairy milk, active dry yeast, sugar, apple cider vinegar, melted butter, and a flax egg.
You'll start by preparing your flax egg and setting it aside. Next, add the yeast, sugar, and warm milk to a bowl. Give it a quick stir and set aside for about 10 minutes or so for it to foam up like the image below on the right.
NOTE: If your yeast doesn't look like the picture below on the right after 10 minutes, then something is wrong with either your yeast or the temperature of your milk. See the "Expert Tips for Success" section below for more info on how to fix this. If your yeast didn't foam up, you'll have to start over with new yeast.
Step 2 - Prepare the Dry Ingredients and Filling
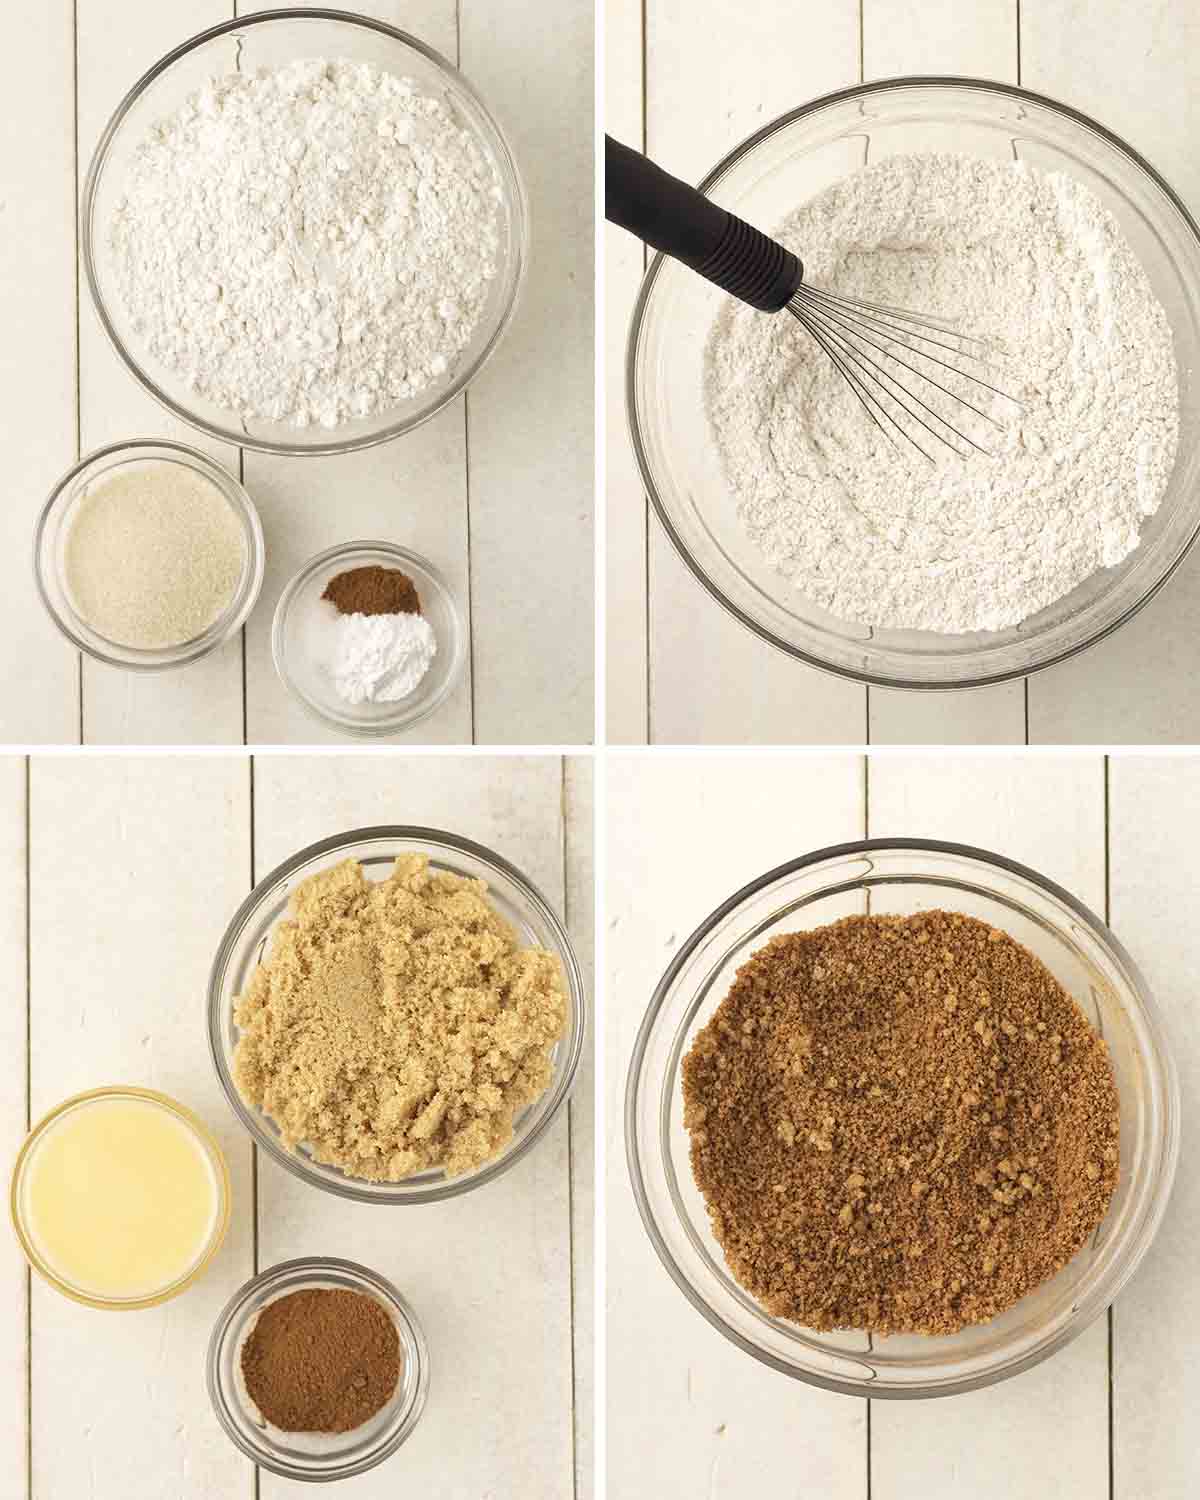
While you wait for the yeast to foam up, measure out your flour (accuracy is important for this recipe, so please refer to my article about how to measure flour correctly) and whisk it together with sugar, salt, baking powder, and a little cinnamon.
For the filling, you'll need brown sugar, cinnamon and melted, cooled butter. Start off by mixing your brown sugar and cinnamon together and then setting it aside. (You'll use the melted butter to brush onto the dough so the filling sticks to the dough.)
Step 4 - Prepare the Dough
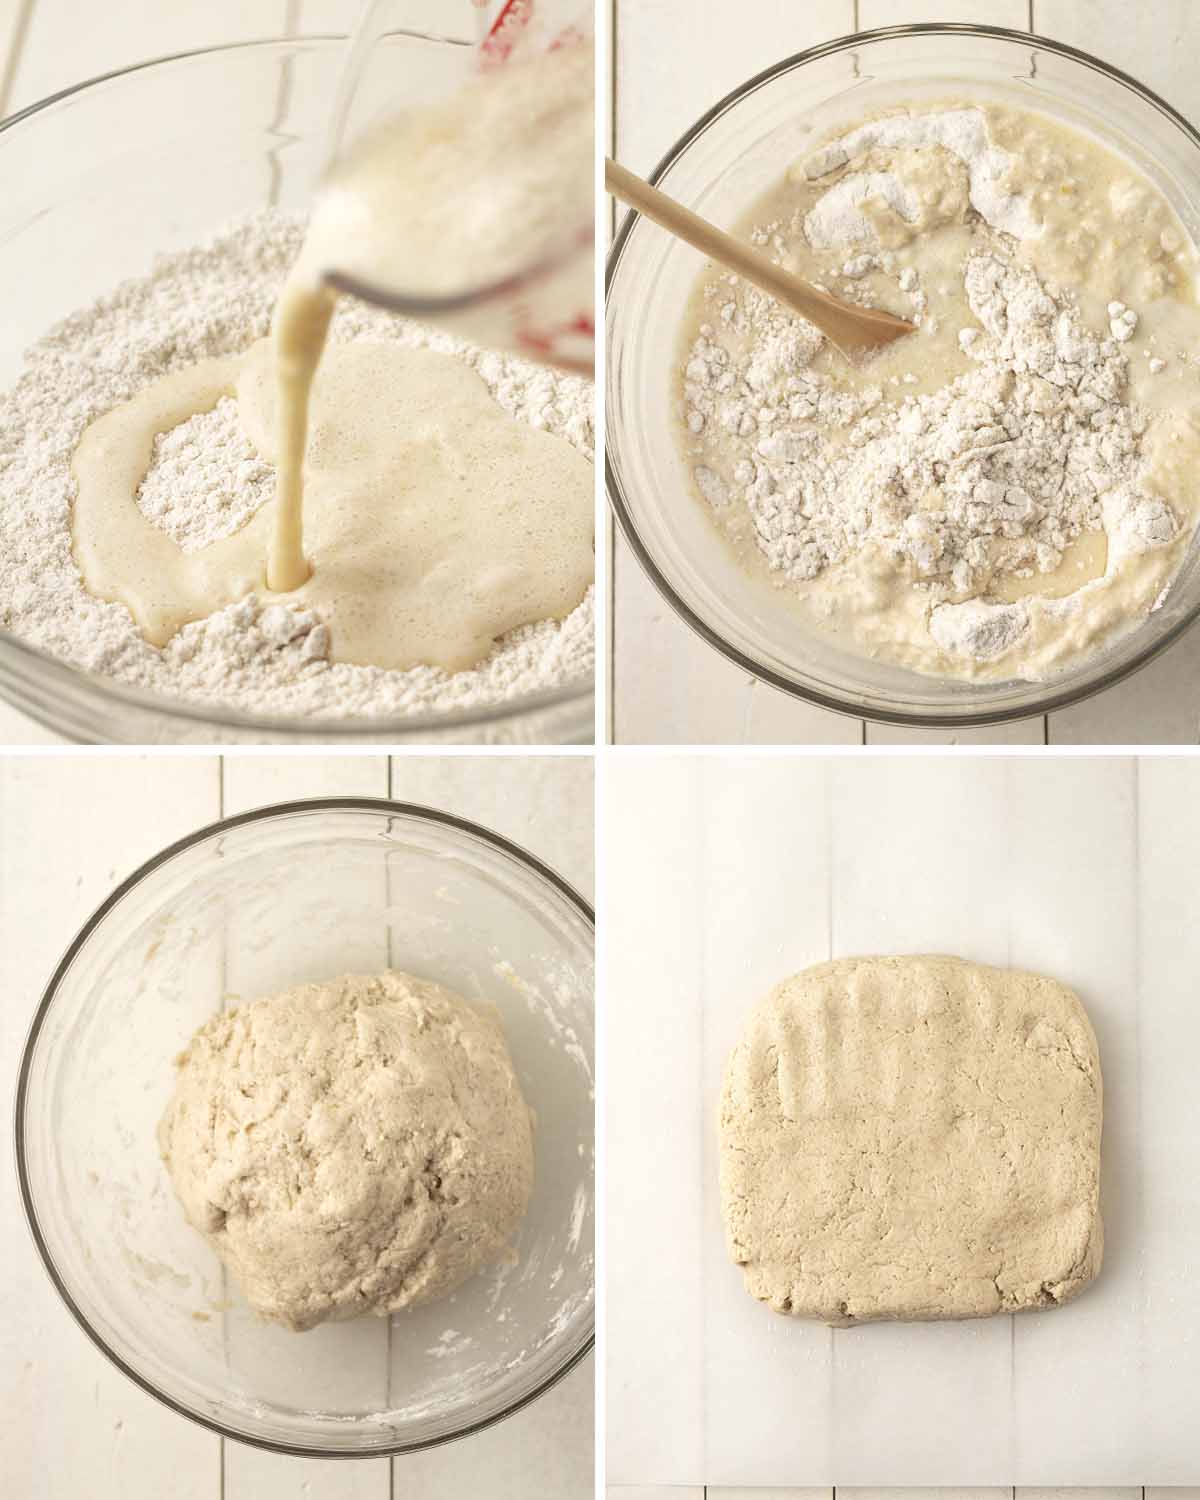
After the 10 minutes for yeast proofing has passed, add the remaining ingredients to the yeast mixture: apple cider vinegar, melted butter, your flax egg and then give it a stir.
Pour the yeast mix into the flour mixture and stir until the dough starts to form. Once that happens, get in there with your hands and gather up all the stray bits and dry areas of flour to form a ball. Don't over work it.
Brush some oil onto a large piece of parchment paper and you can measure and make some marks on the paper so you have some guides to help you know how much to roll it out, or you can just keep a tape measure close by.
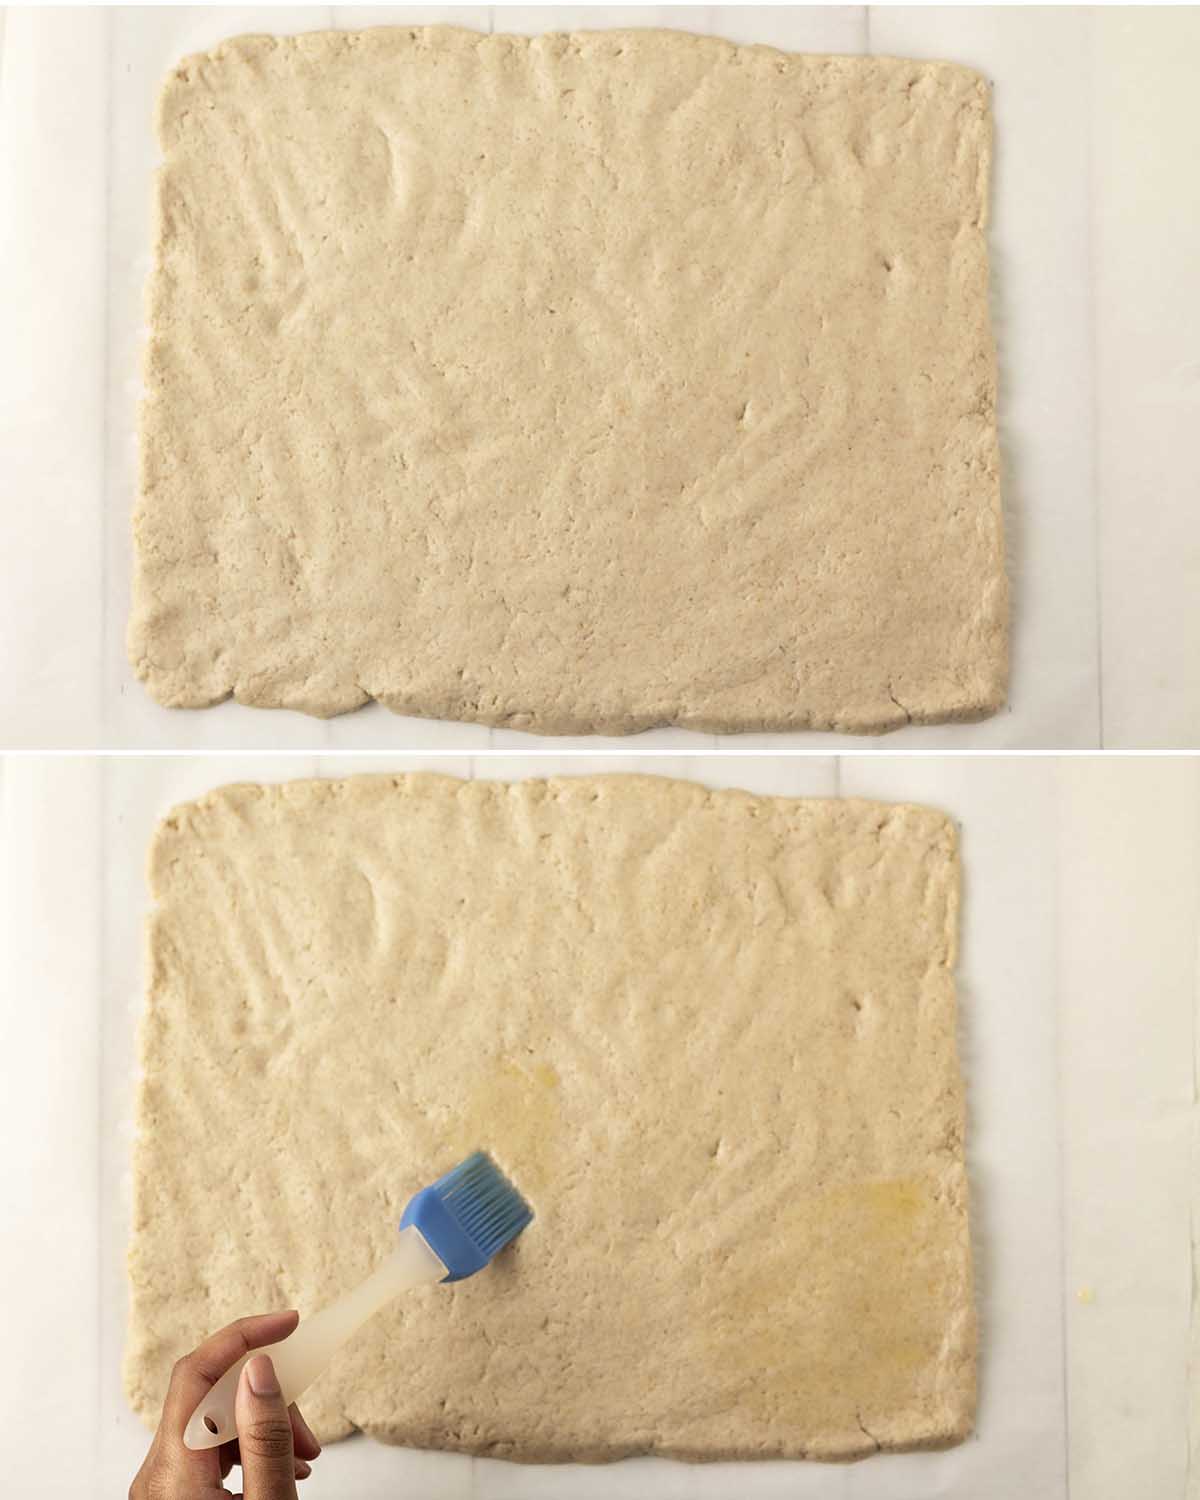
Place the dough ball on top of the oiled parchment paper and using your hands, form it into a square (this makes it easier to form it into the proper shape, see bottom right image below).
Step 5 - Press (Or Roll) Out the Dough
It's important to not have the dough be too thin or the rolls will fall apart. The final size needs to be roughly 10 inches long x 14 inches wide and ¼ inch thick.
You can either use your hands to press it into that rectangular size or roll it with a rolling pin. Have a measuring tape nearby or as mentioned above, you can mark guides on the parchment paper. The longer, 14-inch side, should be facing you.
You can also use a rolling pin to get it to the proper size. If you use a rolling pin, since this is a sticky dough, lightly flour the top of the dough and then place another piece of parchment paper on top of the dough and roll to the proper size.
Once rolled out, brush the melted butter on top.
Step 6 - Fill and Roll
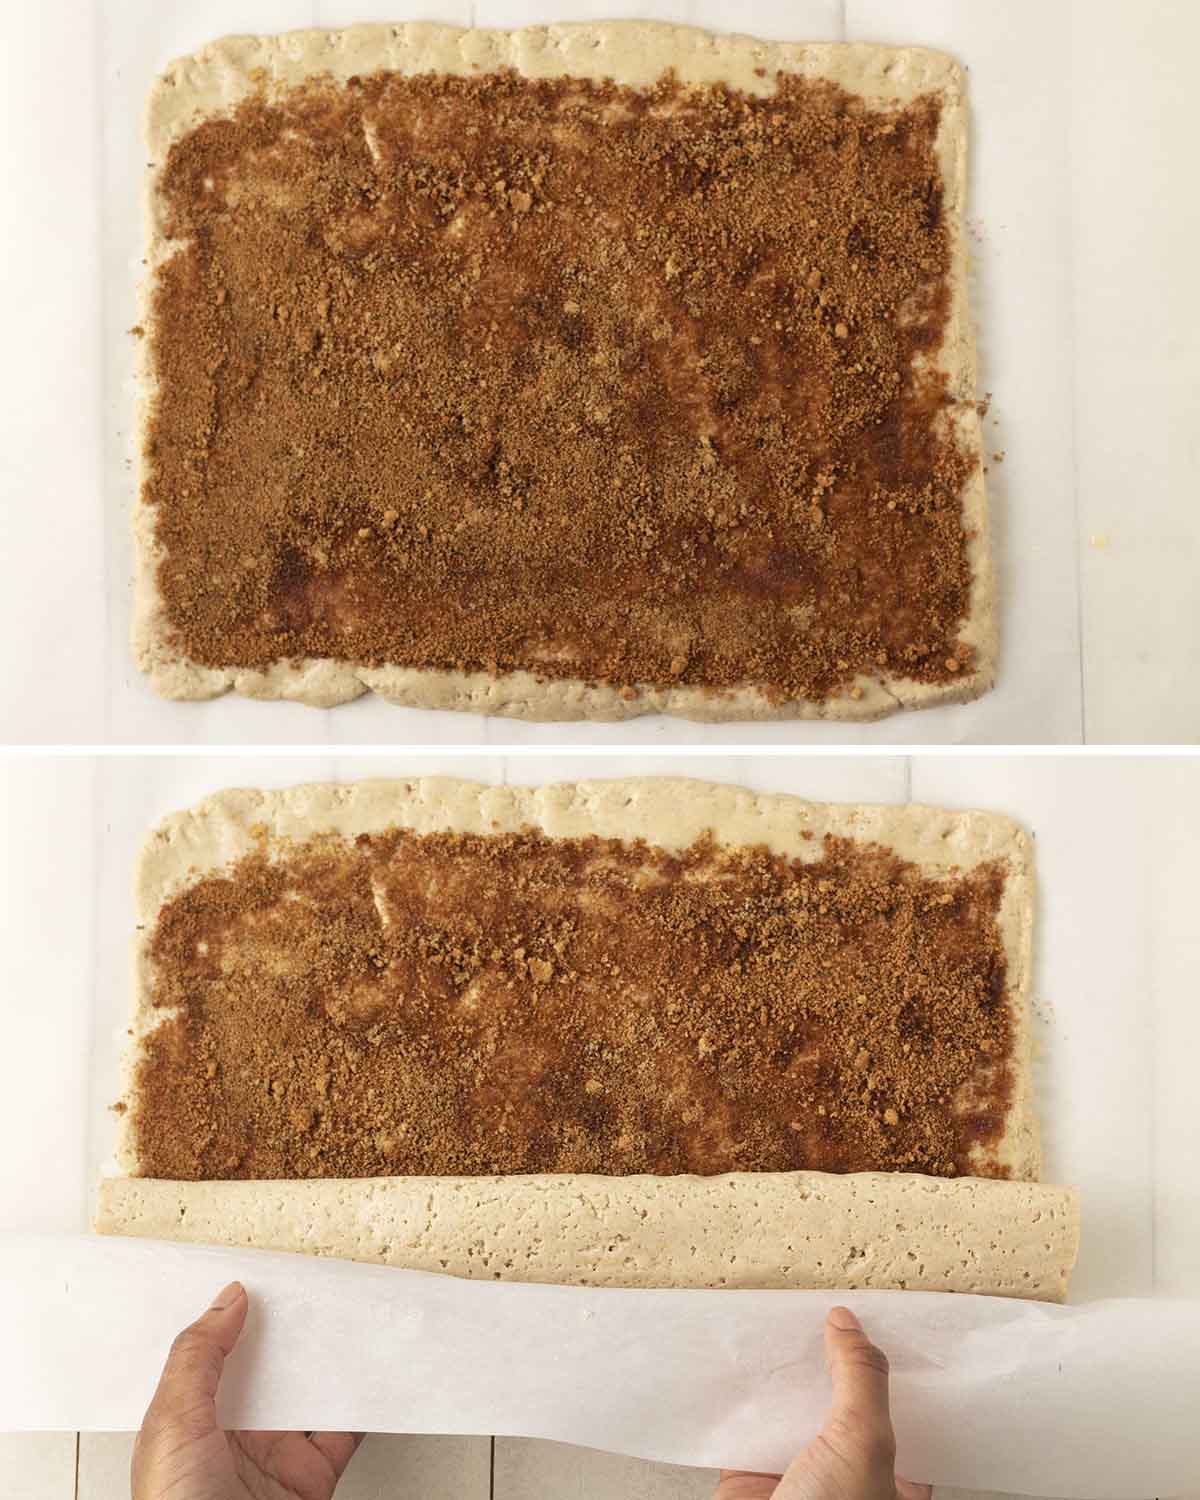
Sprinkle the filling on top of the dough, leaving a small space at the top edge, as shown below.
This is a soft dough, so rolling it up with just your hands will not be easy. To make it easy, use the parchment paper, as shown in the picture below, to slowly roll the dough away from you.
Step 7 - Slice, Rest
With the seam side down, using a sharp knife, slice the rolled up dough into 9 rolls (roughly 1 ½" each) and place them in a greased 8-inch x 8-inch baking dish or an 8-inch round cake pan (if using a cake pan, slice into 8 rolls (roughly 1 ¾" each) rather than 9).
It's important that they sit close together but I wouldn't go smaller than the pan/dish sizes mentioned because then they will be TOO close and not have room to grow. And it's okay if they're touching, this will keep the sides soft.
Cover with a kitchen towel and place in a warm area to rest for one hour. Use the proof setting on your oven if you have it.
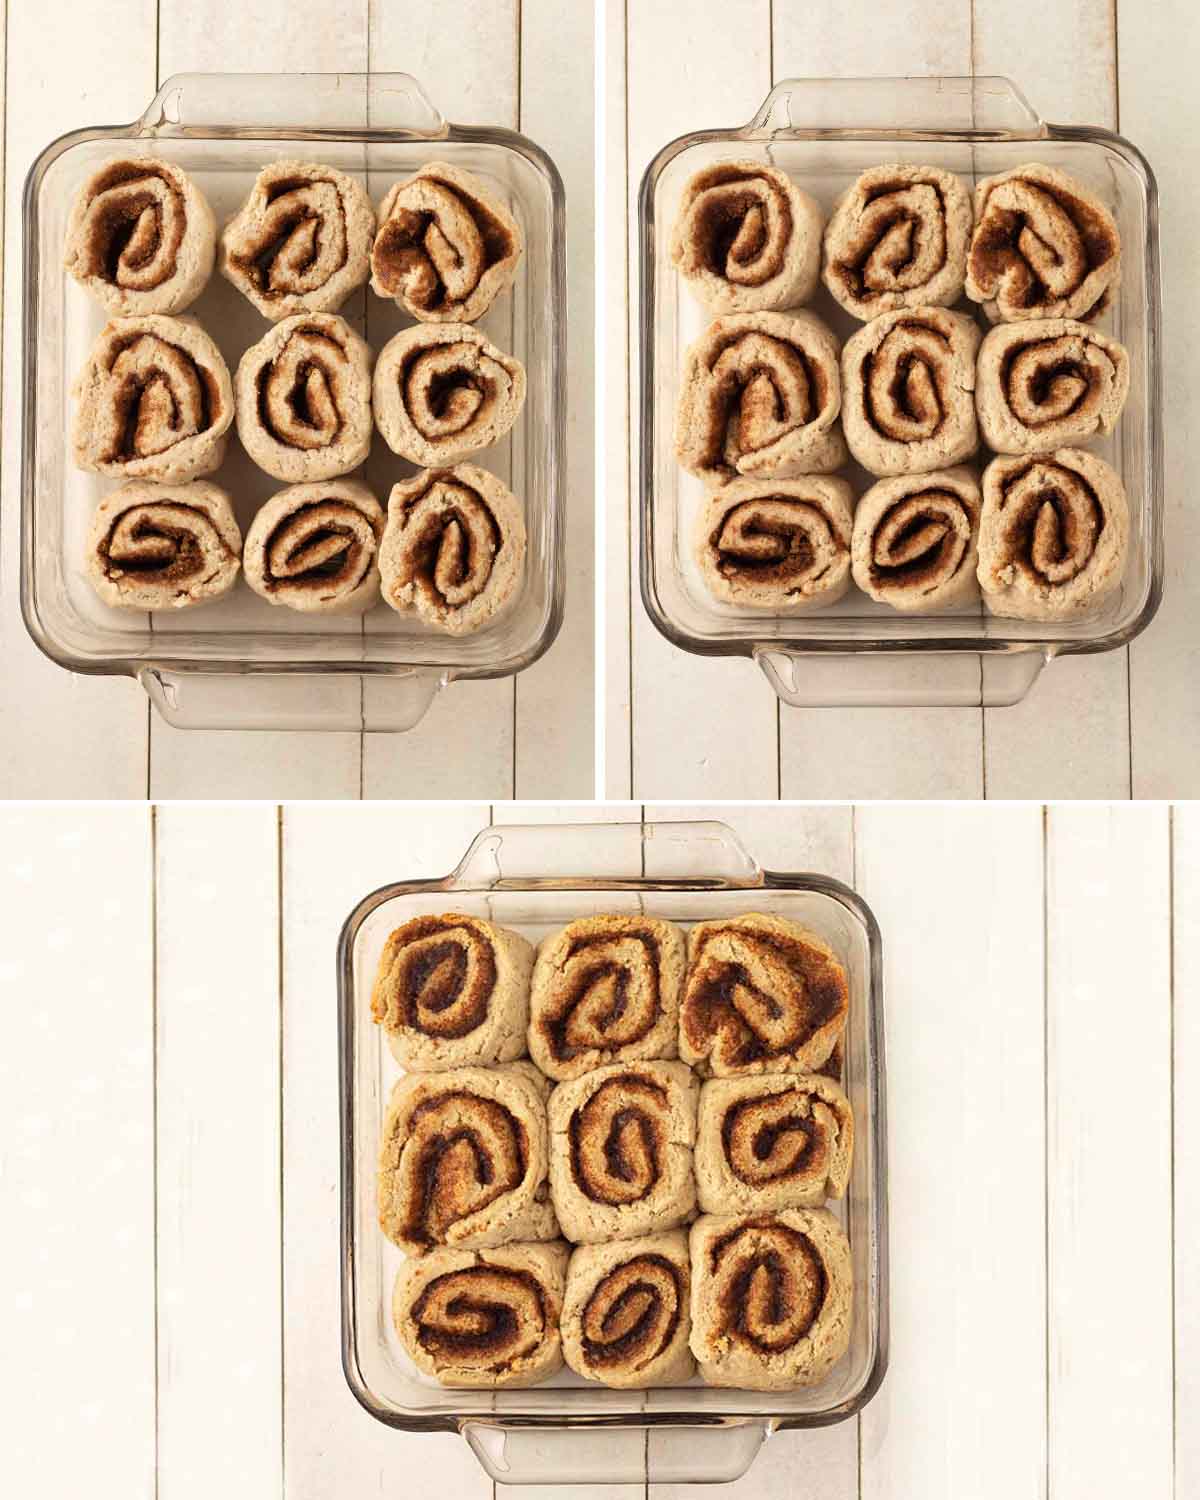
The image on the top left below shows the rolls immediately after they've been sliced and placed in the dish and the image on the top right shows how the rolls will look after they've rested.
Step 8 - Bake
Just before the one hour has passed, preheat the oven and once the rise time has passed and the oven is ready, place them in and bake.
After they've finished, remove from the oven and allow them to cool for a while. The image at the bottom is the baked rolls.
Step 9 - Make the Icing
You can use the icing recipe provided, or you can make my vegan cream cheese frosting for them.
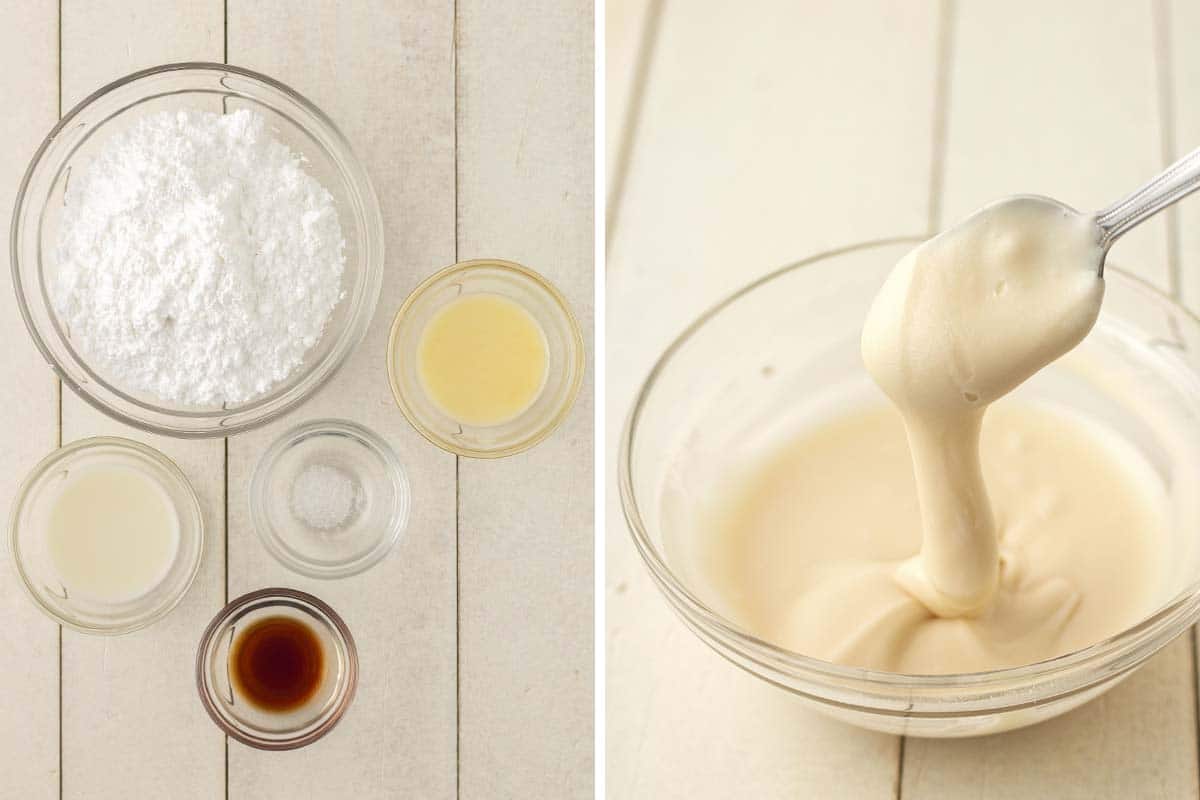
While the buns are cooling, gather the following five ingredients: powdered sugar, melted butter, non-dairy milk, vanilla, and salt.
NOTE: Not all powdered sugar is vegan, look for a brand that's organic (organic sugars are always vegan) or one that is marked as vegan on the label.
Mix all of the ingredients together in a bowl and the result is the richest and most creamy vegan icing for cinnamon rolls you've ever had!
Step 10 - Ice the Buns
After the buns have cooled, spoon and spread the icing onto them. If you aren't going to serve them all at the same time, just add the frosting to the buns that will be served right away.
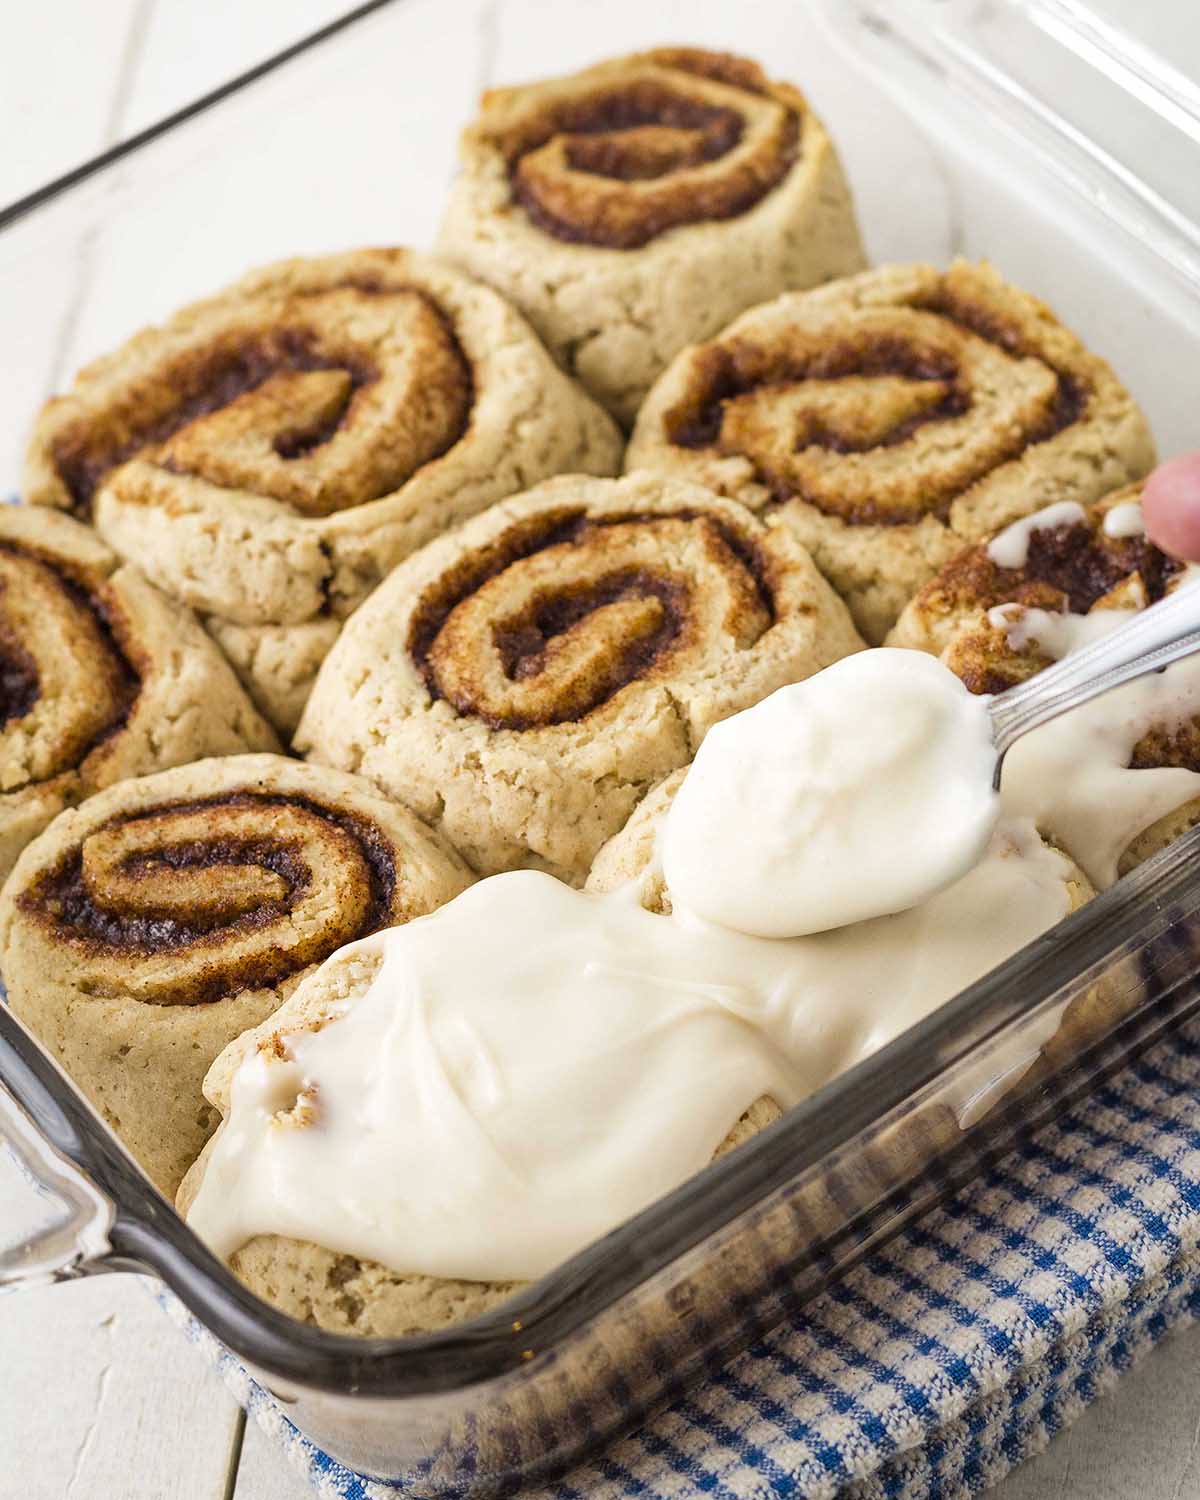
And that's it! You've made it through all the steps, now it's time to devour the best gf vegan cinnamon rolls you've ever had!
For Overnight / Make-Ahead Rolls
Do all steps up to #8 and then cover the baking dish tightly with plastic wrap and put it in the refrigerator so the rolls can slowly rise overnight.
In the morning, remove the dish from the fridge and allow it to sit on the counter at room temperature for 1 hour, then start back at step #9.
What's the Texture Like?
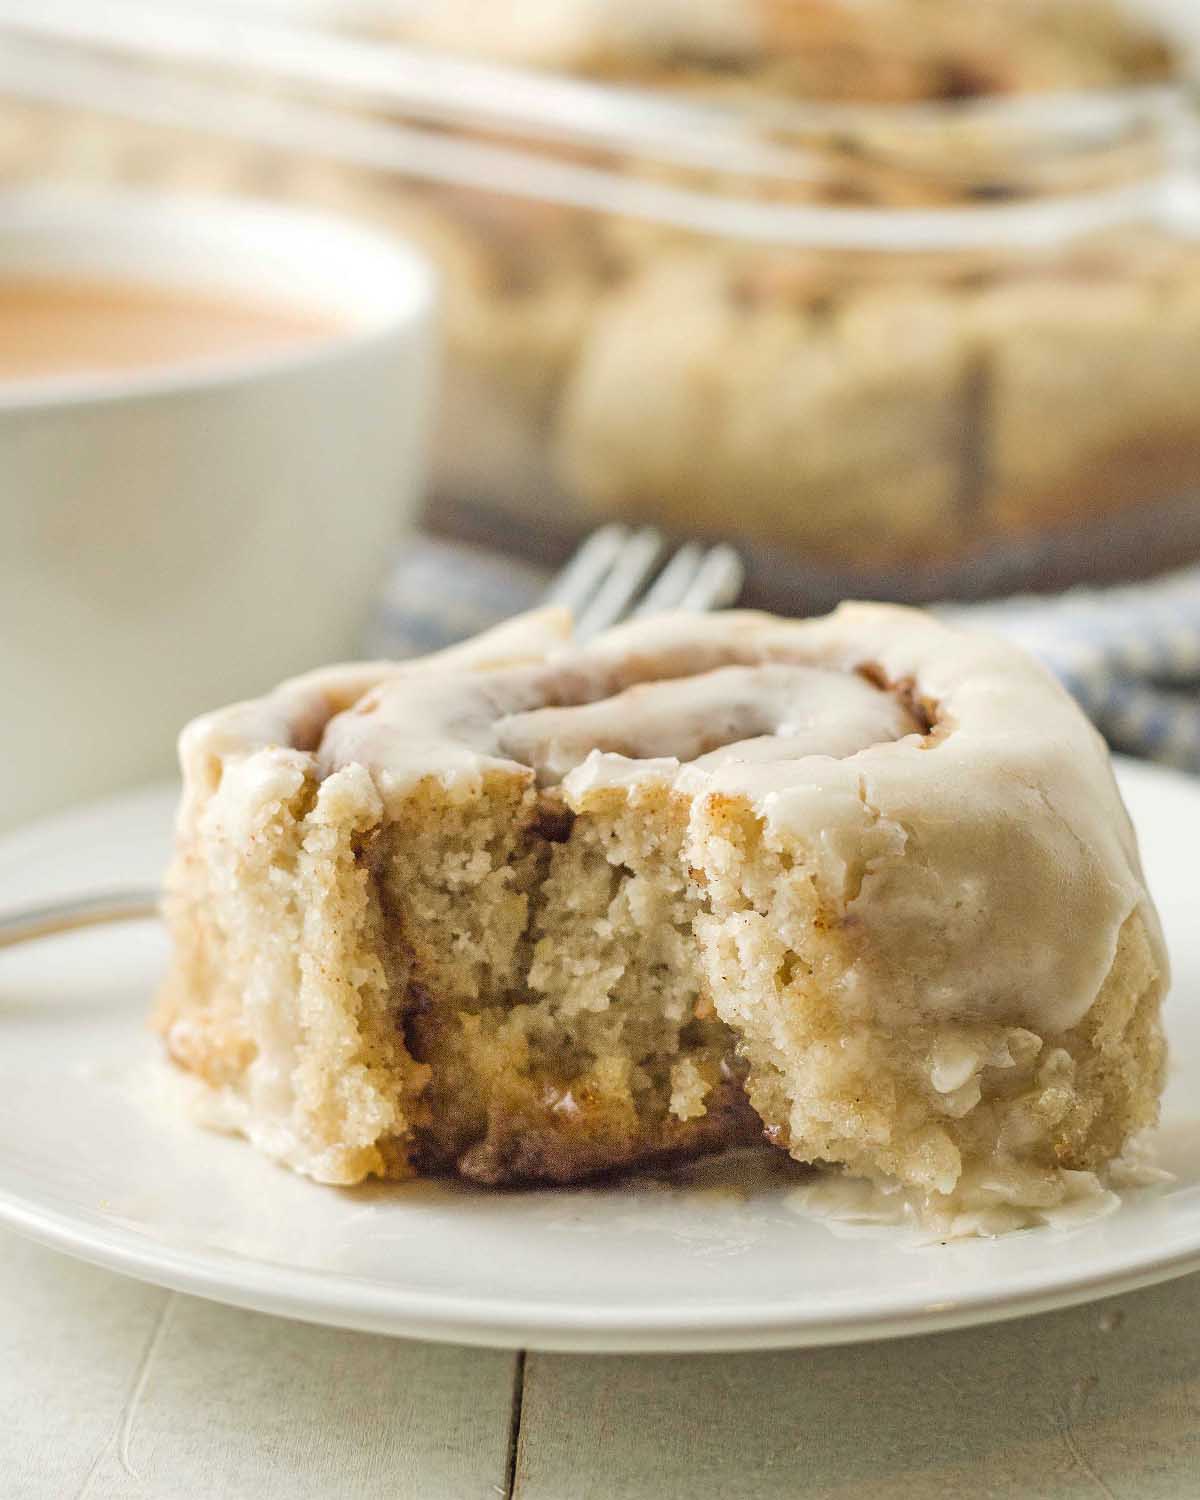
Soft, tender, fluffy, and gooey, thanks to the filling and the icing...and so delicious. See the picture below.
There's no need to miss out when you're vegan + gluten-free, almost everything can be made vegan AND gluten-free (well, almost anything!)
Storing Leftovers
Leftover icing can be placed in an airtight container and kept in the refrigerator. Remove from the fridge about an hour before you need it so it can get back to room temperature.
These rolls are best on the day they're made, but if you have leftovers, keep them in a covered airtight container at room temperature for up to 2 days.
If they're not done after 2 days, move the container to the refrigerator for up to 3 more days. When you're ready to serve them, reheat and they'll be just as delicious and as soft as they were on day 1. Allow them to cool slightly before icing.
Expert Tips for Success
- Make sure your yeast and baking powder are fresh. These are the two ingredients that make the rolls rise and get that nice soft texture that a cinnamon roll needs.
- Make sure that your milk is not too hot and not too cold. It needs to be within the correct temperature range to activate the yeast properly, which is in the 100° F - 110° F (38° C - 43° C) range. If you don't have a thermometer, it should be lukewarm (warm to the touch, but not hot).
- Don't skip the apple cider vinegar. Yes, it's a strange ingredient to add to a cinnamon roll recipe, but it helps the yeast to grow which in turn will help your rolls to expand and rise better. White vinegar can be used instead if you don't have apple cider vinegar.
- Measure your flour correctly. Too much flour in this recipe will result in rolls that are tough, hard, and not soft and fluffy. Measuring all ingredients correctly is essential in any baking recipe, this one is no exception, so please read my article about how to measure flour correctly).
- Don't overwork the dough or your rolls may turn out tough.
- Don't roll / press the dough out too thin or you will have trouble slicing the dough, it needs to be at least ¼ of an inch thick.
- Make sure to place the rolls in a warm, draft-free place to rise. If it's not warm enough, they won't rise properly and if it's too warm they'll rise too fast and have an unpleasant yeast flavour. I like to place them in my oven with the light on. If you have a "proof" setting on your oven, this is the perfect time to use it.
- Follow the recipe exactly as it's written for the very best results.
- If you're making these for a special occasion, give the recipe a test run before the big day.
EMAIL SIGN UP FORM
FAQ
I've only tested this recipe with Bob's Red Mill 1-to-1 Flour in the blue bag (NOT the red bag!) and I highly recommend using it for this recipe. It's rice flour based and contains xanthan gum (another very important ingredient for this recipe). If another flour is used, your results may not be the same as mine.
No, but if you want to make cinnamon rolls with wheat flour, use my vegan cinnamon rolls recipe instead. (You can also try my pumpkin cinnamon rolls or my apple raisin cinnamon rolls.)
Yes! I've included instructions on how to do this in the recipe below.
Active dry yeast needs to be activated separately before using, and instant yeast can be mixed right into your dry ingredients. I have only made this recipe with active dry yeast (my preference because it's easy to tell if it's active since it proofs separately). However, you can make this recipe with the other types, just add it directly to the dry ingredients, add the wet ingredients next, and then reduce the rise time by 10 minutes.
No, this recipe was developed specifically to work with yeast.
Yes! If you allow it to rise too long, the dough will not hold its intended shape, the texture will be off, and it will have an unpleasant, strong yeast flavour. So always follow the timing listed in the recipe.
Use your favourite. Personally, I like Melt Sticks and Becel Plant-Based Sticks, but other brands like Earth Balance and Miyokos will also work well.
Melted coconut oil can be substituted for the butter in this recipe, either unrefined or refined. If unrefined is used, there may be a slight hint of coconut flavour.
I use organic cane sugar for the dough and when proofing the yeast. White granulated sugar can be used instead. Coconut sugar can be used instead of the brown sugar for the filling. I have not baked with sugar substitutes, so I'm not sure if any of them will work in this recipe. Liquid sugars will not work without altering the other ingredients.
When testing this recipe, I tried aquafaba but I was not happy with the results. A chia egg will work but you will be able to see the chia seeds in the rolls, so keep that in mind.
If You Make This Recipe...
Tell me about it! I spent a lot of time perfecting it, so I'd love to hear how things went for you.
Please leave me a comment and rating below or you can also post a picture to Instagram and tag me (you can find me here: @delightfuladventures)
You can help others to find this vegan gluten-free cinnamon rolls recipe by pinning it to one of your food boards on Pinterest. Click here to pin it now!
And If You Like This Recipe...
You may also like these!
- Vegan Gluten-Free Hot Cross Buns
- Cinnamon Sugar Vegan Doughnuts
- Baked Cinnamon Apple Slices
- Vegan Apple Galette
- Vegan Blueberry Galette
- Vegan Gluten-Free Pie Crust
Vegan Gluten-Free Cinnamon Rolls
Suggested Equipment:
Ingredients:
Wet Ingredients
- 1 tablespoon ground flax seeds
- 3 tablespoons water
- 1 cup (240ml) unsweetened dairy-free milk (warmed to 100° F – 110° F (38° C – 43° C)
- 2 ¼ teaspoons active dry yeast
- 1 teaspoon granulated sugar
- ¼ cup (57g) melted unsalted vegan butter (cooled down)
- 1 teaspoon apple cider vinegar
Dry Ingredients
- 2 ½ cups + 1 tablespoon (380g) gluten free flour **see important note about flour below**
- 2 teaspoons baking powder
- ½ teaspoon salt
- ¼ cup (50g) granulated sugar
- ½ teaspoon ground cinnamon
Filling
- ½ cup (100g) brown sugar packed
- 2 teaspoons ground cinnamon
- 2 tablespoons melted unsalted vegan butter
Icing
- 1 cup (120g) powdered sugar
- 1 tablespoon melted unsalted vegan butter
- 1 tablespoon unsweetened dairy-free milk
- ½ teaspoon vanilla extract
- ⅛ teaspoon salt
Instructions:
- Grease an 8-inch x 8-inch glass baking dish OR an 8-inch round cake pan, set aside.
- Prepare your flax egg by whisking together ground flax seeds and water. Set aside to thicken.
Proof the Yeast
- In a medium bowl, add the yeast, 1 teaspoon of sugar, and the warm milk. Stir and set aside for 10 minutes.
Prepare Dry Ingredients
- In a large bowl, add the gluten free flour, baking powder, salt, sugar, and ground cinnamon and whisk. Set aside.
Prepare Filling
- In a small bowl, mix the brown sugar and the cinnamon. Set aside.
Prepare Dough
- Once your yeast has been proofed, add the flax egg, melted butter, and apple cider vinegar to the yeast mixture and stir.
Prepare Rolls
- Brush some oil onto a large piece of parchment paper.
- Place the dough on top of the oiled parchment paper and using your hands, form it into a square (this helps to form it into the proper shape).
- Using your hands, press the dough into a 10-inch long x 14-inch wide rectangle. If you prefer to use a rolling pin, add a little flour to the entire top surface of the dough and place another piece of parchment paper on top of the dough and gently roll it out to the correct dimensions.
- Brush the melted butter on top of the rolled out dough.
- Sprinkle the filling on top of the dough, leaving about a 1-inch space at the top edge (as shown in the image above).
- Using the parchment paper, slowly roll the dough away from you (as shown in the image above).
- With the seam side down, using a sharp knife, slice the dough into 9 rolls (roughly x 1 ½" each) and place them in the baking dish (or cake pan). If using a cake pan, slice into 8 rolls (roughly 1 ¾") rather than 9.
- Carefully place the rolls in the baking dish.
- Cover with a kitchen towel and place in a warm area to rest for one hour. If your oven has the proof setting, you can use it here.
- Just before the one hour has passed, preheat oven to 350° F (177° C).
- Once the rise time has passed and the oven is ready, place the baking dish into the oven.
- Bake for 24 minutes. Remove from oven, place the dish on a cooling rack, and allow to cool for a few minutes.
Prepare Icing
- Add all of the icing ingredients to a small bowl and mix until smooth.
- Once the rolls are warm and no longer hot, spread the icing onto the rolls. If you aren't going to serve all of them at the same time, add the frosting only to the buns that will be served right away.
Recipe Notes:
- Please read all of the information, tips and FAQ info above and the info below before making this recipe.
- It’s important to know that different gluten-free flour blends use different ingredients and ratios, so results will vary if you substitute. I have never used any other brand of gf flour to make this recipe (other than Bob’s Red Mill Gluten Free 1 to 1 Baking Flour (Amazon link) in the blue package, NOT the red package), so please know that your results may not be the same as mine if you substitute with another gluten-free flour blend. The weight listed above is for this specific brand of flour.
- If you cannot use the flour I use, be sure to use a rice based gluten-free flour blend and if the brand you’re using doesn’t contain xanthan gum in the ingredient list, add 1 ½ teaspoons to the dry ingredients, and again, your results may not be the same as mine if a different flour blend is used.
- This recipe will NOT work with coconut flour or any other single gluten-free flour, it must be made with a blend.
- Don't miss that extra tablespoon of flour. This recipe calls for 2 ½ cups PLUS 1 tablespoon of flour, and yes, it really makes a difference in the final result.
- FOR OVERNIGHT / MAKE-AHEAD ROLLS: Do all steps up to #8 and then cover the baking dish tightly with plastic wrap and put it in the fridge so the rolls can slowly rise overnight. In the morning, remove the dish from the fridge and allow it to sit on the counter for 1 hour, then start back at step #10.
- Make sure your yeast and baking powder are fresh before using; these are very important ingredients that contribute to the rolls rising properly.
- When rolling out the dough, have a measuring tape nearby or you can mark guides on the parchment paper to ensure you get it to the correct size. It's important to not roll the dough too thin.
- Melted coconut oil can be substituted for the butter in this recipe, either unrefined or refined. If unrefined is used, there may be a slight hint of coconut flavour.
- Coconut sugar can be used instead of the brown sugar for the filling.
- Use the icing recipe provided or you can make my vegan cream cheese frosting for them instead.
- Store leftover icing in a airtight container and keep in the refrigerator. Remove from the refrigerator about an hour before you need it so it can get back to room temperature.
- Store leftover rolls in an airtight container at room temperature for up to 2 days. If they're not done after 2 days, move the container to the refrigerator for up to 3 more days. When you're ready to serve them, reheat them in the oven at 300° F (150° C) for 10 minutes or the microwave for 30 seconds. Allow them to cool slightly before icing.
- You can also freeze unfrosted rolls by wrapping each one individually and storing them in an airtight container for up to two months. Defrost at room temperature, warm them up, and then add frosting when you’re ready to serve them.
- Adapted from my vegan cinnamon rolls recipe and this gluten-free cinnamon rolls recipe.
- Nutrition info is based on 1 of 9 cinnamon rolls with frosting. Nutrition info is only to be used as a rough guide. Click here to learn how nutrition info is calculated on this website.



Craig says
Thank you SO MUCH for all your time spent on this recipe! It was well worth it and I am so grateful that I found it and tried it. I miss my mom's yummy homemade (not vegan and not GF) cinnamon rolls and I've tried many other recipes, but they don't come close to this! Granted, they are not the same as my mom's, but I wasn't expecting them to be as GF breads just do not have the same texture, but your recipe comes very close in terms of being tender, light, fluffy and oh so delicious! I read ALL of your instructions and notes--twice--and followed it to the letter (except I used coconut sugar) and they turned out perfect! Thanks again!
Gwen Leron says
You're very welcome, Craig! I'm so glad you gave the recipe a try. Thank you for reading through all of the fine details before getting started, that is so important to do for a recipe like this. I don't think anything will be like your mom's cinnamon rolls, but I am glad that these came very close for you 🙂 Thanks for taking the time to come back and leave your comment and rating, much appreciated.
Megan says
I tried to make these today but my dough was too sticky. Any suggestions? The only thing I did slightly different was 1/4 cup water with the milk for proofing the yeast. I used oat milk.
Gwen Leron says
Hi Megan, I am assuming you used an extra 1/4 cup of water and that you didn't replace 1/4 cup of the oat milk with water? If that is the case, that is what caused the dough to be sticky. No extra liquid is needed, the recipe is perfectly balanced as it is and the yeast will proof fine with just the milk. Not sure if it's too late, but I would add a little extra flour to the dough until it is no longer sticky and looks like the dough in the pictures. I hope this helps, let me know if I can help further!
Megan says
I only had 3/4 cup of oat milk so I used the 1/4 cup water to make 1 cup of liquid. I ended up spraying the top of the dough with avocado oil and it made it so I could work the dough. I’m going to bake them in about 20 minutes.
Gwen Leron says
Hi Megan, okay, that makes sense, that you replaced 1/4 of the milk with water to make up the 1 cup. That is fine and should not cause the dough to be extra sticky. Did you use the same flour I used? The Bob's Red Mill 1 to 1 in the blue bag? Different gluten-free blends absorb liquids differently, so if you subbed with a different one, that could be the cause. Other than that, it could be a measuring error. Either way, it sounds as if you got things under control, please check back in and let me know how things turn out!
Megan says
They turned out delicious! Not pretty but my kids gobbled them up and I will be using this recipe for our family Christmas 🙂
Gwen Leron says
Wonderful news, Megan! I am so glad that it all worked out for you. Enjoy!
Craig says
I just made these and found the dough to be rather sticky, but I wasn't surprised as most GF doughs are sticky--I rubbed a little oil on my hands and also found that using the "heels" of my hands to push the dough into shape (rather than my fingertips) helped a lot. They came out great!
Amber says
This recipe rocks! After trying so many other recipes that produced hard rocks "ha-ha." These have become a weekend favorite for my husband and myself. I was only recently diagnosed with celiac disease add that to being a 27 year long vegan and I wasn't sure what how to make baking changes with GF flour. So, thanks for the inspiration.
Gwen Leron says
I am SO happy you tried the recipe and loved it, Amber! I spent such a long time working on this one to make it perfect, a lot of my first tests came out like rocks, too! 🙂 So I am so glad to know this. Thank you so much for taking the time to leave your note and rating, I appreciate it very much.