This page may contain affiliate links. Click to learn more. As an Amazon Associate I earn from qualifying purchases.

Have you ever wondered how to make aquafaba at home? This post contains everything you need to know, including how to make it from dried chickpeas on your stove top, in your Instant Pot / pressure cooker, AND in your slow cooker.
After reading through, you’ll have all the answers on making homemade aquafaba so you can skip the canned stuff!

Save This Recipe!
In a hurry? Drop your email below, and this recipe will be sent straight to your inbox for later. You'll also get fresh recipes every week! You can unsubscribe anytime.
If you've ever wondered: Can I make my own Aquafaba?, the answer is YES! Of course, the quickest way to get your hands on it is buying a can of chickpeas, but if you want to stay away from canned chickpeas, everything you need to know is below.
Aquafaba, (which is also referred to as: chickpea brine / chickpea water / chickpea liquid / chickpea juice /garbanzo bean water / bean liquid / vegan egg white) is an egg substitute and one of those odd ingredients that just appeared out of nowhere a few years ago.
I'll admit, I was very late jumping onto the aquafaba train, but once I got on board, there was no turning back. I now use it to make quite a few recipes!
Making it yourself is cheaper, you get way more than you would from a can, PLUS, you'll get the satisfaction knowing that you made it yourself!
Before I show you how to make aquafaba at home, let's go through a little bit of interesting background you may be wondering about.
What is Aquafaba?
It's a magical ingredient that can be used as an egg white replacement in savoury and sweet vegan and allergy-friendly recipes.
You can use it to make things such as chocolate mousse, cakes, mayonnaise, whipped cream, coconut macaroons, meringues, royal icing, marshmallows, cocktails, as an egg wash, as a coating for crispy recipes, and SO MANY other things.
And why is it called aquafaba? Well, aqua = water faba = bean. Simple as that.
Is Aquafaba Made Only from Chickpeas?
It can be used either use straight from a can of chickpeas or from a can of black beans, white beans, and even kidney beans.
My go-to has always been chickpeas because, while the liquid is a golden colour, when it whips up, it becomes white. The colour remains neutral in recipes and it has a mild smell and flavour that disappears in recipes.
How Does It Work?
No one fully knows that answer to this question, which is why I referred to is as "magical," above! It is thought that the proteins and starches from the chickpeas play a role but there are other factors at play that have not been fully researched.
If you're wondering how to whip it, see my post all about whipping and using an aquafaba egg replacement.
So now that you have all of these interesting facts to share with friends and family when you make them one of your aquafaba treats, let's get into how to make aquafaba!
Before you get started...
...there is one important rule you must follow in order for success and that is to make sure that all tools, bowls, spoons, whisks, pots, jars etc. that will come into contact with the chickpeas and aquafaba be free from any oil and oil residue. Oil will prevent your finished aquafaba from whipping.
I recommend using a metal or glass bowl to whip it and not plastic since plastic can be porous, not wash properly, and can hide oil residue.
How to Make It
(Note: I’ve outlined the step-by-step on how to make it here, but find the full recipe, ingredients, timing, and directions for all cooking methods at the end of this post.)
I've outlined the separate methods to make it (stove top, Instant Pot / pressure cooker, or slow cooker) and tested several times to streamline and simplify the method so you need the same amount of chickpeas and cooking water across the board.
There are a few different techniques for making aquafaba that you'll find, I find this method is the least complicated and easiest way. If you follow the directions exactly as they're written, you will have success, I have not had a fail with it yet.
No matter which method you choose to make it with, you'll start with the following steps. You can follow along with the images below:
1. Pick through your dry chickpeas to get rid of any pebbles or bad chickpeas.
2. Once that's done, rinse them, place in a bowl, cover with water and soak overnight.

3. After the chickpeas have soaked overnight, you'll notice that they have expanded. Drain the soaking water and give the chickpeas a rinse.
4. Place the chickpeas and cooking water in a pot, pressure cooker, or slow cooker. No need to add any salt, baking soda, or anything else. All you need in the pot is the soaked chickpeas and water.
Cooking On the Stove Top
After following the steps above, place the pot on the stove, bring to a boil, and then turn down to a simmer.

About That Foam On Top...
When cooking chickpeas (and plenty of other beans), you'll notice a layer of foam form on top of the cooking water. This is not aquafaba. It's not needed, so simply skim the foam off the top and discard it.

Cooking In the Instant Pot / Pressure Cooker
This is my favourite cooking method, simply because it's the most hands off of the three and because I find it produces the thickest, most viscous of the three methods, which makes whipping quicker.
Follow the standard steps above, and set the IP, walk away, and come back after the pressure has released.

Cooking In the Slow Cooker
Again, follow the standard steps above and set the slow cooker to either high or low heat using the timing mentioned below.
Once done, allow it to cool and then you're ready for the next step.

Separating the Chickpeas from the Cooking Liquid
After the cooling time has passed, you'll separate the chickpeas from the aquafaba by using a strainer as shown below. You'll then set it aside so it can fully cool off.
Straining will also filter out any smaller bits that broke off from the chickpeas while cooking. This is an important step because any bits left in your aquafaba can affect whipping later on.
You'll notice that the aquafaba is still quite watery at this point and you may wonder if it actually worked, not to worry. It's supposed to still be watery when you're at this stage, the real thickening happens during refrigeration, which will happen in the next step.

Refrigerate to Thicken
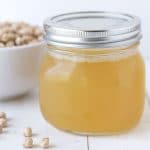
After the aquafaba has cooled, put it in a covered jar and place in the refrigerator overnight. In the morning, your aquafaba will be ready to use.
The final consistency should be similar to an egg white, a little slimy/viscous, not too thick, and not too watery.
Can the Cooked Chickpeas Be Used?
Yes! Because they have been in boiling and soaking in hot water for a longer period of time than what's usually needed for cooking chickpeas, they're going to be very soft.
Because of the softer texture, I like to use them for recipes like vegan pinwheels or hummus. They also work well in recipes that call for roasted chickpeas.
If you have a recipe like a curry that calls for chickpeas, just add them to the sauce towards the end of cooking since they don't need to be cooked and only need to be reheated.
How to Store
I store my aquafaba in a glass jar in the refrigerator, if I don't use it up within a week, I'll freeze what I have left in tablespoon portions in ice cube trays.

The trays I have hold one tablespoon per section, which is convenient. After they freeze in the trays, I remove the cubes and place them in a freezer bag.
I'll then write the date on the bag so I know how old they are. Frozen aquafaba cubes will last up to six months in the freezer.

Defrosting
When I'm ready to use them, I remove the correct amount of cubes I'll need, place them in a bowl on the counter and let them melt and come to room temperature. You can also thaw in the refrigerator if you aren't in a rush to use them or if you are in a rush, you can defrost them for a few seconds in the microwave.
How to Use Aquafaba
Use the following guidelines when using it as an egg replacement in baking:
- 3 tablespoons aquafaba = 1 whole egg
- 2 tablespoons = 1 egg white
When using, follow exactly what the recipe says to do, since each recipe is different. Some will have you whip it up to soft peaks, some to stiff peaks, some you will just need to beat until it's foamy.
It can also be used as a vegan egg wash for baked goods as well as a replacement for eggs when coating food for frying.
How to NOT Use Aquafaba
Like most vegan egg replacements (like flax eggs), it has its limitations. It's recommended to not use it as an egg replacement if you're trying to replace 3 or more eggs or egg whites (like in an angel food cake, for example). It works best in recipes that need to just have one or two eggs replaced.
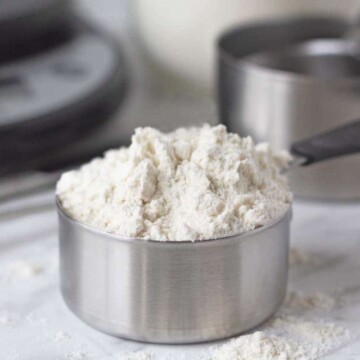
Aquafaba will also NOT work on its own to make things like scrambled eggs, omelettes, or quiches. If you want to make one of those things, you will need a base for the recipe such as chickpea flour, tofu, etc.
How to Whip It
Now that you have a nice supply of aquafaba, you need to learn how to whip it! I outline how to do that and tell you everything you need to know in my aquafaba egg replacement post.
Aquafaba Recipes
These are just a few of the things you can make with your homemade aquafaba (note that in any recipe that calls for canned aquafaba, you can use your homemade aquafaba):
- Aquafaba Chocolate Mousse
- Aquafaba Macaroons
- Royal Icing
- ...and so much more!
Does it Smell Like Chickpeas? Will My Recipe End Up Tasting Like Chickpeas?
Homemade aquafaba on its own does have a mild chickpea small (canned chickpea aquafaba has a stronger smell) but the smell will disappear as you add it to your recipes. Your finished recipe will have no trace of chickpea smell or taste.
For Even More Info and Recipes...
Join the Aquafaba (Vegan Meringue - Hits and Misses!) group on Facebook where you'll find plenty of great tips, recipe ideas, and help if you run into any issues with aquafaba.
How to Make Aquafaba
Suggested Equipment:
Ingredients:
- 1 cup dry chickpeas
- water for soaking
- 3 cups water
Instructions:
- Pick through chickpeas to remove any rocks or bad chickpeas. Rinse with fresh water.
- Add rinsed chickpeas to a large bowl and add enough water to cover the chickpeas. Cover the bowl with a tea towel or plate and let soak for at least 8 hours or overnight.
- When the soaking time has ended, drain the water and rinse the chickpeas again.
Make On the Stove Top:
- Add chickpeas and 3 cups of fresh water to a medium pot and set heat to medium-high. Bring to a boil and then turn down to low and simmer for 45 minutes.
- Check occasionally and skim off any foam that has formed on top (see image above).
- When simmer time has ended, turn the stove off, remove pot from heat, cover, and let sit for 1 hour.
- After the hour has passed, place a strainer over a jar and pour the chickpeas and aquafaba into the strainer to separate the two. (see image above)
- Set the chickpeas aside to use in other recipes and allow the jar of aquafaba to cool. When it has fully cooled, cover and place in the refrigerator to chill for at least 8 hours.
- This method will yield 1 ¼ cups of aquafaba.
Make In an Instant Pot / Pressure Cooker:
- Add chickpeas and 3 cups of fresh water to Instant Pot.
- Place and lock lid onto the pot and close the pressure release valve. Set to pressure cook for 20 minutes. Pot will take roughly 12 minutes to come to pressure.
- After the time has ended, let the Instant Pot naturally release pressure. This will take roughly 33 minutes.
- After pressure has come down, unplug pot, open valve to venting, and let sit for 1 hour.
- After the hour has passed, place a strainer over a jar and pour the chickpeas and aquafaba into the strainer to separate the two.
- Set the chickpeas aside to use in other recipes and allow the jar of aquafaba to cool. When it has fully cooled, cover and place in the refrigerator to chill for at least 8 hours.
- This method will yield 2 cups of aquafaba.
Make In a Slow Cooker:
- Add chickpeas and 3 cups of fresh water to slow cooker and set to low for 5 hours or high for 3 hours.
- When cooking time has ended, turn the slow cooker off, unplug, and let sit for 1 hour.
- After the hour has passed, place a strainer over a jar and pour the chickpeas and aquafaba into the strainer to separate the two.
- Set the chickpeas aside to use in other recipes and allow the jar of aquafaba to cool. When it has fully cooled, cover and place in the refrigerator to chill for at least 8 hours.
- This method will yield 2 cups of aquafaba.
Recipe Notes:
- Please read all of the helpful information above and below before making this recipe.
- It is important that all tools you will be using be free from any oil and oil residue. Oil will prevent your aquafaba from whipping.
- There is no need to add any salt, baking soda, or anything else to the chickpeas at any time.
- Timing and yield info above is based on the stove top method.
- The stove top method will yield 1 ¼ cups of aquafaba and the pressure cooker and slow cooker methods will yield 2 cups.
- I use a 6 quart Instant Pot. If yours is smaller or bigger, everything will remain the same, the only difference will be the times I mention for the pot to come to pressure and come down from pressure.
- If for some reason your aquafaba did not thicken after the chilling time in the refrigerator, test by taking a couple tablespoons and whip with a hand mixer for a few minutes to see if it whips up properly. Sometimes, even though it looks watery, it will still work. If the test fails and it does not whip, you can thicken it up by simmering it on low in a pot on the stove so some of the water evaporates and it’s reduced by about a quarter. Measure it before adding to the pot and measure it after so you can see how much it has been reduced by.
- Nutrition info is for 1 tablespoon of aquafaba and is to be used only as a rough guide. Click here to learn how nutrition info is calculated on this website.
Patricia Paquette says
Love, LOVE your website site !! I personally ALWAYS MAKE 3x 3/4 cup of dry Chickpea that I soak overnight & cook for 42-45 minutes & draine in a strainer & put 1 1/2 cup of COOK CHICKPEA in a MASON JAR that I cover with the AQUAFABA this is a COMPLETE REPLACEMENT of a can of CHICKPEA. I keep them in the fridge. And keep the rest of the AQUAFABA IN ANOTHER MASSON JAR for 3 days MAX in the fridge!!
Gwen Leron says
I'm glad to know you like the recipe, Patricia! Enjoy! And thanks for circling back to leave your review, I really appreciate it.
Beck says
I see a lot of using chickpea water as an egg substitute for baking. Is it suitable for frying or scrambling? Also could it be dehydrated & powdered?
Gwen Leron says
Hi Beck, it's not suitable for frying or scrambling on its own. You can find more info on the best ways to use it in this article: How to Whip and Use an Aquafaba Egg Replacement. As for dehydrating it to turn it into a powder, I have never tried that so I can't advise. Interesting thought, though! I know there is a brand out there that sells it as a powder, so it's possible, I just don't know the process to do that and how complicated it would be. I hope this helps!
mod says
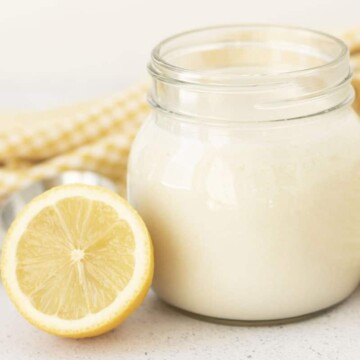
I used unwhipped aquafaba in my vegan mayo recipe and it thickened as it should.
Just ensure you add the oil last, in a slow stream.
Gwen Leron says
I'm glad it worked well for your mayo!
Lynn says
Why do you soak the chick peas when you do them in the pressure cooker. I thought that is why you use the instant pot, so you don't have to soak the beans?
Gwen Leron says
Hi Lynn, that's a good question. There are a couple of reasons why I always soak them, even if I am making the aquafaba in my pressure cooker. Soaking makes the cooking time shorter and it also makes the chickpeas more digestible once cooked (I always use the cooked chickpeas for other recipes). That's just the way I do it for the pressure cooker, I am quite sure that you can make aquafaba in your pressure cooker (in the slow cooker and on the stovetop too!) without soaking the chickpeas, I just have not tested it that way to know the proper timing etc., I've always done it with a presoak. When I have some time, I think I will test that out. I hope this helps!
Laurie B says
Ok, everyone! I went ahead and used those 3 c of chickpeas, soaked overnight, then cooked in my slow cooker. Drained and cooled the aquafaba. Since I had too much, I bought 2 ice cube trays and froze most of it. The cube openings were only 1 1/2 tbsp so I know for the future it will take 2 cubes for 1 egg replacement. ANYWAY I used my whipped aquafaba for a no oil no butter banana nut bread. It was easy peasy and I have to personally thank Gwen for her outstanding directions on this. I do have vegan friends to cook for and now thanks to this website, I will never be intimidated again!
Gwen Leron says
I'm so glad everything worked out for you, Laurie! Thanks for taking the time to come back and leave your comment and rating, much appreciated!
Laurie B says
Shoot! I bought too many chickpeas (3c), so I am tripling this recipe. Once I can put it in the slow cooker, should it be 9c of water? I am using filtered water. Freezing it for sure! Going to make a few vegan dishes for Steve's son. Will report back, but in the meantime, I am super grateful to have found this!
Gwen Leron says
Hi Laurie! Yes, you will need to adjust the water amount to account for the extra chickpeas. 9 cups of water for 3 cups of chickpeas is correct. Let me know how things go!
Fairlo says
Thanks and blessings for sharing this.. a later comer to this discovery and have been using the cans..
Gwen Leron says
You're welcome! It's great to be able to make it yourself. Enjoy!
Saranya says
Thanks for the recipe. I tried to make it myself. I pressure cooked the chickpeas and drained the water. I also whipped it. Everything comes perfect except the baked macroons are sour.
Please help me on the taste.
Gwen Leron says
Hi Saranya, I'm glad that the aquafaba turned out perfect for you. What macaroon recipe did you use, was it the one on this website? If so, I'm not sure why they would have turned out sour, I have never had that happen. Did you follow the recipe exactly as it is written when you were making the aquafaba? When making the macaroons, did you measure the apple cider vinegar correctly? Adding too much will give it an off taste, but not so much that the final macaroons would be sour. I'll need a little more info to help you troubleshoot the macaroons. Please let me know what recipe you used and if you made any changes to the recipe while making it.
Lauren Simmons says
Hi gwen when what do you do with the water the chickpeas have soaked in all night or for the 8 hours. Do you use that for anything is that aquafaba too or does that just get pour out, thrown out and not used for anything.
Gwen Leron says
Hi Lauren, the soaking water gets drained after the soaking time has ended, it's not needed. Once drained, give the chickpeas a rinse and then place them in fresh cooking water. Let me know if you have any other questions!
John says
I made some Aquafaba (cooked my chickpeas in my Crockpot).
I didn't soak my chickpeas overnight, but rather threw them directly out of the bag into the Crockpot and pressure cooked them for 50 minutes.
But I can't make the Aquafaba to foam when I whip it in my Stand Mixer. After the first failure, I boiled the remaining Aquafaba and reduced it by half (it caught a bit more consistency), but it still would not foam. I only get bubbles on the top. I know it's not an issue with the machine because I tested with Aquafaba from canned chickpeas and it foamed marvelously, but of course I want to use my own.
What am I doing wrong? 🙁
Gwen Leron says
Hi John, there are a bunch of things that could be happening. I list a lot of them in the "troubleshooting" section of this article: Aquafaba Egg Replacement. Give that article a read and see if anything sticks out to you. I'll also list a few things here. 1) It may sound silly, but do you have enough aquafaba in your stand mixer? I prefer to use my electric hand mixer because I find that the stand mixer beater does not always reach far enough into the mixer bowl to really whip the aquafaba well. I also find that the stand mixer takes longer. 2) Are you mixing for long enough? Sometimes it takes a long while for you to make any progress. 3) Did you refrigerate it overnight before whipping? 4) Was there any chickpea "residue" in the aquafaba? If so, you should strain it to get everything out.
Start with what I pointed out here and then read the article, I am sure something here or in the article will help. Let me know how things go!
Thao says
Can this recipe be doubled?
Gwen Leron says
Hi Thao, yes, it can be doubled.
Suzy says
I never thought of freezing aquafaba in ice cube trays! When I make my veggie stock I freeze like that and use 1 or 2 when I saute, but this is genius! I can do this if I used canned chickpeas as well, yes? Thank you so much!!
Gwen Leron says
Hi Suzy! Yes, you can freeze the canned stuff, too! I always have aquafaba cubes in my freezer so when I need them, they're there 🙂 Great idea to the same thing with veggie stock, too.