This page may contain affiliate links. Click to learn more. As an Amazon Associate I earn from qualifying purchases.
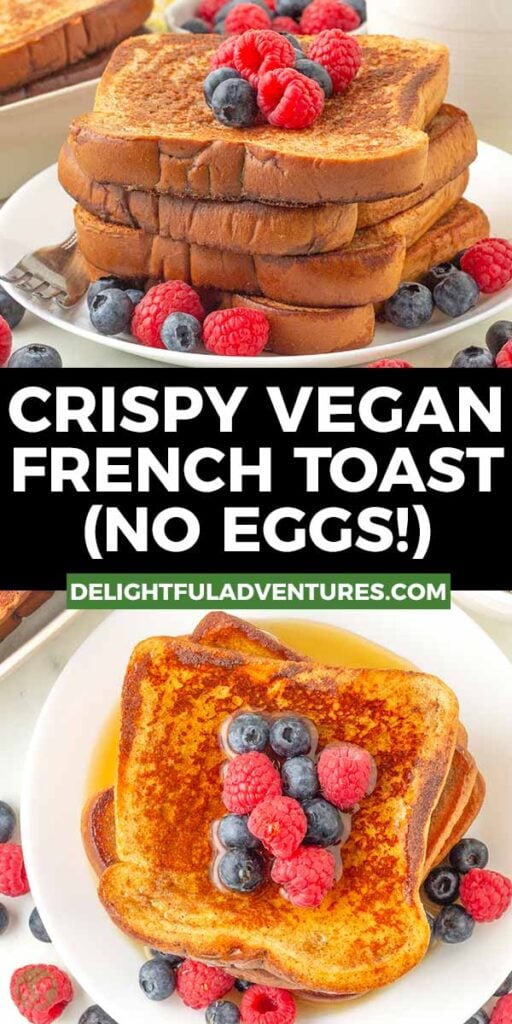
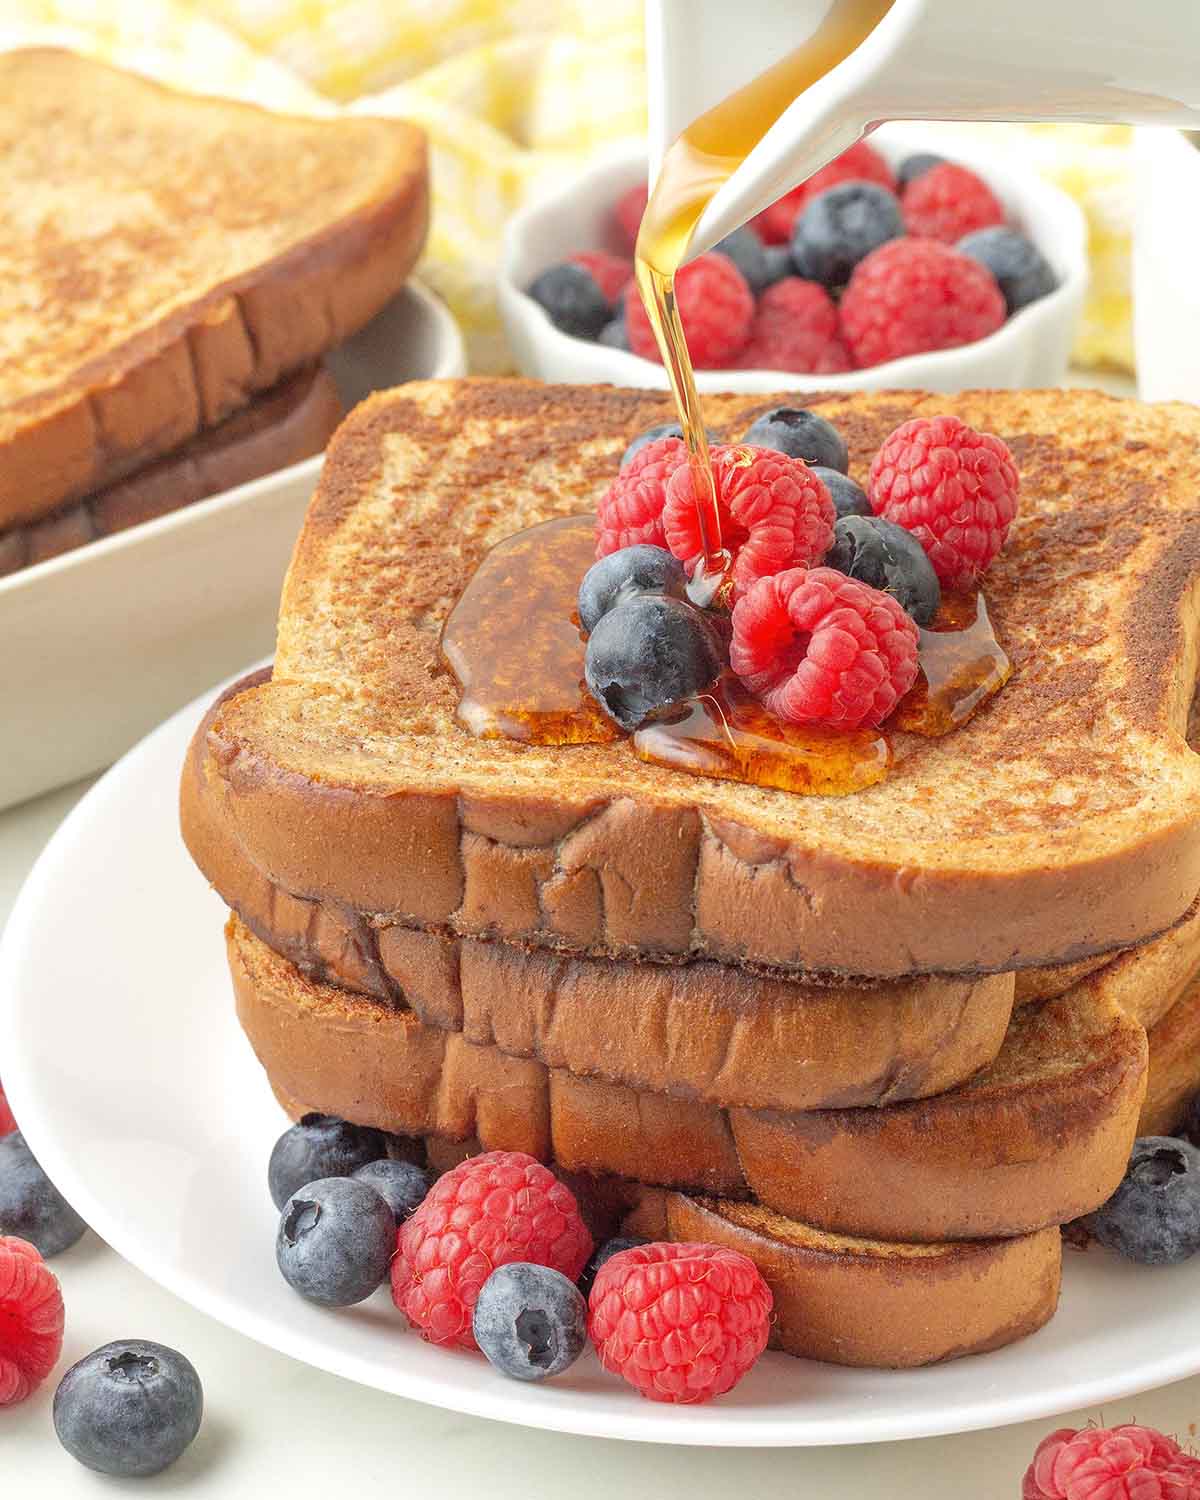
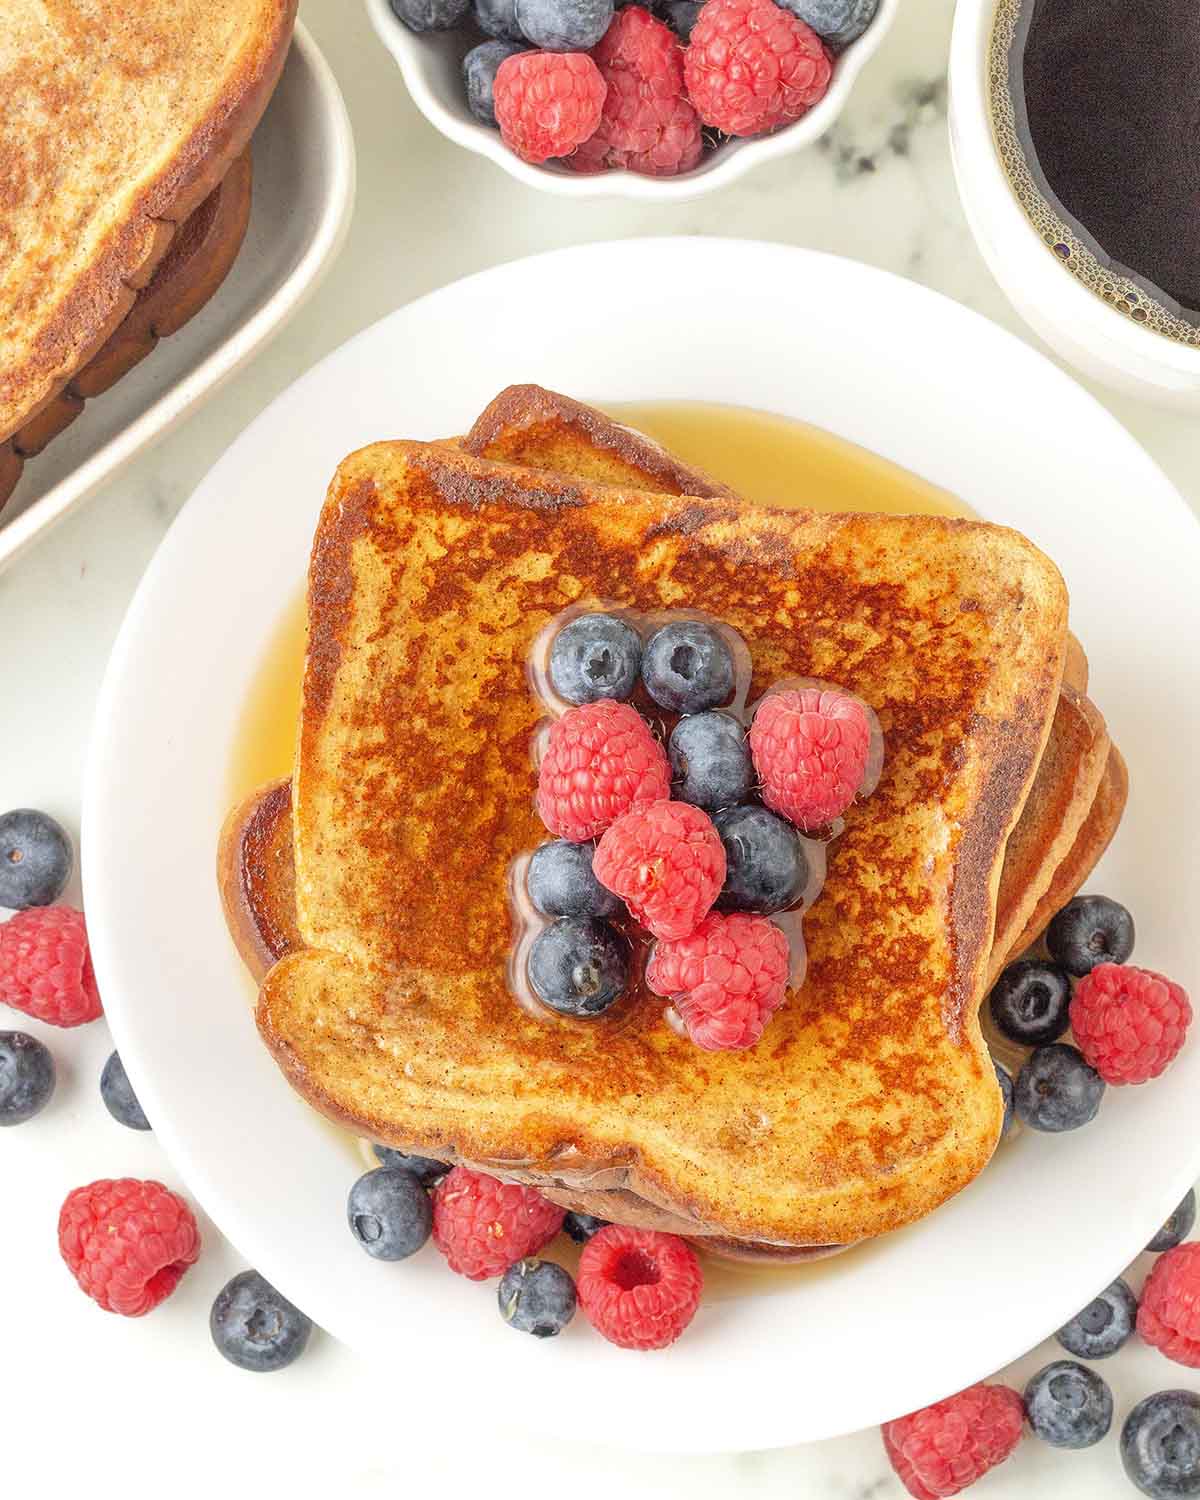
Golden and crisp on the outside and soft on the inside, this crispy vegan French toast is easy to make and uses simple ingredients you probably already have. It’s great for relaxed mornings, a casual brunch, or a special celebration, and it can be made gluten-free if needed.
It’s a simple dairy-free French toast recipe with no eggs that has the perfect texture, you’re going to love it!

Save This Recipe!
In a hurry? Drop your email below, and this recipe will be sent straight to your inbox for later. You'll also get fresh recipes every week! You can unsubscribe anytime.
When you think of crave-worthy, sweet vegan breakfasts, what are the first things that come to mind? For me, it's fluffy vegan pancakes, golden vegan waffles, and crispy vegan French toast.
Lucky for you, I already have recipes here for pancakes and waffles, but today, I'm going to share my recipe for satisfying, crowd-pleasing French toast that I hope becomes as much of a favourite in your home as it is in mine.
With this recipe, you'll get golden French toast that's crisp on the outside, soft and custardy on the inside, with a hint of spice and sweetness. How you decide to top them is totally up to you, but I'll give you some options below.
I’m going to share a lot of tips and pointers in this post, because while French toast without eggs is a simple recipe with just a few ingredients, there are a few things that can make or break it, even though they may seem like small things.
Be sure to read through everything before you start, and as always, if you have any questions, please feel free to ask in the comments below. I'm always glad to help!
Grab These Ingredients
Ingredient Notes + Flexible Options
(NOTE: Only ingredients with special notes are listed below. The full ingredient list can be found in the recipe card.)
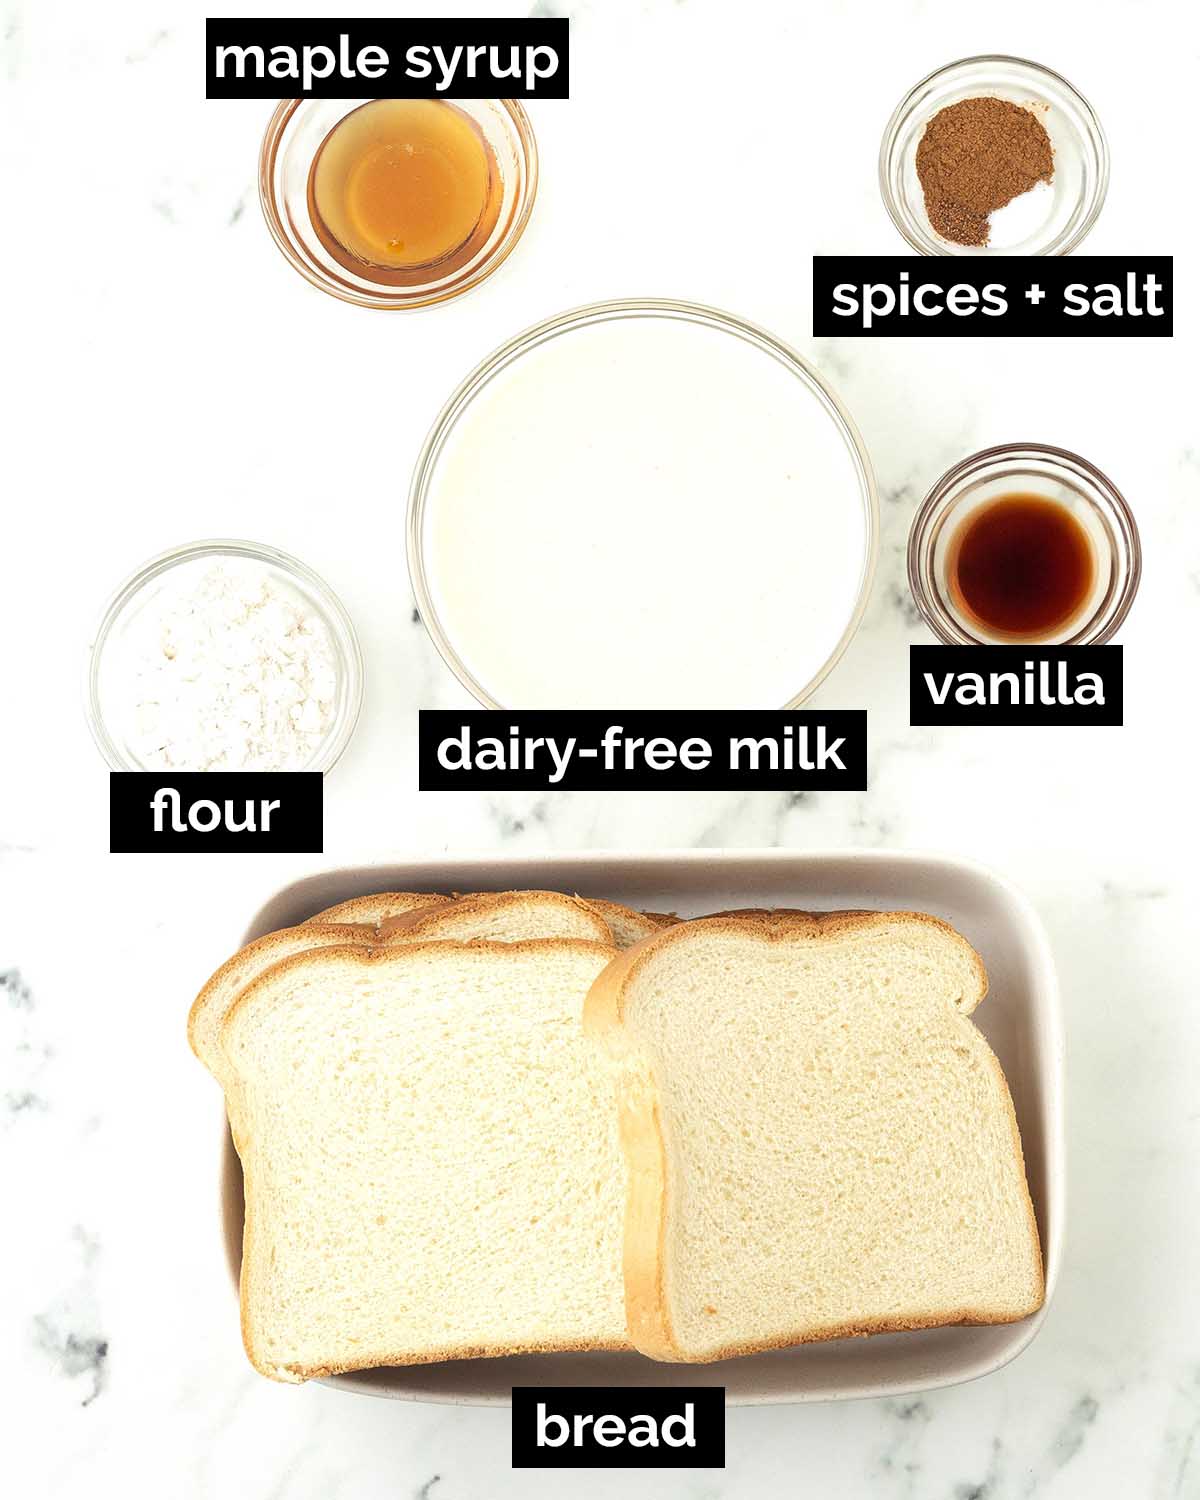
Bread - The bread is one of the things that can make or break your French toast. Stick with sturdy, thick slices that are dry rather than fresh. The bread doesn’t need to be stale, just dry enough to soak the batter up properly. Bread that's a few days old works well, but may still need to be dried. I’ll explain why dry bread is best and how to dry it below.
I’ve tested my French toast recipe with several types of bread, and my favourite is the one shown in the photos. It’s a thick-sliced, store-bought vegan brioche, with slices that are about three-quarters of an inch (2cm) thick. It holds up well while soaking up the batter evenly.
Other types of bread you can use are thick-sliced French bread or Italian bread, challah, Texas toast, thick-cut sandwich bread or bakery-made sandwich bread that you slice yourself so you can control the thickness.
Choose bread with a soft crust and a tight crumb so it absorbs the batter evenly and holds together while cooking.
Don't use super-fresh or thin-sliced bread. Bread like this will not hold up to the batter, and it will fall apart. Also, avoid rustic-style breads that have extra thick crust and lots of holes. The crust will become tougher as it cooks, and the holes will cause the slices to soak up the batter inconsistently.
For vegan gluten-free French toast: Use a thick-sliced vegan gluten-free bread and use gluten-free flour for the batter.
Flour - This recipe uses all-purpose flour (no cornstarch) to thicken the batter.
Dairy-Free Milk - Any type will work. I recommend soy or oat since they tend to be slightly thicker than other plant milks.
Spices - The cinnamon is a must, don't skip it, but the nutmeg is optional. Use it if you love nutmeg and want to bump up the spice flavour.
Let's Talk About Drying Out the Bread
This step is optional, so you can skip ahead if your slices are already dry.
If your slices are very fresh and still have moisture, there are a few simple ways to dry them out.
Using dry bread is important because dry bread soaks up the batter without becoming soggy. Bread that’s too fresh can fall apart or cook up too soft and soggy instead of crisp on the outside and tender inside.
When dried, the slices should feel dry and lightly toasted on the outside but still be flexible, and not hard or extra crusty. When you press them, they shouldn’t feel damp or squishy.
The Oven Method:
- Preheat oven to 275°F (140°C).
- Place the bread slices in a single layer on a wire rack set over a baking sheet.
- Bake for 12 minutes. Remove from oven and set aside.
Use a Toaster or Toaster Oven
Set your toaster or toaster oven to the lowest setting and watch the bread closely. Use short 30 to 60-second bursts and check after each one. You'll know they're dry when the slices are dry on the outside but still flexible.
If they start to crisp or turn brown, they’ve gone too far, and you'll need to start again with new slices, so keep a close eye on them. Once you get the hang of it, you'll know exactly what to look for.
Just Leave Them to Sit
Place the slices on a wire rack and let them sit at room temperature for a few hours until they feel dry on the outside but still bend easily.
How to Bring It All Together
(Note: I’ve outlined the step-by-step here, but find the full recipe, ingredients, and directions in the recipe card at the end of this post.)
Start by getting the pan ready. My preference when making French toast is to use a well-seasoned cast iron pan, but you can also use a good non-stick pan or a non-stick griddle. I don't recommend stainless steel, the French toast will stick.
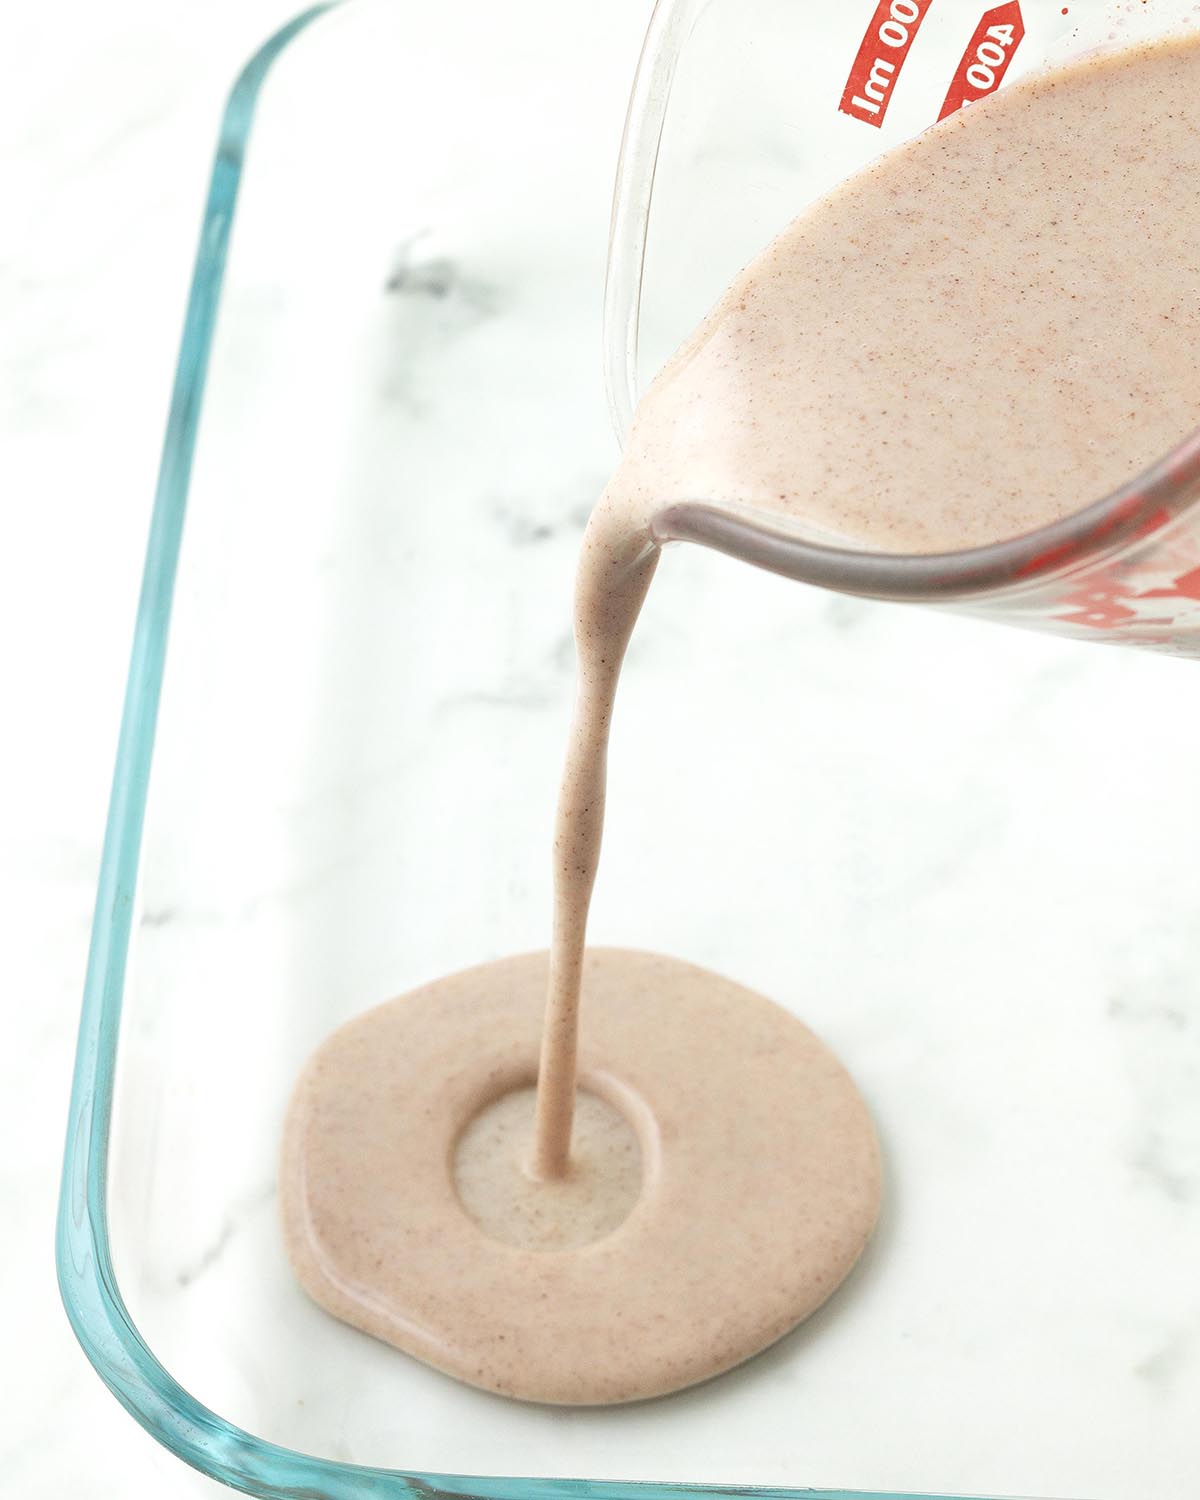
Whisk the batter ingredients and pour into a shallow dish.
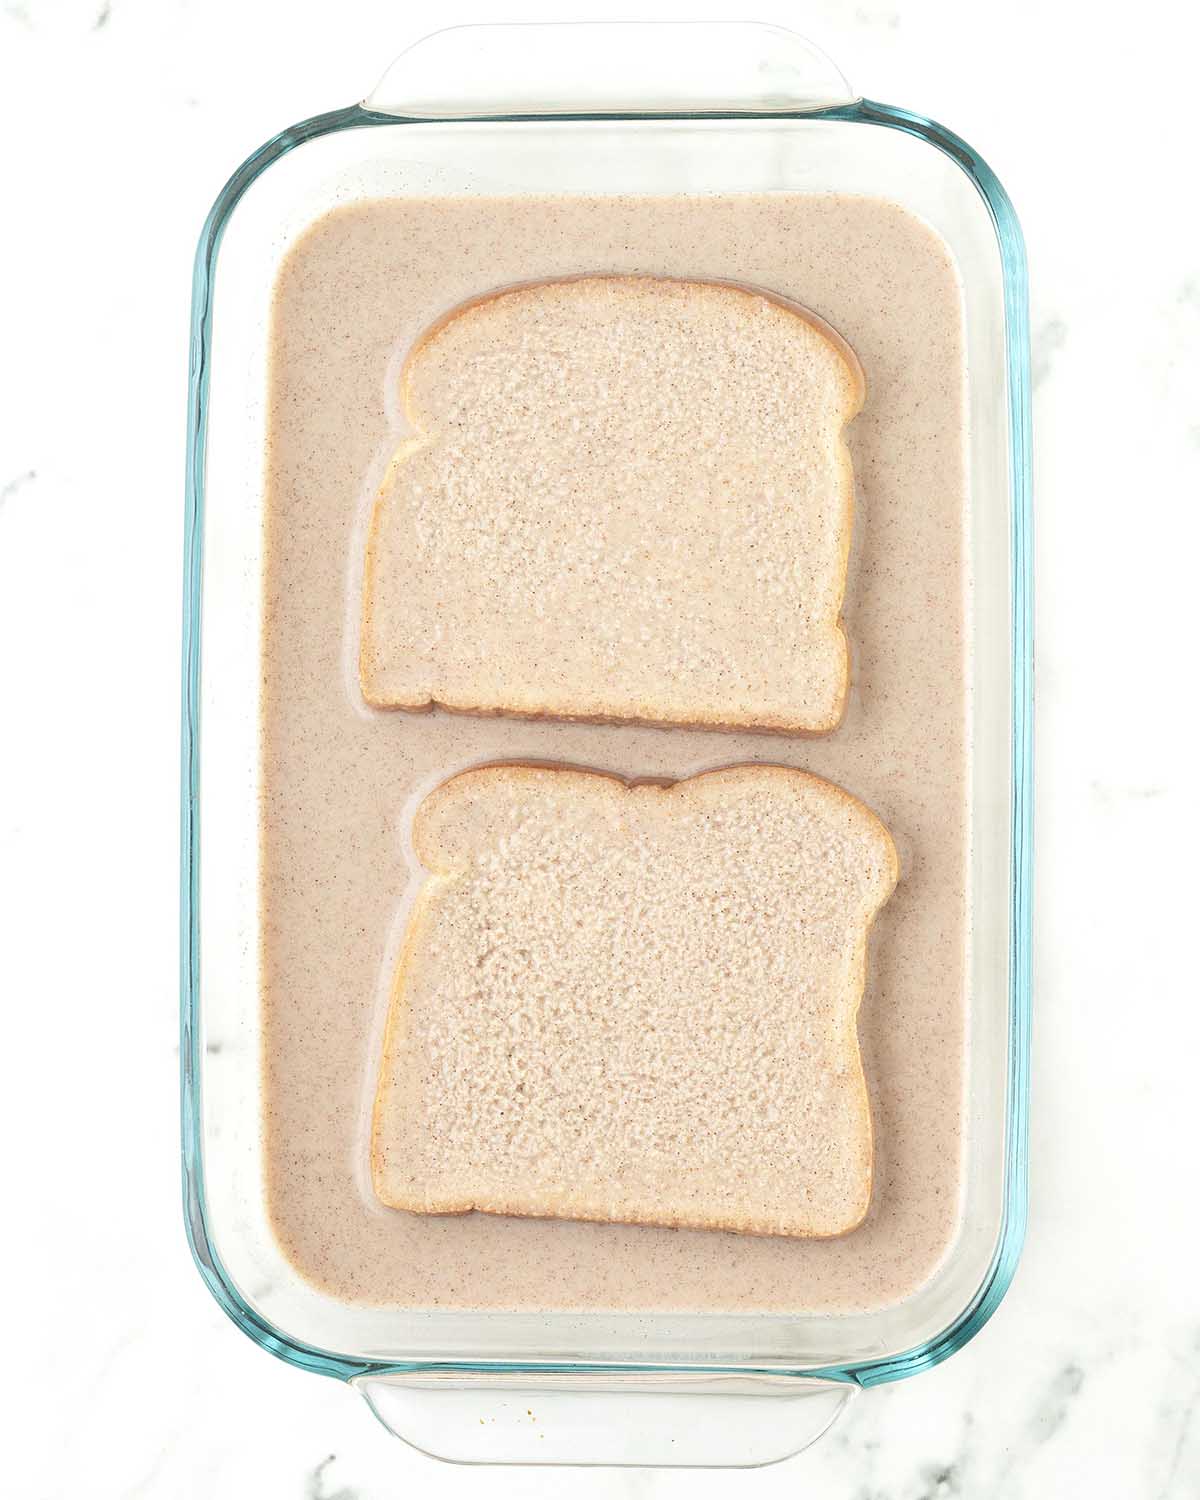
Soak the bread on each side. The bread should not be so saturated that it becomes floppy and soggy.
Only dip the slices right before you cook them, don't leave them soaking while you cook another batch.
Recipe Tip
I like to mix the batter in a measuring cup or bowl since a few small clumps of flour can remain, no matter how well the mixture was whisked. If you spot any undissolved bits of flour, just strain the batter through a sieve while pouring it into the dish.
If you're using a griddle, the whole batch can be cooked at once, but if you're using a non-stick or cast iron pan (like I do), you'll only be able to cook 1-2 slices at a time, depending on its size. I've included info on how to keep the slices warm and crisp in the recipe below.
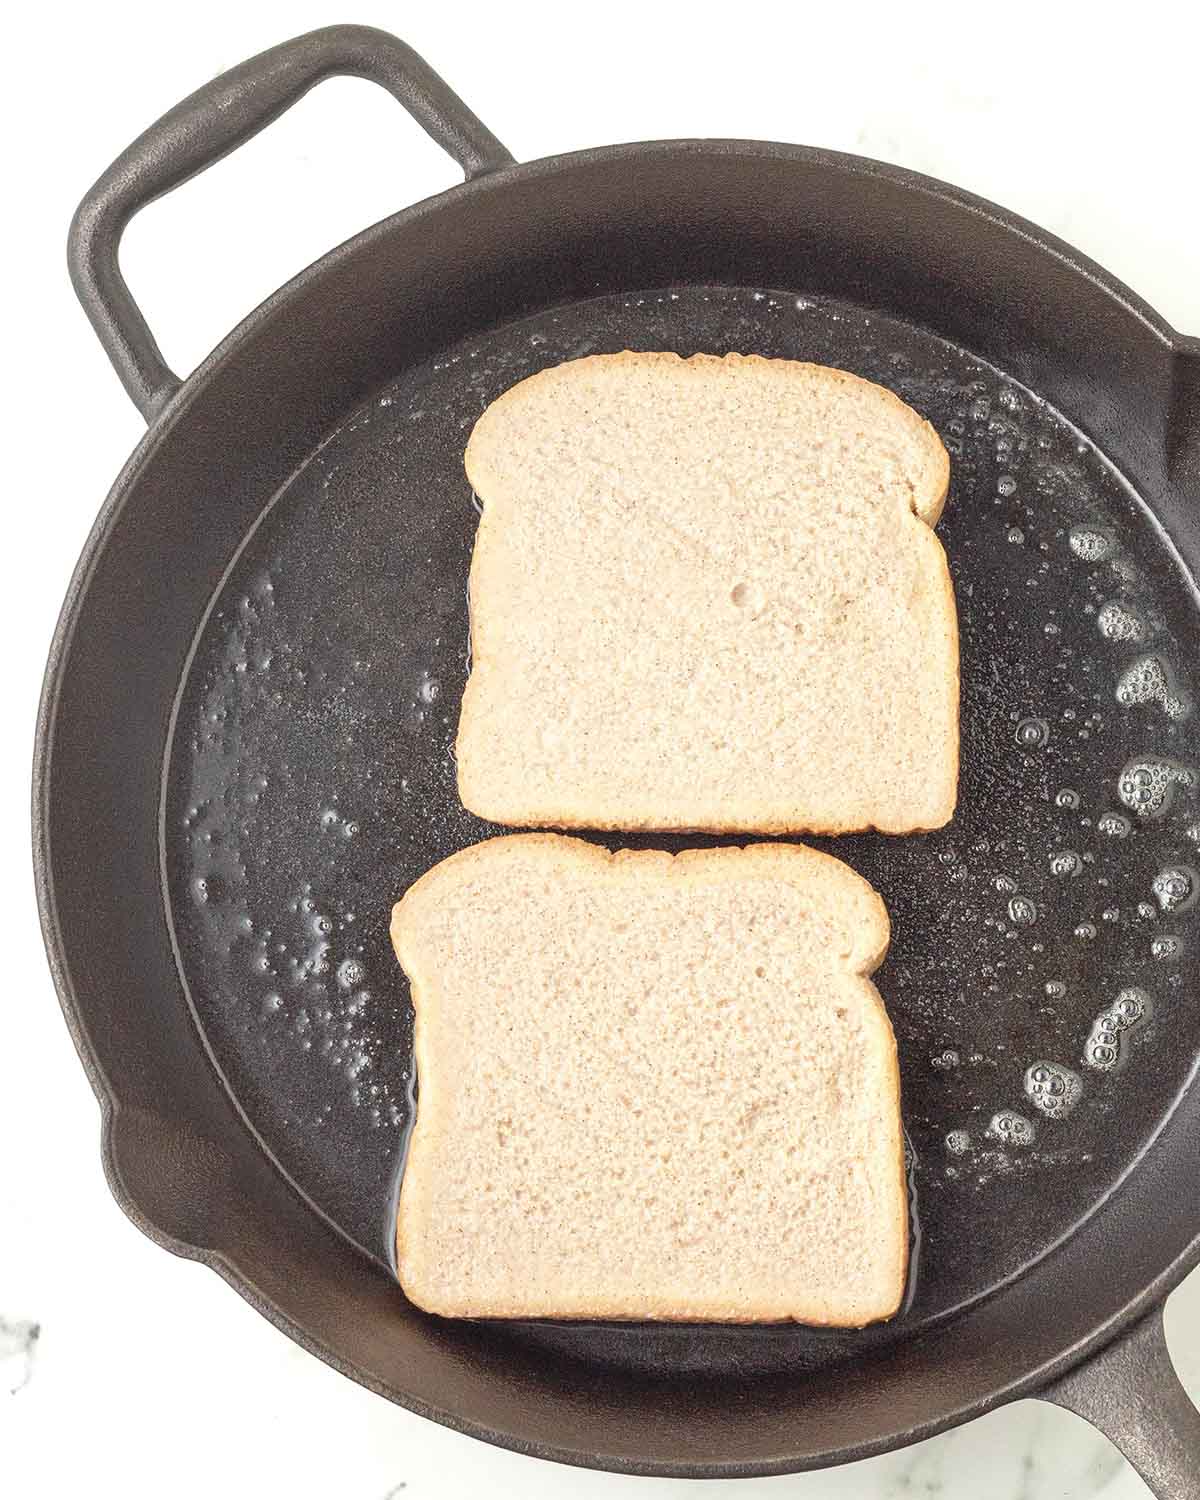
Place the slices, 2 at a time, in the fully pre-heated, buttered pan. The slices should sizzle when added to the pan.
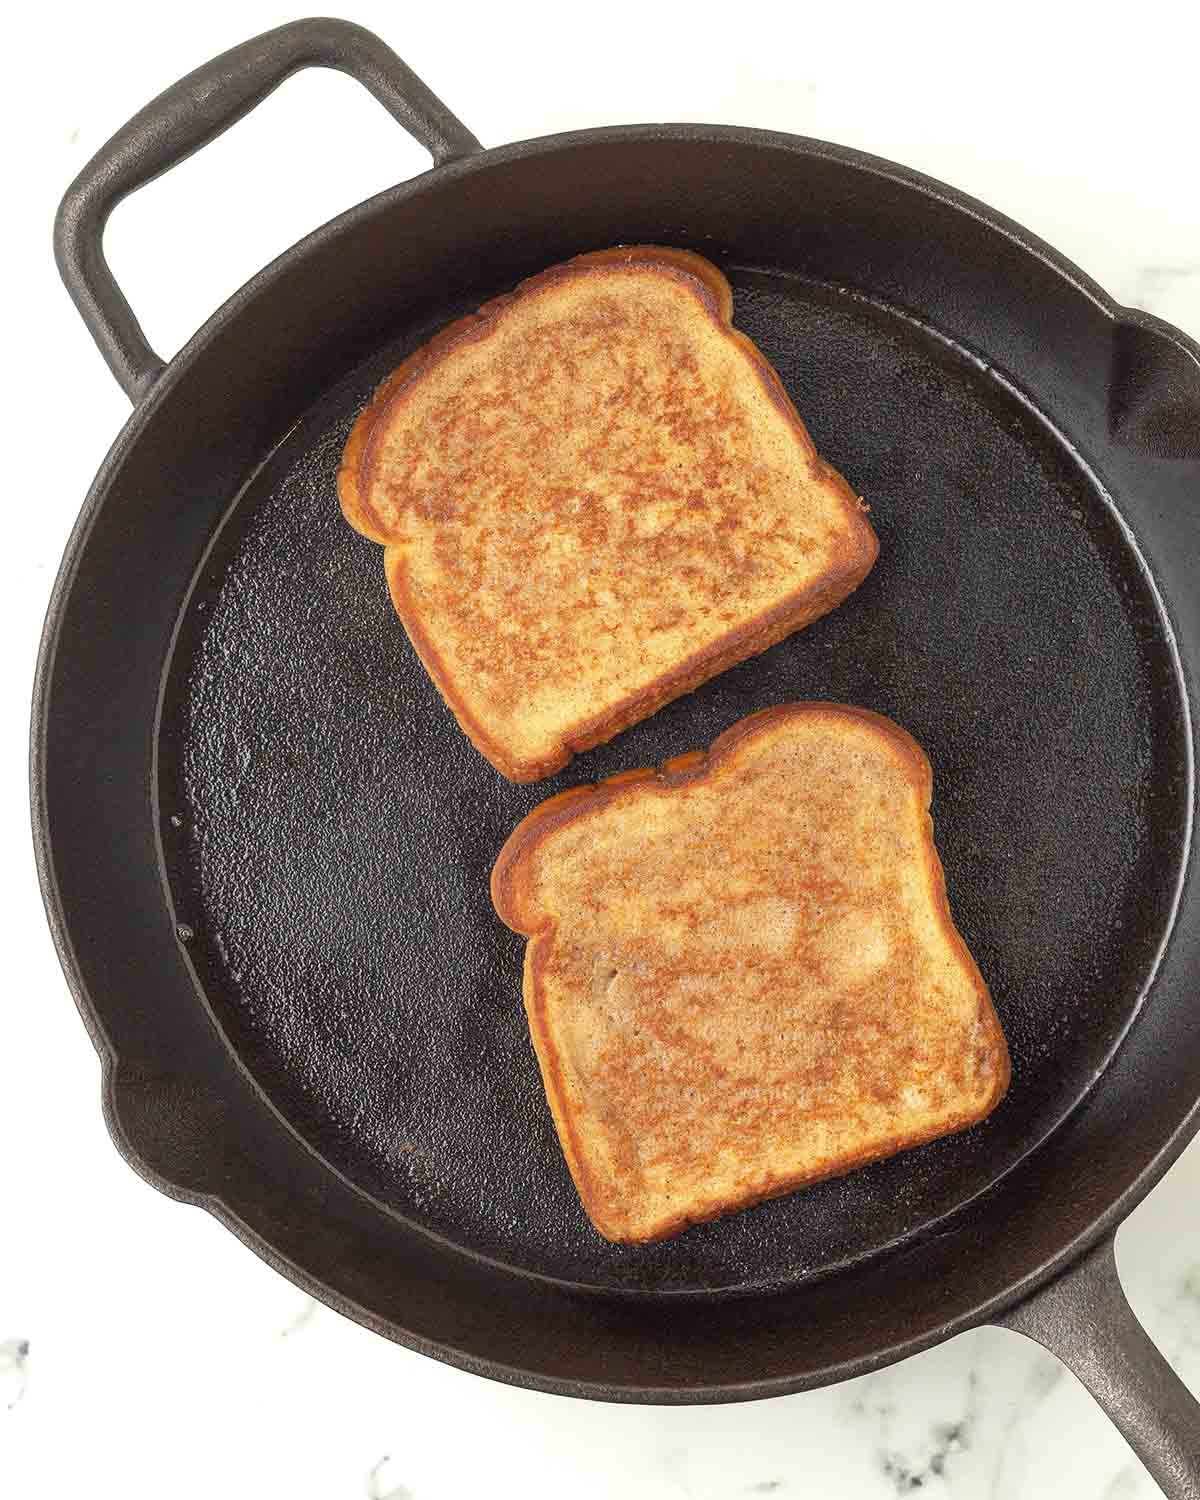
Flip after a few minutes and finish cooking the second side. Repeat for the rest of the slices, adding more butter to the pan in between batches.
You'll know they're done when they're golden brown on both sides.
Recipe Tips
- Getting the pan to the right temperature and keeping it there makes all the difference for the best vegan French toast possible. Too hot and the slices will stick, burn, and be undercooked inside. Too cool and they’ll cook too slowly and turn soggy, so adjust the heat as you go.
- If the first pieces come out too soggy, this means that you've soaked them too long OR the pan is not hot enough. Re-adjust where necessary for the rest of the batch.
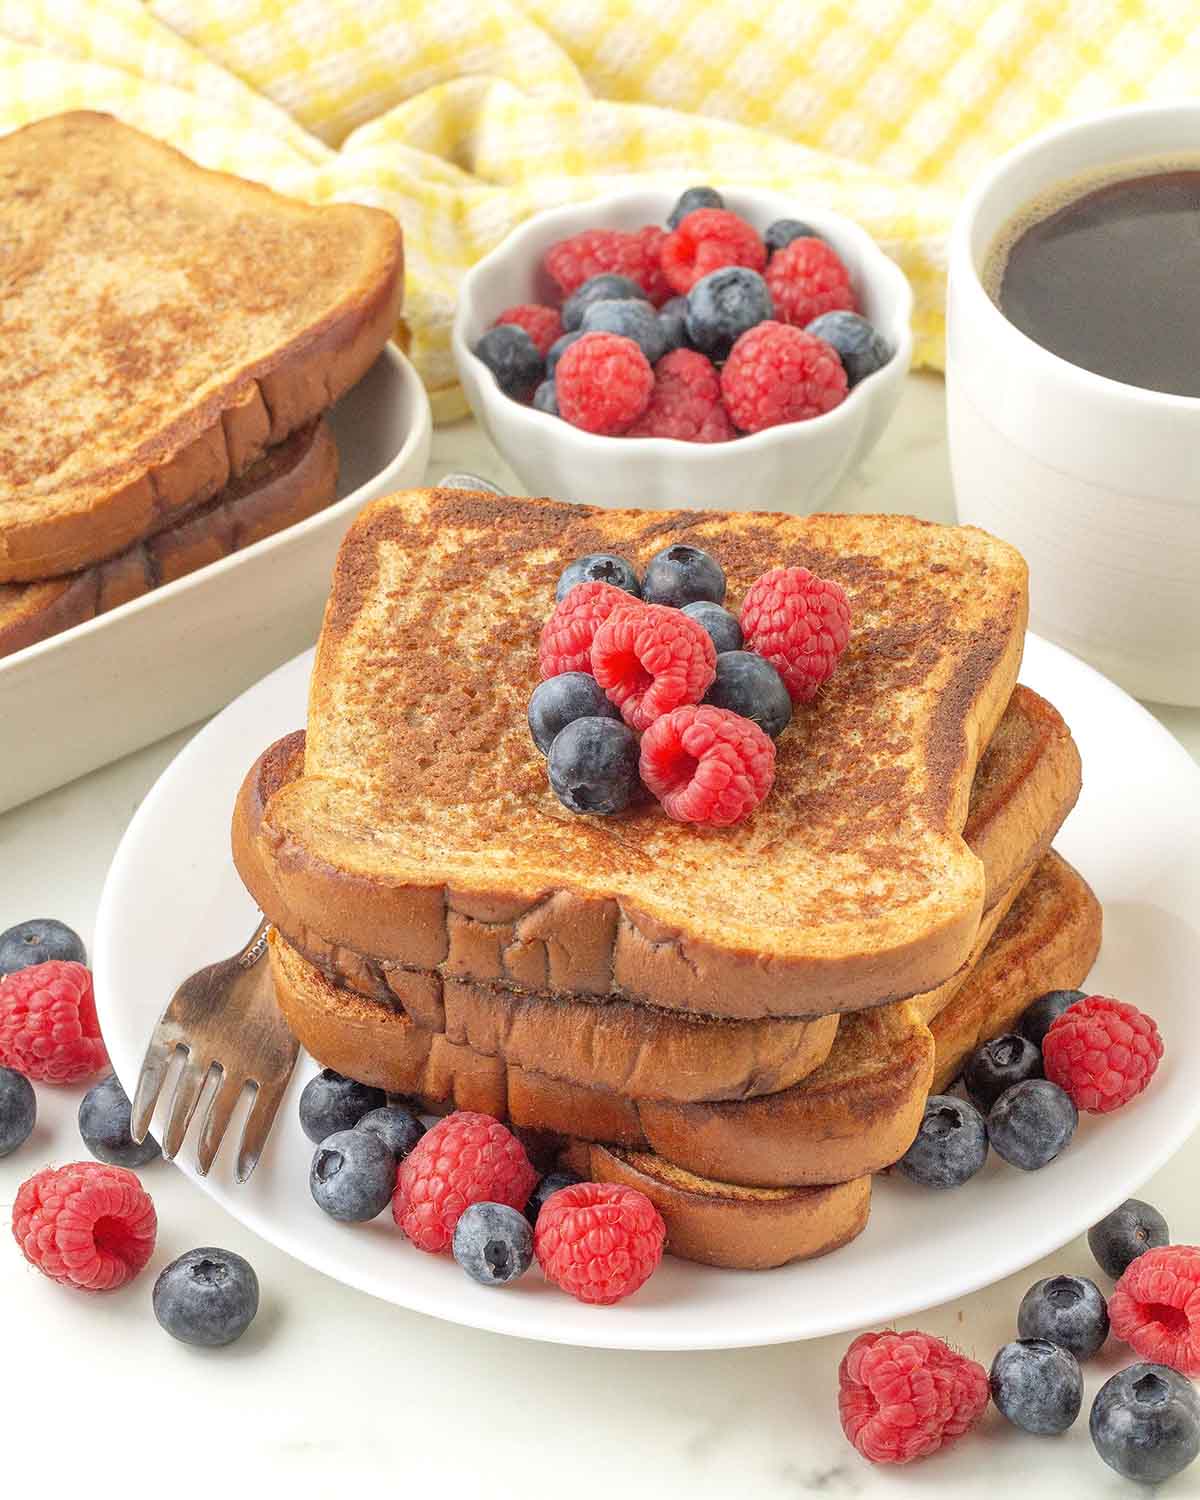
Some Topping Ideas
Maple syrup is, of course, a must, but you can also top it with fresh berries, dairy-free whipped cream, or a few extra dashes of cinnamon.
You may also like a homemade fruit sauce like this easy strawberry sauce or this fresh blueberry compote. To make it extra special, drizzle with homemade vegan maple caramel sauce or dollop some creamy vegan lemon curd on top.
Tips for Success
- Measure and have all your ingredients ready to go before starting. This will make the process run smoothly, quickly, and easily.
- Measure your ingredients correctly. I highly recommend using a scale and my weight measurements to measure your flour. Accurate measurements will always give you the best results. See the "Suggested Equipment" section in the recipe card for the scale I use and recommend.
- Read this post from top to bottom before you start. I’ve included many tips and tricks so your French toast turns out perfectly. Also, read through the recipe below at least once before getting started.
- Follow the recipe exactly as it’s written for the very best results.
If This Makes It To Your Table...
I’d love to hear how this vegan French toast recipe worked out for you! Leave a comment and rating below, and feel free to share a photo on Instagram and tag me so I can see your remake (I LOVE seeing your remakes!). I'm @delightfuladventures over on Instagram.

Crispy Vegan French Toast (No Eggs)
Suggested Equipment:
Ingredients:
- 1 cup (250ml) unsweetened dairy-free milk
- 3 tablespoons (23g) all-purpose flour
- 1 tablespoon pure maple syrup
- 1 teaspoon vanilla extract
- 1 teaspoon ground cinnamon
- ¼ teaspoon ground nutmeg (optional)
- ⅛ teaspoon salt
- 6 slices thick-cut bread (see notes below)
- unsalted vegan butter (for frying)
Instructions:
Dry the Bread (Optional)
- If needed, see notes above for several ways to dry your bread.
Get the Oven Ready for Finished Slices (Optional)
- Place a wire rack over a baking sheet. Set aside.
- Heat the oven to 200°F (95°C).
Make the Batter:
- Add the dairy-free milk, flour, maple syrup, vanilla, cinnamon, nutmeg (if using), and salt to a measuring cup or bowl and whisk well until all of the flour has dissolved.
- Pour the mixture into a shallow dish.
Get the Pan Ready:
- Heat the pan over medium-low heat for at least 2 minutes. (The heat may need to be adjusted a few times while cooking the batch.)
- Add a tablespoon of vegan butter to the pan and allow it to melt and coat the entire surface.
Fry the French Toast:
- Give the batter another whisk before placing 2 slices of the bread into the dish, and let it soak for 10 seconds on each side. (See note below)
- Place the two slices of bread in the heated skillet. Flip after 3-4 minutes and cook the second side for another 3-4 minutes.
- As the slices finish, transfer them from the pan to a plate, and serve right away, or if you want to serve everyone at once, place the French toast on the rack and pan you prepared earlier and place it in the warmed oven to keep the slices warm and crisp.
- In between batches, add more butter to the pan when needed and allow it to fully melt before adding the new slices of bread.
- Repeat steps 1-4 until all slices of bread have been fried. If you find that the French toast is browning too much or too fast, turn the heat down slightly.
- Serve with maple syrup or other toppings of your choice. (Suggestions above!)
Recipe Notes:
- Please read all of the information above, as well as the notes below, before making this recipe. French toast is a simple recipe, but several steps must be followed exactly so the results are what you expect.
- The bread I use only needs to soak in the batter for about 10 seconds per side, but yours may need a little more or less since different breads and thicknesses, plus level of dryness will absorb the batter differently. The soaking time given is a rough estimate. As a general guide, thinner slices less than three quarters of an inch need less soaking time, while thicker slices need a bit more. After soaking, cook one or two test pieces first. If they turn out dry, let the next slices soak longer. If they’re soggy, soak for less time or slightly increase the heat so the pan is hotter.
- French toast is best on the day it's made, but if you have leftovers, fully cool and store for up to three days in an airtight container in the refrigerator. Reheat in your oven, air fryer, toaster, or toaster oven until it's hot and crisp.
- Nutrition information is based on one of six pieces of French toast, without maple syrup or toppings, and the recipe is prepared exactly as written. Nutrition info is only to be used as a rough guide. Click to learn how nutrition info is calculated on this website.


Did You Make This Recipe or Have a Question About It?