This page may contain affiliate links. Click to learn more. As an Amazon Associate I earn from qualifying purchases.
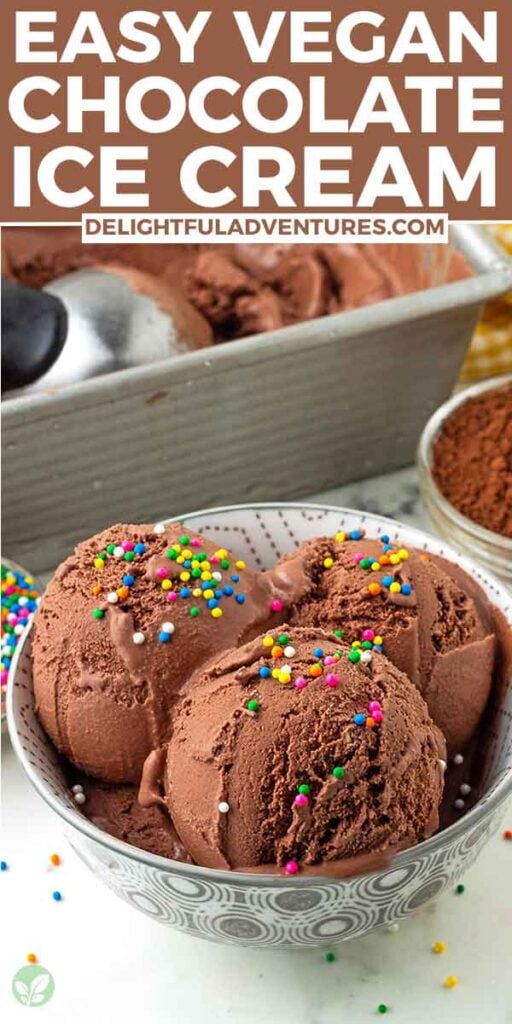
Indulgent, rich, and velvety homemade vegan chocolate ice cream that beats anything store-bought! With just a few ingredients and an ice cream maker / churn, you can whip up this creamy, melt-in-your-mouth treat that’s easy to scoop and never icy. Completely dairy-free with no eggs, no bananas, and no nuts, and so delicious that no one will ever know it’s vegan.

Save This Recipe!
In a hurry? Drop your email below, and this recipe will be sent straight to your inbox for later. You'll also get fresh recipes every week! You can unsubscribe anytime.
There's nothing better than a scoop of cool, creamy ice cream on a hot day, right? But really, it doesn't have to be hot outside to indulge in this vegan chocolate ice cream, you can have it any day of the year, even in the middle of winter, and it'll be just as satisfying.
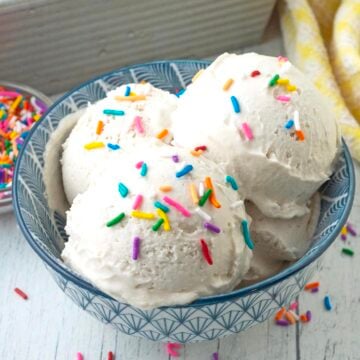
This particular ice cream, like my vanilla ice cream and vegan peach ice cream, is silky smooth, rich, and luscious. This is thanks to vegan heavy cream being the main ingredient used in the ice cream mixture.
It's so easy to make, and once you taste it, see how rich it is, and how it's filled with dreamy dark chocolate flavour, you'll think twice about buying it at the grocery store!
Looking for more classic decadent desserts? How about vegan crème brûlée, or vegan butterscotch pudding? Both are easy to make and so delicious!
Ingredients You'll Need

Ingredient and Substitution Notes
Unsweetened Vegan Heavy Cream or Vegan Whipping Cream (NOT vegan whipped cream) - You'll need a dairy-free heavy cream / whipping cream (they're the same, but brands refer to them differently) which is the vegan alternative to dairy heavy cream. This ingredient cannot be substituted.
I use Silk Dairy-Free Whipping Cream (if you click that link, you will see the Canadian packaging, this is what it looks like in the US). If you can't find this brand, Country Crock, Califia Farms, and Violife are just a few other brands that make it.
Dairy-Free Milk - I recommend using one that's naturally creamy and not thin. I used soy milk in the ice cream you see in the pictures but I also tested with almond milk and oat milk and both worked great. Make sure the type you use is unsweetened and unflavoured.
Cocoa Powder - I use unsweetened Dutch-process cocoa powder because I like the rich chocolaty flavour it provides. If you prefer, you can use natural cocoa powder/cacao powder, but keep in mind that this type tends to be slightly more bitter and acidic when compared to Dutch-process cocoa powder, so you may need to use a little more sugar.
Light Brown Sugar - Brown sugar adds another layer of flavour to the ice cream and it also helps to create a soft, silky texture.
Sugar - I use organic cane sugar, but you can also use granulated white sugar, just make sure it's vegan. Both types of sugar jointly serve a few purposes in this homemade ice cream, the main two being sweetening and flavouring, but they also contribute to the final texture and level of creaminess.
Don't use less sugar than the recipe calls for! Reducing it will make your ice cream icy, hard to scoop, crumbly, and not creamy. While testing, I found that these exact amounts are needed to make the perfect dairy-free chocolate ice cream.
Vanilla Extract and Salt - Both balance and enhance the flavours of the ice cream. Don't skip either of them.
How to Make It
(Note: I’ve outlined the step-by-step on how to make this recipe here, but find the full recipe, ingredients, and directions in the recipe card at the end of this post.)
For this recipe, you will need an ice cream maker, it cannot be made without one. I have had the 2-Quart Cuisinart Ice Cream Maker for many years and I highly recommend it if you are looking for one!
IMPORTANT: Make sure you freeze the machine's ice cream bowl for at least 24 hours before you make the ice cream so it turns out correctly.

Add all the ingredients for the ice cream base to a bowl and whisk well. Make sure the sugar has dissolved. (I recommend using a mixing bowl with a spout so it's easy to pour into the machine.)
Make sure that the mixture is smooth (no cocoa powder lumps) and that the sugar has dissolved before proceeding.

Pour the ice cream mixture into the ice cream maker and churn.
NOTE: The amount of time it takes to finish will depend on your machine, if your mixture is cold, and the amount of time you kept the mixing bowl in the freezer before starting.
TIP: Make sure the vegan heavy cream and dairy-free milk are very cold, use them straight from the fridge, and don't let them sit at room temperature for any amount of time! If the ice cream base is not cold, refrigerate it for at least a ½ hour before proceeding and then give it a quick whisk before pouring it into the machine. If the mixture is not cold, the churn time will be extra long.

When it reaches soft-serve consistency, stop the machine. This happens around the 20-minute point for me. You can serve it right away if this is the texture you prefer, but if you like a firmer ice cream, go to the next step.

Quickly transfer the ice cream to a container or a long rectangular pan (like a bread pan). Place plastic wrap directly onto the surface of the ice cream, cover it, and place it in the freezer for at least 4 hours to firm up completely.
You can use any type of airtight container you have, but I like to freeze my ice cream in a bread pan because of its rectangular shape. This shape makes it easy to slide the scoop on a longer surface to get nice, round scoops.
Homemade ice cream freezes harder than store-bought, so after it has firmed up, remove it from the freezer and let it sit at room temperature for 15 minutes to soften slightly so it's easy to scoop.
When serving, to take it over the top, you can drizzle it with chocolate syrup, maple caramel sauce, or, for something a little different, strawberry sauce. It can also be topped with sliced fresh berries, chocolate chips, toasted coconut, crushed cookies, or even cubed brownies!

TIP: If solid, frozen ice cream remains on the sides of the bowl after churning, use a hard plastic, rubber, or silicone spatula to gently scrape it off and avoid metal to prevent scratches. Let the scraped ice cream soften separately in a bowl before mixing it to a soft-serve consistency, then add it to the container with the rest.
Storing Leftovers
Homemade ice cream typically does not last as long in the freezer as store-bought ice cream. Keeping it for longer will cause the ice cream to become icy, so use up what you have within 2 weeks.
Always store it in an airtight container or use containers specifically made for homemade ice cream. Serve it in a cone or a bowl, I don't have a preference, I love it both ways!

Tips for Success
- Measure and have all your ingredients ready to go before starting. This will make the process run smoothly, quickly, and easily.
- Measure your ingredients correctly. I highly recommend using a scale and my weight measurements when making this recipe. (See the "Suggested Equipment" section in the recipe card for the scale I use and recommend.)
- Pre-plan when you will be making this recipe so you get the timing right. Make sure to freeze your ice cream maker's bowl for at least 24 hours before starting.
- Store your ice cream in an airtight container. Air will contribute to extra crystallization, making the texture icy and this can cause freezer burn. If your container does not have a lid, place a piece of plastic wrap directly on the surface of the ice cream and place the container in a freezer bag before freezing to help prevent these things.
- Keep in mind that the ice cream maker will not fully freeze your ice cream, it will only reach soft-serve consistency. For it to fully freeze, it needs to sit in the freezer for at least 4 hours.
- Read this post from top to bottom before you start. I’ve included many tips and tricks I've gathered while testing this recipe, things you may not think of. Also, read through the full recipe before getting started.
- Follow the recipe exactly as it’s written for the very best results.

If You Make This Recipe...
Tell me about it! You can do that by leaving a comment and star rating below, and you can also post a picture on Instagram so I can see your chocolate ice cream. I’m @delightfuladventures on Instagram.
If You Like This Recipe...
You may like these other crave-worthy vegan chocolate recipes:

Creamy Vegan Chocolate Ice Cream (No Nuts, No Bananas)
Suggested Equipment:
Ingredients:
- 2 cups (500ml) unsweetened vegan heavy cream or vegan whipping cream
- 1 cup (250ml) unsweetened dairy-free milk (see note below)
- ½ cup (43g) Dutch-process cocoa powder (sifted)
- ⅓ cup (67g) light brown sugar
- ¼ cup (50g) granulated sugar
- 1 tablespoon vanilla extract
- ¼ teaspoon salt
Instructions:
- 24 hours before starting, place the ice cream maker's bowl into the freezer.
- Add vegan heavy cream, dairy-free milk, cocoa powder, brown sugar, sugar, vanilla extract, and salt to a mixing bowl and whisk well. Make sure sugar has dissolved and cocoa has been fully incorporated into the mixture before proceeding.
- Transfer the frozen ice cream bowl from the freezer to the ice cream maker. Set the mixing paddle and cover into place, and turn the machine on. Carefully pour the ice cream base into the machine.
- Once the ice cream reaches soft-serve consistency, roughly 20 minutes, turn the machine off.
- You can enjoy it at this point as soft-serve, but if you prefer firmer ice cream, using a rubber spatula, immediately transfer it to a freezer-safe container, cover it, and place it in the freezer to firm up for 4-6 hours.
Recipe Notes:
- Please read the helpful info above and below before making this recipe to ensure success.
- Use unsweetened, unflavoured dairy-free milk so you control the flavour and sweetness. Use a naturally creamy milk like soy or oat for the best results.
- Churning time will vary, depending on your ice cream maker and how long you freeze your ice cream bowl. Aim to freeze it for at least 24 hours before starting this recipe.
- I highly recommend using a scale to weigh your cocoa powder and sugar (this is the one I have (Amazon Link).
- Store your ice cream in an airtight container for up to 2 weeks. To ensure it lasts this long, place a piece of plastic wrap directly on the surface of the ice cream before covering the container.
- If solid, very hard ice cream remains on the sides of the bowl after churning, use a hard plastic, rubber, or silicone spatula to gently scrape it off—avoid metal to prevent scratches. Let the scraped ice cream soften separately in a bowl before mixing it to a soft-serve consistency, then add it to the container with the rest.
- Remove from the freezer and let it sit at room temperature for 15 minutes before serving so it's easy to scoop.
- Nutrition info is based on 1 serving (½ cup) and the recipe is made exactly as written using unsweetened, unflavoured soy milk. Nutrition info is only to be used as a rough guide. Click to learn how nutrition info is calculated on this website.

Jaynine says
Hey, I have a quick question can I use almond milk or cashew milk?
Gwen Leron says
Hi Jaynine, yes, you can, just for the dairy-free milk though, the vegan heavy cream cannot be substituted. I tested with almond milk and the results were great, however, I did not test with cashew milk but I think it would also work fine. I hope this helps, let me know how things go!
Christiane Voisin says
Great recipe! Very chocolaty and creamy. TY!! Husband and friend like it too.
Gwen Leron says
I'm glad you and your husband (and friend!) like the ice cream, Christiane! It's a big favourite here, too. You should try the vanilla next. Enjoy!