Learn how to blind bake a pie crust in this step-by-step filled with plenty of tips and tricks to ensure you end up with a perfectly baked flaky crust for all of your homemade sweet and savoury pies (like cream pies, meringue pies, custard pies, for quiche, and more!).
Save This Recipe!
In a rush? Don't have time to scroll through this page right now? Enter your email below and this recipe/article will be sent straight to your inbox so you can come back to it when you're ready. Plus, you'll receive delicious recipes every week! You may unsubscribe at any time.
If you're a budding pie-baker, an expert pie baker, or someone who loves dessert and just wants to learn how to bake pies so you're ready for the next time a craving hits, this is a page to bookmark and refer to over and over again!
I'm going to go over everything you need to know about how to blind bake a pie crust. While it is a simple process, it's not as simple as just putting pie dough in a pie dish and baking it. It's a very specific process that needs to be done in a particular way.
When a pie crust bakes, the fat melts and creates steam which is what creates all those flaky layers we love. However, the melting fat also causes the crust to shrink and if there's nothing inside the crust to help hold its shape, it will shrink, puff up, and not be usable for a pie.
Learning how to pre-bake a pie crust the correct way is essential to avoid a pie crust that’s soggy, shrinks, bubbles, and/or slumps. Keep reading and you'll be on your way to baking amazing pies.
Looking for a pie crust recipe? How about my vegan butter pie crust or my vegan gluten-free pie crust recipes?
What Does It Mean to Blind Bake a Pie Crust?
The term blind baking means to bake a pie crust without filling, either partially or fully. Many pie recipes will have you bake the crust and the filling together (for example apple pie, cherry pie, and blueberry pie) but some pie recipes have fillings that don't require baking or need just a short bake time, not enough time to fully cook the crust.
There are two ways to blind bake a pie crust, I go over how to do both of them in this post, but it's important to understand the difference between the two:
Par-Baking
You would par-bake (partially bake) a pie crust for a pie that requires the filling to be cooked for a short amount of time, like a pie that has a filling that is very runny and could cause the pie to have a soggy bottom crust. Partially baking the crust will prevent the bottom of the crust from turning out soggy.
Custard-based pies and some pumpkin pie and pecan pie recipes call for par-baking. This type of pie crust will be returned to the oven with the filling to finish baking.
Fully Blind Baking
This method would be used if your pie filling does not need to be cooked at all or if the filling has been pre-cooked, like a chocolate pie, strawberry pie, coconut cream pie, or lemon meringue pie.
NOTE: The method for par-baking and blind baking a pie crust covered in this post is specifically for pastry pie crusts made with flour and fat, this process is not meant for other types of pie crusts such as graham, Oreo, oat, etc.
Things You'll Need
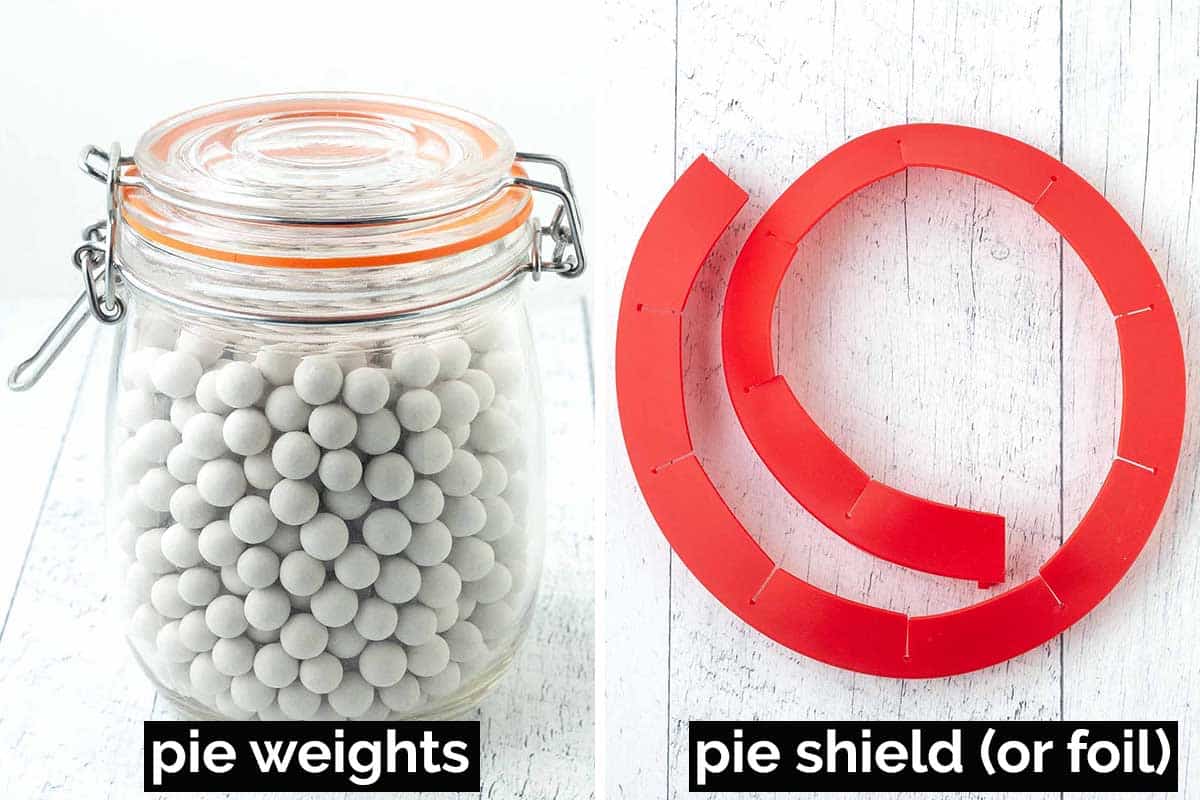
There are a few tools you'll need to bake an empty pie crust, just two are pictured here and I've included info about all of them below.
Pie Crust - You will need a standard pie crust recipe, one that has flour and fat (either butter or shortening). This method will not work with specialty pie crusts such as those made with Oreos, graham crumbs, cookies or crackers.
Pie Dish - A good quality pie dish is needed. Either glass or metal will work, but if you prefer to use a glass dish, please make sure that you are using one that is made from "borosilicate glass," this type of glass can withstand big temperature changes.
The pie crust needs to chill in the fridge before baking so the dish will be very cold when it's placed in the hot oven, so using a dish that can handle this is very important for safety.
Pie Weights - These are essential to baking an empty pie shell, they will weigh down the crust so it does not shrink, slump, and puff up. You can purchase reusable ceramic pie weights, but you can prebake a pie crust without pie weights like the ones I have.
Instead, you can use dried beans, uncooked rice, uncooked lentils, or even sugar. All of these can be reused like ceramic pie weights but they cannot be used in recipes once they have been baked. Store them in a jar to use again.
NOTE: These are the ceramic pie weights I own. You will need 3 packages for the pie crust to bake properly. Don't be tempted to use less (I did this once and the result was not good, the pie crust shrunk A LOT and was unusable for a pie.) They can be used over and over again.
Parchment Paper or Foil - You'll need a piece to line the pie crust before baking to make a barrier between the pie crust and the pie weights.
Pie Shield or Foil - If you will be fully blind baking your crust, I find that the edges tend to get a little too brown for my liking during the second bake time.
If you don't mind that happening, you can fully bake the crust without using one, but if you prefer a lighter-coloured edge, use a pie shield to protect it from getting too brown. If you don't want to purchase one, you can use aluminum foil.
How to Do It
(Note: I’ve outlined the step-by-step on how to partially bake and fully blind bake the pie crust here, but find the full and detailed directions in the recipe card at the end of this post.)
NOTES:
- This method starts with premade pie dough already in the pie dish with the edges crimped or fluted. Use either my vegan pie crust or my vegan gluten-free pie crust or another recipe you prefer.
- This method will not work with specialty pie crusts such as Oreo, graham, cookie, or cracker crusts.
- This method is only for recipes that call for a single bottom crust and no top crust.
1. With the pie crust in the pie dish, begin by "docking" the bottom of the pie crust. Do this by poking the tines of a fork into the bottom of the pie crust to create little holes. This will help to let the steam escape at the crust cooks and prevent it from puffing up and they will close up as the crust bakes.
2. Continue until the bottom has fork marks throughout. You can also dock the crust going up the sides of the pan, too, just don't poke any holes into the decorative edges. Place the dish in the refrigerator for AT LEAST 1 hour so it can chill before baking. This step is EXTREMELY important for the finished crust to have the correct texture and form.
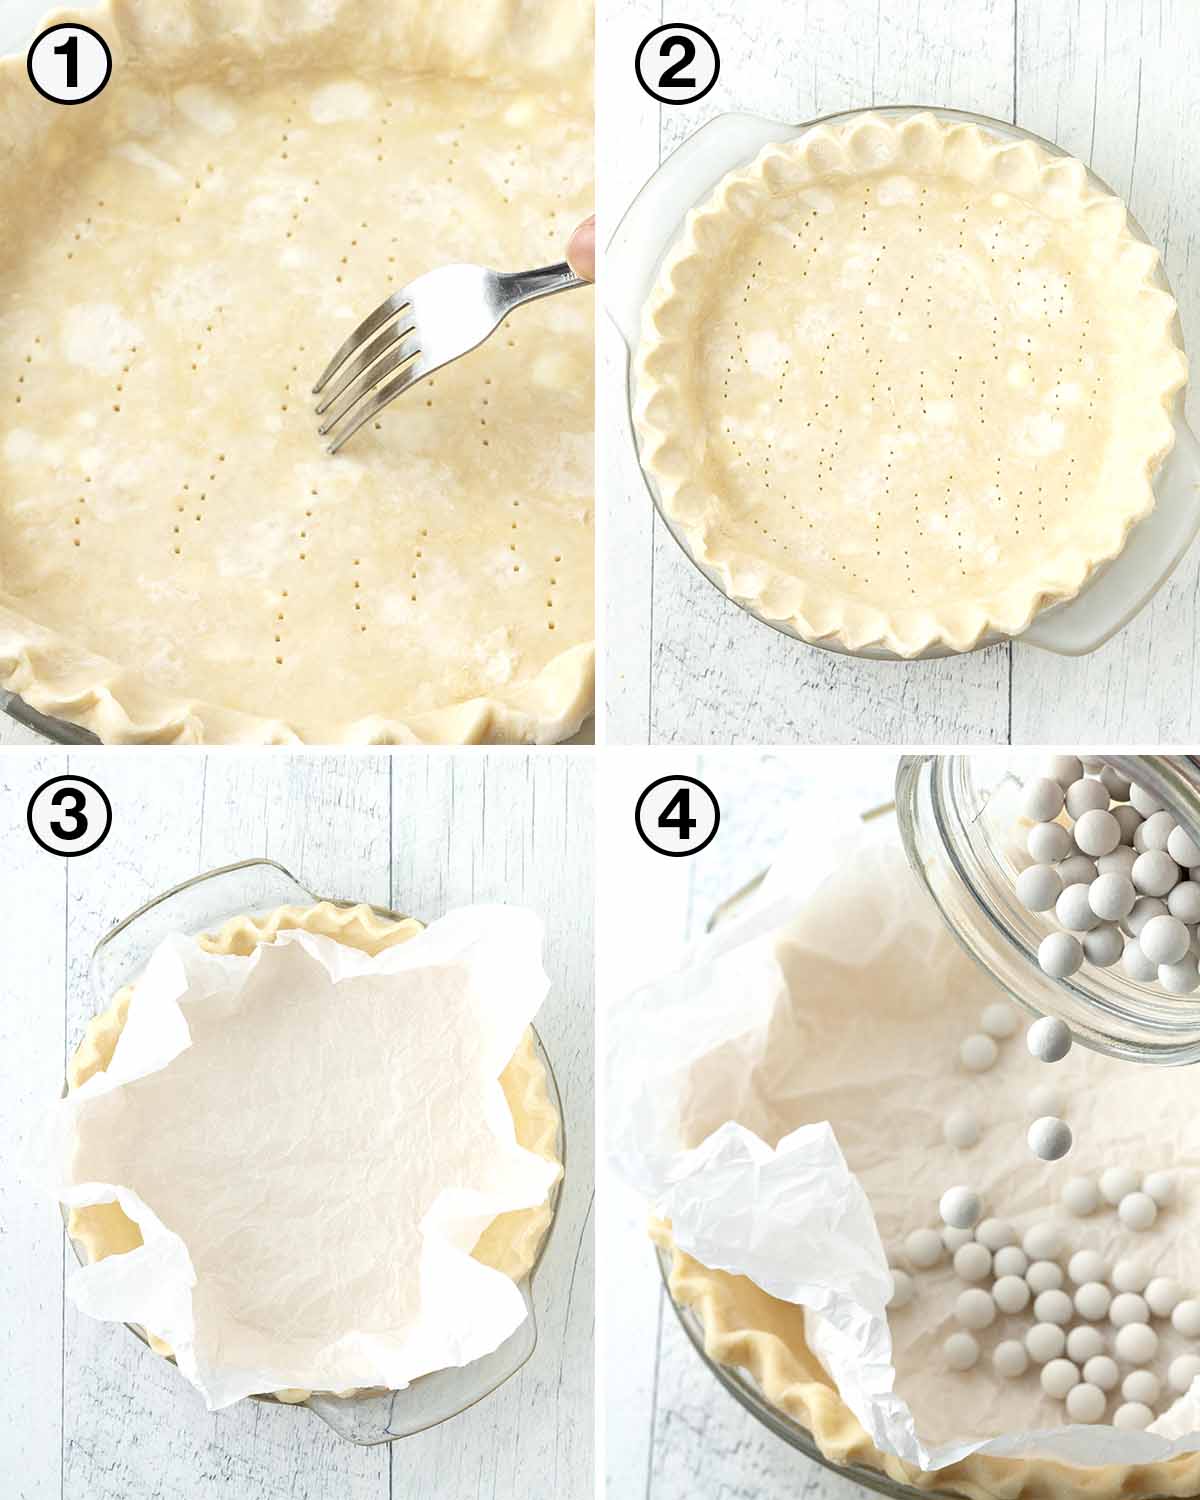
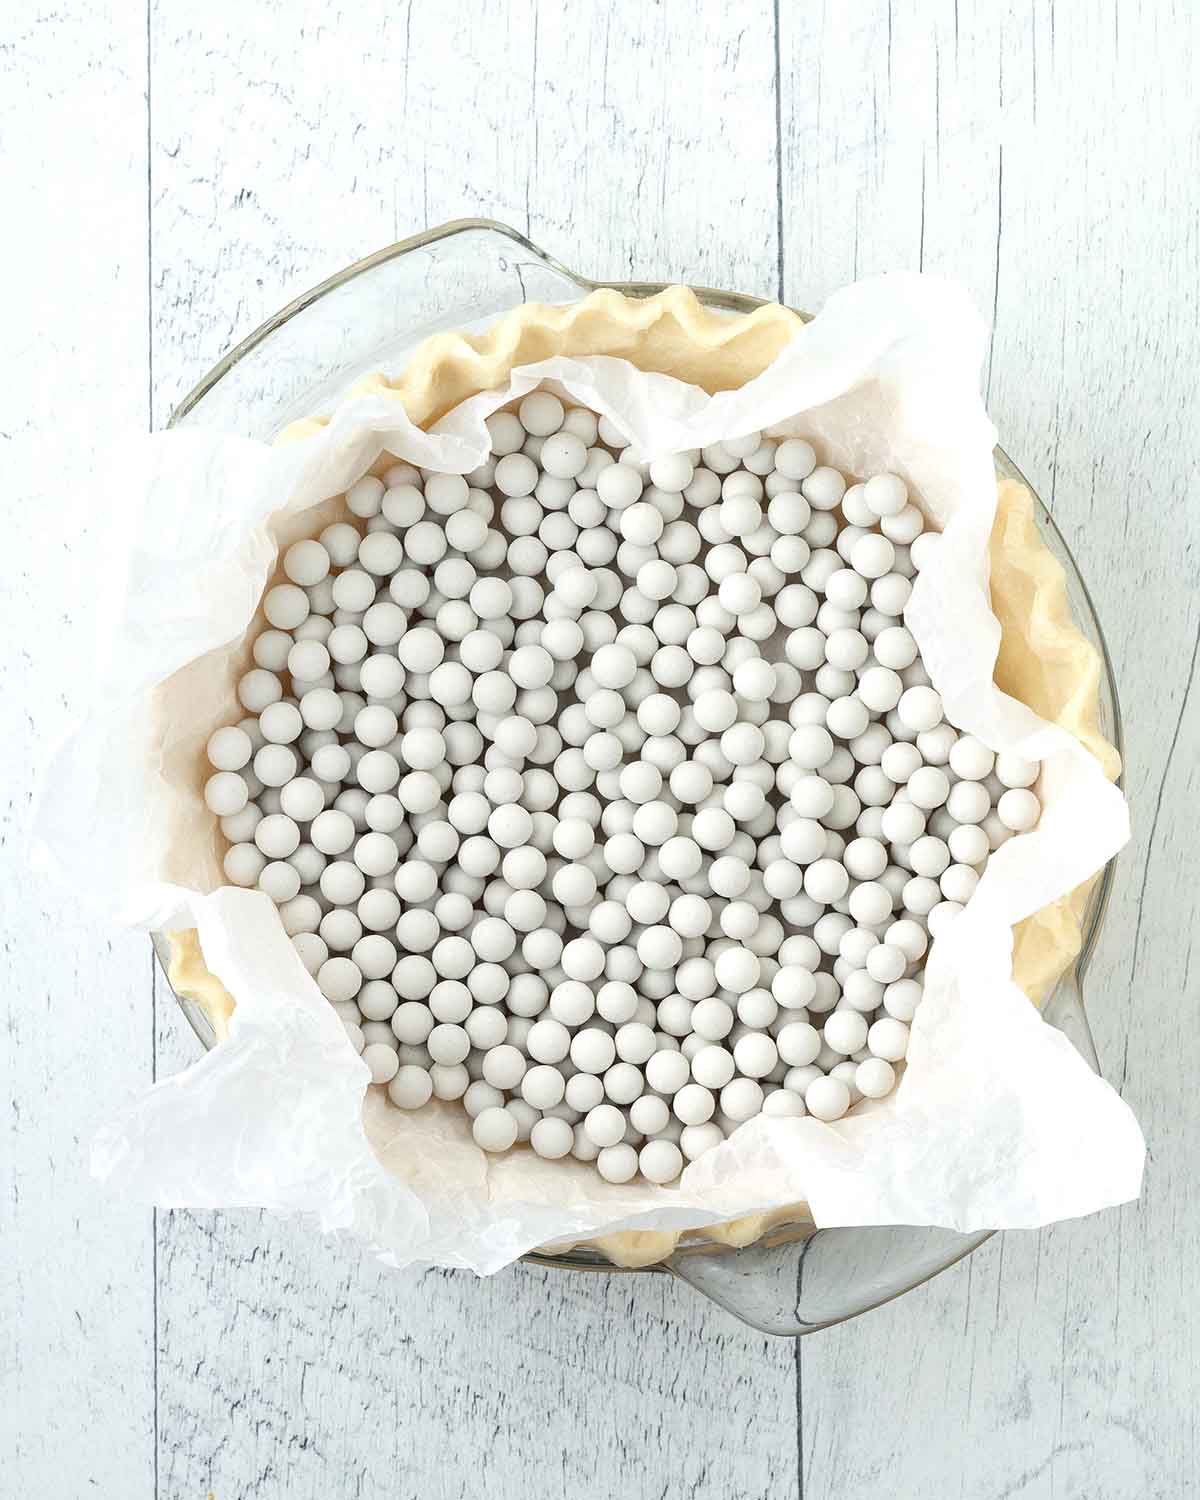
3. When the chilling time has ended, remove it from the fridge and place a piece of parchment paper that has been crumpled up a few times (this helps it to conform to the shape of the pie crust) into the pie crust. Gently push it into the corners so the entire bottom and sides are covered and fold it over the edges of the crust.
TIP: Foil can also be used and moulds better to the crust but it tends to stick to the pie crust which is one of the reasons I prefer parchment. If you only have foil, lightly grease the surface of the foil that will come in contact with the pie dough with a light layer of oil, or cooking spray to prevent sticking.
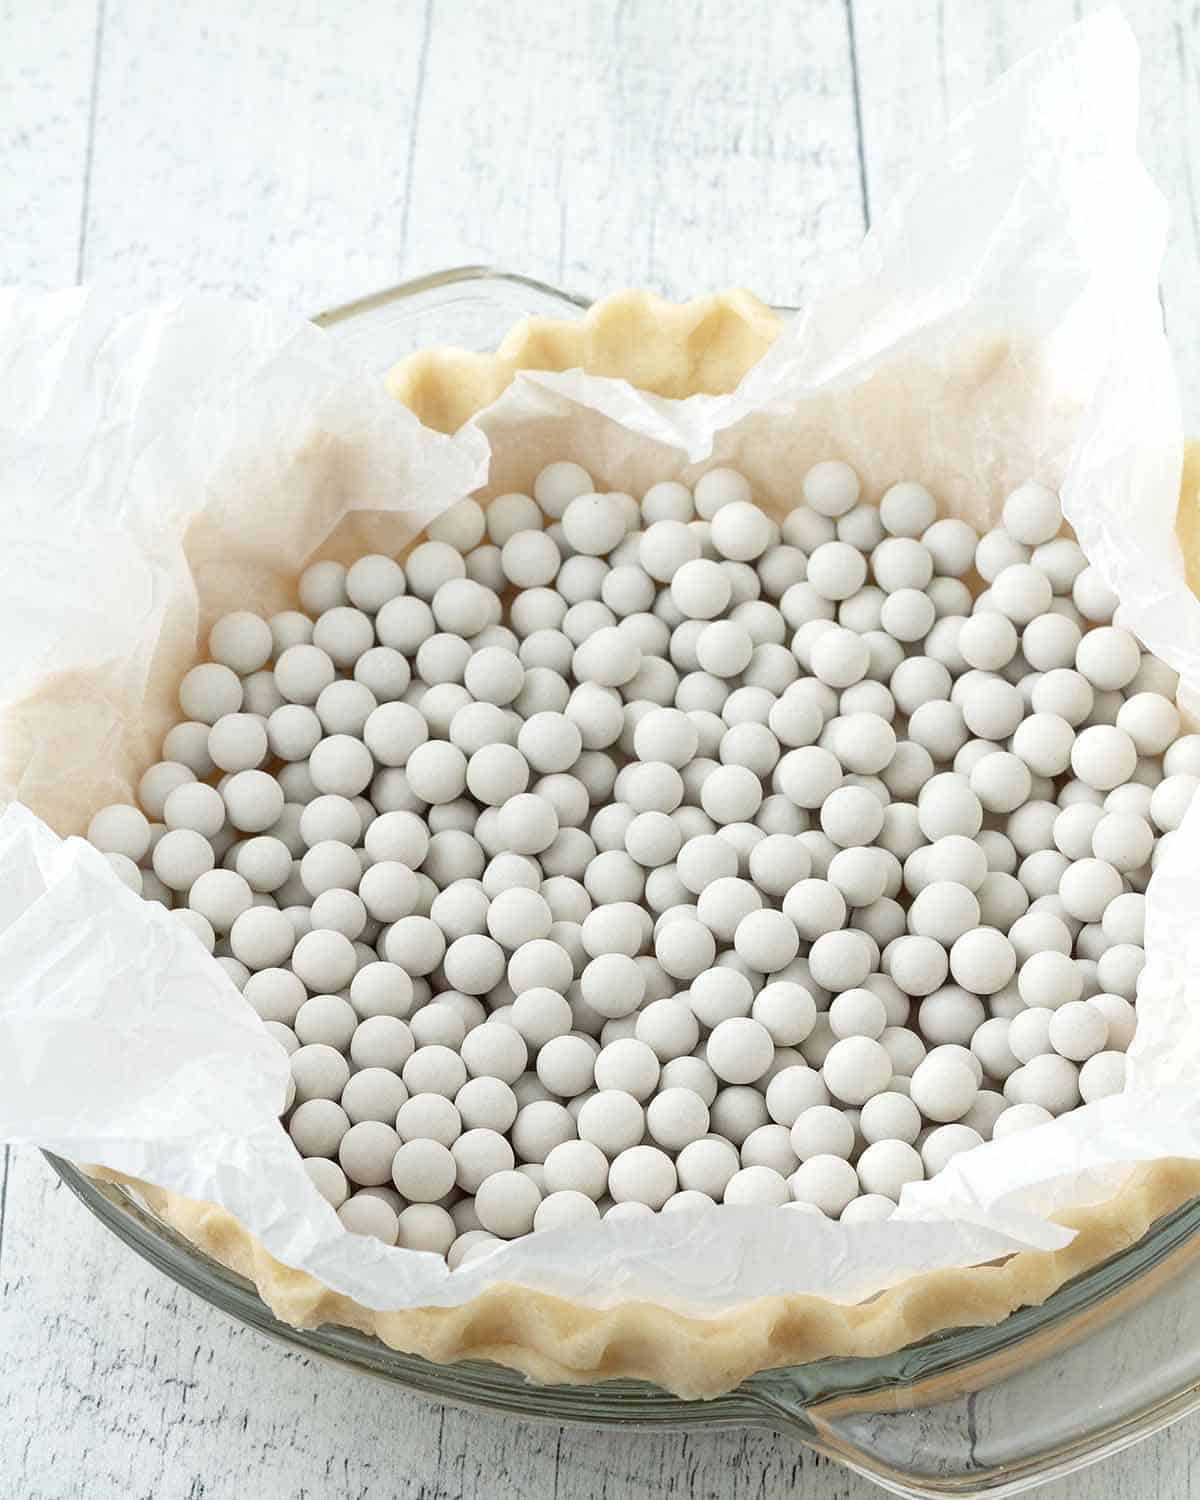
4. Pour the pie weights into the crust. Make sure they are evenly distributed in the pie shell and that they fill the corners. The weights should fill in up the sides of the crust so there is pressure against the sides as well.
Next, place the dish into the oven and bake!
If you are making a par-baked pie crust...
After the baking time has passed, you will have a partially baked crust. Stop here and place the dish on a cooling rack.
Carefully lift the parchment from the corners to lift the pie weights (they will be HOT!) and carefully lower the parchment holding the weights into a bowl or a baking sheet. The crust does not need to be fully cooled before you add the filling and return it to the oven.
After you have filled the pie crust continue baking your pie using the cooking direction from the recipe you are making.
NOTE: After removing the pie weights from the crust, let them fully cool before handling them. When they are cool, place them in a jar for the next use.
If you are making a fully baked pie crust...
Carefully lift the parchment from the corners to lift the pie weights (they will be HOT!) and carefully lower the parchment holding the weights into a bowl or a baking sheet.
Place a pie shield over the edges of the pie crust, this will prevent it from browning too much. You can either purchase a silicone pie shield or you can mould two pieces of foil to fit onto the edges like in the picture below.
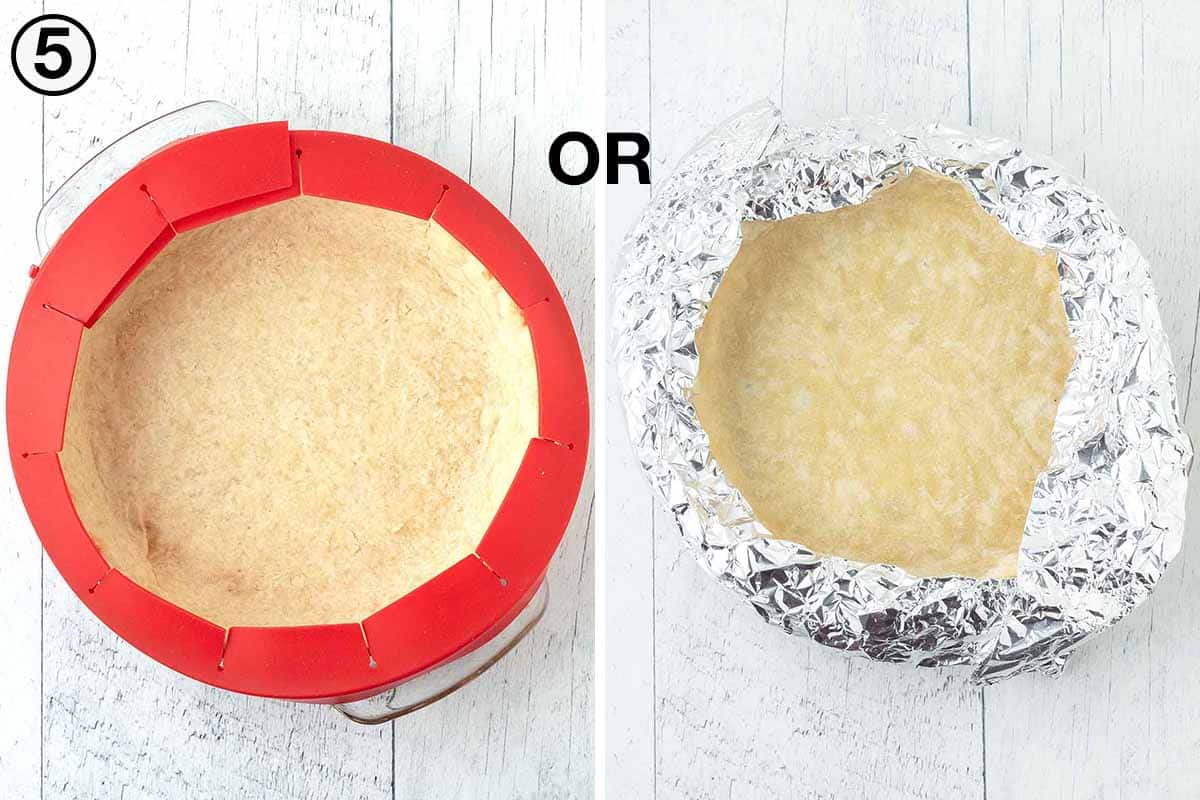
Place the dish back in the oven for a few more minutes to complete baking.
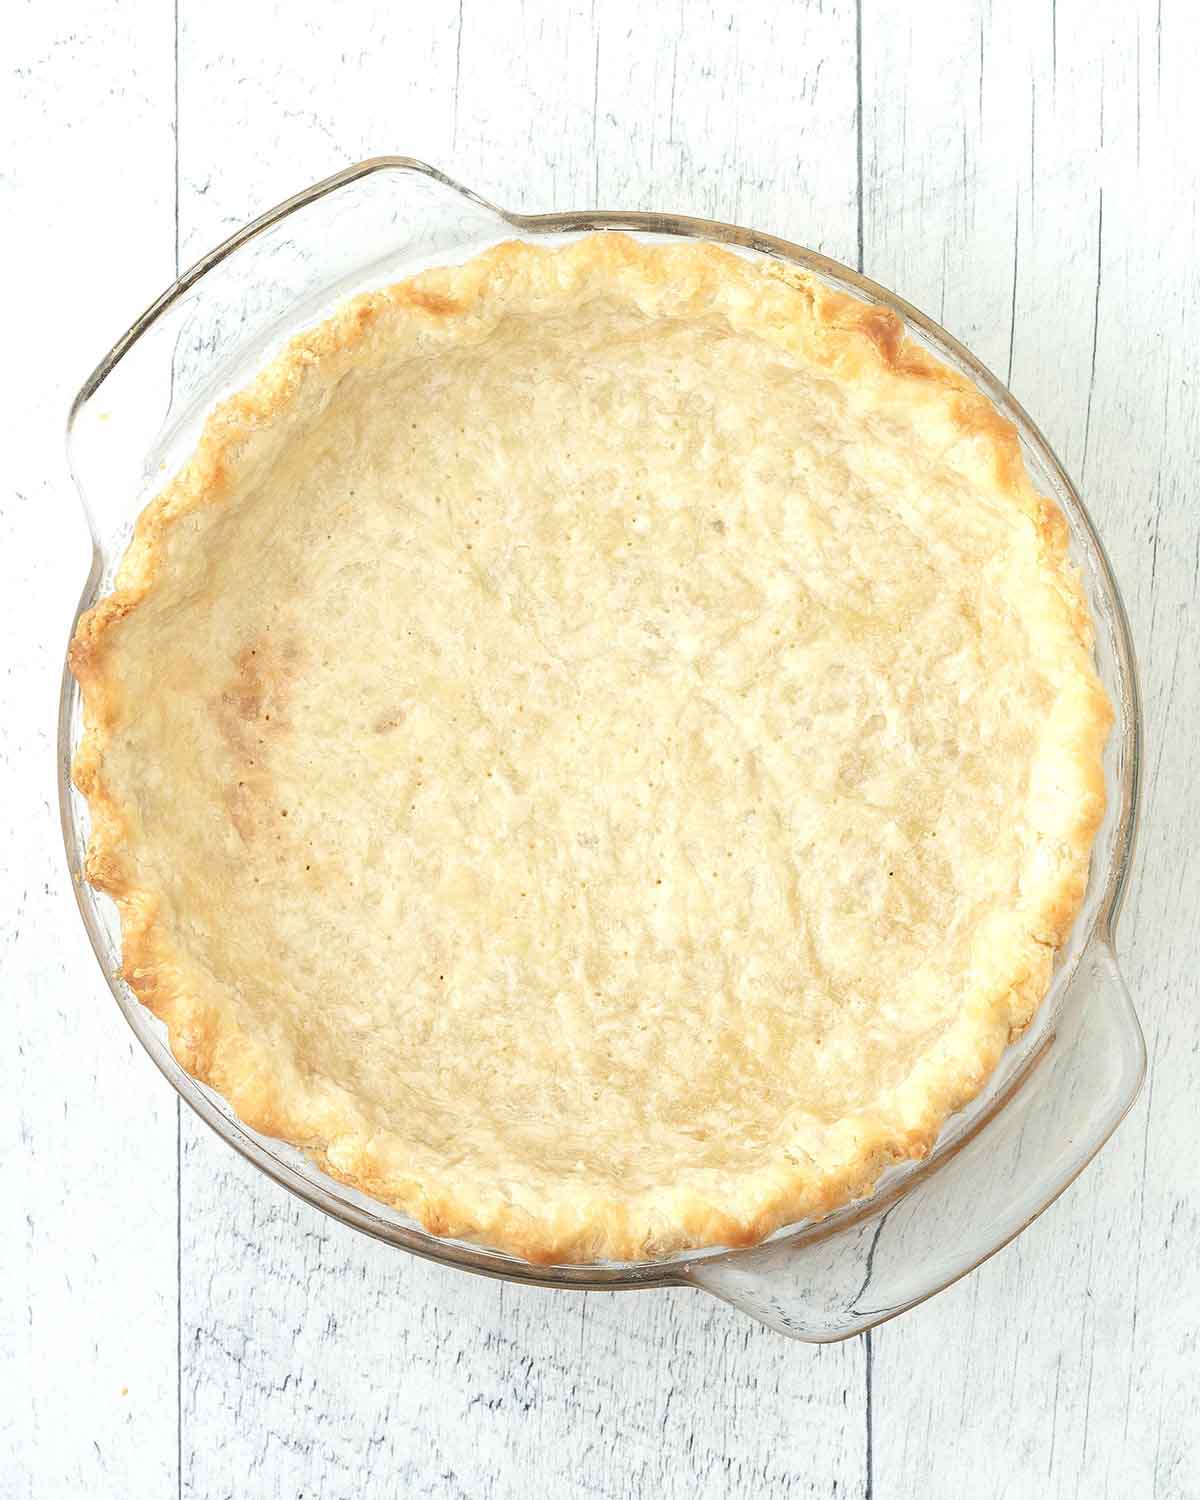
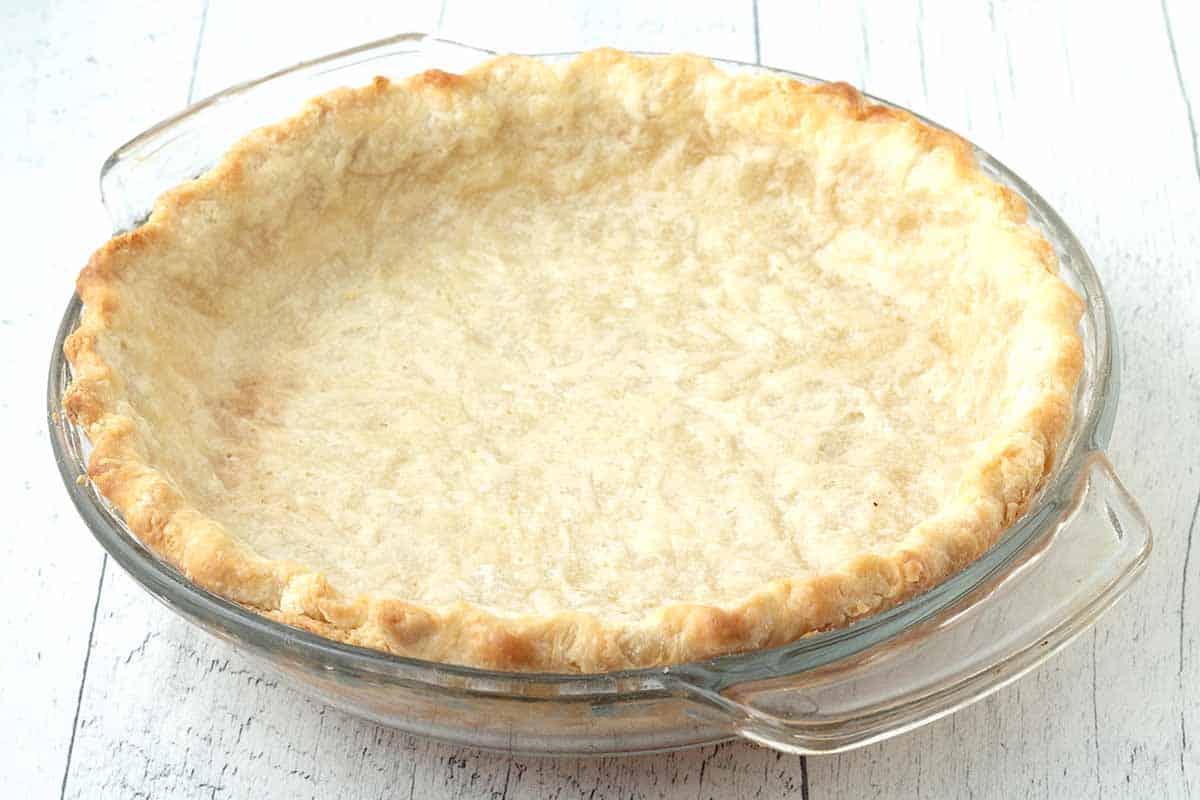
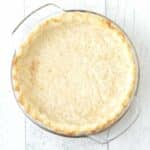
When the baking time is up, you will have a fully baked crust that is crisp, flaky, and golden brown.
If the bottom puffed up a little during this second stage of baking, simply poke it with a fork or gently press it down with the back of a spoon.
Place the dish on a cooling rack and allow it to fully cool before you add any filling to it.
Making Ahead and Freezing
You can pre-bake your pie crust 2-3 days in advance of when you will need it. After the weights have been removed, allow it to fully cool in the dish and then carefully wrap the dish and crust in plastic wrap and foil (do it gently because the crust can break easily!).
You can also freeze it for up to one month by wrapping the fully cooled crust (while it's still in the pie dish) in plastic wrap and then foil and placing it in a freezer bag or an airtight container.
When you're ready to use the frozen crust, thaw it in the refrigerator overnight or at room temperature.
Looking for some delicious pies to make? Check out all of my easy vegan pie recipes.
Tips for Success
I tested this method countless times, so many times that I still have several frozen crusts in my freezer waiting to be used! I learned a lot along the way, so please read these tips before starting, they will help you get everything right.
- Have everything ready to go before starting. This will make the process run smoothly, quickly, and easily.
- Only use blind-baked pie crusts for single-crust pie recipes. Adding a top crust after the bottom has been baked will not work. See the FAQ below for more info.
- Don't skip the chilling step to ensure you end up with a deliciously flaky crust that has the correct form. Feel free to stop and chill the dough at any time during the process if you feel it's getting warm. Before baking, chill it for at least 1 hour, longer, if possible. If you will be chilling it for longer than 1 hour, cover it with plastic wrap so it does not dry out. The dough needs to be very cold before baking to prevent shrinking. If it's too warm it will not have the proper texture and you can lose the crimps.
- Don't skip the pie weights and use enough of them! If weights are not used, or you don't use enough of them, there will be nothing to hold the shape of the crust and it will shrink down the sides of the dish and the result will be misshapen.
- Don't skip the parchment paper or foil! A barrier in between the dough and the weights is needed or the weights will sink in and bake into the crust.
To help you further develop your kitchen skills, have a read through all of my helpful how-to posts.
Tips for Success (continued)
- If you are using a glass pie dish, make sure it can handle going from cold to hot temperatures without issue. If it's not made from the type of glass that can handle extreme temperature changes, your dish will shatter so this is very important. Make sure to check the label before buying.
- Don't let the high baking temperature scare you. The oven temperature is high, but this is the temp I found worked best. If you are fully blind baking your crust and you see it browning too quickly, place a shield around the edges (see above for more info). If baked at too low of a temperature, the fat in the crust will just melt which will make the crust shrink and bake unevenly. It will also cause the crust to not be golden and flaky.
- Read this post from top to bottom before you start. It's not a complicated process but I’ve included a lot of tips and tricks. Also, read through the full post with all the details before getting started.
- Follow this step-by-step exactly as it’s written for the very best results.
FAQ
They can be blind-baked, but keep in mind that store-bought pie crusts are thinner than a homemade pie crust recipe and they are also made using a different ratio of fat to flour, so the baking times are usually shorter. The timing in my method is specifically for homemade crusts and will be too long for a store-bought crust, so if you do want to use my method, you will have to adjust the timing and keep a close eye while the crust bakes so it does not burn. The package may also have directions for blind baking, if it does, follow those directions instead of following the method outlined in this post.
Weights are essential to successfully blind-baking a pie crust. If you don't use them, there will be nothing to hold the shape of the crust and it will shrink down the sides of the pie dish and puff up. The result will be misshapen so always use pie weights. Reusable ceramic pie weights can be purchased or you can use dry beans, dry rice, dry lentils, or sugar.
There are a few things that can cause the crimping (or fluting) to "uncrimp" or "unflute" while blind baking. The first is not using enough pie weights, always use enough so the crust doesn't shrink down and move while baking. Next is not chilling the crust long enough before baking. A cold crust is essential to having it retain its shape while baking. The last cause is a pie dough that has too much water. As the water evaporates while baking, the shape will get lost. Always start with a good and well-tested pie dough recipe.
No, it will not. Adding the filling slows down the rate that the blind-baked crust cooks (it won't cook as quickly as when it was par-baked) and it will also be baked at a lower temperature. Just follow the exact directions in the recipe you are making and it will be fine.
After the bottom crust is baked, there is no way to stick the top crust to the bottom crust so it seals properly. This can cause the filling to bubble out of the sides while it bakes, and the top will not stay in place after the pie is baked. There may be some creative ways to do this, but at this time, I have not tested any methods so I cannot recommend anything that I feel confident will work. If you want to have a top for your pie, you can add a streusel or crumb topping.
Yes, they can. Just cut the dough into the size you need, place them in mini tart pans or a muffin pan, line each tart with parchment paper, fill with pie weights, and bake. Since they are smaller than a full pie crust, they will need to be baked for a shorter amount of time.
Typical apple pie recipes do not require the crust to be blind baked, the crust cooks along with the filling, however, if you are making a specialty recipe that calls for the crust to be baked before the apple filling is added, follow what the recipe says for the best results.
If You Make This Recipe...
...I'd love to know how things went and what you made with your pie crust! Did you make a chocolate pie? A banana cream pie? A key lime pie? Leave a comment and star rating below or you can post a picture on Instagram and tag me so I can see it. (I’m @delightfuladventures on Instagram!)
If You Like This "How To" Post...
...you may like these others:
How to Blind Bake a Pie Crust
Suggested Equipment:
Ingredients:
- 1 pre-made pie dough (see note below)
Instructions:
This method starts with premade pie dough that has already been rolled and placed in a pie dish with the edges crimped or fluted. Use either my vegan pie crust or my vegan gluten-free pie crust or another recipe you prefer.
- Dock the pie crust by poking a fork into the bottom of the pie crust. Continue until the crust has fork marks throughout.
- Place the pie dish in the refrigerator for AT LEAST 1 hour so it can chill before baking.
- Before the chilling time is up, preheat the oven to 425°F (220°C).
- When the chilling time has ended, remove the dish from the fridge and place a piece of parchment paper that has been crumpled up a few times into the pie crust. Gently push it into the corners so the entire bottom and sides are covered and fold it over the edges of the crust.
- Pour pie weights into the crust. Make sure they are evenly distributed and that they fill the corners. The weights should fill in up the sides of the crust so there is also pressure against the sides.
- Place the dish into the oven and bake for 20 minutes.
- When the baking time is up, remove the pie crust from the oven and place it on a cooling rack.
If you are par-baking the pie crust:
- Carefully lift the parchment from the corners to lift the pie weights (they will be HOT!) and carefully lower the parchment holding the weights into a bowl or a baking sheet.
- Add the pie filling to the crust and proceed with the pie recipe you are making. The crust does not need to be fully cooled before adding the filling and returning it to the oven.
If you are fully blind baking the pie crust:
- Carefully lift the parchment from the corners to lift the pie weights (they will be HOT!) and carefully lower the parchment holding the weights into a bowl or a baking sheet.
- Place a pie shield over the edges of the pie crust and bake for an additional 7 minutes.
- When the baking time is up, remove the dish from the oven and place it on a cooling rack. Remove the pie shield and allow it to fully cool before adding the pie filling.
Recipe Notes:
- Please read all of the information tips, and FAQ info above, as well as the notes below before baking your pie crust.
- I tested this method with both my vegan pie crust and my vegan gluten-free pie crust. Use one of these or another recipe you prefer. If you use a different pie dough, keep a close eye on it while it bakes since it may take a few minutes longer or bake a little faster. This method is not meant for specialty pie crusts like those made from Oreo cookies, graham crackers, or pretzels, it's meant to be used for a crust made from flour and butter or shortening.
- If you are using a glass pie dish, please make sure that you are using one made from "borosilicate glass." This type of glass can withstand big temperature changes.
- Don't skip chilling the dough before baking it, this step is very important for the crust to bake properly and have the correct texture.
- If you aren't using a pie shield and you notice the edges of the crust browning too quickly, place a pie shield or foil over the edges to protect them from over-browning.
- When removing the pie weights from the crust, carefully lift the parchment from the corners to lift the pie weights (they will be HOT!) and carefully lower the parchment holding the weights into a bowl or a baking sheet.
- To make ahead and store or freeze: Allow the crust to fully cool in the dish (without the weights) and then carefully wrap the dish and crust in plastic wrap and foil (do it gently because the crust can break easily!). You can also freeze it for up to one month by wrapping the fully cooled crust (while it's still in the pie dish) in plastic wrap and then foil and placing it in a freezer bag or an airtight container. When you're ready to use the frozen crust, thaw it in the refrigerator overnight or at room temperature.
- Nutrition info is based on ⅛ of my vegan pie crust recipe made as written and with no filling. Nutrition info is only to be used as a rough guide. Click to learn how nutrition info is calculated on this website.

Leave a Reply