This page may contain affiliate links. Click to learn more. As an Amazon Associate I earn from qualifying purchases.

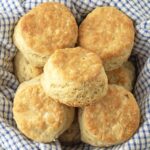
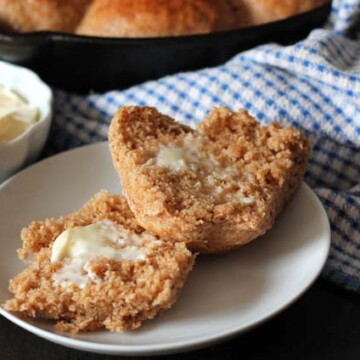
Flaky and buttery vegan biscuits that bake up golden, soft, and perfectly flaky. This simple homemade recipe uses vegan buttermilk to help create a light, tender texture and that classic biscuit flavour you love.
They’re easy to make, completely dairy-free and egg-free, and perfect to enjoy at breakfast, brunch, or alongside any meal. Enjoy them warm from the oven with jam, vegan butter, or your favourite sweet or savoury topping.

Save This Recipe!
In a hurry? Drop your email below, and this recipe will be sent straight to your inbox for later. You'll also get fresh recipes every week! You can unsubscribe anytime.
Flaky, tender vegan biscuits from scratch? What can be better than that? These soft, but crisp-edged biscuits are a favourite and a regular on my weekend baking rotation because they're simple, reliable, and everyone loves them!
While they're best served warm, fresh from the oven, I like to bake a batch and keep them in the freezer to reheat individually during the week.
Now, before we start, let me say this...once you start scrolling through the pictures and you see the process to make them come to life, please don't feel intimidated.
While the number of images might make this recipe seem complicated, it's not. Getting it right is really just about using the proper technique, which is simple, promise.
I just added a few extra pictures to show you every step. So have no fear, I'm going to walk you through everything to make sure they turn out perfectly.
Let's make some biscuits!
Before We Dive In
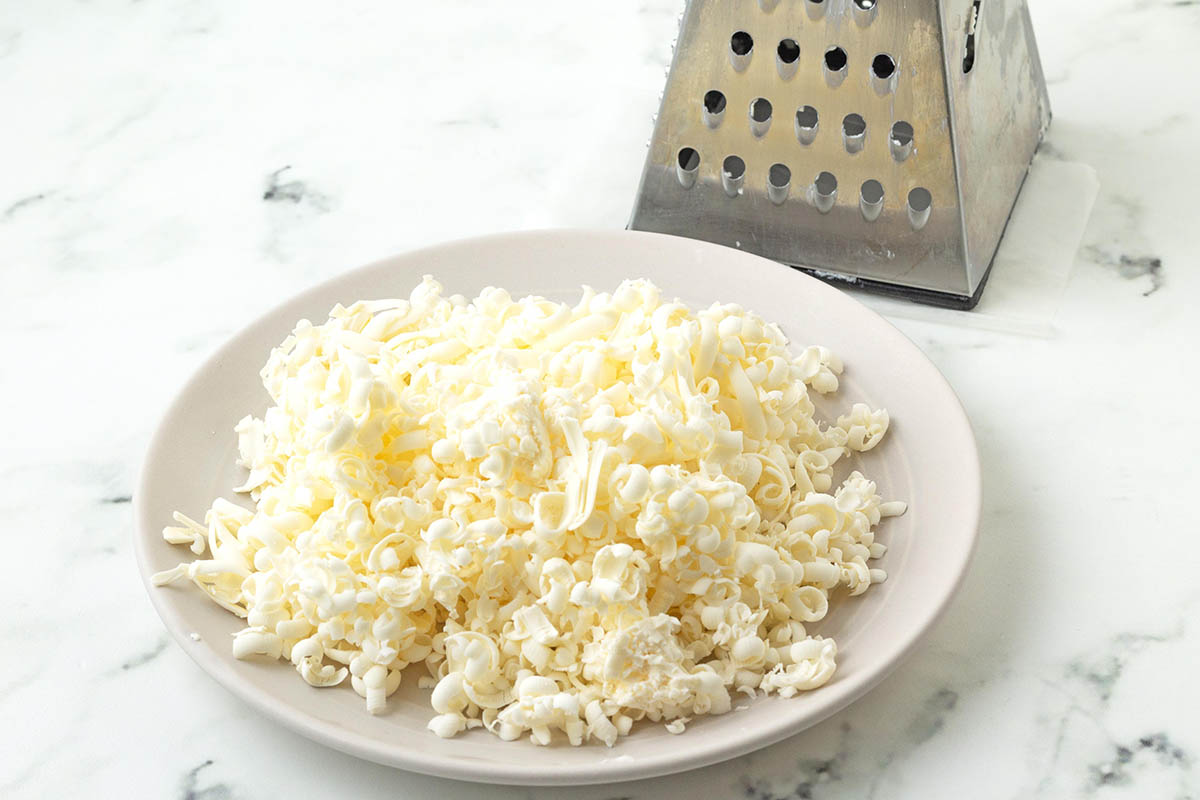
The vegan butter in this recipe is probably the most important ingredient, since it's the one that has the most impact on whether your biscuits will be flaky or not.
One key to flaky biscuits is making sure your butter is as cold as possible. The more intact the pieces of butter remain, the better. You don't want them to melt.
So, take note of these tips for how to treat the butter in this recipe:
- Put your stick of butter in the freezer the day before you plan to make the biscuits.
- The day you will be making the biscuits, grate the butter on the largest holes of your box grater.
- After grating, place the plate or bowl holding the butter back in the freezer until you need to add it to the recipe.
- Work quickly with the dough so your hands don't melt the butter.
Here's Everything You'll Need
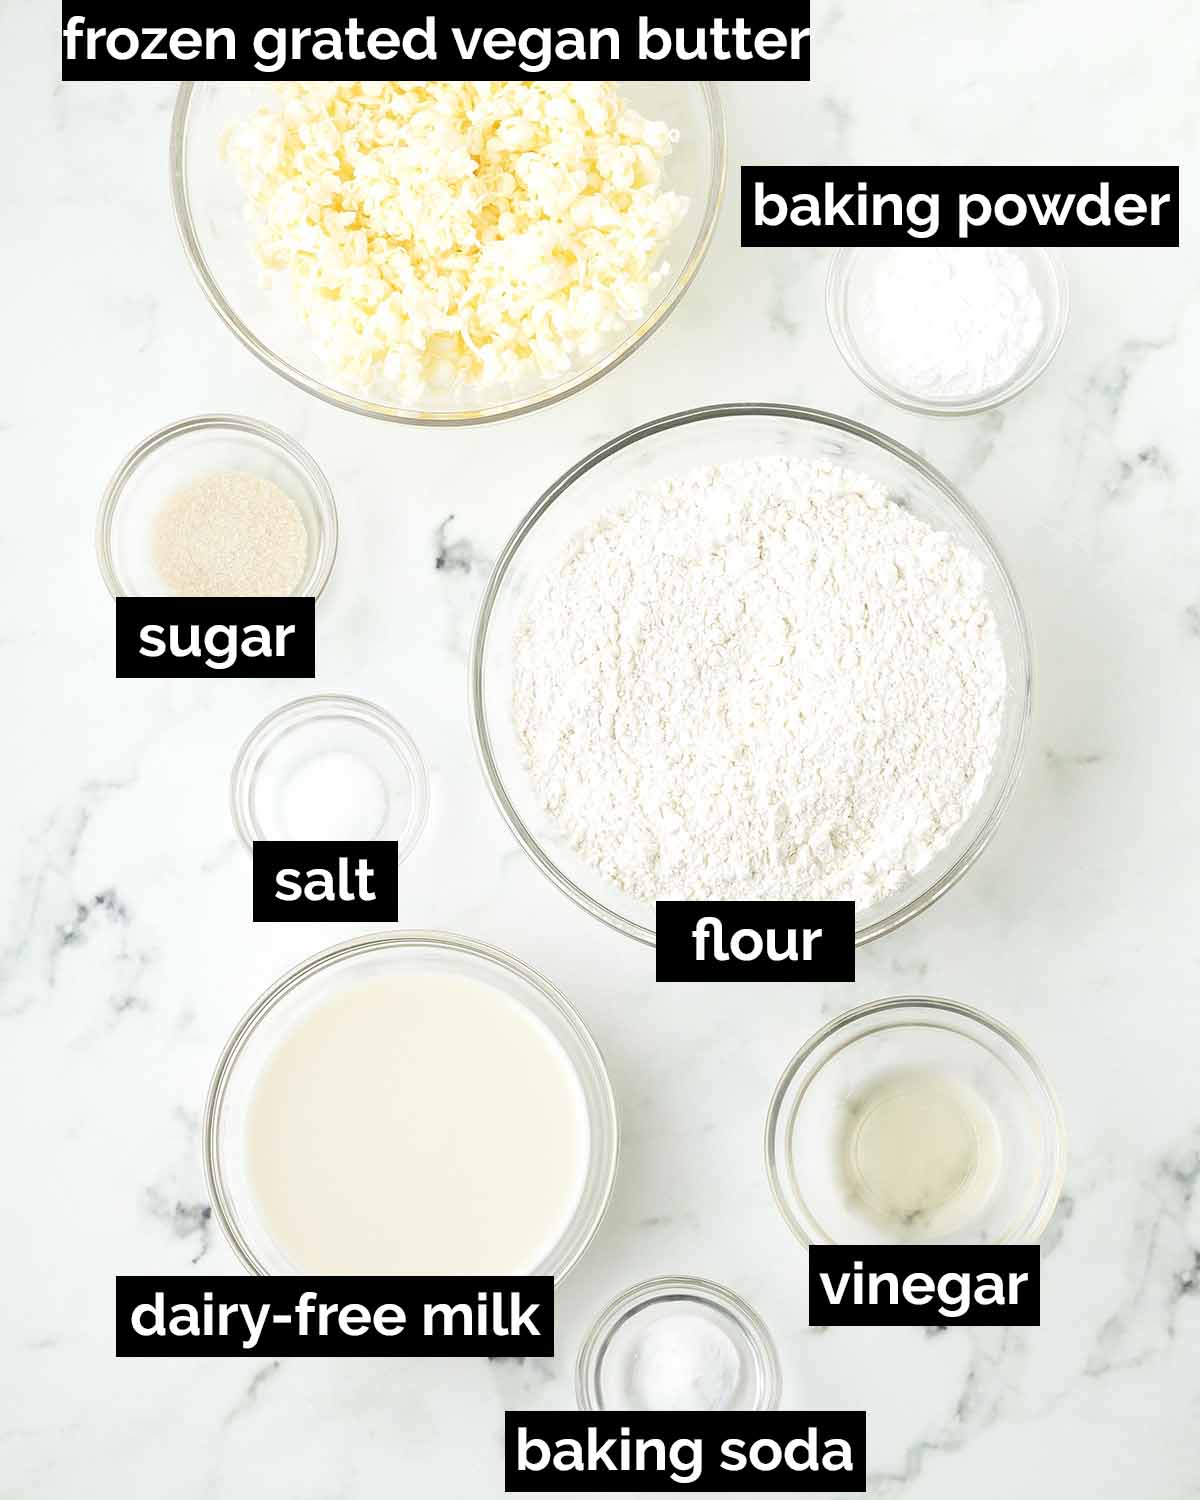
Notes on Ingredients and Options
(NOTE: Only ingredients with special notes are listed below. The full ingredient list can be found in the recipe card.)
Unsalted Cold Vegan Butter - Only use butter that comes in hard stick form (or blocks). Vegan margarine or butter that comes in a container is too soft and will not work well in this recipe.
Dairy-Free Milk + Vinegar - These two ingredients make the vegan buttermilk. In my testing, soy milk always makes the best vegan buttermilk; however, if you don't have soy milk, any dairy-free milk will work, just make sure it's unflavoured and unsweetened. I use apple cider vinegar, but white vinegar or lemon juice will also work perfectly.
Baking Powder - Baking powder is the star that helps these biscuits rise, so making sure it's fresh is important. This recipe calls for a bit more than other baking recipes, which is why I strongly recommend aluminum-free baking powder. It ensures your biscuits taste their best and rise perfectly. I use and recommend aluminum-free baking powder for all baking.
Baking Soda - Just a little is needed, so don't be tempted to skip it. It plays a role in the biscuits' browning to that beautiful golden colour. It also reacts to the acidity of the buttermilk to help with rising.
Sugar - The sugar also helps the biscuits to brown and helps to balance the flavour, don't leave it out. The biscuits won't taste sweet since it's such a small amount.
How to Make Them from Start to Finish
(Note: I’ve outlined the step-by-step on how to make these vegan buttermilk biscuits here, but find the full recipe, ingredients, and directions in the recipe card at the end of this post.)
Start by combining the dairy-free milk and vinegar. Stir and refrigerate to keep it cold.
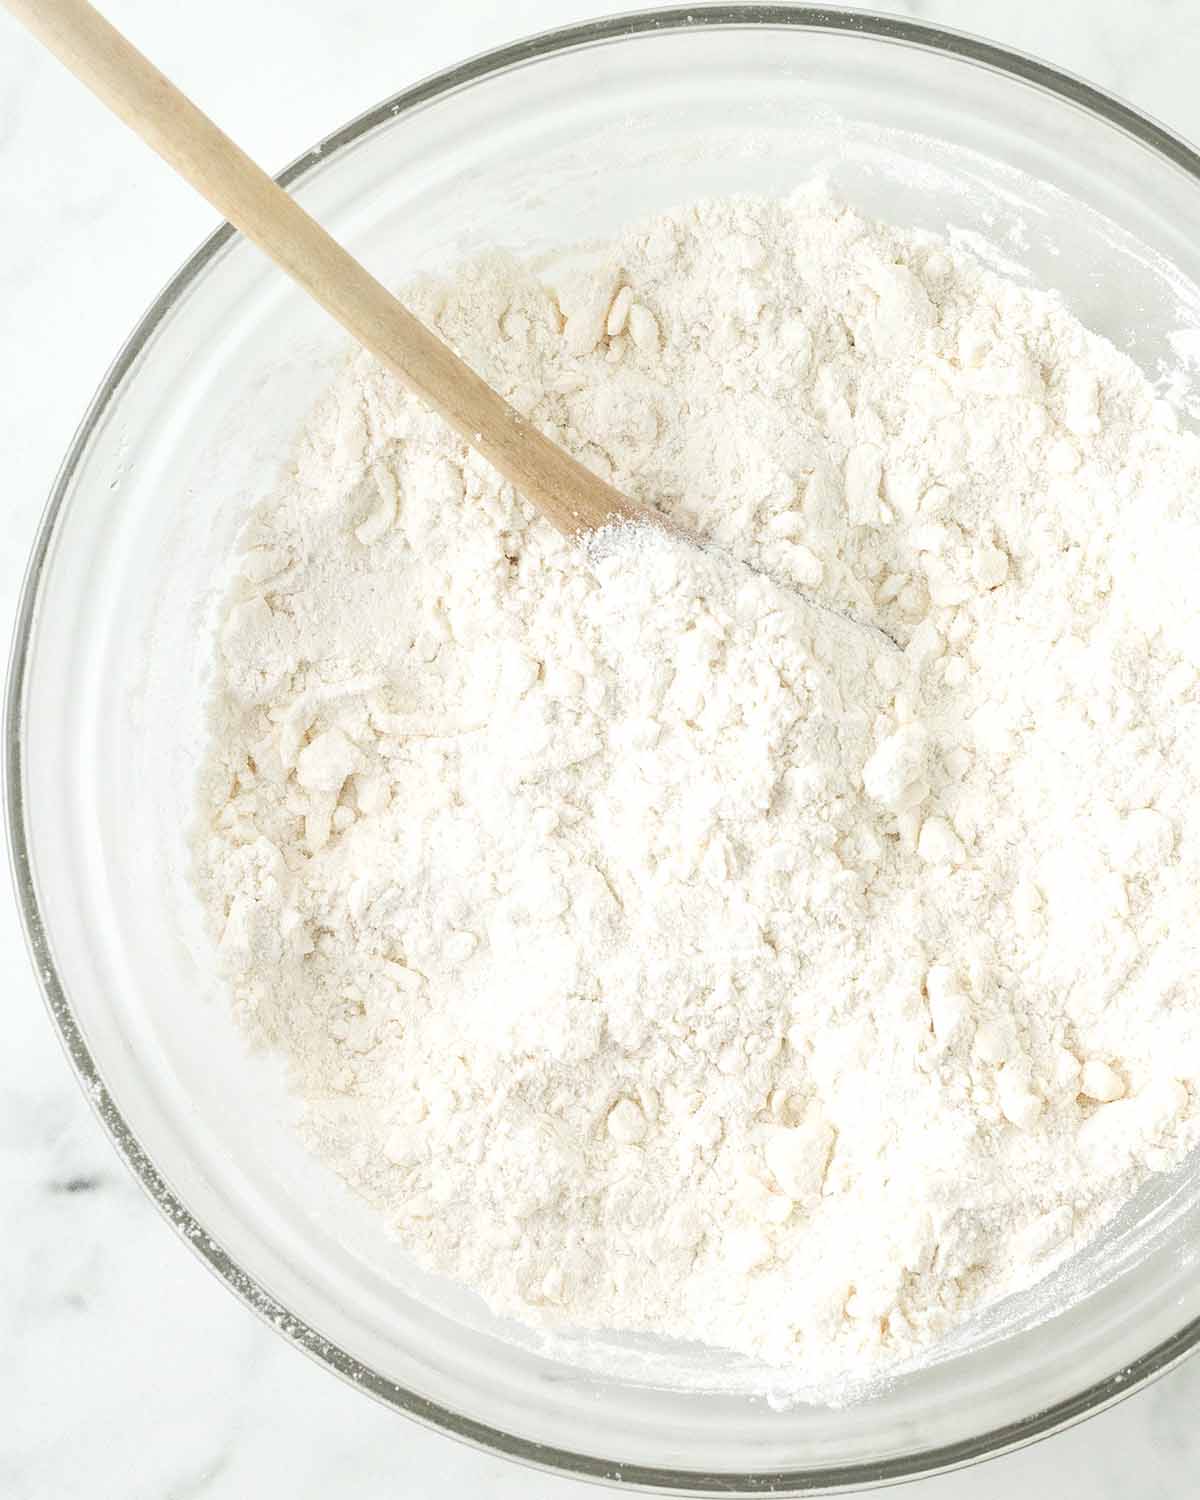
Whisk together the dry ingredients. Stir in the frozen grated butter.
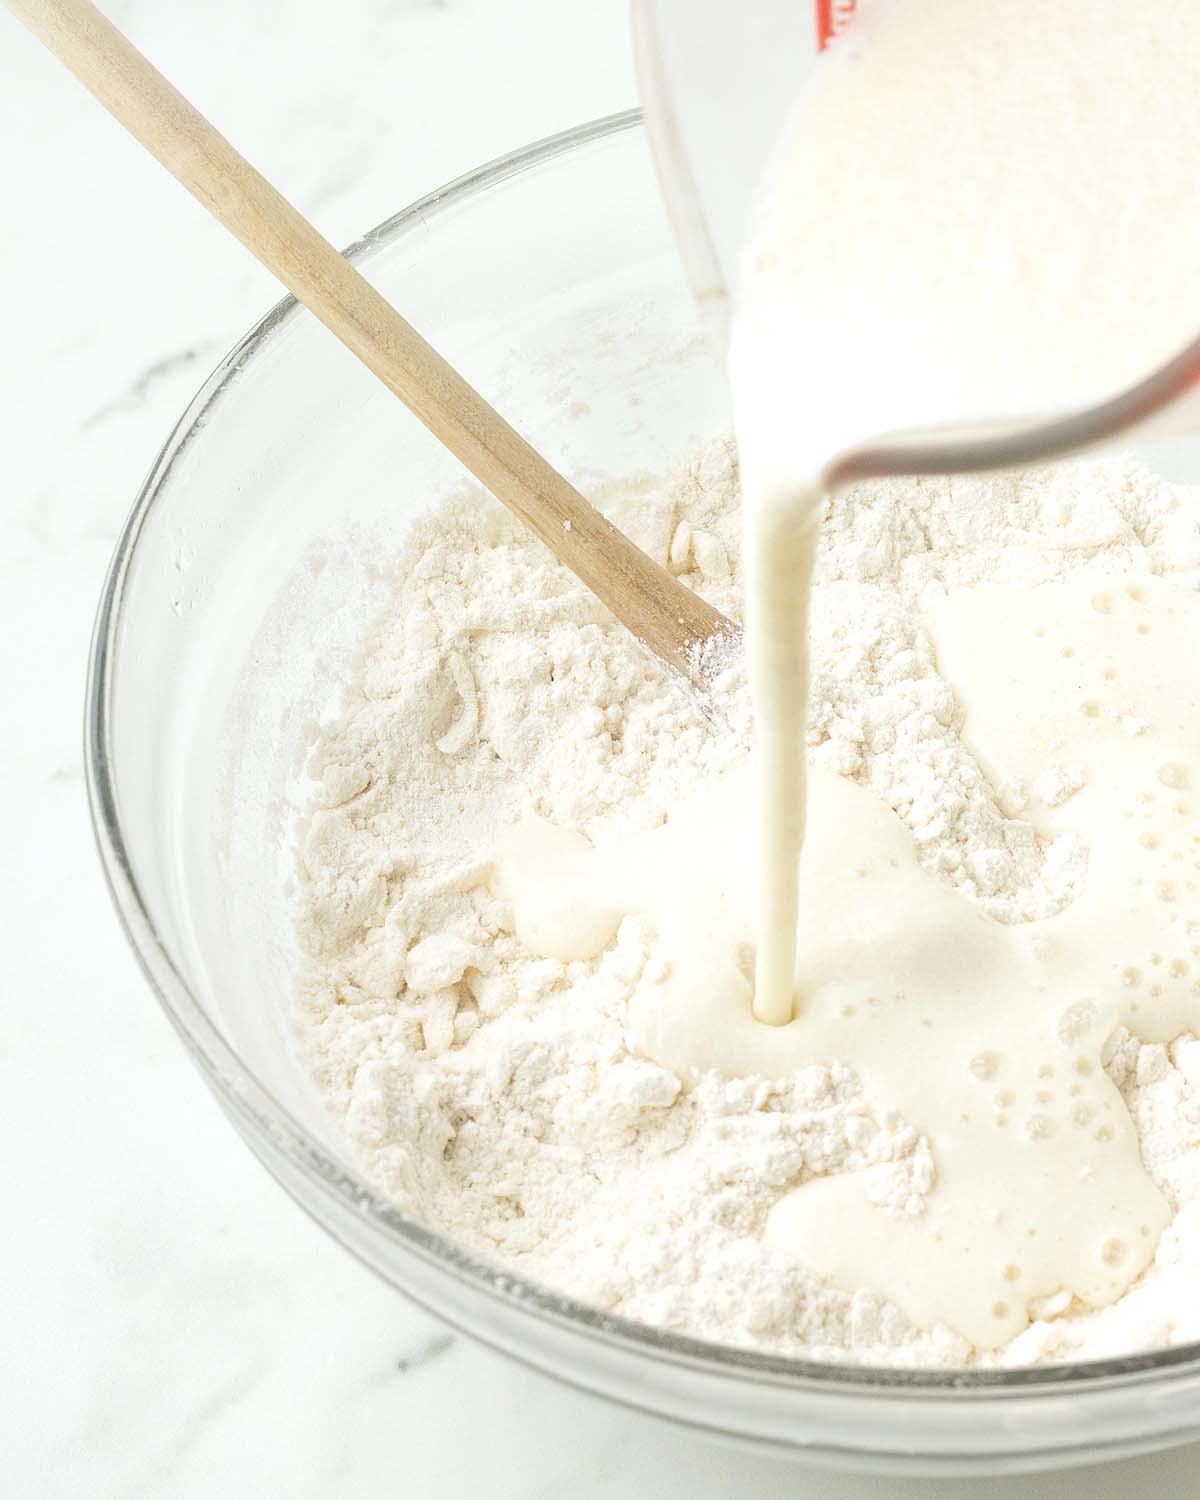
Pour the cold buttermilk into the bowl.
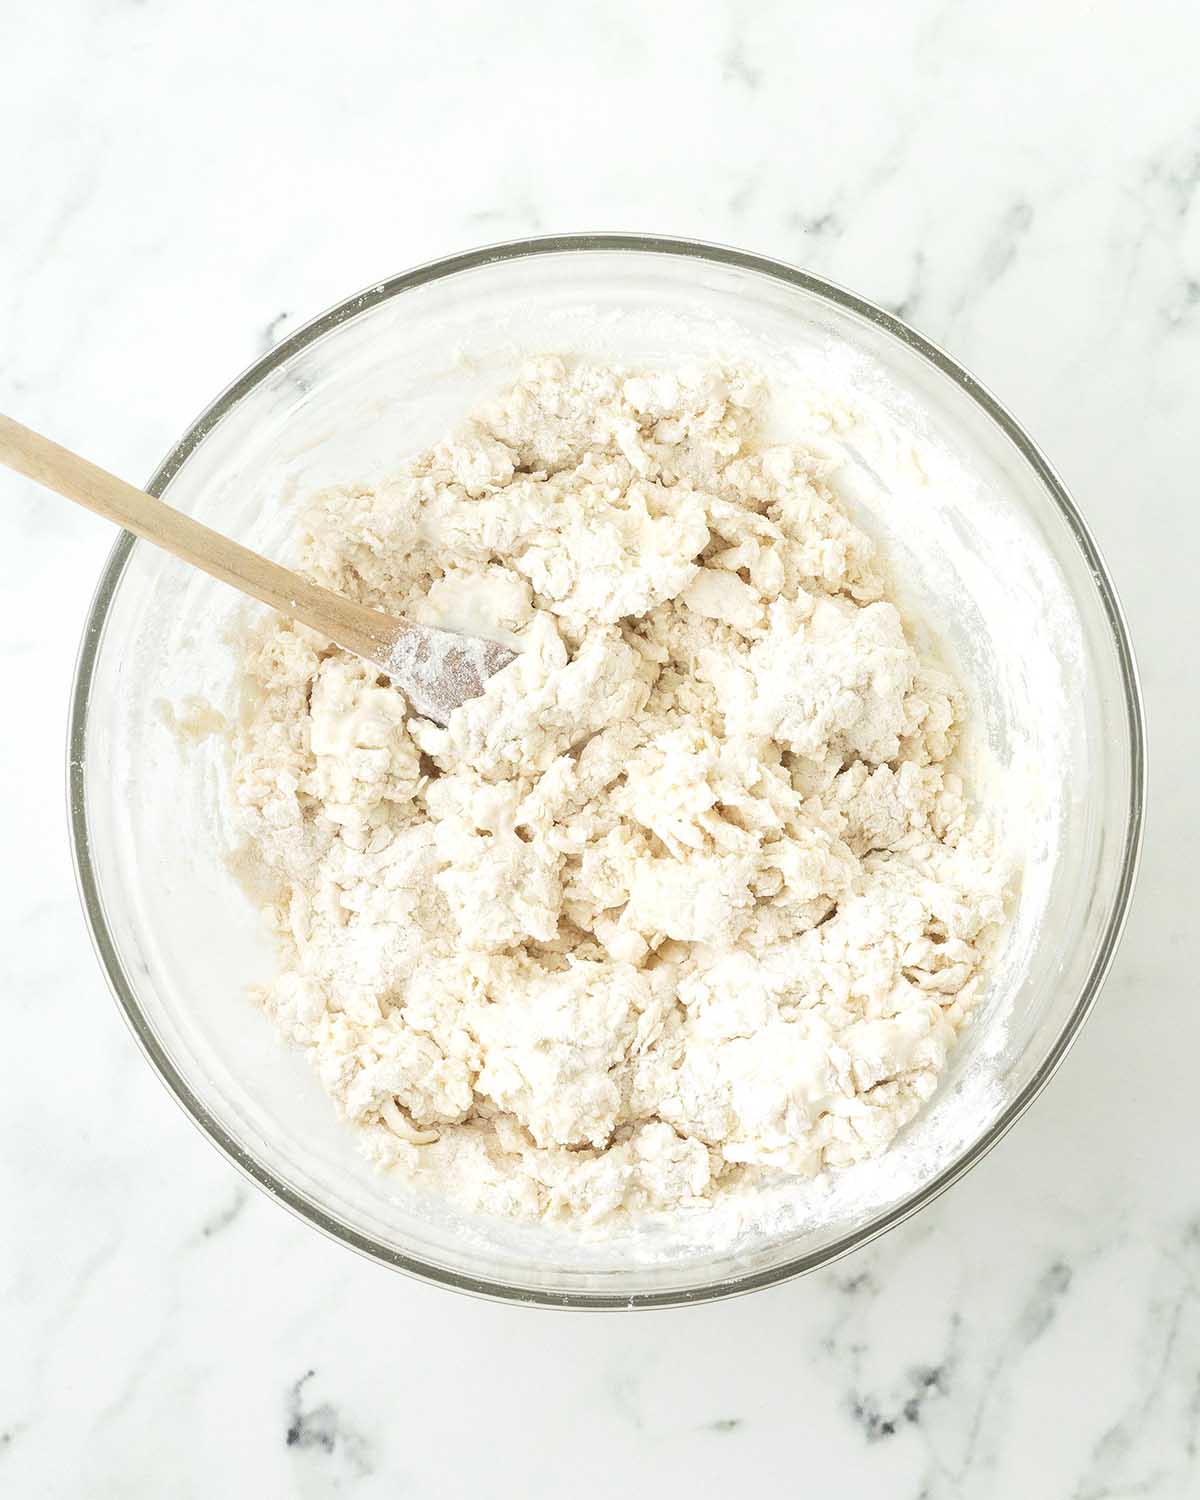
Stir to combine the wet and dry ingredients.
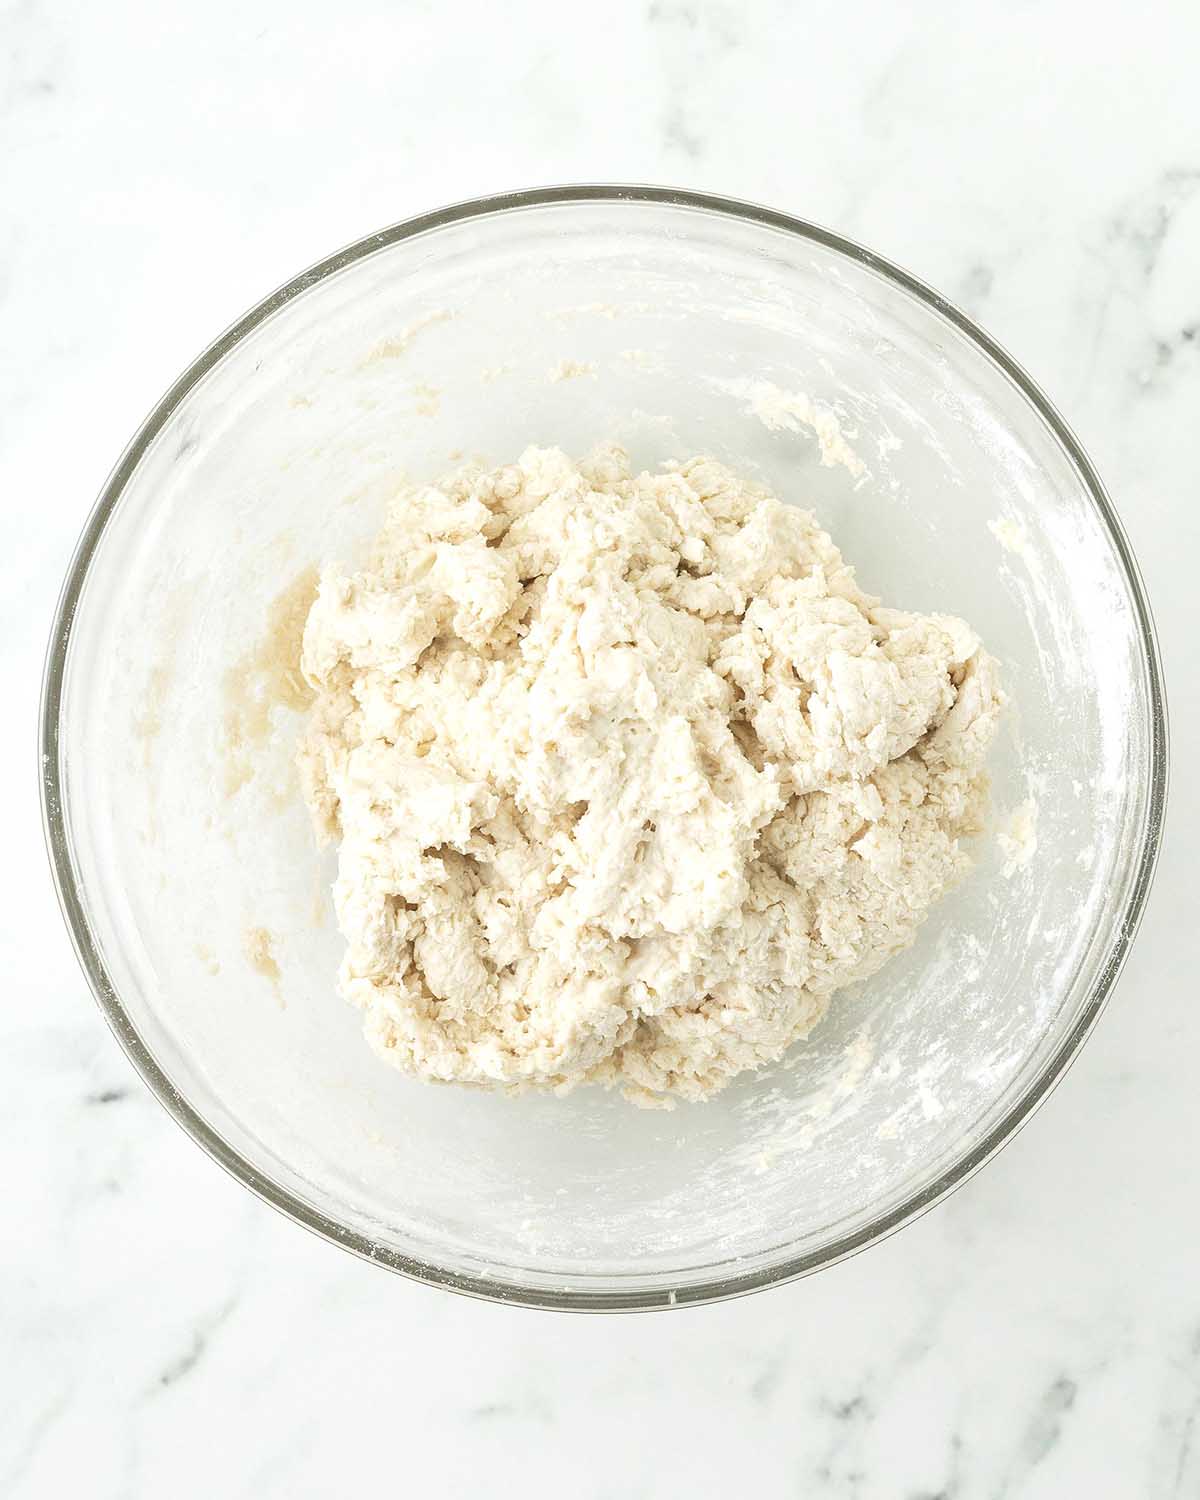
Continue stirring until a rough, shaggy dough forms. Don't overmix.
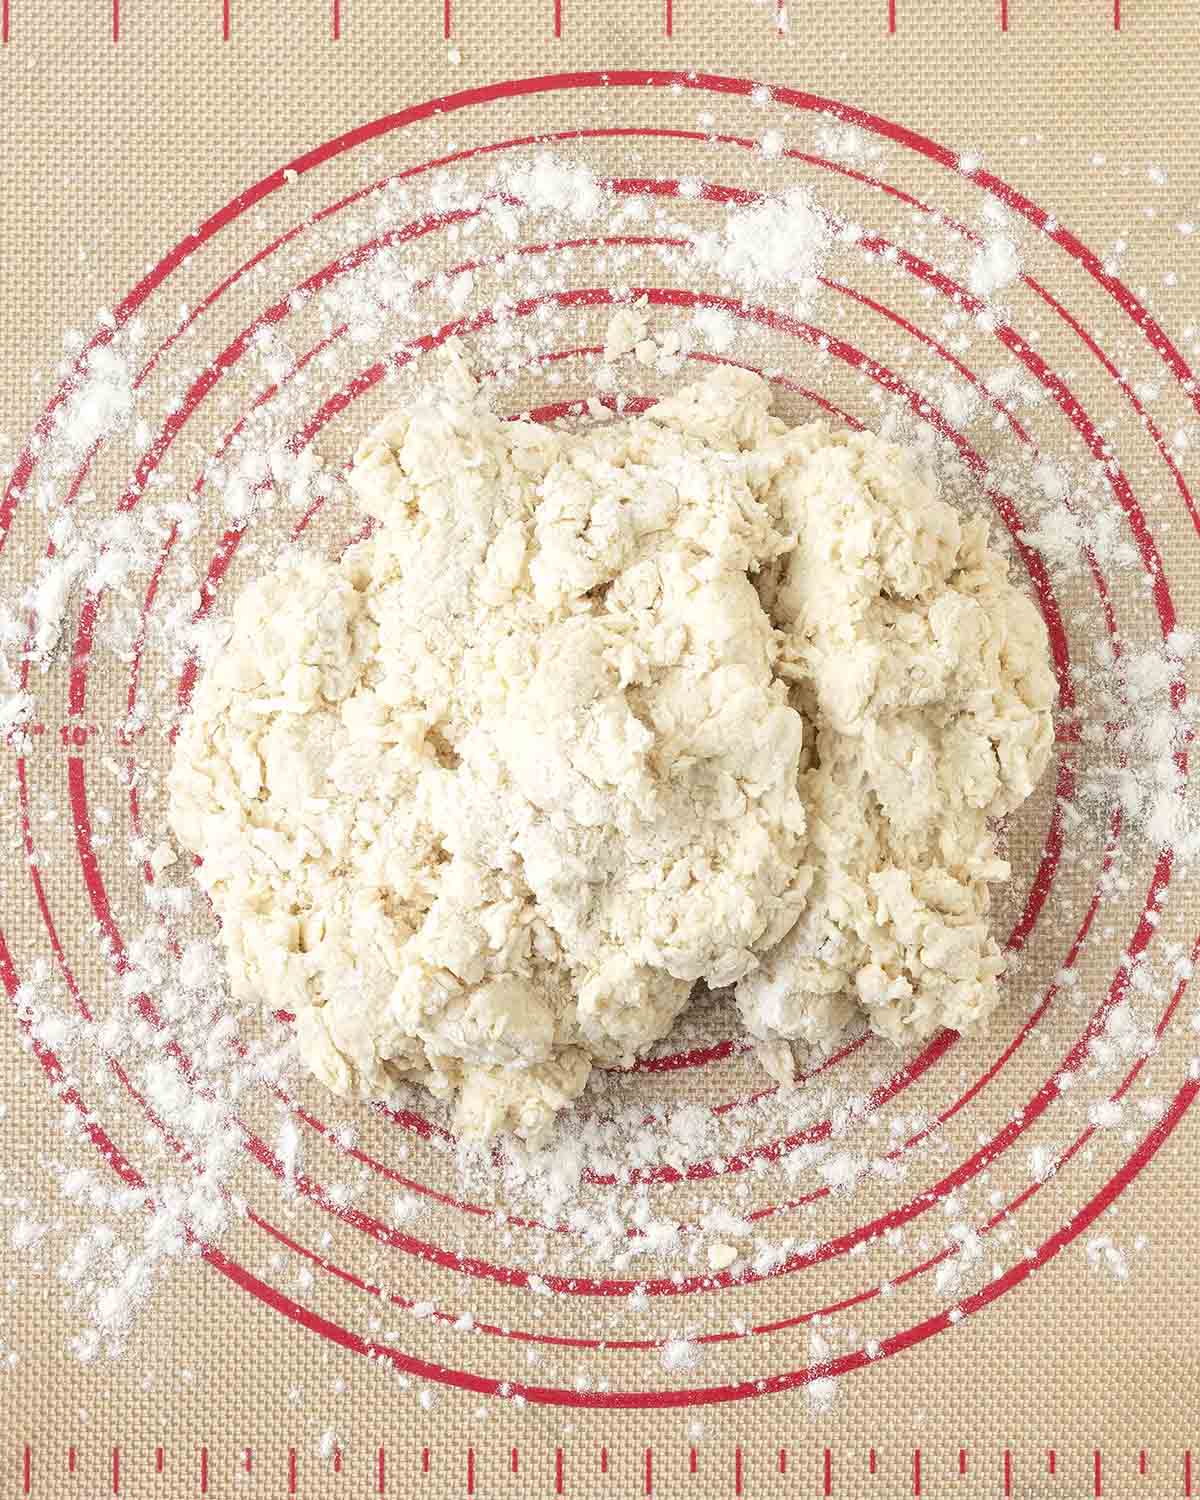
Transfer the dough to a floured pastry mat or parchment paper.
Pat the dough into a rectangle.
Recipe Note
The next few steps go through the technique of folding the dough. This process is called lamination, and it's what gives your biscuits those wonderfully flaky layers we all love.
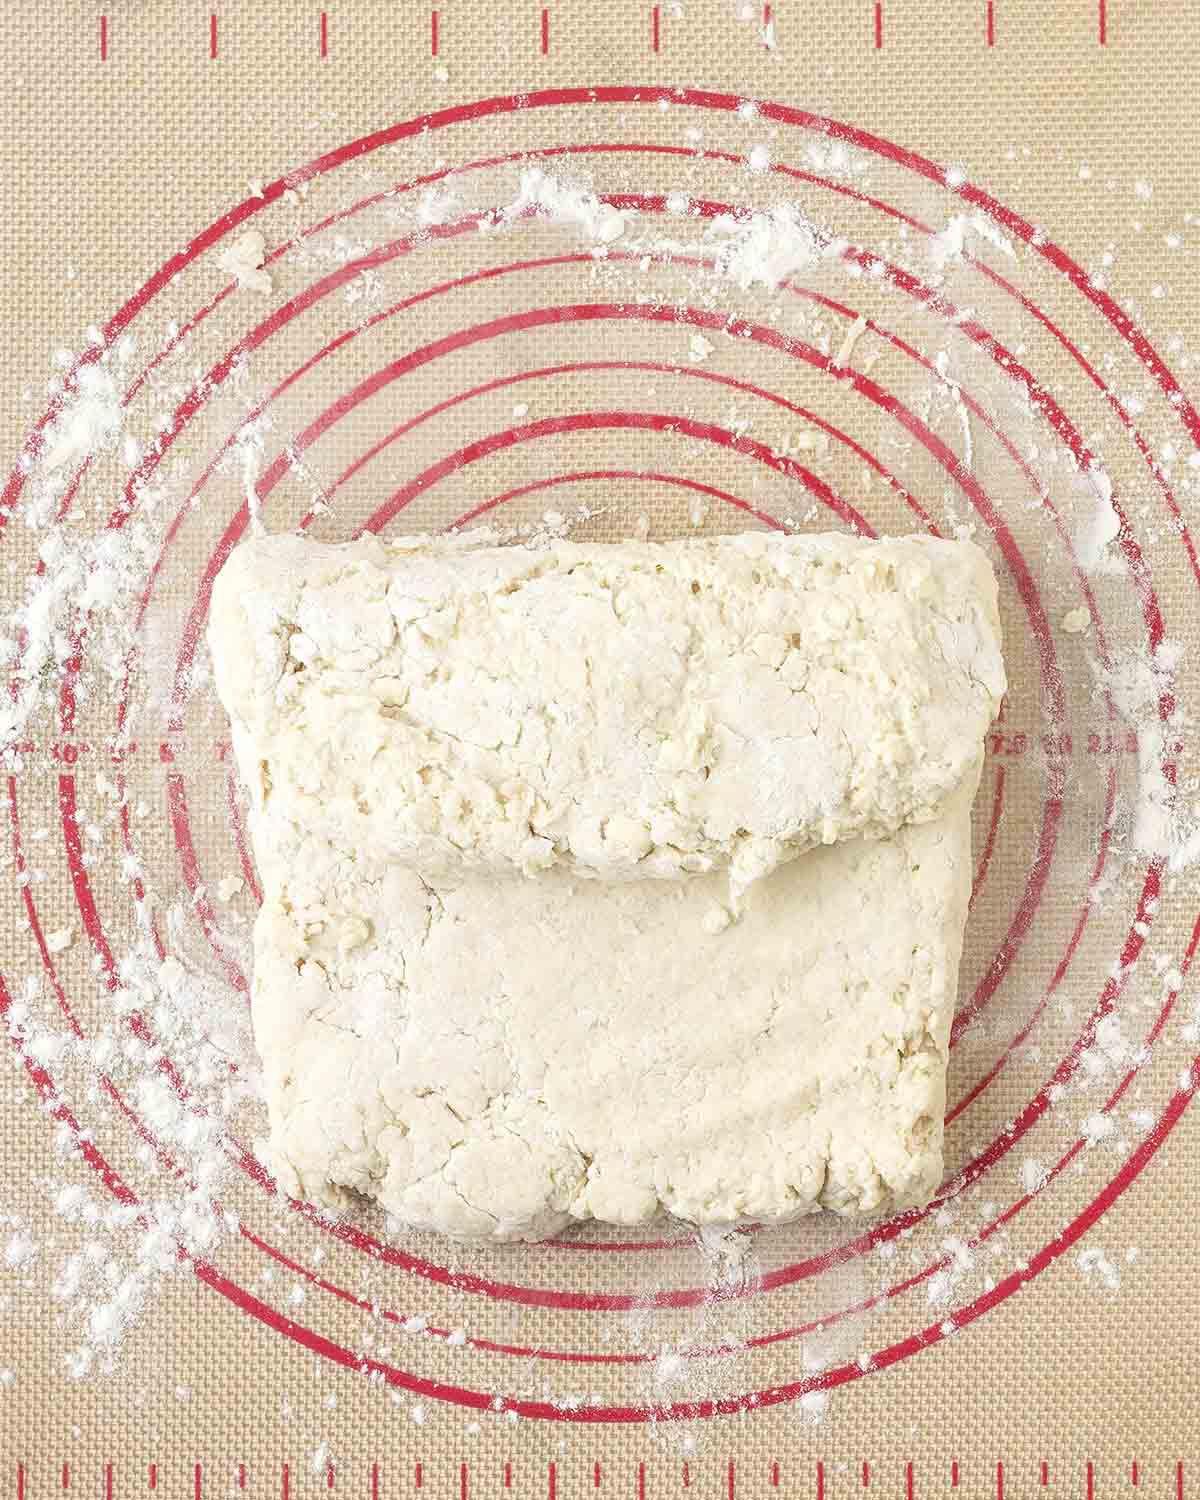
Fold the top third down to the center.
Fold the bottom third up over the top.
Hands or Rolling Pin?
I like to shape and flatten the dough with my hands instead of a rolling pin. It’s easy to press too hard with a pin and lose those lovely layers you're creating. Your hands have a lighter touch that keeps the layers intact. Just remember to work quickly so your hands don't melt the butter.
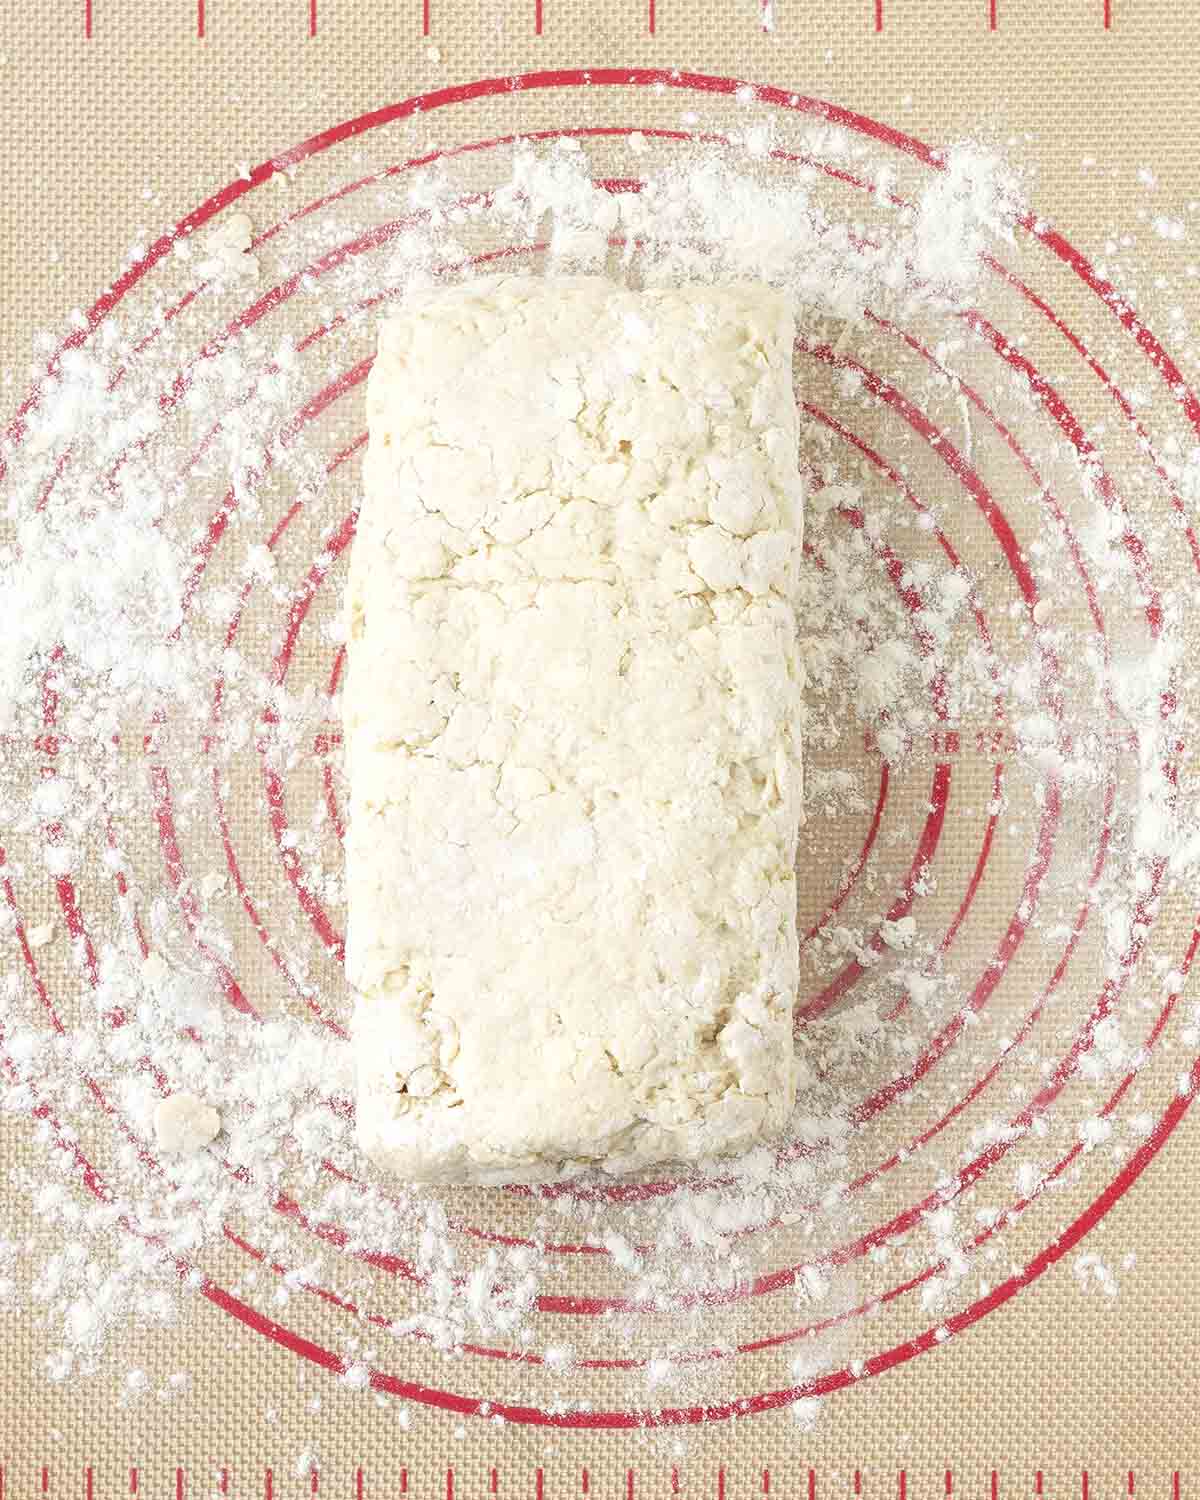
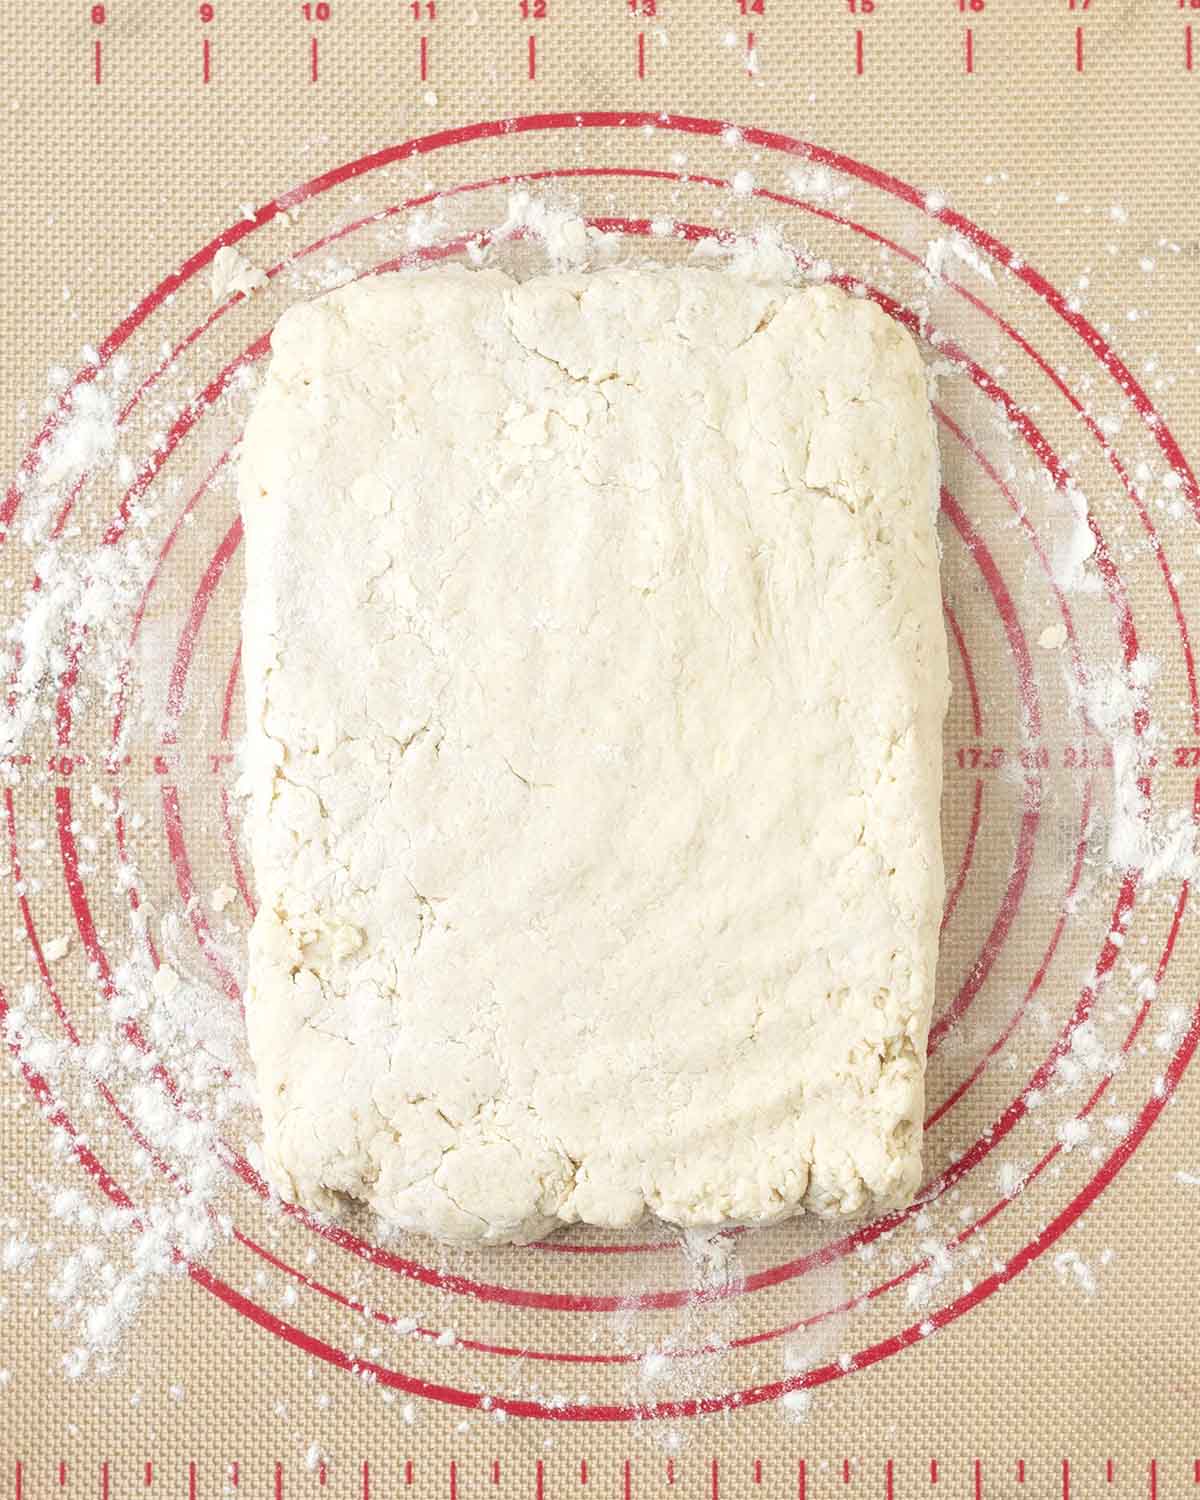
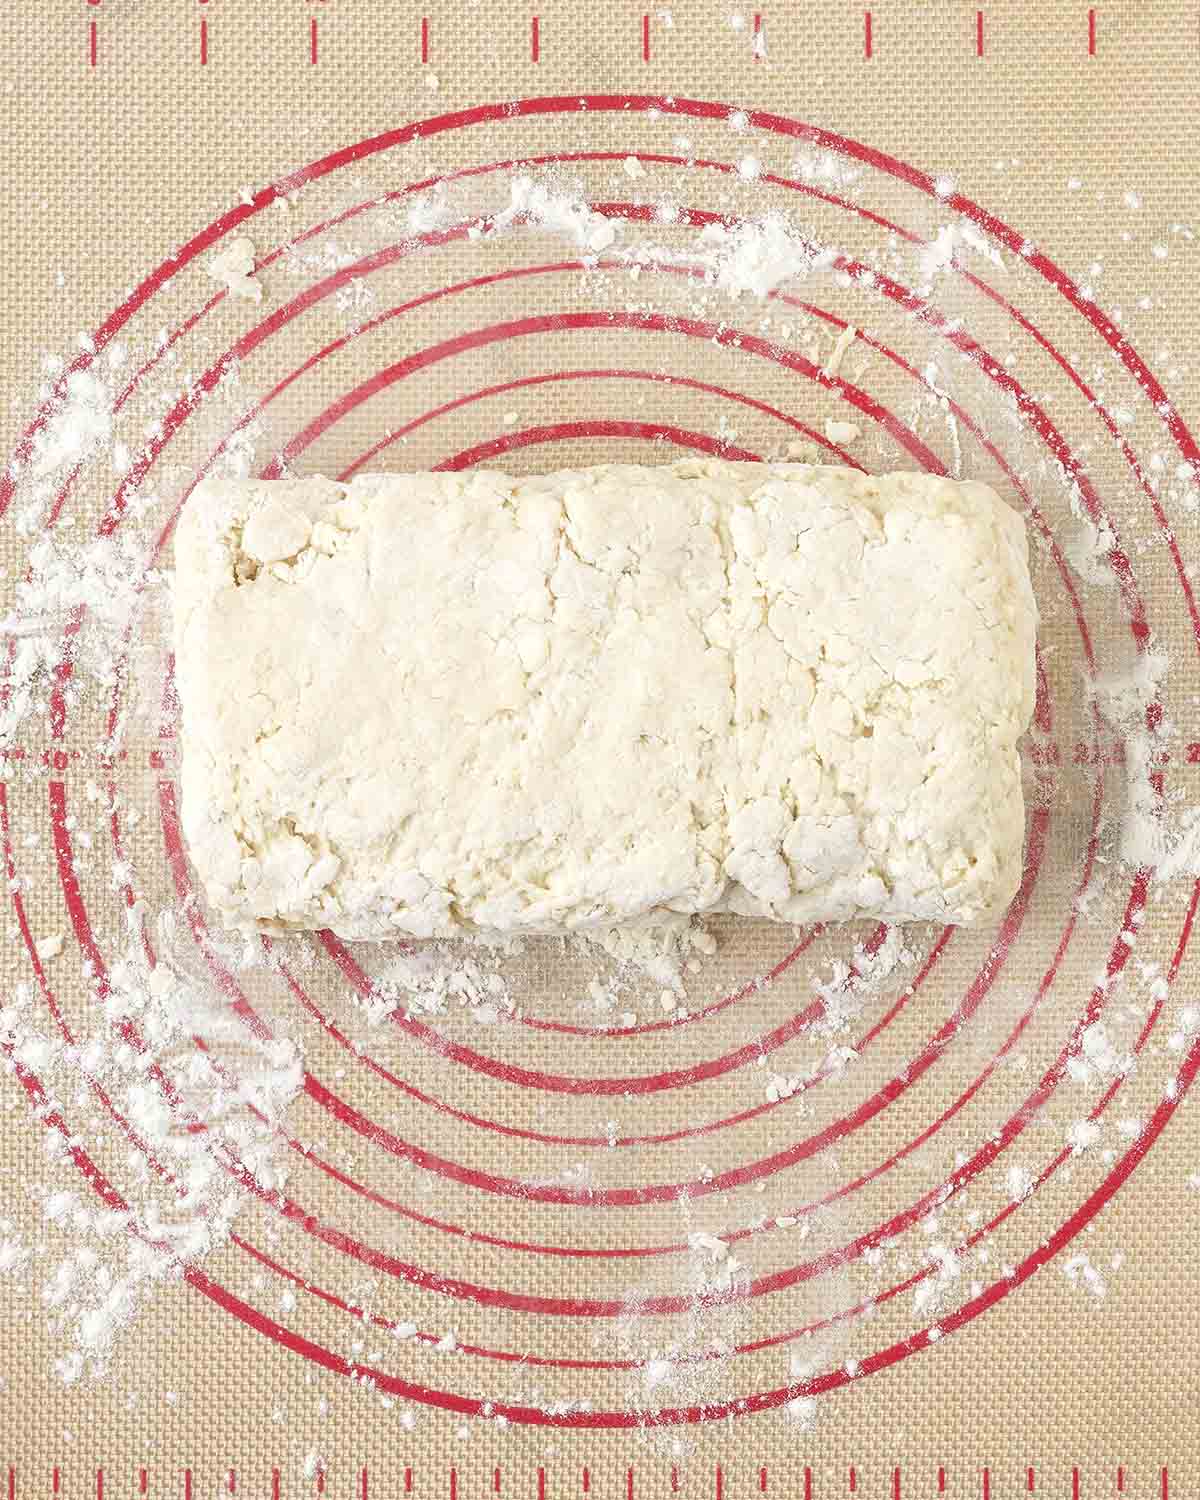
Turn the dough 90 degrees, shape it into a rectangle again, and repeat the folding process. Do this a total of four times.
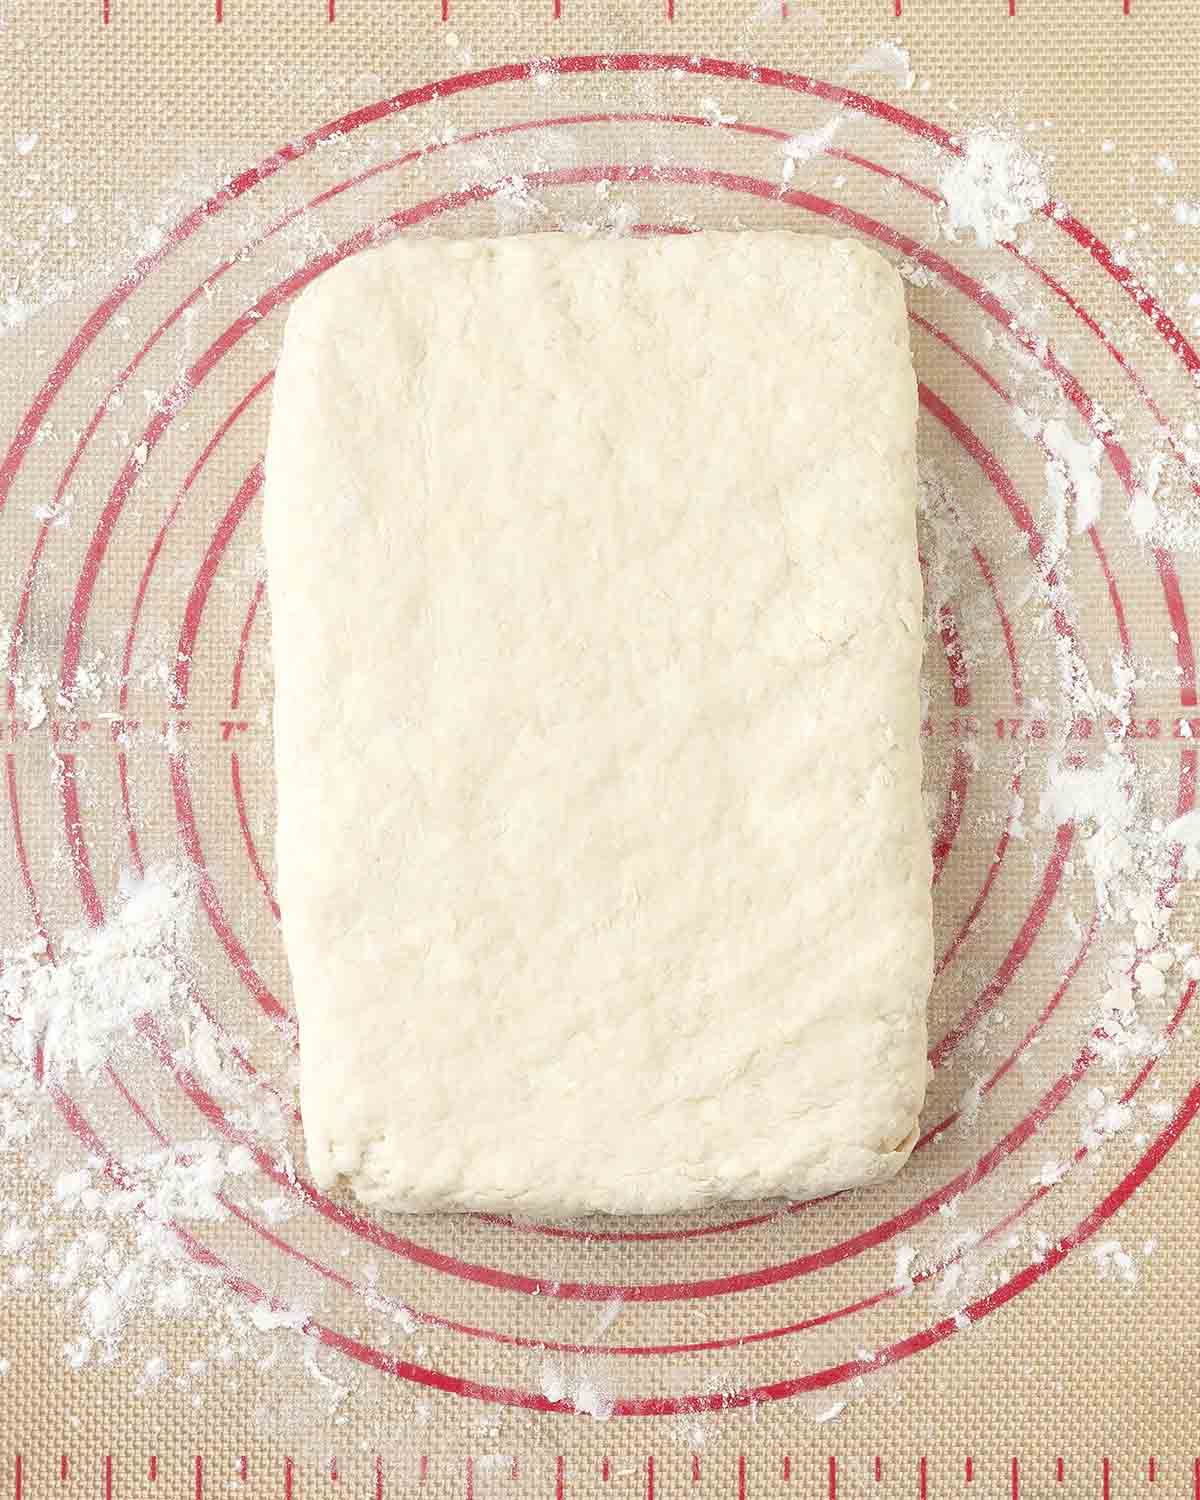
After all the folding and reshaping is done, gently pat it into an even rectangle that's ¾ inch thick. Give it a quick check with a ruler. If it's too thin, your biscuits will not rise very tall.
Recipe Note
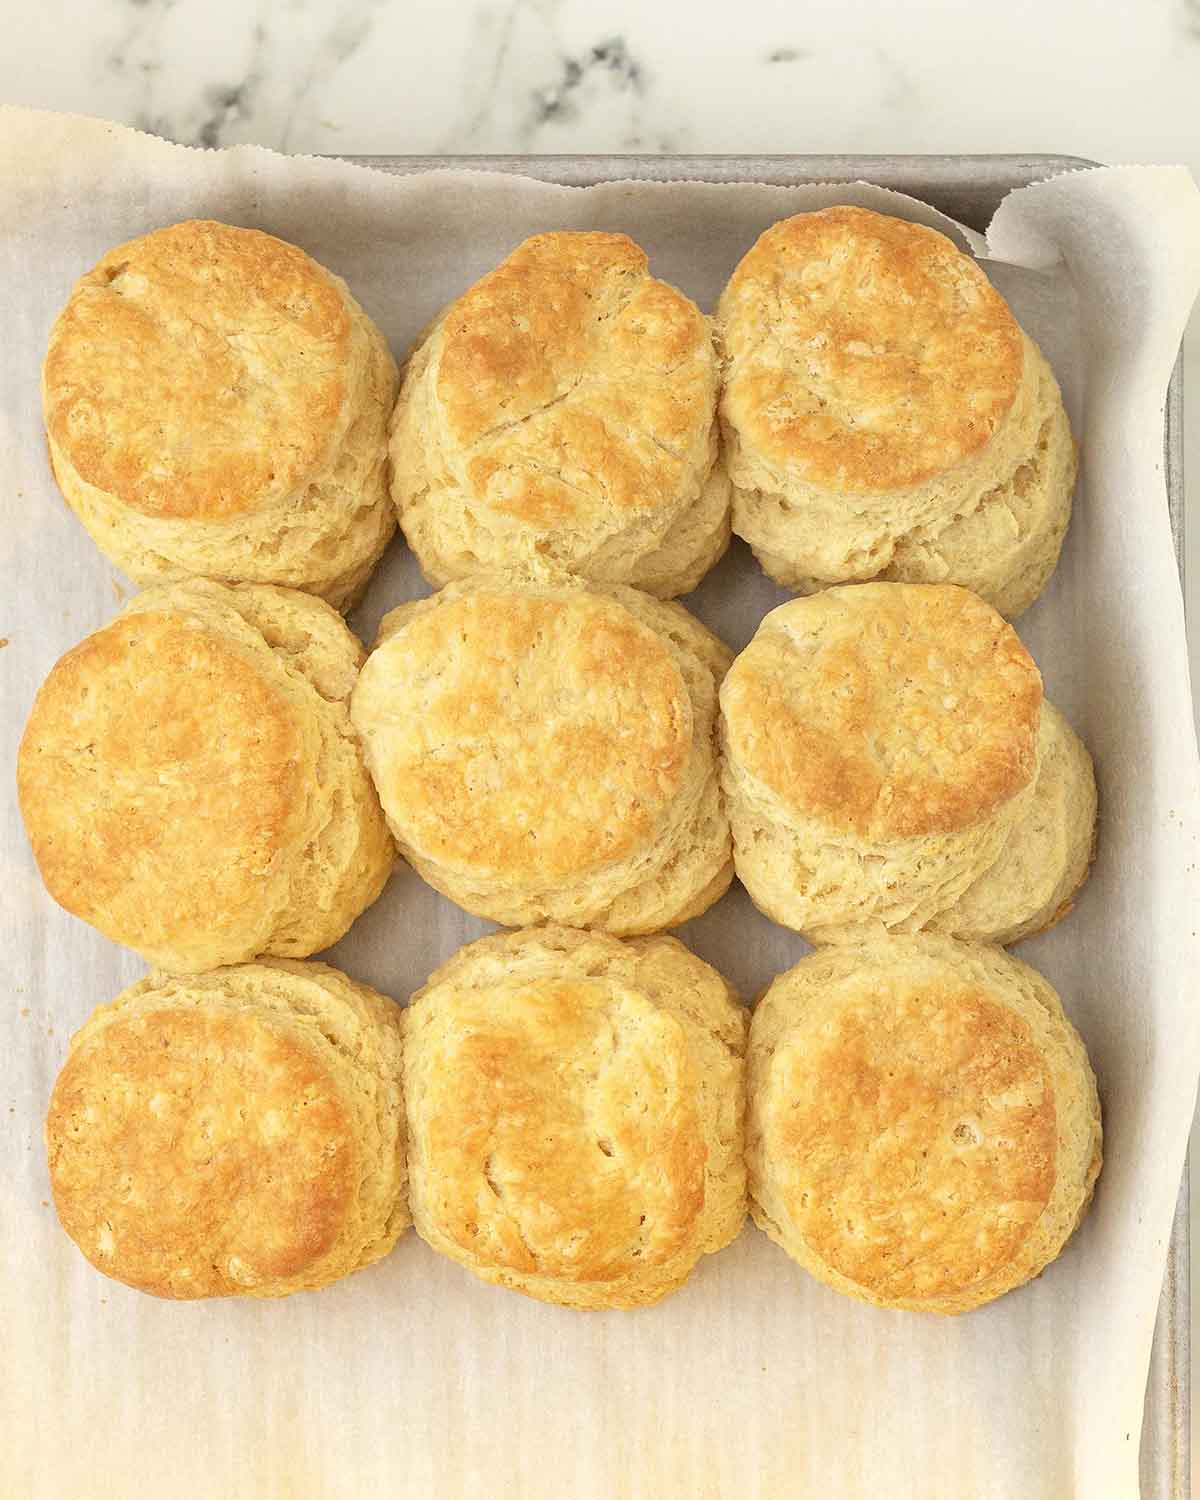
I use a 2.5-inch round cutter when making biscuits. With this recipe, that size cutter will make you 9 biscuits. You can use a slightly larger cutter if you'd like, but you will get fewer biscuits and they won't be as tall (I wouldn't go any larger than 3 inches).
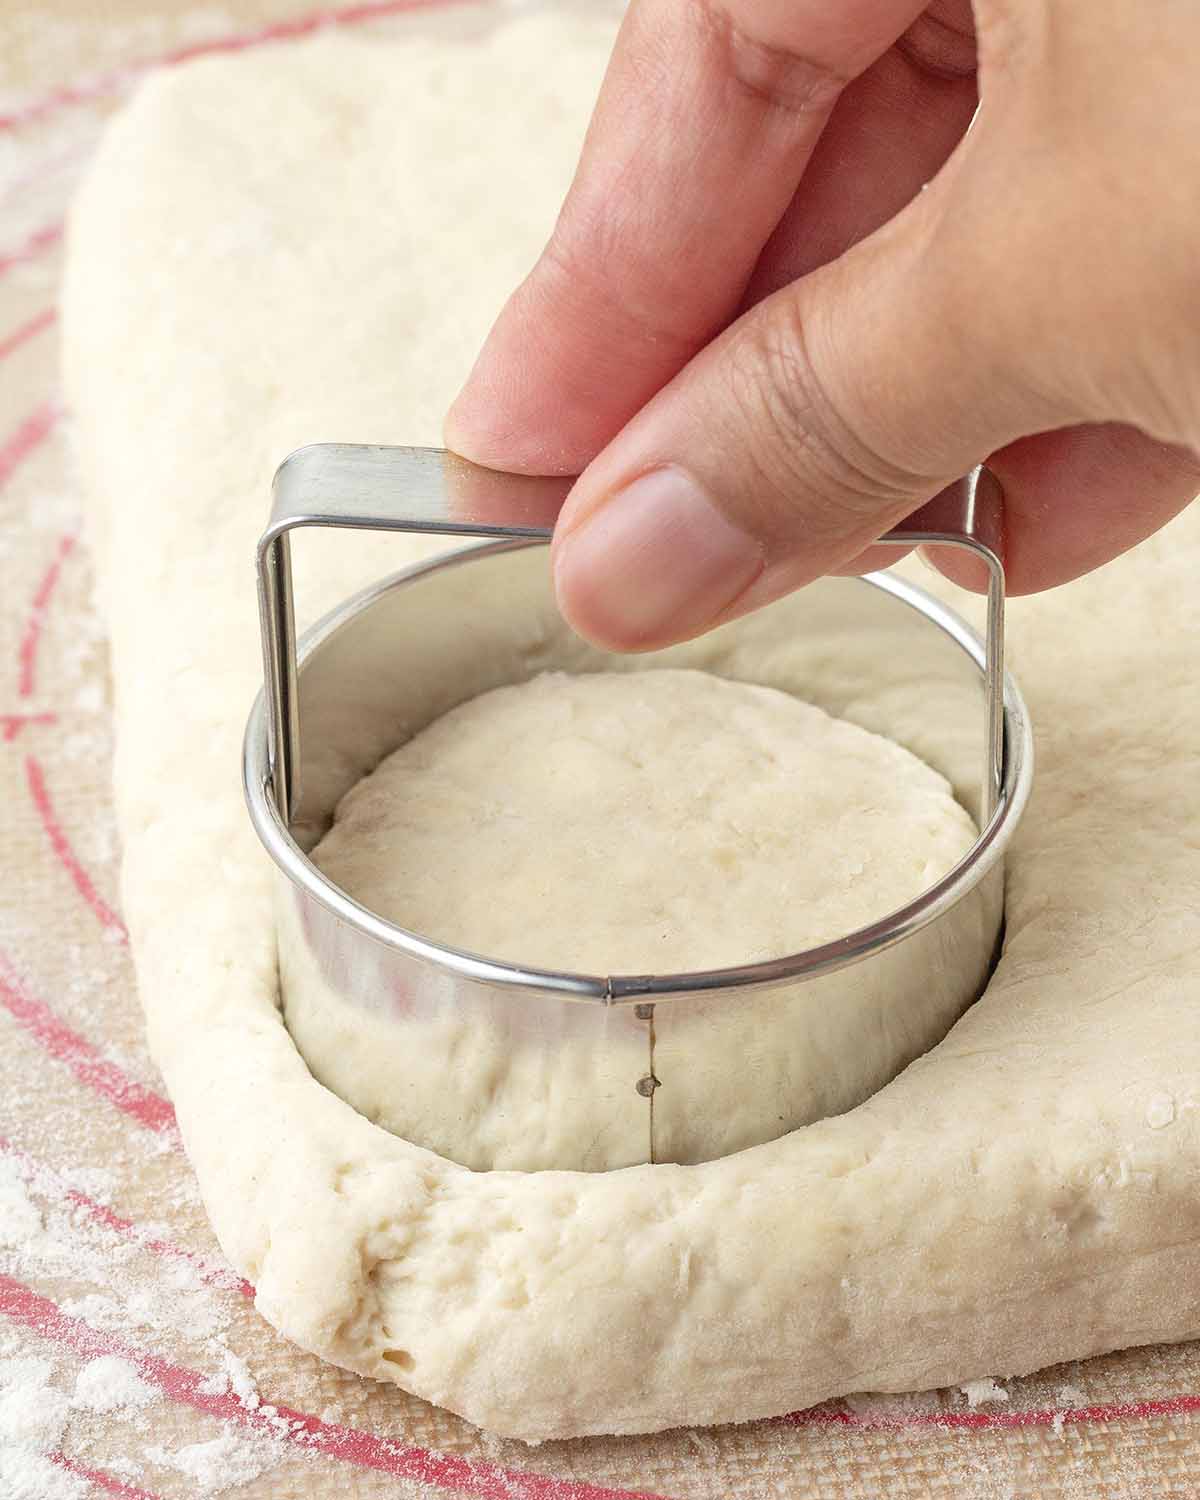
Dip a 2.5-inch round cutter in flour, then cut out one biscuit. Press straight down and lift straight up without twisting or wiggling the cutter.
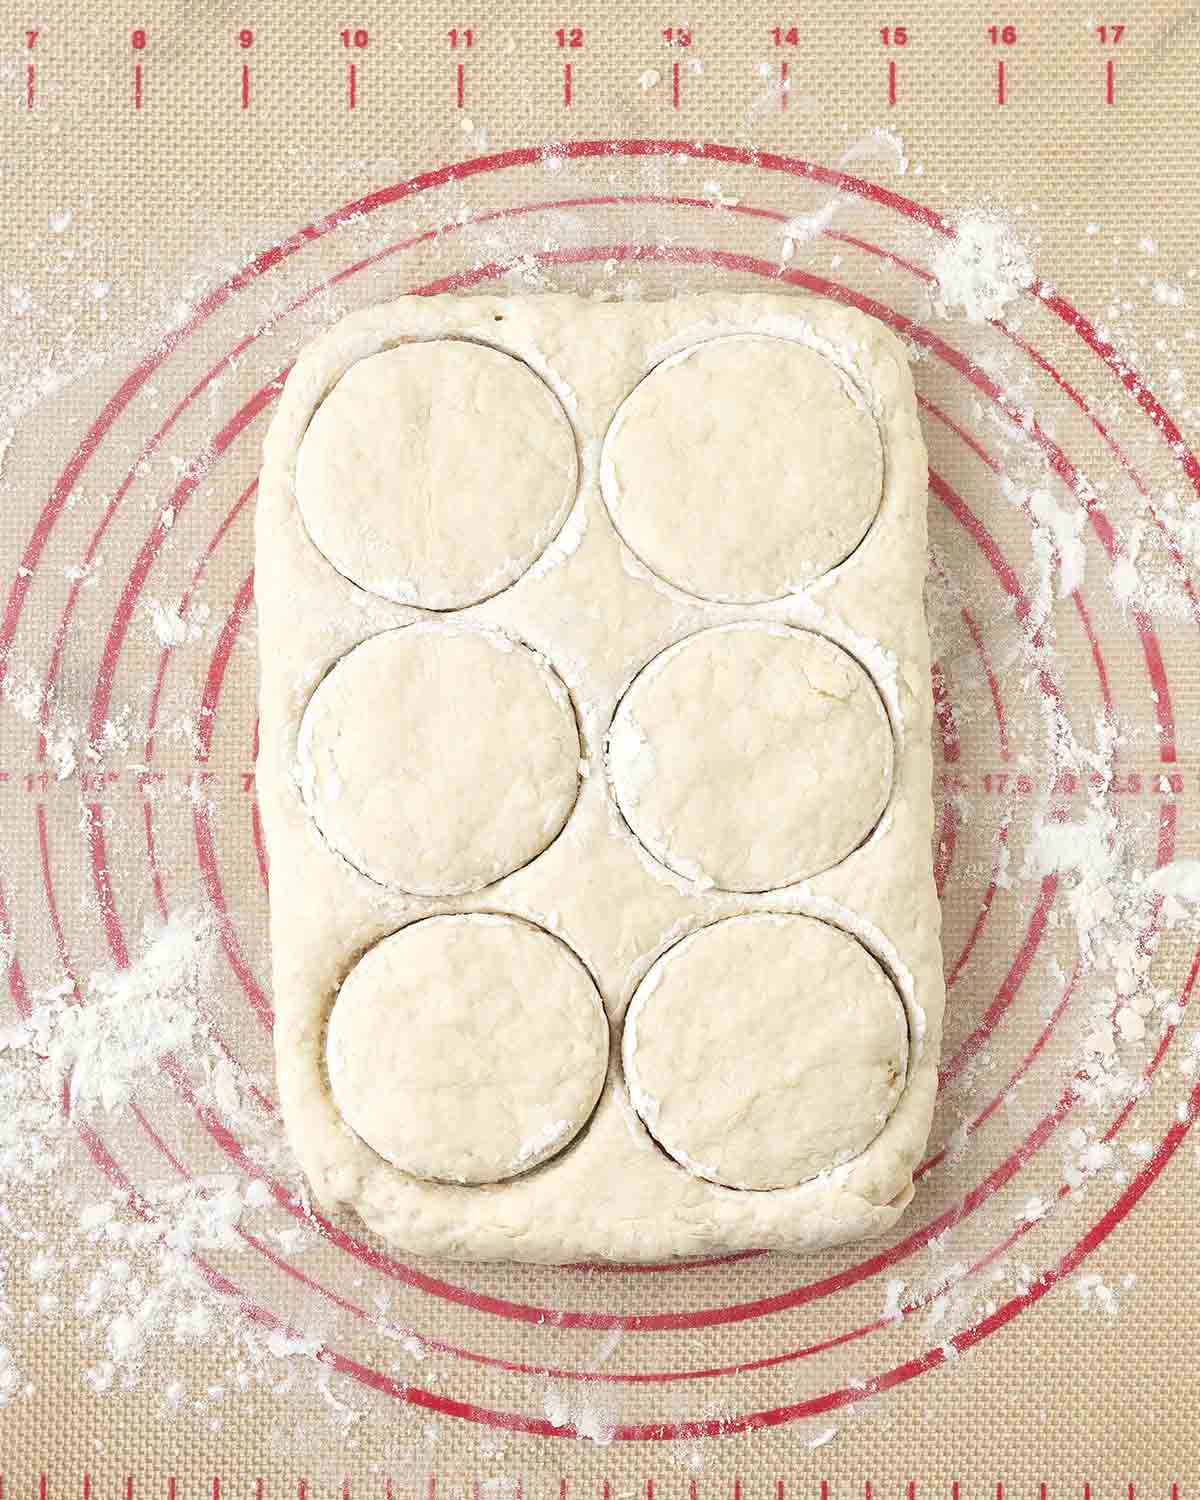
Repeat until you have six biscuits. Gather the scraps, pat them into a square, flour the cutter, cut, and repeat. Place them all on a plate and chill in the fridge.
Recipe Tip
Scraps get a bad rap for making biscuits a little less tender, flaky, and not so pretty, but I never waste this dough because biscuits made with scraps can turn out just as good as the first batch. Just don’t knead or overwork the dough and keep it cool, or you’ll end up with classic “scrap biscuits!”
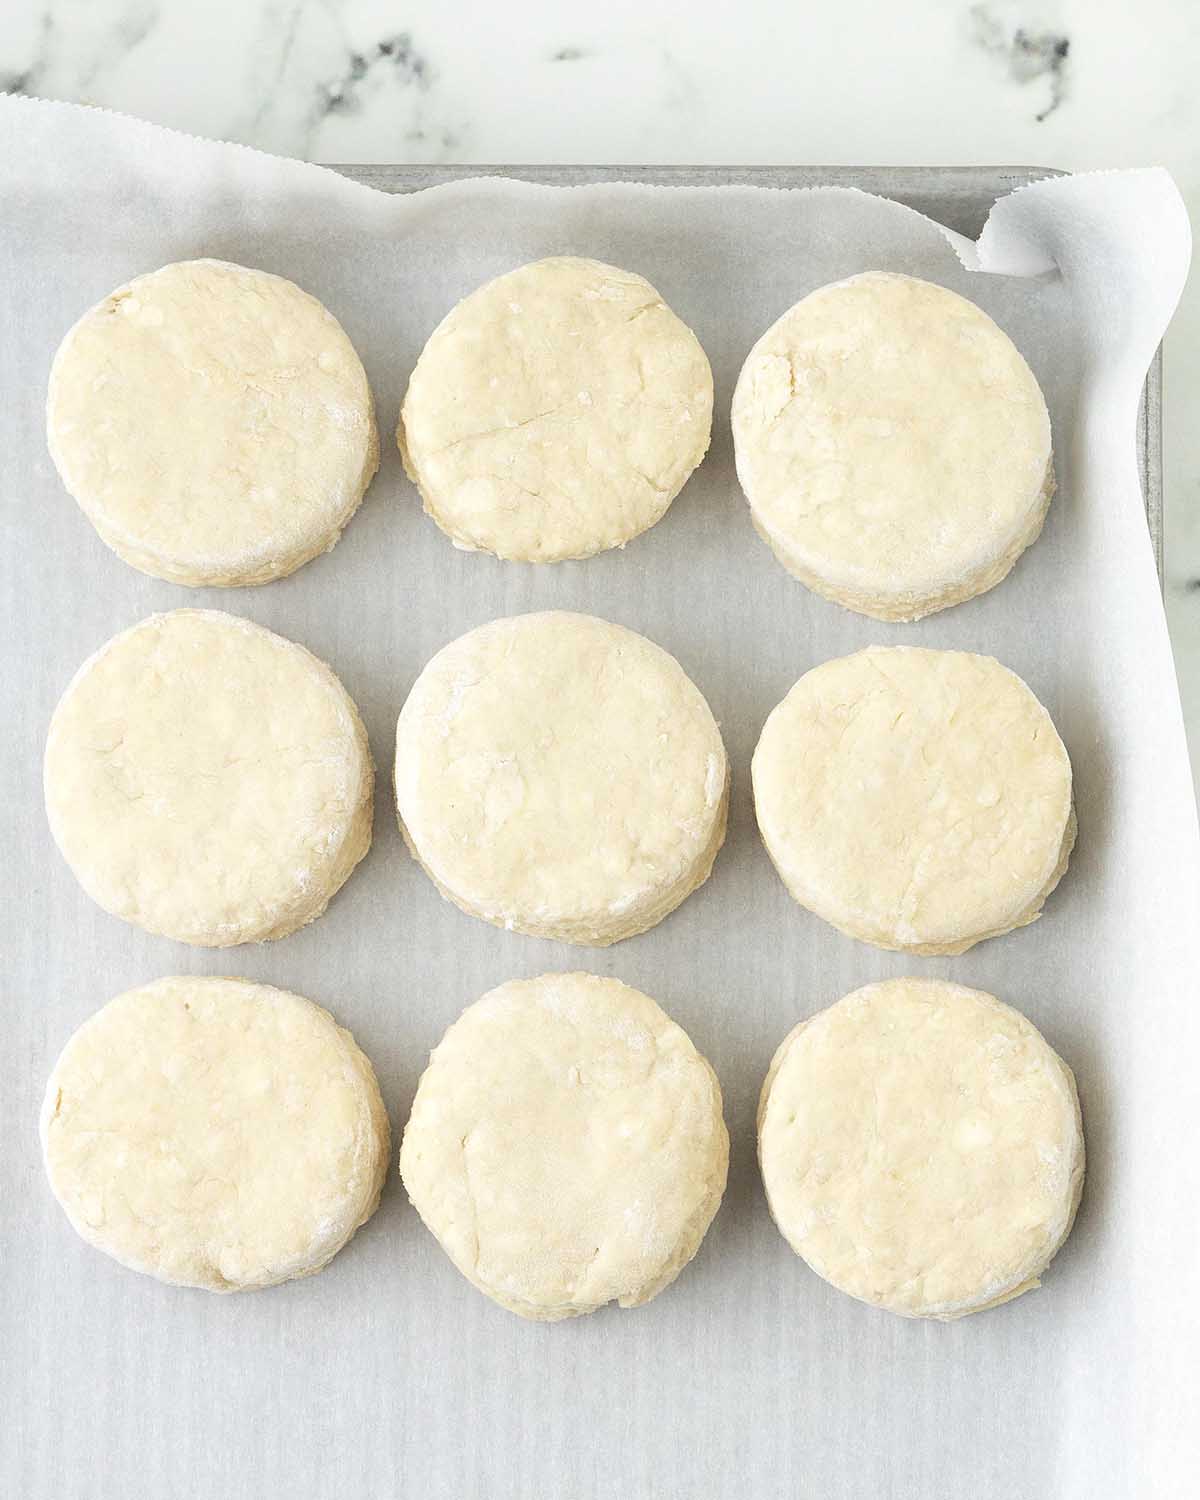
After chilling, place the biscuits in a corner of the baking pan so the sides can support them as they rise. Arrange them close together, almost touching.
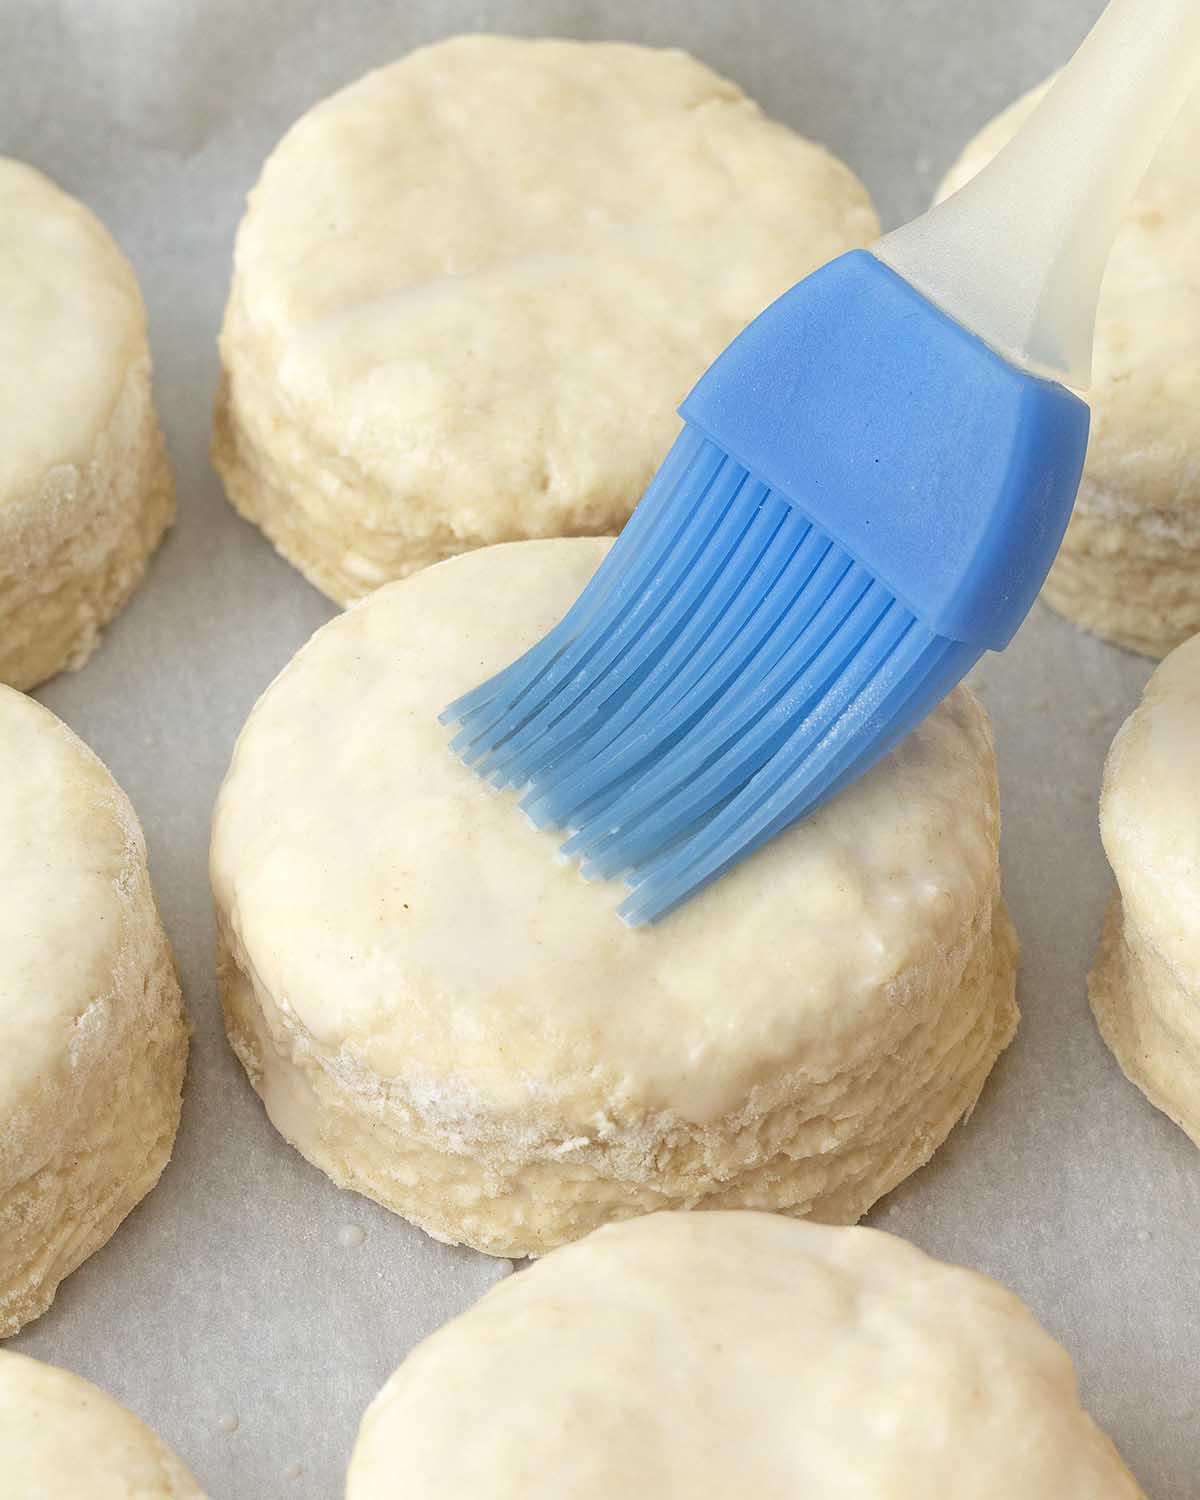
Brush the tops with dairy-free milk (this helps the tops get nice and brown!).
Bake until golden brown.
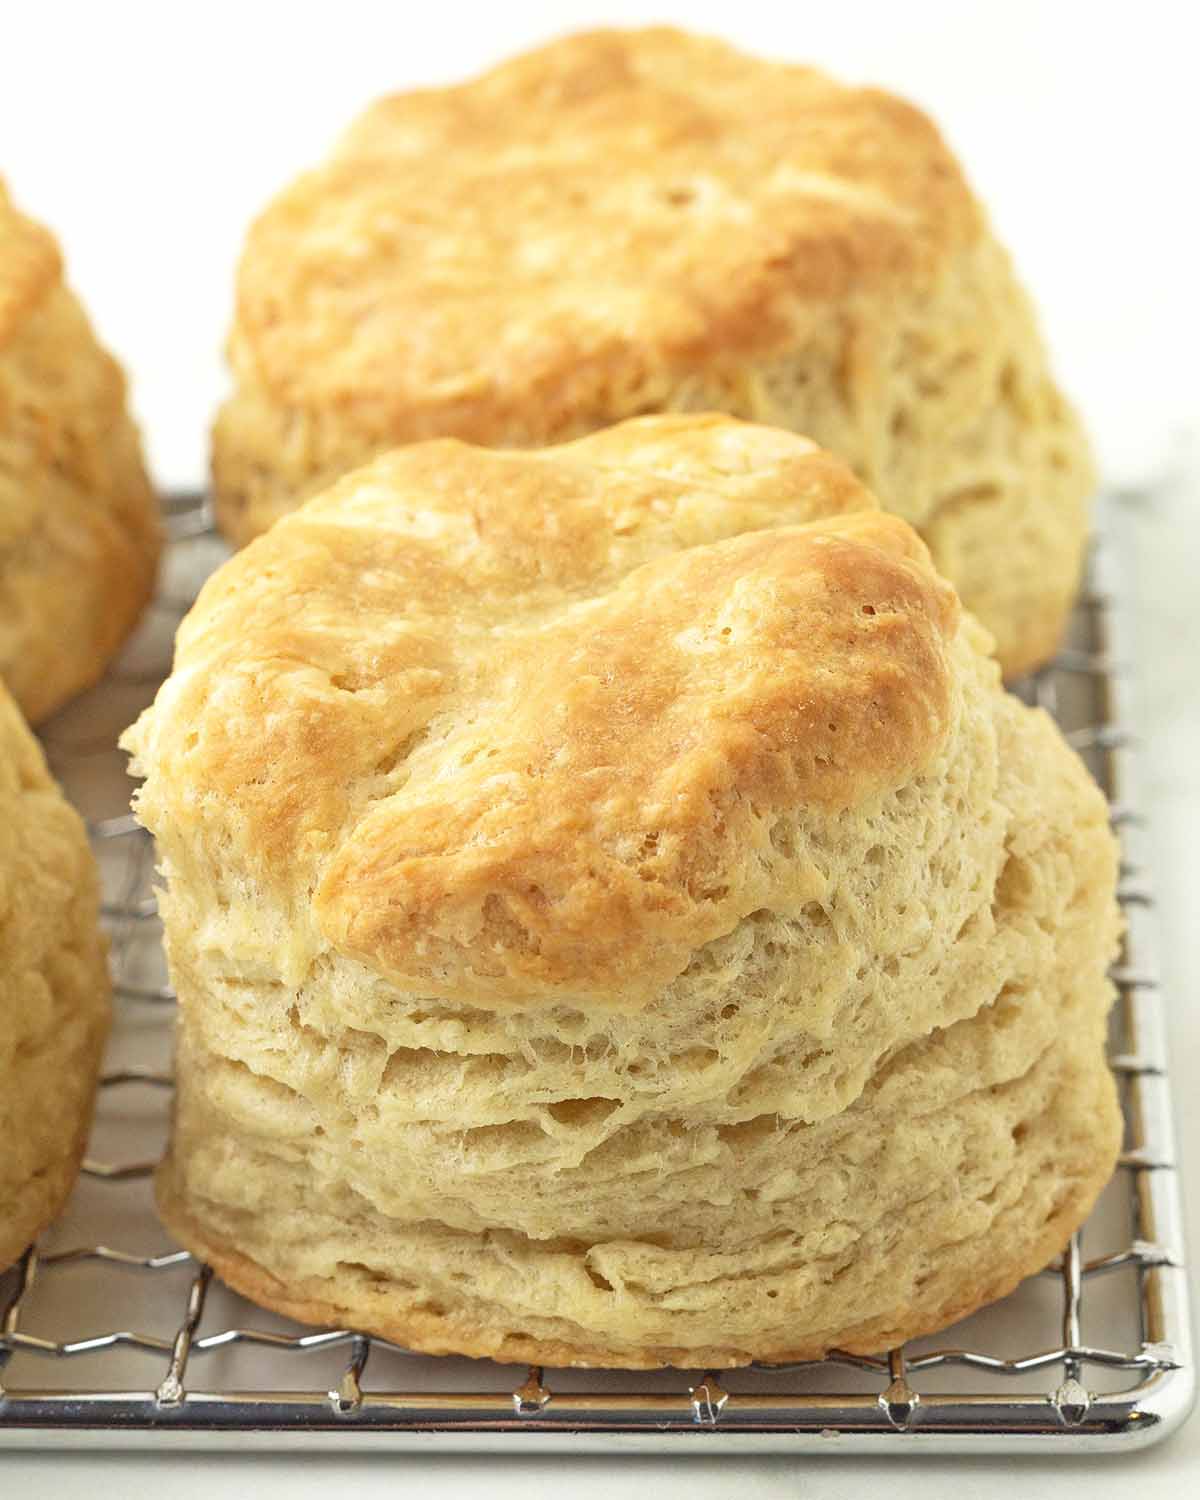
Remove the pan from the oven, let the biscuits cool for a few minutes, then transfer to a rack and serve warm.
Recipe Tip
As they bake, the biscuits will rise and touch each other, so they'll be stuck together when they come out of the oven. (Baking them so close contributes to your biscuits rising taller!) When you transfer them to the cooling rack, keep them together. This helps the sides that are touching stay soft while the exposed edges remain crisp.
Tips to Keep In Mind
- Measure and have all your ingredients ready to go before starting. This will make the process run smoothly, quickly, and easily.
- Measure your ingredients correctly. I highly recommend using a scale (this is the one I have) and my weight measurements. Please read my article about how to measure flour correctly.
- Keep everything as cold as possible. The colder your milk and butter are, the better your biscuits will turn out. You can even take it a step further by chilling your tools in the fridge before you start, so everything stays nice and cool.
- Don't overmix the dough. Overmixing will develop the gluten and make the biscuits tough.
- Stop and refrigerate the dough if you need to. If at any point you feel the dough is warming up and the butter has started to melt, stop and place it in the fridge for 15-20 minutes so everything cools back down.
- Take care not to over-bake the biscuits, or they'll become hard.
- Read this post from top to bottom before you start. I’ve shared all of my tips gathered during testing, so you get everything right. Also, read through the full recipe before getting started.
- Follow the recipe exactly as it’s written for the very best results.

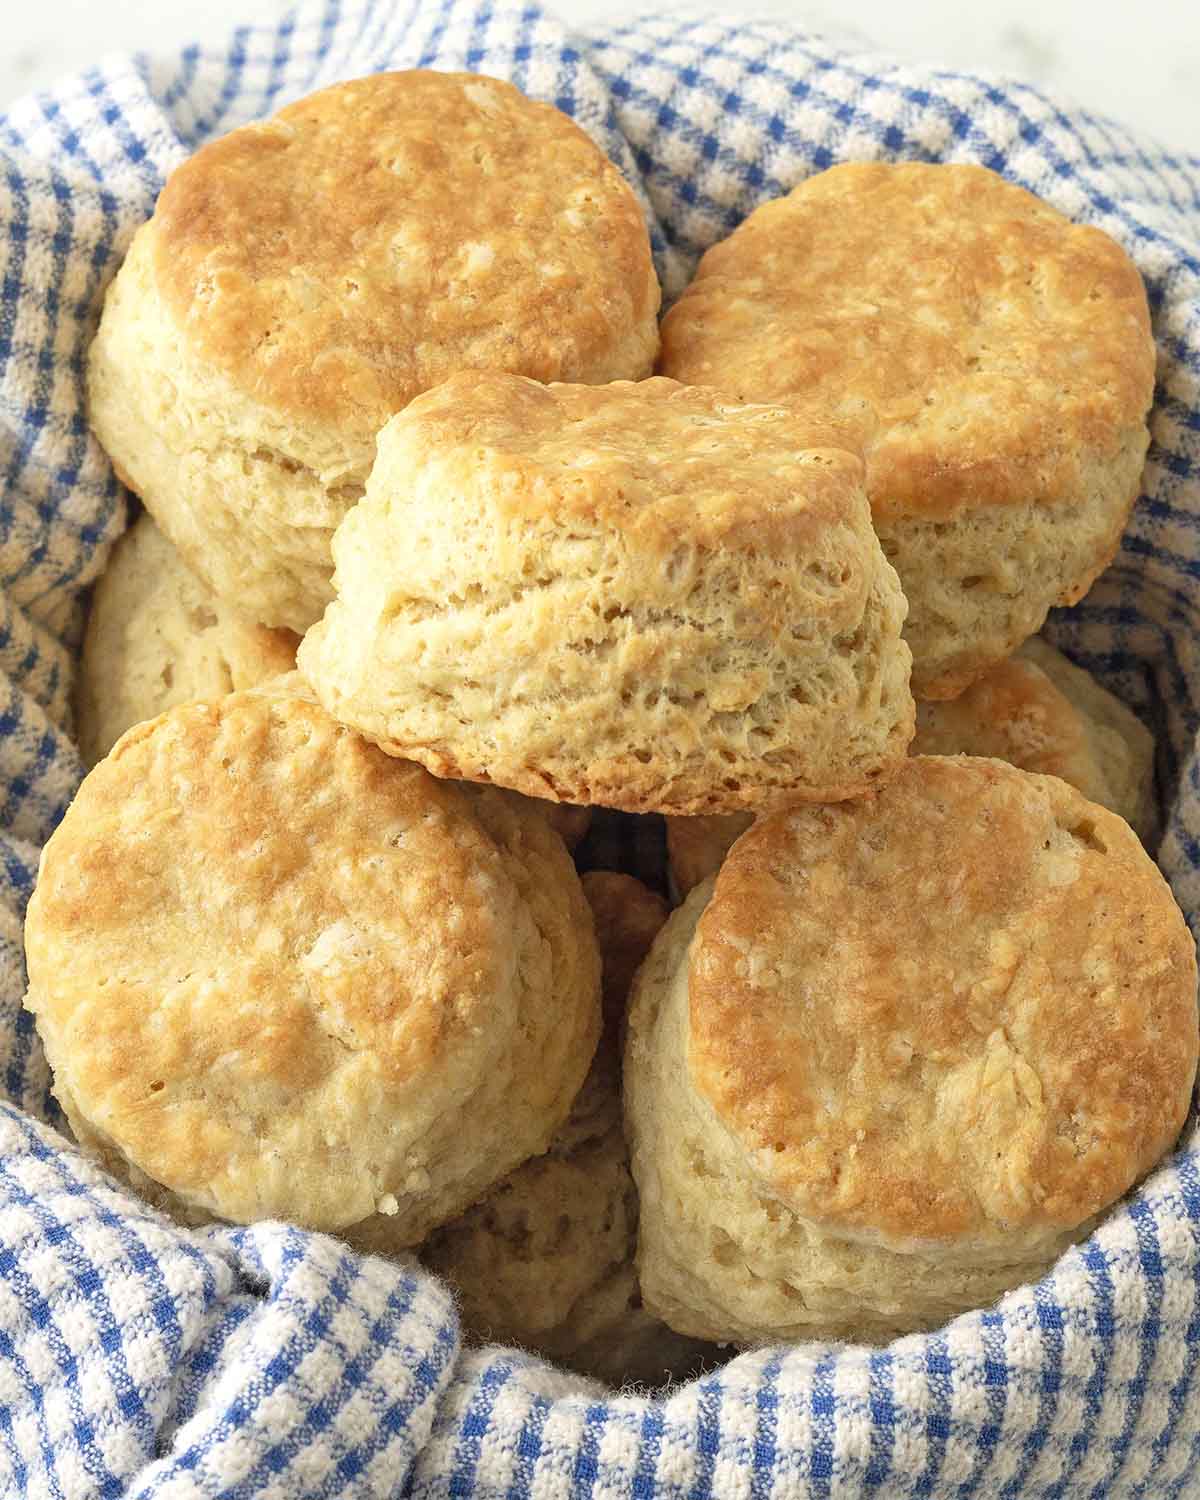
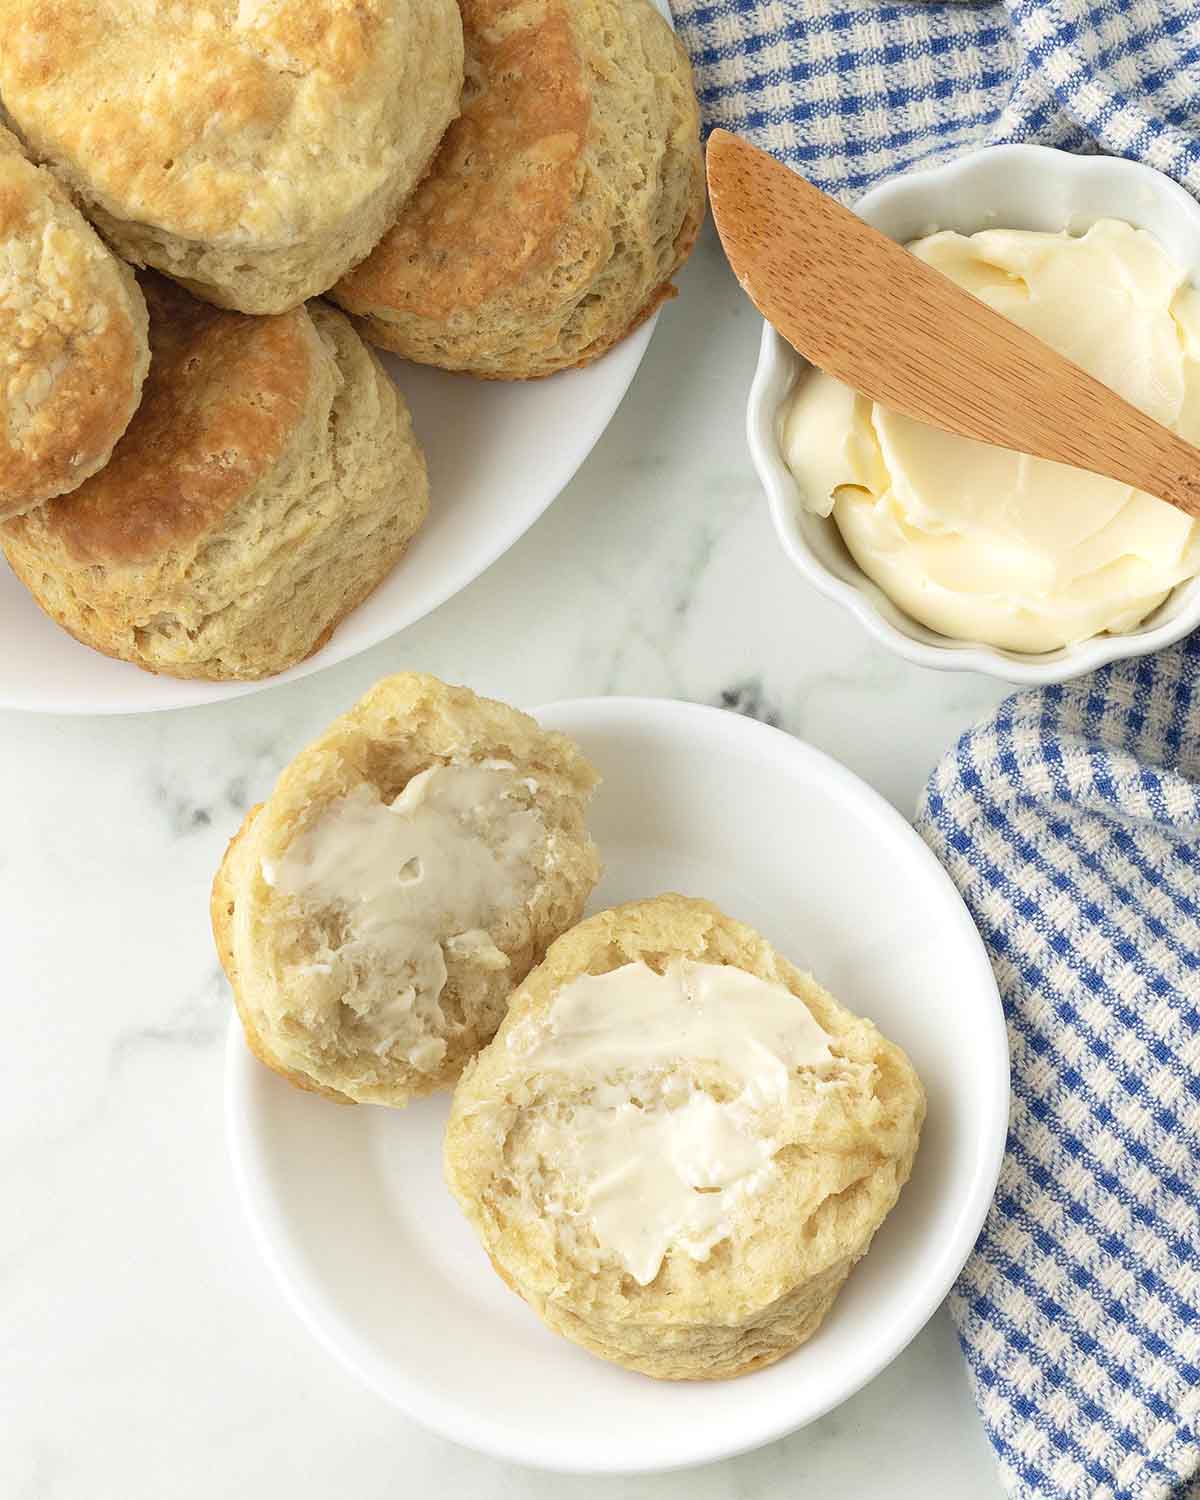
How Should You Enjoy Your Biscuits?
Enjoy them however you like! They’re at their best when they're warm on the day they’re made. Have them plain, or spread with vegan butter, jam, or both!
They can also be enjoyed as a side to soups or stews like my easy vegan mushroom stew or this hearty lentil sweet potato chili. You can even make breakfast sandwiches with them or serve them alongside a tofu scramble.
If These Make it to Your Table...
I’d love to hear how this vegan biscuit recipe turned out for you! Share your experience with a comment and rating below, and/or post a photo of them on Instagram and tag me so I can see your results! (I'm @delightfuladventures on Instagram).
Flaky and Buttery Vegan Biscuits with Buttermilk
Suggested Equipment:
Ingredients:
For Vegan Buttermilk:
- 1 cup (250 ml) unsweetened dairy-free milk (unflavoured, cold)
- 1 tablespoon apple cider vinegar or lemon juice
For Biscuit Dough:
- 2 ½ cups (313g) all-purpose flour
- 2 tablespoons baking powder
- ½ teaspoon baking soda
- 1 tablespoon granulated sugar
- ½ teaspoon salt
- ½ cup (113g) unsalted vegan butter (frozen, grated)
For Brushing Tops:
- 1 teaspoon unsweetened dairy-free milk
Instructions:
- Line a baking pan with parchment paper (if needed), and set aside.
Make Vegan Buttermilk:
- Pour the dairy-free milk into a measuring cup or bowl.
- Add the apple cider vinegar to the milk and stir.
- Place in the refrigerator to keep cold, for at least 10 minutes, while you prepare the dry ingredients.
Make Biscuit Dough (work quickly to keep the dough cold and the butter from melting):
- In a medium bowl, whisk together the flour, baking powder, baking soda, sugar, and salt.
- Add the frozen grated butter to the mixture and stir. Break up any large pieces of butter that have stuck together with the mixing spoon.
- Slowly pour the rested, chilled buttermilk into the dry ingredients and stir just until a rough, shaggy dough forms. A few dry spots are fine. Avoid overmixing.
- Transfer the dough to a floured pastry mat or parchment paper.
- Flour your hands and press the dough together (don't knead it). If the dough is too sticky, sprinkle more flour on top. Pat it into a rectangle about ¾ of an inch thick. The shorter edge should be facing you.
- Fold the dough into thirds, like you would fold a letter, by bringing the top third down to the center, then fold the bottom third up over the top. If there are any loose bits of dough, place them on top before continuing.
- Flour the pastry mat again. Turn the dough 90 degrees, shape it into a rectangle again, and repeat the folding process.
- Repeat the patting, folding, and turning two more times for a total of four rounds.
- The dough should look smoother now. Gently pat it into an even rectangle about ¾ inch thick and roughly 6 inches wide by 9 inches long.
- Dip a 2.5-inch round cutter in flour, then cut out one biscuit. Press straight down and lift straight up without twisting or wiggling the cutter. Dip the cutter in flour again before cutting the next one, and repeat until you have 6 biscuits. Place the biscuits on a plate after you have cut them.
- Gather the remaining scraps and press them together, it should be enough for three more biscuits. Fold the dough in half and pat it into a ¾ inch thick square, with a surface big enough to cut one biscuit. Flour the cutter and cut the biscuit, placing it on the plate. Repeat two more times.
- Place the plate with the biscuits in the refrigerator to chill for 30 minutes.
- Preheat oven to 425°F (220°C).
Bake:
- After chilling, remove the plate from the fridge and place the biscuits in a corner of the baking pan so the sides can support them as they rise. Arrange them close together, almost touching.
- Brush the tops with dairy-free milk.
- Bake for 17-18 minutes, until golden brown. Don't overbake.
- Remove the pan from the oven and let the biscuits cool for a few minutes. Then transfer them to a cooling rack and serve warm.
Recipe Notes:
- Please read all of the info above and below before making this recipe.
- Freeze your stick of butter overnight. Grate it just before you will be making the biscuits, and keep the grated butter in the freezer just before it needs to be added to the dry ingredients.
- Store leftovers in an airtight container at room temperature for up to three days. Reheat for a few seconds in the microwave or for a few minutes in the oven at a low temperature before serving.
- To freeze, once they've cooled completely, tightly wrap them individually, store them in a container or freezer bag, and freeze for up to two months. Thaw them at room temperature and reheat before serving.
- The nutrition info listed below is based on the recipe as written. Nutrition info is only to be used as a rough guide. Click here to learn how nutrition info is calculated on this website.
Danielle Taylor says
These look awesome but we have wheat allergies I’m curious if they’d work with a gluten free all purpose flour
Gwen Leron says
Hi Danielle, I usually provide a gluten free option for almost all of my recipes, except for the few where I tested and could not get the results to a place that felt good enough to share. This recipe was one of those. I was able to get the vegan gluten free version to have a really nice texture, but the flavour was where things always fell short, and they did not rise quite as high. Since biscuits have a mild flavour, the gluten free versions took on the taste of the flour blends I tested with. I tried countless times over the course of a year and was never happy enough with the final results.
So to answer your question, yes, the recipe will technically work with a gluten free all purpose blend. I tested with several blends, and the best texture came from Bobs Red Mill 1 to 1 in the blue bag, however, the flavour was not great and the rise was lower than the wheat flour version.
I know this may not be the answer you were hoping for and I'm sorry I have not been able to make a version I feel confident sharing. I hope this still helps though. Please feel free to reach out if you have any other questions.