This page may contain affiliate links. Click to learn more. As an Amazon Associate I earn from qualifying purchases.

A homemade vegan lemon meringue pie that’s smooth, silky, and filled with bright citrusy flavour. This vibrant recipe layers a sweet but tart lemon filling topped with fluffy aquafaba meringue over a tender, golden crust for a dessert that feels extra special yet easy to make.
Completely egg-free and dairy-free, with no tofu, no nuts, and no coconut, plus a simple gluten-free option, this is a crowd-pleasing dessert everyone will want a slice of!

Save This Recipe!
In a hurry? Drop your email below, and this recipe will be sent straight to your inbox for later. You'll also get fresh recipes every week! You can unsubscribe anytime.
This vegan lemon meringue pie is a showstopping dessert that's suitable for any occasion. It has the perfect balance between sweet and tart! It's perfect for spring celebrations, since lemon is the star, but it can be made any time of year.
I don’t know about you, but to me, this dessert fits just about any occasion. Want a lemon meringue pie instead of pumpkin pie for Thanksgiving? Why not?! Want it instead of cake for your birthday? Great choice! You serve this perfect pie whenever you feel like it!
Now, you may start scrolling and think... hmm, this recipe seems complicated. But I promise, it's not. Yes, there are three separate components, and it takes a bit of time to make, but for the majority of that time, the components are either cooling or chilling.
I’ll walk you through everything step by step, so you’ll see it’s easier than you might think. I’ll also give you timing tips so your pie is perfectly ready when it’s time to serve. So please don't be intimidated, I've got you throughout the entire process, beginning to end.
Let's dive into all you need to know about this luscious vegan lemon pie that you're going to crave quite often after you take that first bite!
A Look at the Ingredients
(NOTE: Only ingredients with special notes are listed below. The full ingredient list can be found in the recipe card.)
Pie Crust

Please follow my easy vegan pie crust recipe. To save time, I suggest preparing the pie dough up to three days before you make the pie since it needs to chill before it can be baked. The dough can rest in the fridge until you are ready to bake it.
The crust will need to be blind baked. You can read all about how to do that in my step-by-step guide on how to blind bake a pie crust. Follow the instructions in that post for fully blind baking a crust.
For Vegan Gluten-Free Lemon Meringue Pie: Make my tender vegan gluten-free pie crust recipe. The filling’s already naturally gluten-free, so there’s no need to change anything.
Lemon Filling Ingredients
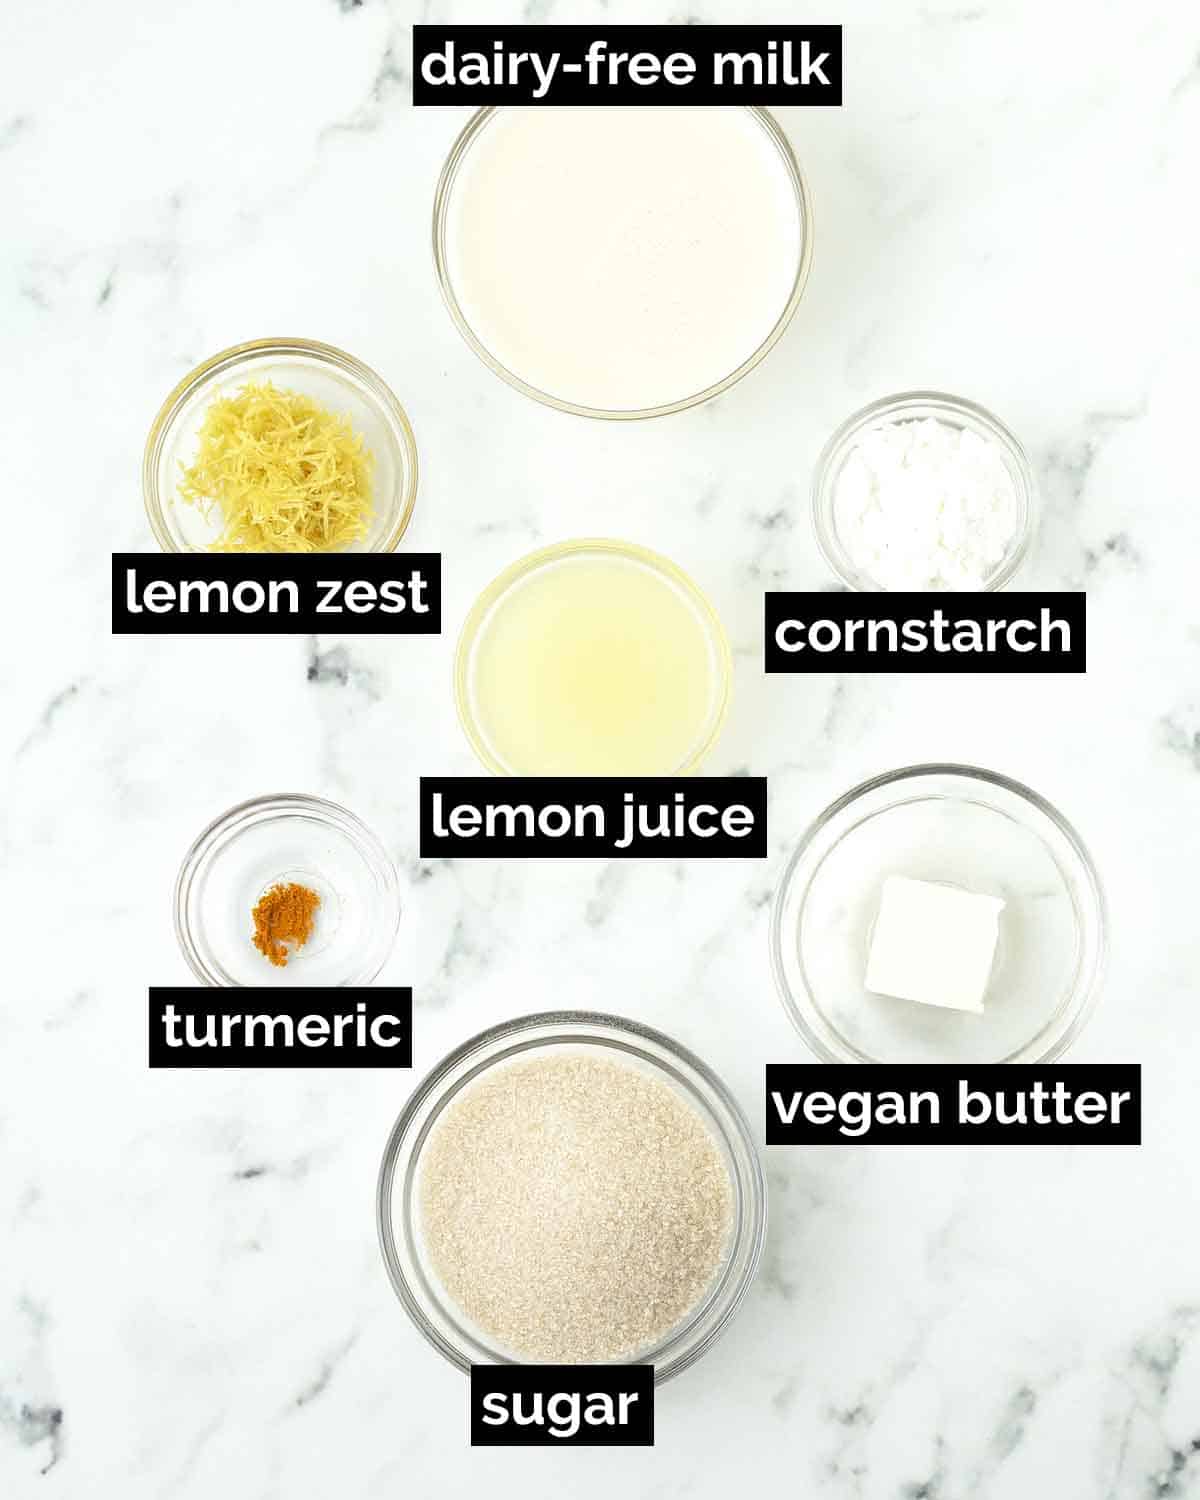
Cornstarch - This is used to thicken the filling, so it cannot be left out. If you want to make your lemon pie filling without cornstarch, arrowroot starch (also referred to as arrowroot flour or arrowroot powder) can be used instead.
Sugar - I use granulated organic cane sugar, but white sugar works too. Make sure it's vegan (organic sugar always is!). Don’t cut back, it balances the tart lemon and helps with structure.
Lemon Zest - This ingredient is essential and significantly contributes to the bold lemon flavour of your filling, so don't leave it out. If you want your filling to be perfectly smooth, see the recipe notes for an extra step you can do to achieve this.
Lemon Zesting Tips
- Always zest your lemons before juicing them.
- Use a microplane grater for the finest zest.
- Don't zest too deeply. If you grate past the yellow skin into the white pith, it’ll make the flavour bitter.
- Wash your lemons well before zesting them.
Vegan Butter (Optional!) - Whisking in a little vegan butter at the end of the cooking time will result in a creamier, glossier, and smoother filling. It can be omitted if you prefer; the result will still be great.
Ground Turmeric (Optional!) - The finished lemon filling will be a pale colour that has a slight yellow tint. I like to add a tiny bit of ground turmeric to give a more yellow colour. It can be left out if the colour is not important to you.
Aquafaba Meringue Ingredients

Aquafaba - If you aren't familiar with this ingredient, it's the water in a can of chickpeas. That sounds really weird, I know, but the things it can do in your recipes are magical. In this recipe, it's used in place of egg whites to whip into a fluffy, cloud-like, eggless meringue topping for your pie.
You can either make your own aquafaba or get it from a can of unsalted chickpeas. Make sure it's at room temperature before starting. There's no substitute for aquafaba in this recipe.
Recipe Tip
Always strain your aquafaba, whether it's homemade or canned. Sometimes, there are little bits of chickpeas or chickpea skins in the liquid that you don't want getting into your meringue.
Lemon Juice and Cream of Tartar - These are both acids that help to stabilize the meringue. Stabilization is important for meringue, so it holds its form and doesn't collapse. I tested with just lemon juice, then just cream of tartar, and then with both. I like the result when both are used best, but if you don't have cream of tartar, you can use just lemon juice.
Sugar - When testing, I went back and forth with the amount of sugar I used in the meringue topping. The amount called for is the perfect balance, and it doesn't make it too sweet. Please don't reduce the amount of sugar; it contributes to the structure of the meringue and helps the caramelization process when you torch it later on.
The Step-by-Step
(Note: I’ve outlined the step-by-step on how to make this recipe here, but find the full recipe, ingredients, and directions in the recipe card at the end of this post.)
Recipe Tip
I recommend starting this pie a day before you need to serve it. Make the crust and filling a day in advance, then let it chill overnight. The meringue should be made just before serving. Doing everything in one day will be time-consuming, with lots of waiting for things to chill and cool.
As mentioned above, there are three separate steps to preparing the components for this recipe: the pie crust, the lemon curd filling, and the meringue.
Step 1: Make, Bake, and Cool the Pie Crust
There are three steps to get the pie crust ready:
- Make the pie dough and let it chill.
- Follow my vegan pie crust recipe or my vegan gluten-free pie crust recipe.
- Bake the pie dough.
- Fully blind bake it. Follow the steps in my post on how to blind bake a pie crust.
- Cool the baked pie crust completely before moving on to the next step.
Step 2: Prepare the Lemon Filling
Start by zesting and then juicing the lemons. Squeeze the lemon juice into a small strainer placed over a measuring cup.
Next, whisk the plant milk and the cornstarch together in a small bowl and set it aside.

Add the lemon juice and sugar to a small pot over medium-high heat and heat until the sugar dissolves. Add the cornstarch mixture and the lemon zest to the pot and whisk.

Whisk the mixture continuously until it has thickened. Remove the pot from the heat.
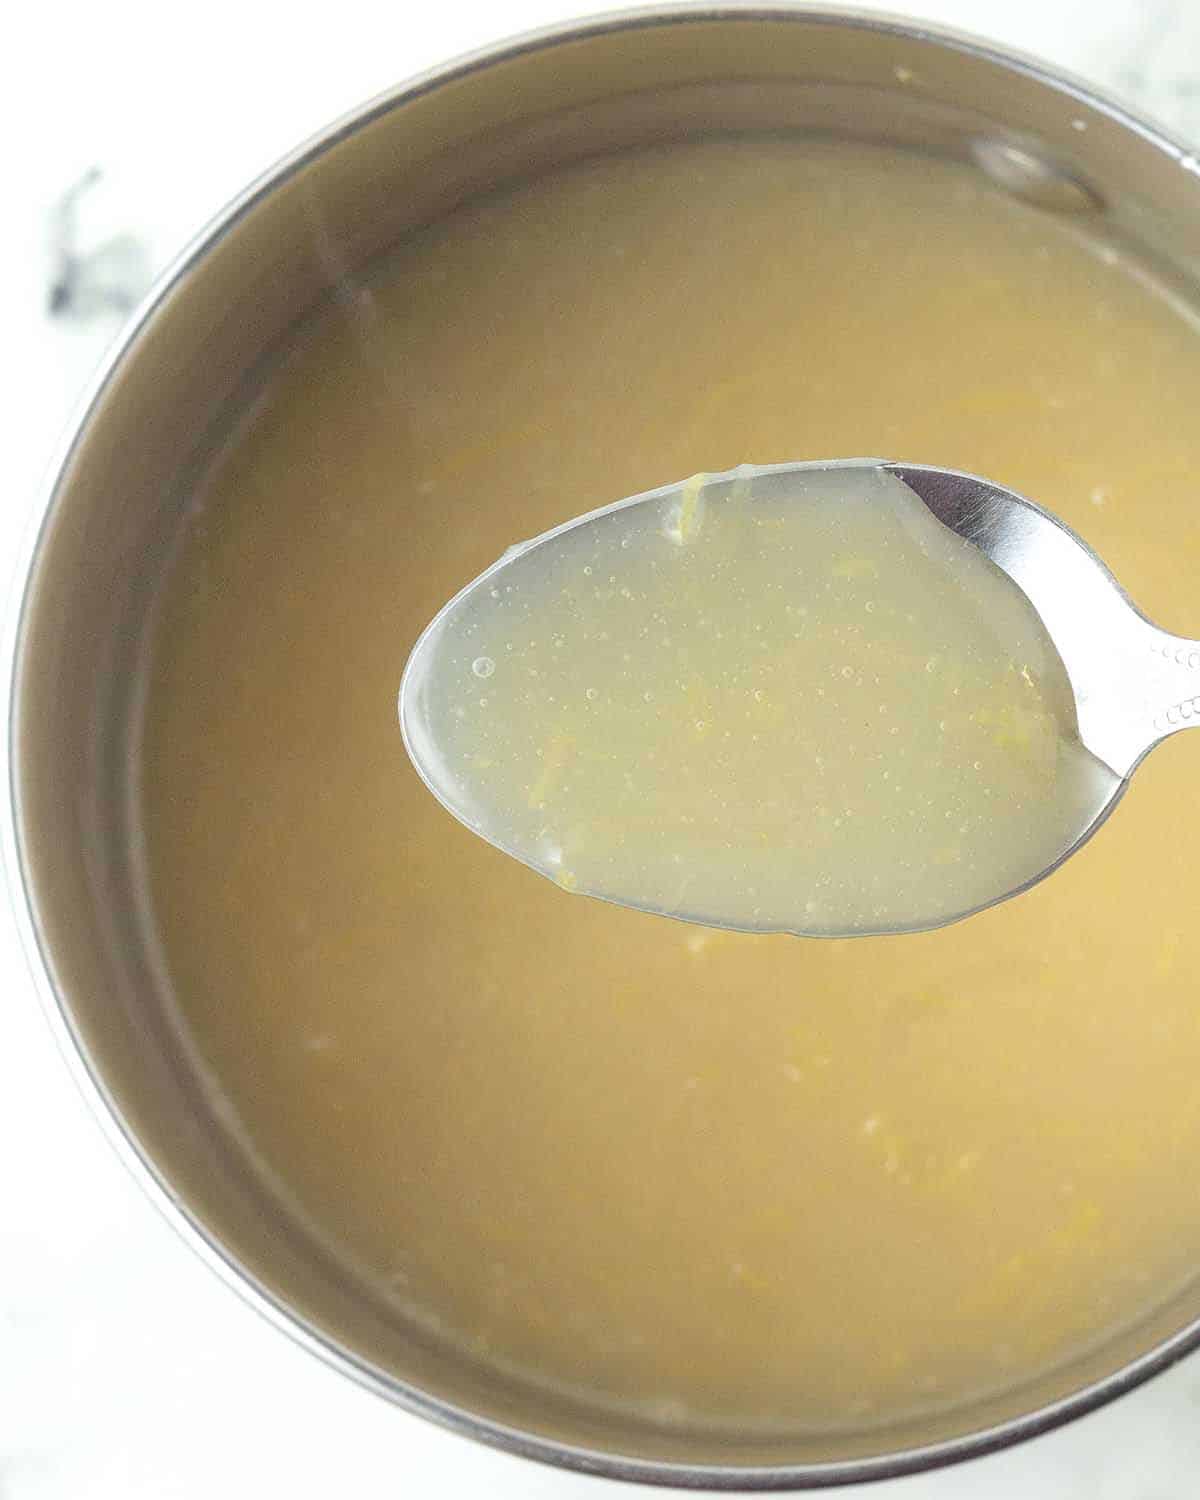
When the cooking time is up, the mixture will be thick and a very pale yellow.
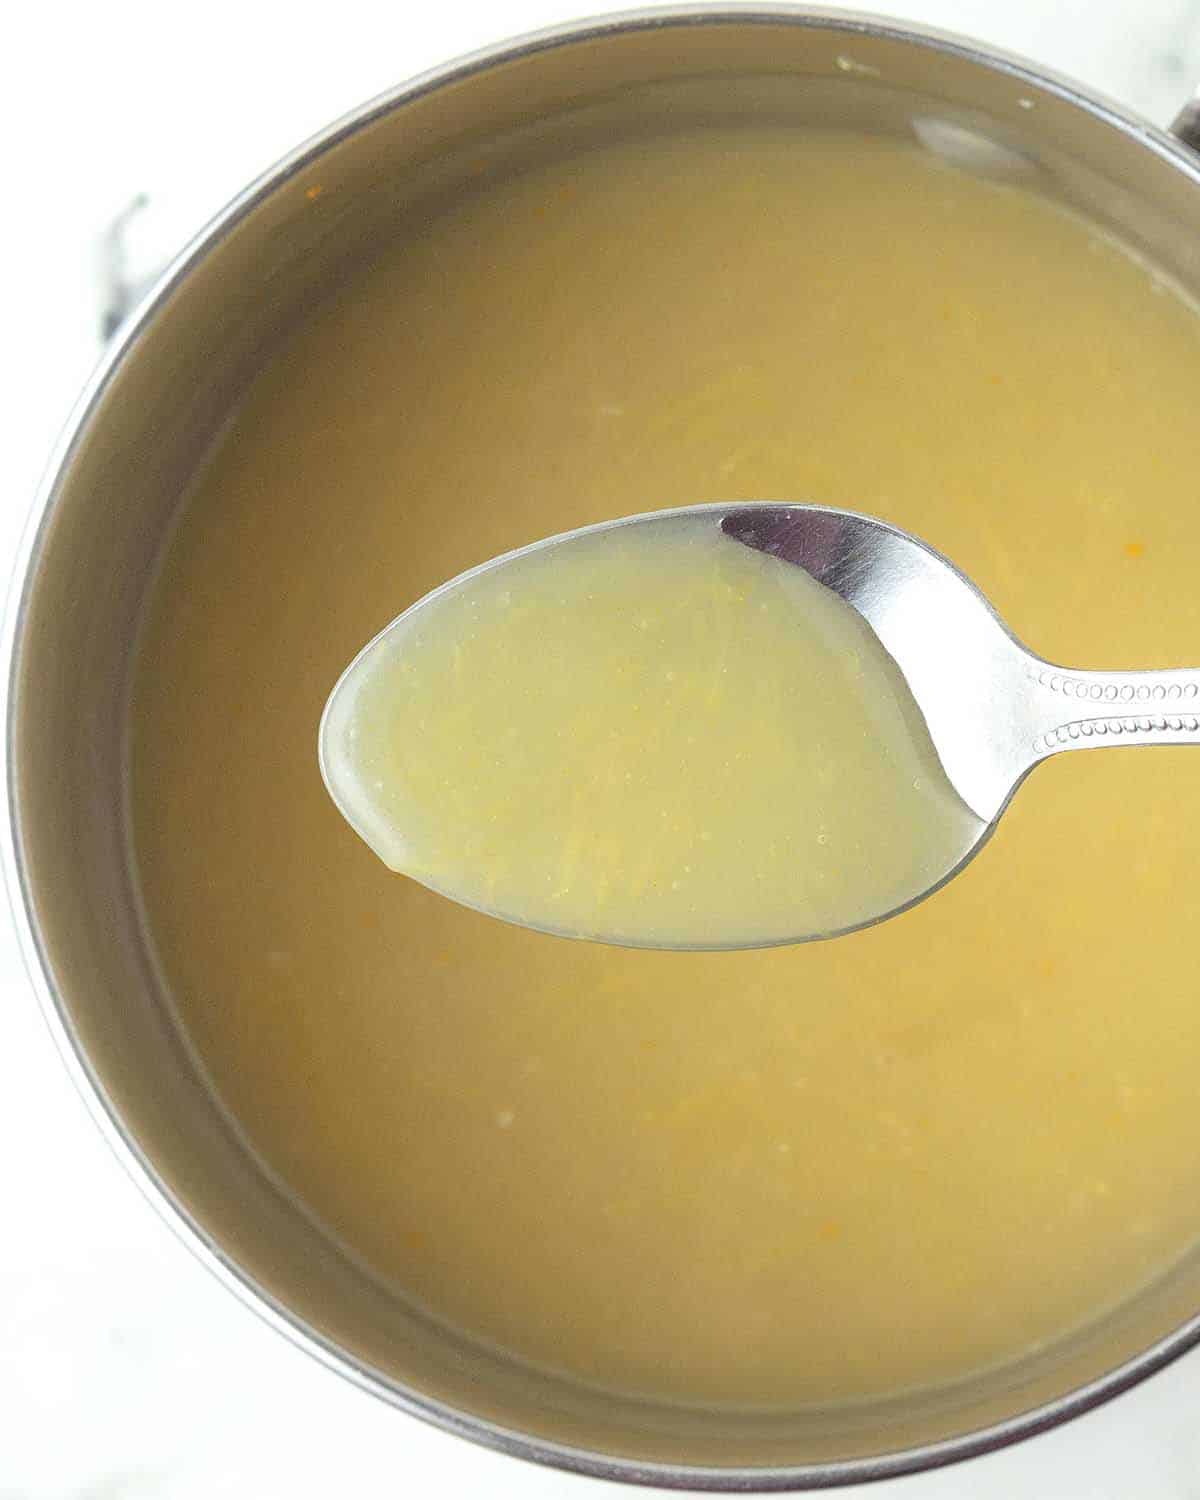
If using vegan butter and turmeric, add them now and whisk until fully combined. Cool for 20 minutes.

Pour the lemon filling into the prepared pie crust.

Press plastic wrap directly onto the filling and chill the pie in the refrigerator.
Step 3 - Whip the Aquafaba Meringue
I recommend using a hand mixer to make your meringue. Do this step shortly before serving your pie.

Add aquafaba, lemon juice, and cream of tartar to a clean metal or glass bowl and whip at high speed.

When you reach the soft peaks stage, add the vanilla extract.

Keep whipping until you get to the stiff peaks stage.

Gradually add the sugar while continuing to whip.
What are Peaks?
In recipes, "peaks" describes the shape and firmness that a whipped ingredient (such as aquafaba, heavy cream, egg whites, coconut cream, etc.) holds after being beaten or whisked. Peaks show how much air is whipped in and how stable the mixture is. There are three types of peaks:
- Soft peaks flop over when the whisk is lifted
- Medium peaks curl slightly but hold shape
- Stiff peaks stand straight up and hold shape firmly

When the aquafaba becomes thick, stiff, and glossy, you can stop.

Remove the chilled pie from the fridge, peel the plastic wrap away, and transfer the meringue to the top of the lemon filling.
Recipe Tip
Depending on your aquafaba and your mixer, getting it to the thick, stiff, glossy state can take anywhere from 2.5 minutes up to 15 minutes. Be patient and don't give up.

Use a spoon or spatula to create swirls and peaks so the meringue surface isn’t flat.

Move a kitchen torch flame in slow circles over the surface until the peaks turn golden. Continue until the top is caramelized to your liking.
Recipe Note
I highly recommend using a kitchen torch, also called a blow torch or a brûlée torch (this is the kitchen torch I own), for the last step. I don’t suggest using your oven broiler because it gives inconsistent results. No torch? No problem, the pie is still delicious as is!
Torching the meringue doesn’t just make the pie look pretty; it also adds a delicious layer of flavour by caramelizing the sugar and giving it a hint of toasted marshmallow flavour.
The next, and best step, is to slice and serve! It's best on the day it's made, but if you have leftovers, see the recipe notes for info on how to store them.

Tips for the Perfect Pie
- Measure and have all your ingredients ready to go before starting. This will make the process run smoothly, quickly, and easily.
- Measure your ingredients correctly. I highly recommend using a scale (this is the kitchen scale I have) and my weight measurements when making this recipe.
- Get the timing right. This is especially important for this recipe! The crust and the filling need to be prepared in advance, well before you start making the meringue. Also, take note of the timing for this recipe so you know exactly how long it will take. There's a lot of cooling and chilling time, so keep that in mind if you're preparing it for a special occasion and need it for a certain time or day. Plan accordingly!
- Don't skip chilling the crust and filling. Not only does this help it set properly, but it will also help you get clean slices.
- Pay close attention when measuring your cornstarch (or arrowroot starch). They clump easily, so use a scale if possible or the scoop and level method. Too much or too little will affect the texture and density of the filling.
- Oil will prevent your aquafaba from whipping. Make sure the bowl and all tools you use when whipping it are clean and free from any oil residue.
- Read this post from top to bottom before you start. I’ve included plenty of tips and tricks to help you. Also, read through the full recipe before getting started.
- Follow the recipe exactly as it’s written for the very best results.

If You Give This a Try...
I’d love to hear how it turned out for you! Leave a comment and rating below, and/or post a photo of your vegan meringue pie on Instagram and tag me so I can see it. (I'm @delightfuladventures on Instagram).

Vegan Lemon Meringue Pie (with Aquafaba Meringue)
Suggested Equipment:
Ingredients:
- 1 x 9-inch blind-baked pie crust (see note below)
For the Lemon Filling:
- 1 ½ cups (375ml) unsweetened dairy-free milk (unflavoured)
- ¼ cup (32g) cornstarch (arrowroot starch may also be used, same measurement/weight)
- 1 cup (200g) granulated sugar
- ½ cup (125ml) lemon juice (freshly squeezed, see note below)
- 2 tablespoons (12g) lemon zest
- 2 tablespoons (28g) unsalted vegan butter (optional, see note below)
- ¼ teaspoon ground turmeric (optional, see note below)
For the Aquafaba Meringue:
- ½ cup (125ml) aquafaba
- ½ teaspoon lemon juice
- ¼ teaspoon cream of tartar
- 1 ½ teaspoon vanilla extract
- 6 tablespoons (75g) granulated sugar
Instructions:
Prepare Pie Crust (make a day in advance):
- Make either my vegan pie crust or my vegan gluten-free pie crust recipe, blind-bake the pie crust and then fully cool it. This can be done a day in advance.
Prepare Lemon Filling (make a day in advance):
- Add the milk and cornstarch to a small bowl and whisk well until the cornstarch has combined with the milk. Set aside.
- Add the sugar and lemon juice to a small saucepan over medium-high heat. Whisk until all of the sugar granules have dissolved, roughly 3 minutes.
- Give the milk/cornstarch mixture another mix and then add it to the pot along with the lemon zest.
- Continuously whisk until the mixture has thickened enough to coat a spoon, this will take roughly 5-6 minutes. It will start to bubble towards the end of the cooking time, but don't let it boil.
- Remove the pot from the heat and, if using, whisk in the vegan butter and turmeric. Continuously whisk until the butter has melted and the turmeric has been incorporated into the mixture.
- Allow the mixture to sit in the pot for 20 minutes so it can cool down. Whisk every few minutes during the rest time so it doesn't form a skin on top.
Start Assembling the Pie (do a day in advance):
- Transfer the lemon filling to the cooled pie crust. Make sure the filling is even and smooth out the top using a rubber spatula.
- Place plastic wrap directly on the surface of the filling and place the pie in the refrigerator to chill for at least 2 hours or overnight.
Prepare Aquafaba Meringue (make the day of serving):
- Once the pie has finished chilling, add aquafaba, lemon juice, and the cream of tartar to a clean metal or glass bowl. With a hand mixer, begin whipping at high speed.
- When you reach the soft peaks stage, add the vanilla extract. Keep whipping until you get to the stiff peaks stage. This can take anywhere from 2.5 minutes to more, depending on your mixer and your aquafaba.
- Once you reach the stiff peaks stage, slowly add the sugar, a tablespoon at a time, and continue whipping. Wait until each sugar addition has been dissolved into the aquafaba before adding more sugar. The mixture will start to become glossy and thicker. Once all the sugar has been added and the aquafaba is glossy and thick, stop whipping.
Finish Assembling the Pie (Do Shortly Before Serving):
- Remove the pie from the fridge and carefully remove the plastic wrap. Using a spoon or rubber spatula, transfer the meringue to the top of the lemon filling. Spread it so it covers the entire surface of the lemon filling.
- Using a spoon or rubber spatula, create swirls and peaks with the meringue so the surface is not flat.
- Turn on your kitchen torch and hold it about 1 to 2 inches above the meringue. Move the flame in slow circles over the surface until the peaks turn golden. Don’t linger in one spot; move away and then go back over any areas you want darker. Continue until the top is caramelized to your liking.
- Slice and serve right away.
Recipe Notes:
- Please read all of the information above, as well as the notes below, before making this recipe.
- Make my vegan pie crust or my vegan gluten-free pie crust for this recipe.
- Use freshly squeezed lemon juice. Store-bought bottled lemon juice will not give the same bright, fresh flavour. You will need roughly 2.5 medium lemons to get the amount of juice needed, more if your lemons are on the small side, and less if they are large.
- The turmeric gives the filling a brighter yellow colour (the taste will be undetectable), and the butter makes it creamier, glossier, and smoother. These can both be omitted if you prefer; the result will still be great.
- If you want to have a completely smooth curd with no bits of lemon zest, pass it through a sieve before adding it to the pie crust.
- Don't add the sugar to the aquafaba too fast or all at once, this can cause the meringue to deflate.
- Cover and store leftovers in the fridge for up to three days. If your pie dish has a domed cover, use that, if not, loosely cover it with plastic wrap or slice the leftovers and place them in a deep airtight container with a cover. The meringue will start to deflate, weep, and get runny the longer it sits in the fridge, causing the crust to get soft, so use it up as soon as possible.
- Nutrition info is for 1 slice of 8 made using my easy vegan pie crust. Calorie count per serving if using my vegan gluten-free crust is roughly 340. Nutrition data is only to be used as a rough guide, click here to learn how nutrition data is determined on this website.
Did You Make This Recipe or Have a Question About It?