This page may contain affiliate links. Click to learn more. As an Amazon Associate I earn from qualifying purchases.
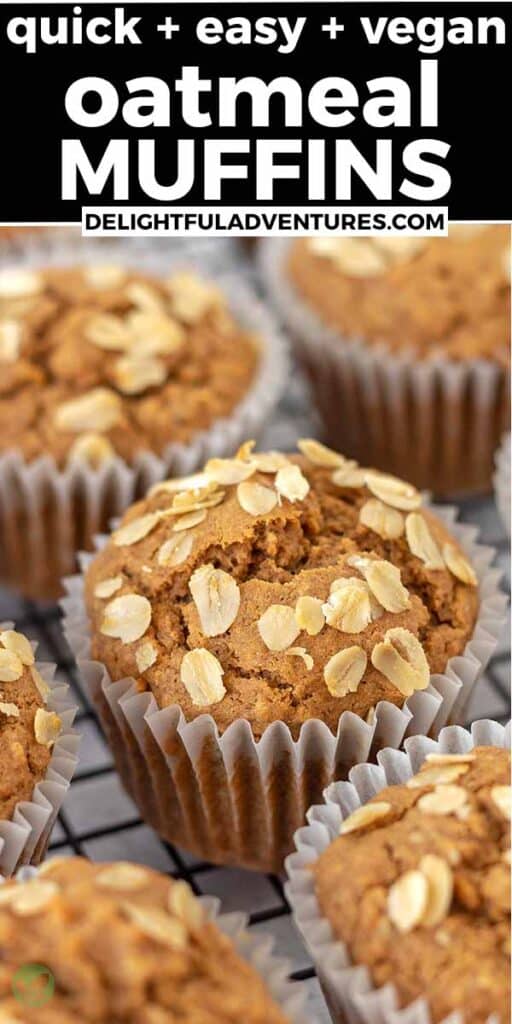
Easy homemade vegan oatmeal muffins that are dairy-free, egg-free, can be made gluten-free, and contain no banana. They’re moist, fluffy, lightly sweetened, and filled with warm spice flavour.
You can make them plain or customize them with the add-ins of your choice (like chocolate chips, nuts, raisins, and more!).
Bake up a batch of these simple and delicious vegan muffins and serve them at snack time, breakfast or brunch.
.")
Save This Recipe!
In a hurry? Drop your email below, and this recipe will be sent straight to your inbox for later. You'll also get fresh recipes every week! You can unsubscribe anytime.
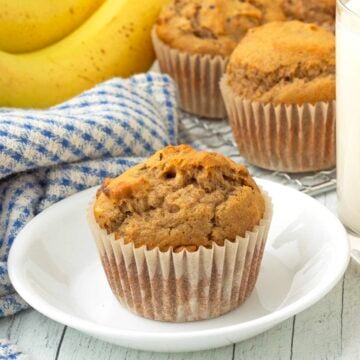
Muffins are a favourite around here in case you didn't notice! If you haven't had a chance to browse all of my recipes, there are quite a few to choose from like my vegan carrot muffins, vegan sweet potato muffins, and vegan lemon poppy seed muffins to name a few!
These vegan oatmeal muffins (without banana!) are the latest addition and they're a must-make! They're soft, fluffy, wholesome, and filled with oats and spices. They're also extra good when enjoyed with a mug of creamy oat milk hot chocolate.
You'll love that you have the choice of making them plain or adding in some dried fruit, nuts, or chocolate chips to customize them just the way you want.
This recipe is vegan but you have the choice of making it gluten-free, too. If you do make the gluten-free option, I usually only give one flour blend recommendation for my muffin recipes, but with this one, you get two. Keep reading for all of the details!
Ingredients You'll Need
All of the ingredients are vegan pantry staples.
You will be making a quick, DIY vegan buttermilk with two of them which will contribute to the muffins' texture (just like it does in my vegan buttermilk pancakes recipe!) and soften the oats, I'll explain how to do everything below, it's easy!
I recommend making these easy plant-based muffins exactly as the recipe is written for the best and intended results, but you’ll find some info below so you know what can and absolutely cannot be changed.
.")
Ingredient and Substitution Notes
This recipe was developed and tested to be just vegan or vegan AND gluten-free, so you have some choices for the flour you use.
For vegan oatmeal muffins: Use regular all-purpose white flour.
For vegan gluten-free oatmeal muffins: You'll need a gluten-free flour blend, Bob’s Red Mill Gluten-Free 1 to 1 Baking Flour to be specific, the one in the BLUE bag with xanthan gum.
I also tested it with the other Bob's Red Mill GF flour blend, the one in the red bag and the results were also great. See the "Which Flour Blend to Use" section below for more info.
I have not tested this recipe with any other type of flour than the three mentioned above, so if you use something different, your result may not be the same as mine.
Make sure to measure your flour correctly or the muffins will not have the correct texture.
Rolled Oats – Old-fashioned rolled oats are what you need for this recipe, with no substitutions. Be sure to use certified gluten-free rolled oats, if needed.
Quick-cooking oats, instant oats, and steel-cut oats cannot be used, stick with rolled oats for the best and intended results.
Dairy-Free Milk – I recommend using almond milk or soy milk for this recipe since you need to make vegan buttermilk to soak the oats in. Those two types of milk make the best vegan buttermilk, however, if you don't have either, you can substitute with another plant-based milk.
Lemon Juice – Lemon juice is needed to make the buttermilk but if you don’t have lemon juice, the second-best choice is apple cider vinegar, followed by distilled white vinegar.
DO NOT use balsamic, white wine, red wine, or sherry vinegar. They will give your buttermilk a strong flavour that may come out in the muffins.
(If you use lemon juice or one of the recommended types of vinegar, the taste will not come through in the muffins.)
NOTE: Using vegan buttermilk helps to break down the oats so they are tender in the muffins. It also helps to make the muffins rise (the acid reacts with the baking soda), and finally, it helps, along with the oil, to make the muffins moist. If regular plant-based is used instead, the texture of the muffins will not be as intended.
Flax Eggs – Since this is an eggless recipe, the flax eggs act as the binder. If you can’t have flax, chia eggs will work as a substitute.
Baking Powder and Baking Soda - These are both very important ingredients that help the muffins to rise (the baking soda also interacts with the buttermilk!). They cannot be substituted, so make sure they're both fresh or your muffins will turn out dense and not rise very much.
Sugar – You can use either coconut sugar or brown sugar for this recipe. If you use brown sugar, make sure you’re using a vegan brand (organic will always be vegan). They will no longer be refined sugar-free if brown is used. I have not tested this recipe with any liquid sweeteners or alternative sweeteners.
Oil – I usually use melted coconut oil when making this recipe, but any neutral-flavoured oil, like safflower, or sunflower can be used instead. If you use coconut oil, make sure that your other ingredients are at room temperature so it does not solidify when added to the recipe. I have not tried to make this recipe oil-free.
Spices and Vanilla - They won't be oatmeal spice muffins without them, so don't leave these ingredients out.
If you love vegan breakfast muffins or muffins for brunch or snacks, click this link to find even more muffin recipes!
Which Gluten-Free Flour Blend to Use
If you're making the vegan gluten-free version, it's important to know that you should always use the same flour the recipe calls for to get the expected results.
I tested two gluten-free flour blends for this recipe and they both worked well, so please use one of these for the best and intended results:
Gluten-Free 1-to-1 Baking Flour (in the blue bag) - I tested this recipe with both of the Bob's Red Mill gluten-free flour blends and both results were great, however, I prefer the texture and flavour results from using this flour best. The muffins you see in the pictures in this post are made with the 1-to-1 blend.
Gluten-Free All-Purpose Baking Flour (in the red bag) - The muffins made with this flour were fluffier, but because these are lightly flavoured muffins and because this flour blend is bean-based, those flavours are present in the background, but just slightly. The batter is also runnier than what is shown in the images below.
These muffins also last for a shorter amount of time, which is typical for baked goods made with this flour and they need less baking time than muffins made with the other blend. If you use add-ins, the batter will likely make more than 12 muffins.
Are you making the vegan gluten-free version of this recipe? If you are new to vegan gluten-free baking, be sure to read all of my vegan gluten-free baking tips!
How to Make Them
(Note: I’ve outlined the step-by-step on how to make this recipe here, but find the full recipe, ingredients, and directions at the end of this post.)
1. The first step is to make vegan buttermilk, it's easy and quick. Simply add the milk and lemon juice to a bowl and stir.
2. Next, add the rolled oats, stir, and set the bowl aside so the oats can hydrate and soften.
.")
3. Mix the dry ingredients together.
4. Add the rest of the wet ingredients, including the sugar, to the soaked rolled oats you prepared earlier. Stir to combine everything, but don't overmix. The oats will be very soft at this point and you don't want to turn them to mush by mixing too much.
5. Combine the wet and dry ingredients.
6. Stir until everything has combined, and again, don't over-mix. If you are using any add-ins, fold them in here.
.")
7. Evenly divide the batter into your prepared muffin pan. You can use either a spoon or a scoop to do this. I like using a scoop because it’s quicker and easier to divide the batter, this is the scoop I’m using in the picture below.
8. This step is optional, but if you'd like, you can add a small amount of rolled oats to the top of each muffin. (If you don't want to use rolled oats, you can leave them plain or use turbinado sugar or cinnamon sugar instead.)
9. Continue adding the rolled oats to the top of each muffin, again, this is optional.
10. Bake!
.")
How to Know When They’re Ready
Follow the time stated in the recipe, and you can also do the toothpick test by simply sticking a toothpick into the center of the largest muffin. If the toothpick comes out clean, they’re done.
Note that if you are making the vegan gluten-free version, both of the flours I recommend using require different baking times. See the recipe notes for more info.
After your oatmeal muffins have been baked, remove them from the oven and let them sit in the pan for a few minutes before carefully removing them (they’ll still be hot!) and placing them on a cooling rack.
Allow them to cool almost completely before serving.
.")
Optional Add-Ins
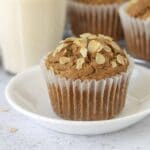
The muffins in the pictures were made without add-ins, but they're wonderful with add-ins. Make them plain, or use add-ins...it's up to you!
Here are some ideas:
- raisins
- chocolate chips
- nuts (toasted walnuts, pecans, sunflower seeds, pumpkin seeds all work well)
- dried cranberries
- chopped dates
- chopped apples (see my vegan apple oatmeal muffins and make those instead!)
- chopped pears
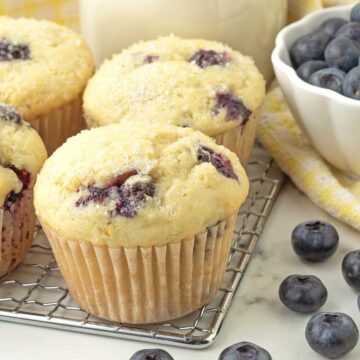
- blueberries
- lemon zest or orange zest
Need a warm drink to enjoy alongside your muffin? How about creamy vegan hot chocolate, and almond milk latte, an oat milk latte, or a vegan pumpkin spice latte?
Storing Leftovers
Store any leftovers in an airtight container at room temperature for up to 4 days, after that, move them into the refrigerator for another 1-2 days.
When you’re ready to serve, bring them up to room temperature, and you can warm them up slightly, if you’d like, before serving.
Note: If you use fruit as an add-in such as blueberries or apples, they will only last at room temperature for 2 days because of the extra moisture. After 2 days, move them into the refrigerator for another 3-4 days.
Freezing
To freeze, fully cool and wrap them tightly. Place them in an airtight container and freeze them for up to one month.
When you’re ready to serve them, thaw at room temperature and serve. Just before serving, you can warm them up a bit in the microwave if you’d like.
.")
What's the Texture Like?
Soft, fluffy, moist, and perfect! (See the image below!) No one is going to know these are vegan (or vegan AND gluten-free!).
But to get this texture, you must follow the recipe exactly as it’s written. Any substitutions or changes and you risk your muffins not turning out as expected.
Tips for Success
- Measure and have all your ingredients ready to go before starting. This will make the process run smoothly, quickly, and easily.
- Measure your ingredients correctly. I highly recommend using a scale (this is the one I have) and my weight measurements. Please read my article about how to measure flour correctly.
- Use the same flour I use. Baking vegan gluten-free can be tricky because different flours produce different results. My top recommendation for the vegan gluten-free version is Bob's Red Mill Gluten-Free 1-to-1 Baking Flour (in the blue bag) and as a second choice, the gluten-free all-purpose flour (in the red bag) can be used). See the “Which Gluten-Free Flour Blend to Use” section above for more info.
- Make sure your baking powder and baking soda are fresh, these are two of the ingredients that help the muffins to rise and become fluffy.
- Don’t over-bake. If over-baked, you’ll end up with dry, crumbly muffins. See the section above called “How to Know When They’re Done” for more details.
- Read this post from top to bottom before you start. I’ve included a lot of tips and tricks so you get things right. Also, read through the actual recipe before getting started.
- Follow the recipe exactly as it’s written for the very best results.
.")
If You Make This Recipe...
Please let me know how things went by leaving a star rating and a comment below. You can also share a picture of your vegan oat muffins on Instagram and tag me (I’m @delightfuladventures) so I can see them!
And If You Like This Recipe...
You may also like these other easy vegan gluten-free muffin recipes:
Moist Vegan Oatmeal Muffins (No Banana!)
Suggested Equipment:
Ingredients:
- 2 tablespoons ground flax seeds
- 6 tablespoons water
- 1 cup (240ml) unsweetened dairy-free milk
- 1 tablespoon lemon juice (see note below for substitutions)
- 1 cup (100g) rolled oats (gluten-free, if needed)
- 1 ½ cups (210g) gluten free flour OR all-purpose white flour (if using all-purpose flour, use 1 ½ cups (188g), **please see important notes about flour below**
- 1½ teaspoons baking powder
- ½ teaspoon baking soda
- ¼ teaspoon salt
- 1½ teaspoons ground cinnamon
- ½ teaspoon ground nutmeg
- ⅓ cup (80ml) oil
- ⅔ cup (100g) coconut sugar (OR ½ cup (100g) light brown sugar)
- 1 teaspoon vanilla extract
- ½ cup optional add-ins (see above and below for more info)
- 2 tablespoons rolled oats (optional, for sprinkling on top, gluten-free, if needed)
Instructions:
- Preheat oven to 350° F (177° C).
- Prepare your flax eggs by whisking together ground flax seeds and water. Set aside to thicken.
- Line a muffin tin with liners or generously grease the inside of each cup with coconut oil.
- In a medium bowl, add dairy-free milk, lemon juice, and stir. Add in the rolled oats, stir again, and let it sit for 10 minutes so the oats can hydrate.
- In a medium bowl, whisk together the flour, baking powder, baking soda, salt, cinnamon, and nutmeg.
- After the oats have soaked, add the flax eggs, oil, sugar, and vanilla to the same bowl and mix until all ingredients have blended. Don't over mix or the oats will start to break down.
- Slowly add the dry mixture to the wet mixture and stir until combined. Stir in any add-ins, if using. Don't over mix.
- Using a spoon or a large scoop, divide batter into the 12 muffin cups.
- If using, sprinkle optional rolled oats on top of each muffin.
- Bake for 25 minutes or until a toothpick inserted in the middle of the largest muffin comes out clean.
- Let muffins cool in muffin pan for a few minutes and then remove and place them on a cooling rack.
Recipe Notes:
- Please read all of the helpful information above and below before making this recipe.
- ***If you are making the vegan gluten-free version, it’s important to know that different gluten-free flour blends use different ingredients and ratios, so results will always vary if you substitute. I tested this recipe with both the Bob’s Red Mill Gluten Free 1 to 1 Baking Flour (Amazon link) in the blue bag and the Bob’s Red Mill Gluten Free All Purpose Baking Flour (Amazon link) in the red bag. Both results were great, but I prefer the results from the 1 to 1 flour, the muffins you see in the images above were made with the 1 to 1. The weight listed above is for this specific flour. Please see the "Which Flour Blend to Use" section above for more info about this.***
- If using the Gluten-Free All-purpose Baking Flour (red bag), the batter will be a little runnier than what is shown in the images above. Use the same cup measurement, but the weight for this flour is 210g. Muffins made with this flour will also require less baking time. Bake for just 18 minutes. If you use add-ins, the batter will likely make more than 12 muffins.
- This recipe will NOT work with coconut flour or any other single gluten-free flour.
- For the best results, always measure your flour correctly.
- Make sure to use unsweetened and unflavoured dairy-free milk.
- If you don't have lemon juice to make the buttermilk, apple cider vinegar or distilled white vinegar can be used instead.
- Any type of neutral flavoured oil can be used, such as sunflower or safflower.
- Store leftovers in an airtight container at room temperature for up to 3 days, after that, move them into the refrigerator for another 3-4 days. When you're ready to serve, bring them up to room temperature, and you can warm them up slightly, if you'd like, before serving.
- If you use fresh fruit as an add-in such as blueberries or apples, they will only last at room temperature for 2 days because of the extra moisture. After 2 days, move them into the refrigerator for another 3-4 days.
- To freeze, fully cool and wrap them tightly so they are airtight. Place in an airtight container and freeze for up to one month. When you’re ready to serve them, thaw at room temperature and serve. Just before serving, you can warm them up a bit in the microwave.
- Nutrition info is based on 1 muffin made using Bob's Red Mill 1 to 1 flour (in the blue bag) with the recipe made as written. The calorie count for the muffins using the Bob's Red Mill Gluten-Free All-Purpose flour in the RED bag is 202 per muffin and the calorie count for the muffins made with regular all-purpose flour is 207. Nutrition info is only to be used as a rough guide. Click to learn how nutrition info is calculated on this website.


Jackie T. says
Made these last week as mini muffins and they were a delightful snack on the go! Was looking for a vegan muffin recipe that didn't require bananas and this worked out perfectly. My toddler also enjoyed eating them, too. Thanks for sharing this recipe! I'm so excited to try out some of your other muffin recipes in the future--so many options!
Gwen Leron says
Aww, Jackie, I'm so happy to know you and your little one like them! And yes, muffins are one of my favourite things to make, so there are plenty of recipes to choose from. If you ever have any questions, please always feel free to get in touch. Take care, and enjoy!
Becky says
Hi I want to make this this afternoon but am unclear if i can use regular all purpose flour, not gluten free. Thanks
Gwen Leron says
Hi Becky, you can use either type. The recipe details the info about each flour (1 ½ cups (210g) gluten free flour OR all-purpose white flour (if using all-purpose flour, use 1 ½ cups (188g), **please see important notes about flour below**). Let me know if you have further questions, enjoy!
MommaOfBoys says
We’ve been vegan over 4 1/2 years. I have tried so many muffin recipes and never liked them, because they are too dense for us. These came out just perfect and even better the kids loved them!! So happy I found your recipes. Thank you!
Gwen Leron says
I'm so happy you found my recipes, too! Glad to know you loved the muffins, I have quite a few others on the website in addition to this one. If you have any questions about them or any of the other recipes, please feel free to ask. Enjoy the rest of what you have left!