This page may contain affiliate links. Click to learn more. As an Amazon Associate I earn from qualifying purchases.

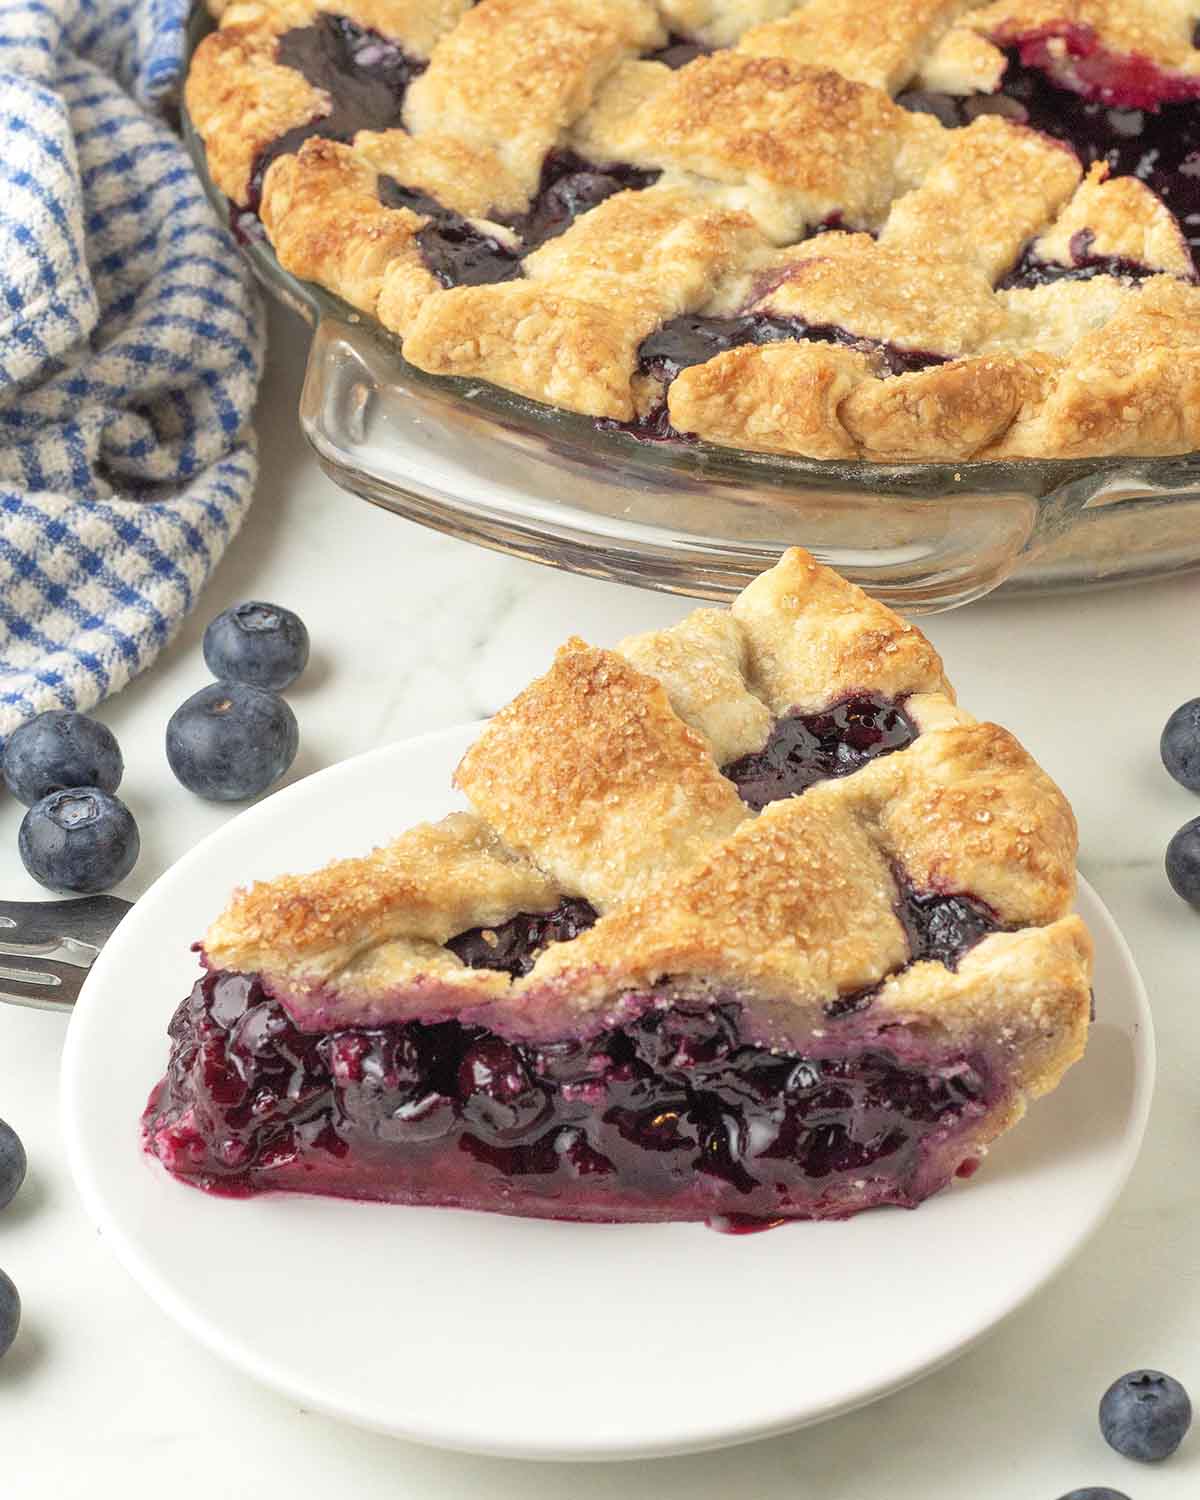
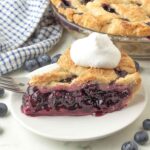
A recipe for homemade vegan blueberry pie that’s simple, inviting, and perfect to serve on any occasion. The luscious filling is bursting with juicy berries (fresh or frozen!) that bake into a jammy, flavourful center, all wrapped in a golden, homemade crust that’s flaky and tender.
This classic dessert is fully egg-free, dairy-free and has a simple gluten-free swap if you need it. Enjoy a slice just as it is, or top it with a scoop of ice cream or a dollop of whipped cream for the perfect finish!
Save This Recipe!
In a hurry? Drop your email below, and this recipe will be sent straight to your inbox for later. You'll also get fresh recipes every week! You can unsubscribe anytime.
Whether you're a seasoned baker or one who's just starting, a timeless vegan blueberry pie is another recipe you need in your vegan pie recipe collection. Once you see how easy this is, you’ll be looking for any chance to make it again.
You might think of this as only a summer dessert, and while it’s perfect in the summer with fresh, in-season berries, it works beautifully with frozen blueberries, too, so you can enjoy it all year long.
Surprisingly, it's quite easy to prepare, and I make it simple for you with step-by-step instructions. The no-cook filling calls for only 6 ingredients, none of them fancy or hard to find. You'll be a blueberry pie-making pro after just one try!
So let's go through it all from start to finish so you can make yourself one of the best vegan blueberry pies you'll ever have.
The Simple Stuff You'll Need
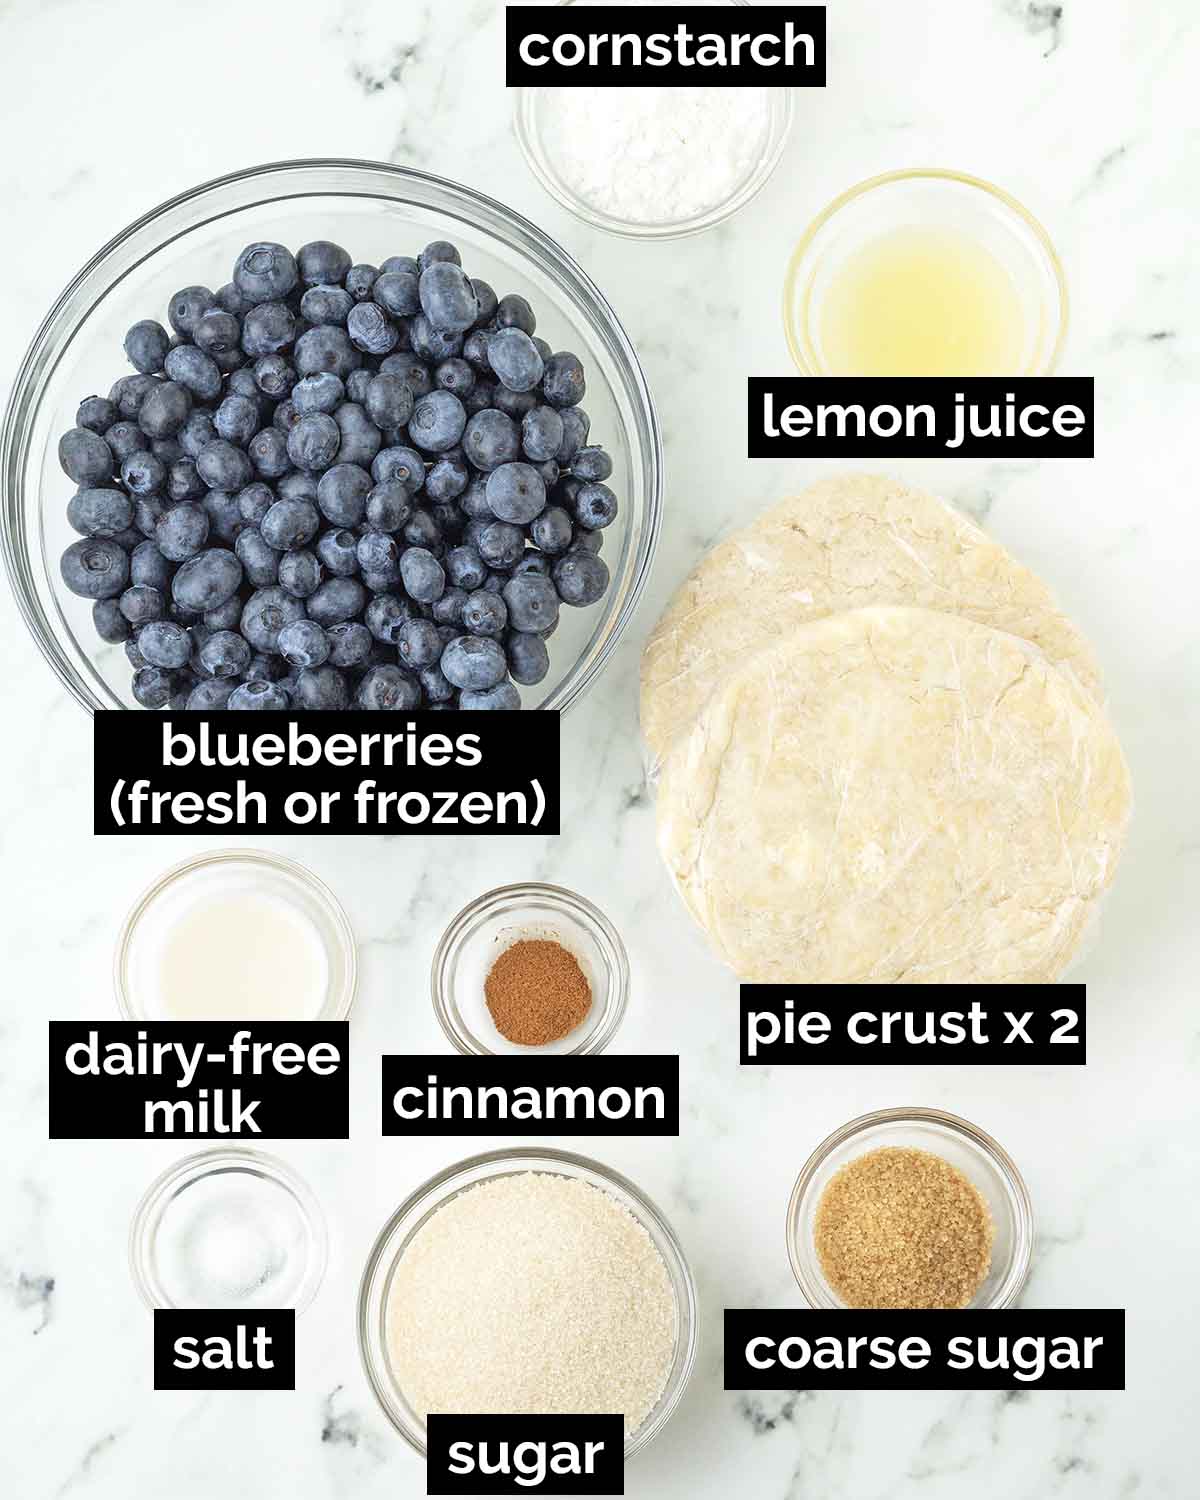
A Few Notes On Ingredients
Note: Only ingredients with special notes are included in the list below. The full ingredient list can be found in the recipe card.
Pie Crust - Please follow my buttery vegan pie crust recipe. This is a double-crust pie, so double the crust recipe. I recommend making the recipe twice rather than doubling the measurements and then dividing the dough into two, unless you have a scale and can split the dough accurately.
For Vegan Gluten-Free Blueberry Pie: Make my flaky vegan gluten-free pie crust recipe. The filling is already gluten-free as-is!
Blueberries - I used fresh blueberries for the pie you see in the images, but I tested a few times with frozen blueberries because we should all be prepared in case a blueberry pie craving hits when they aren't in season!
If you use frozen blueberries, do not thaw them. Because they're going in frozen, they're going to release a lot of liquid, so you'll have to adjust the amount of cornstarch to make sure the filling isn't runny. Please take note of that adjustment in the recipe notes.
Cornstarch - Cornstarch is what thickens the filling, so this ingredient cannot be skipped. If you can't use or don't have it, please use arrowroot starch instead, same measurement and weight.
How to Make It
(Note: I’ve outlined the step-by-step on how to make this recipe here, but find the full recipe, ingredients, and directions in the recipe card at the end of this post.)
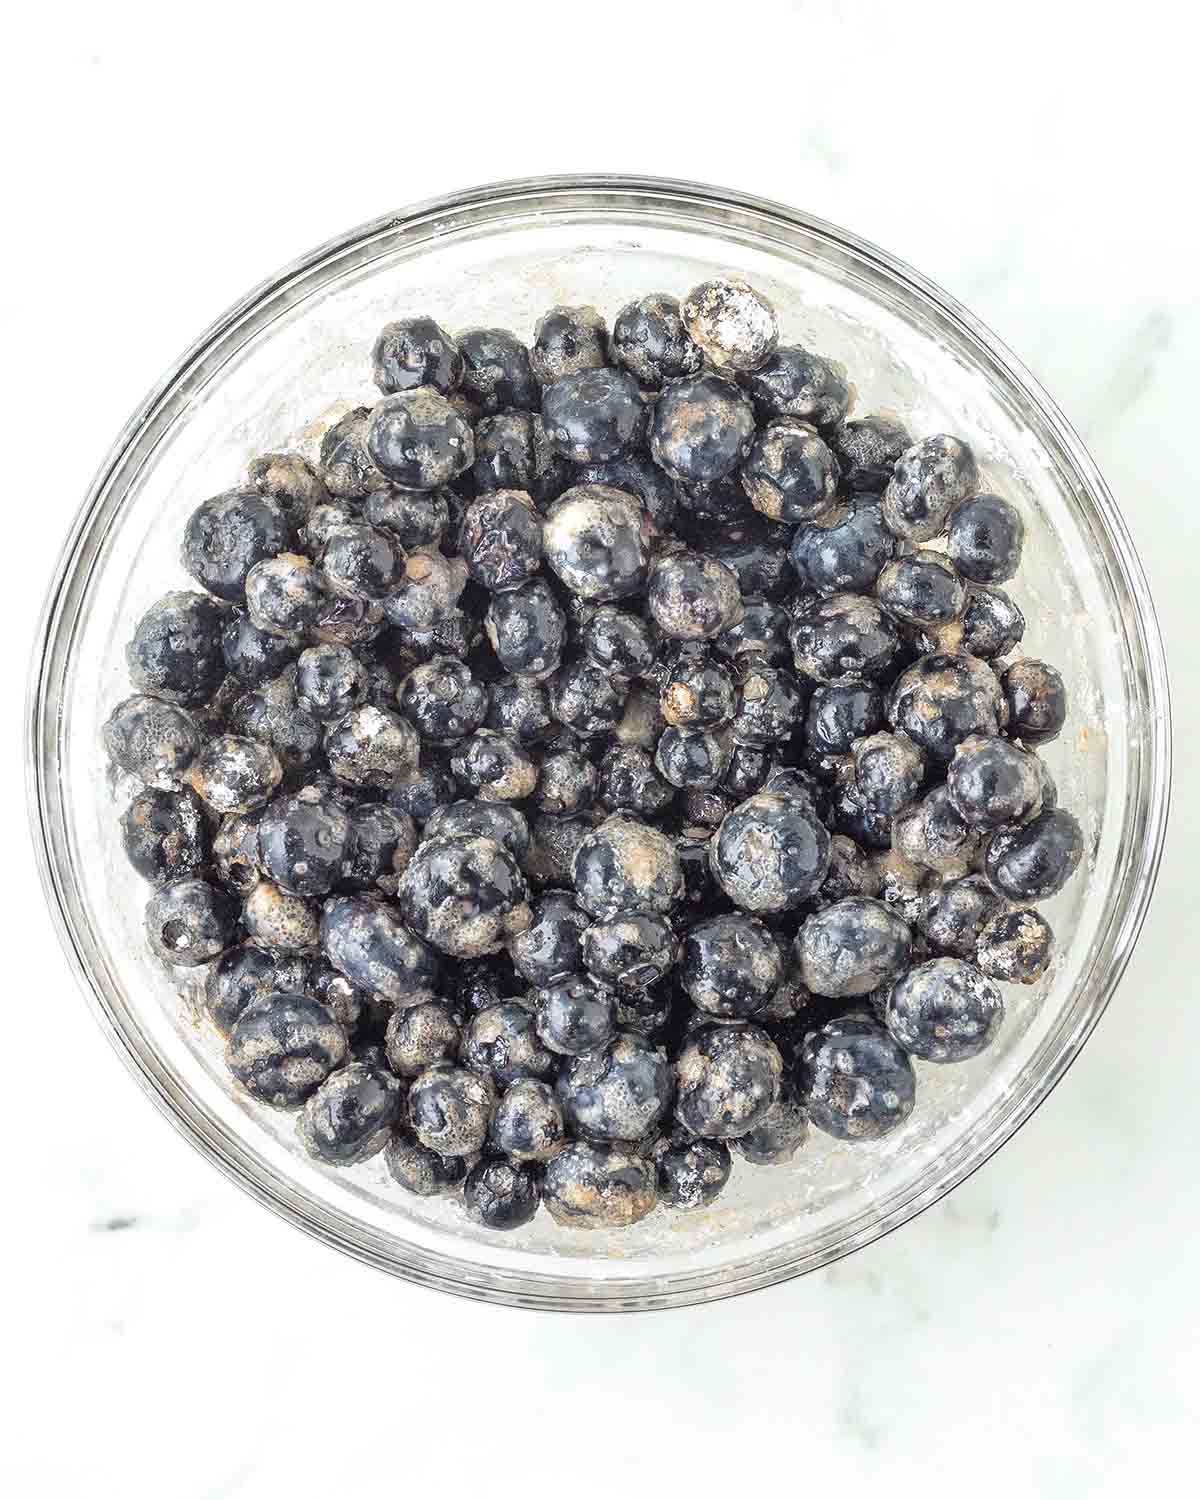
Rinse and drain the blueberries, place them in a bowl, and toss gently with lemon juice. Add the rest of the filling ingredients, then mix to coat.

Roll out the first pie dough into a 12-inch circle, place it in a 9-inch pie plate, press it into the corners, and mend any cracks if necessary.

Roll the second pie dough into a 12-inch circle.
To Make a Lattice Top Pie: Trim the dough on either side for straight edges, then cut it into strips using a pizza wheel, a pastry wheel (pictured above), or a sharp knife.
For a Non-Lattice Top Pie: Place the rolled dough over the pie, trim excess to an inch, seal and crimp the edges, then cut slits for steam to escape.
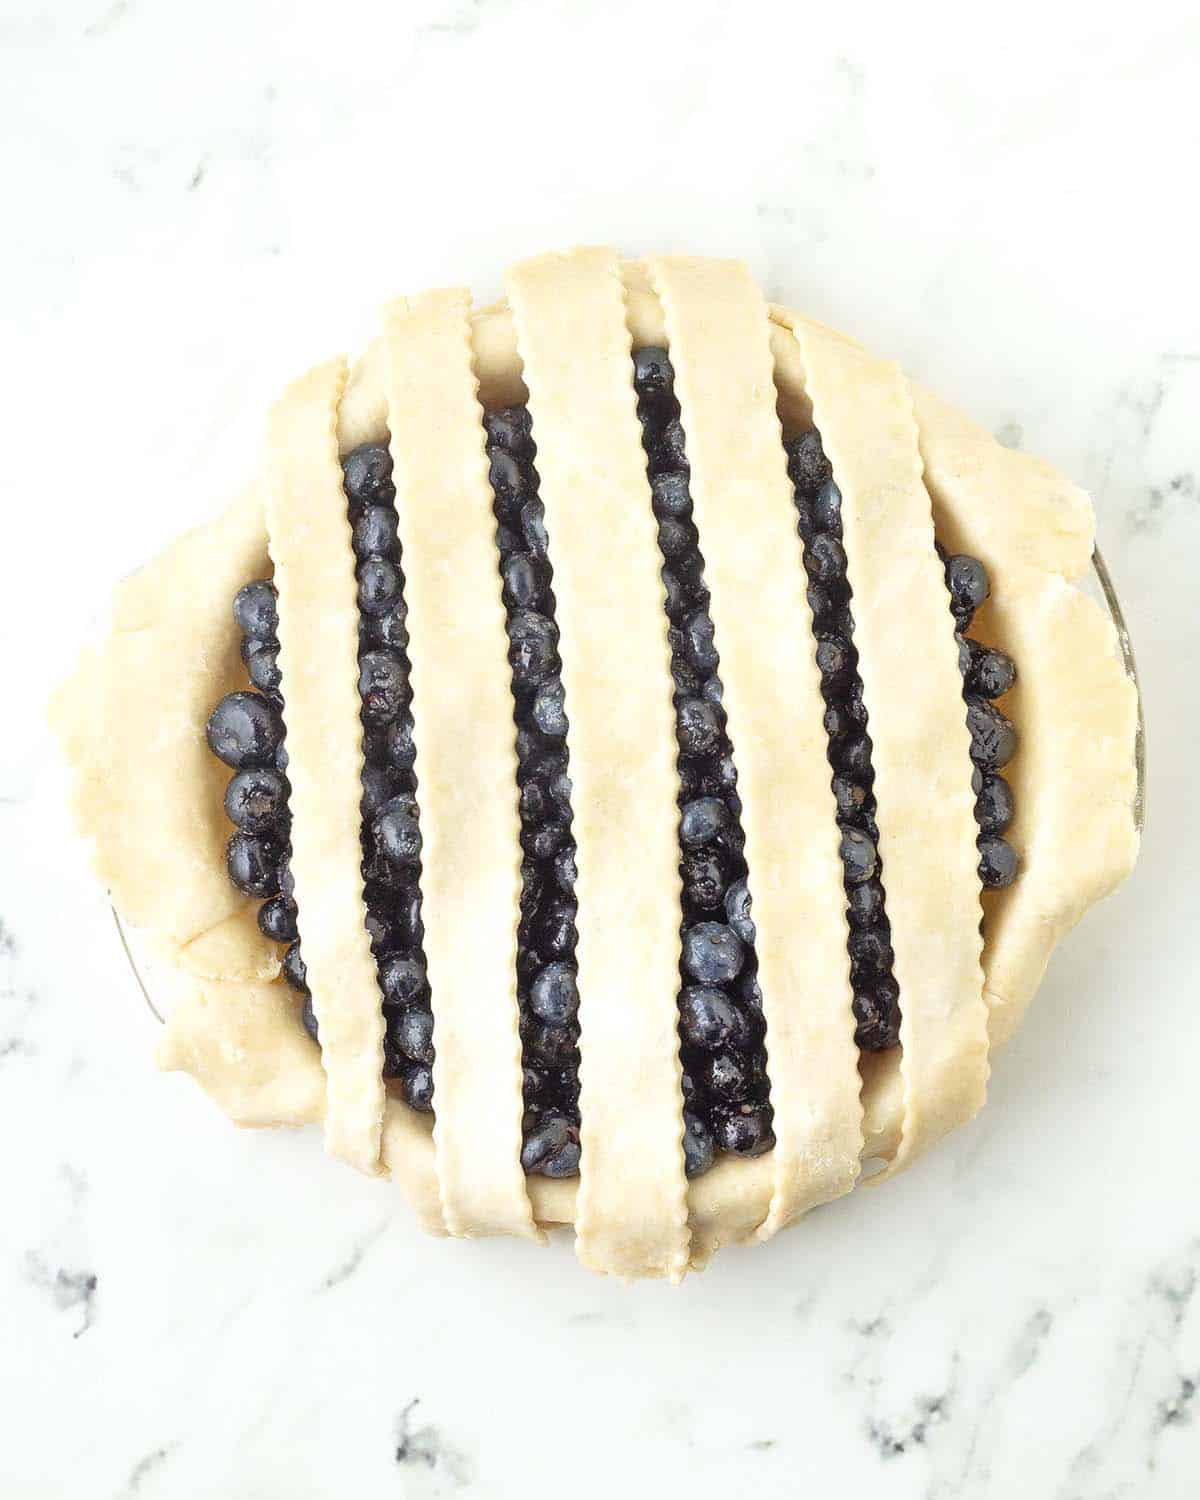
Place 5 strips vertically on top of the pie.
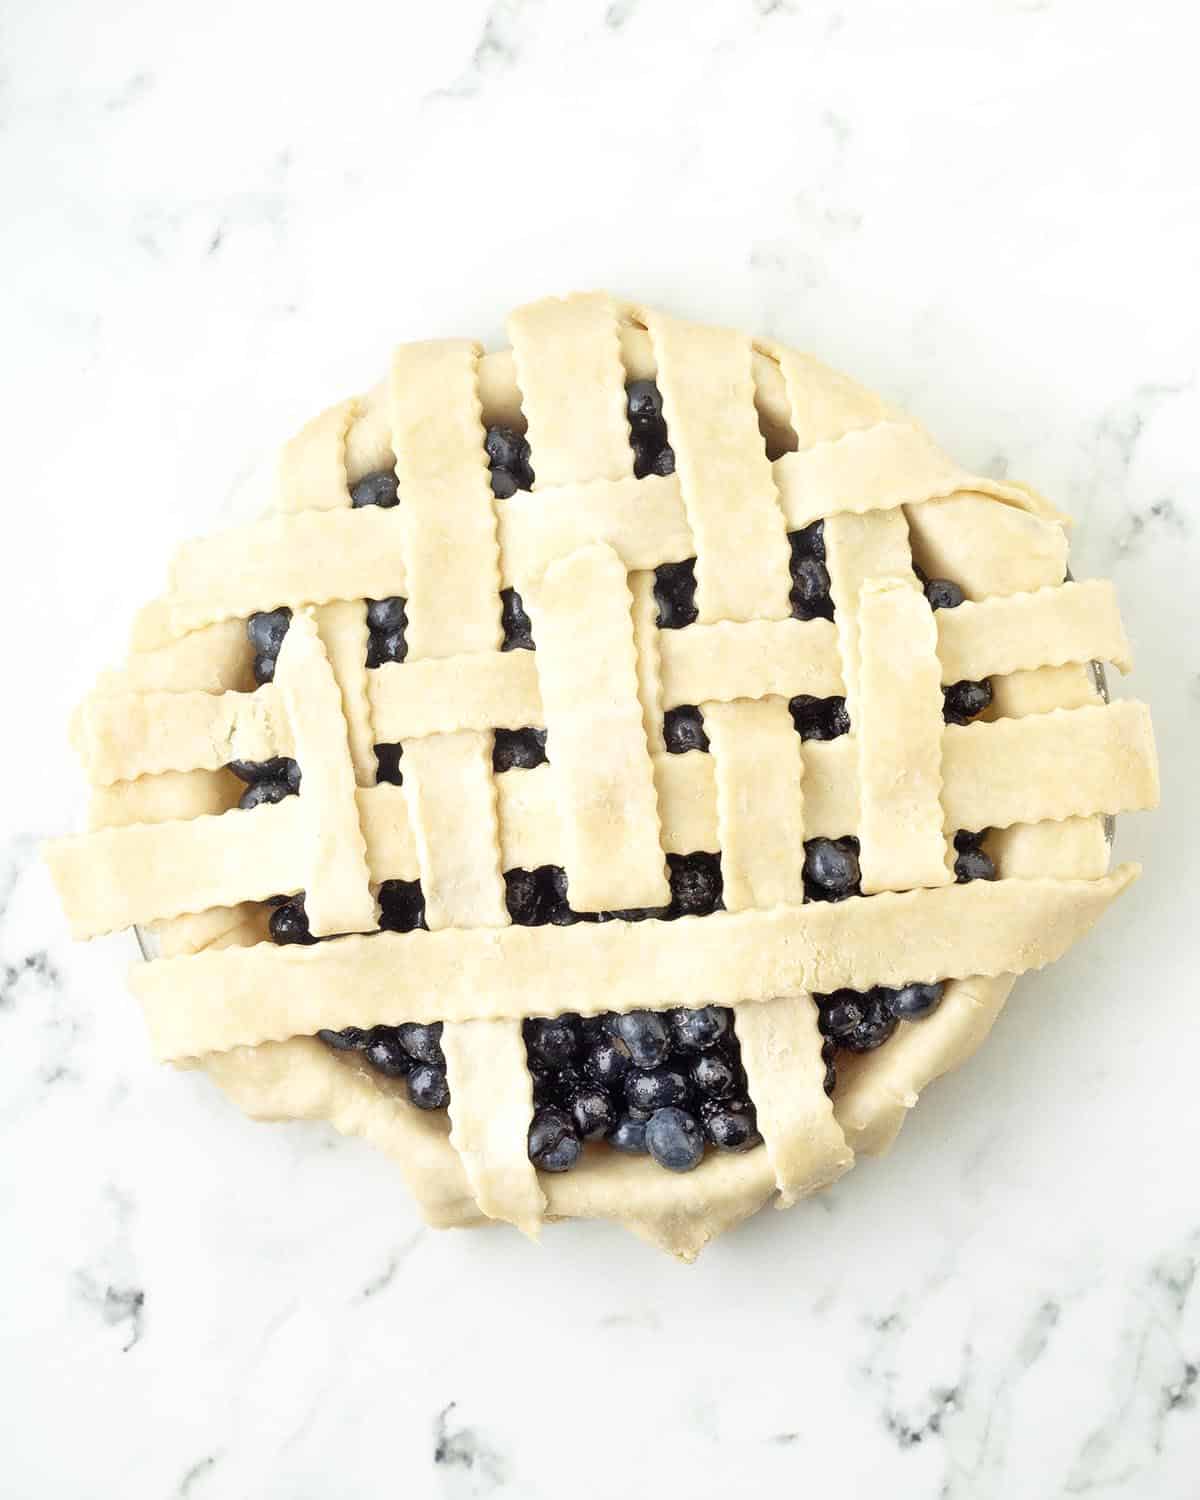
Arrange the remaining strips, one at a time, over and under the strips to create the lattice design. (For a visual tutorial, watch this video.)
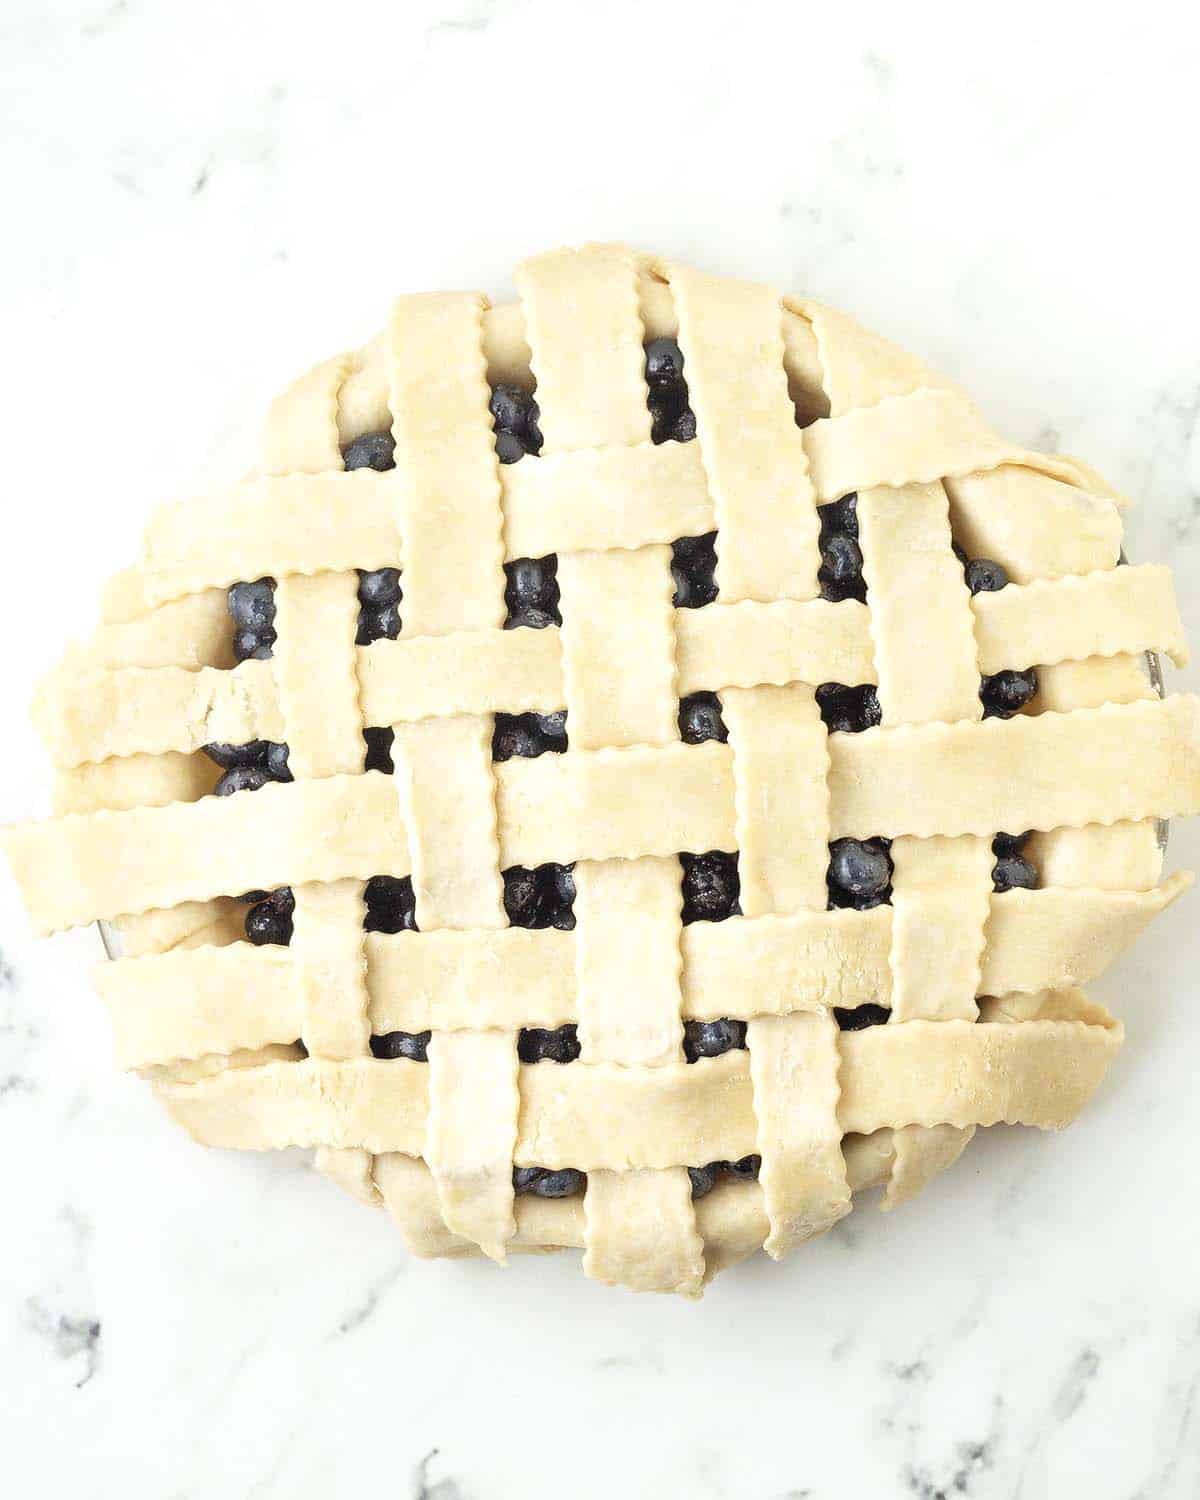
Trim any excess pieces of dough so only about 1 inch is left around the edges.
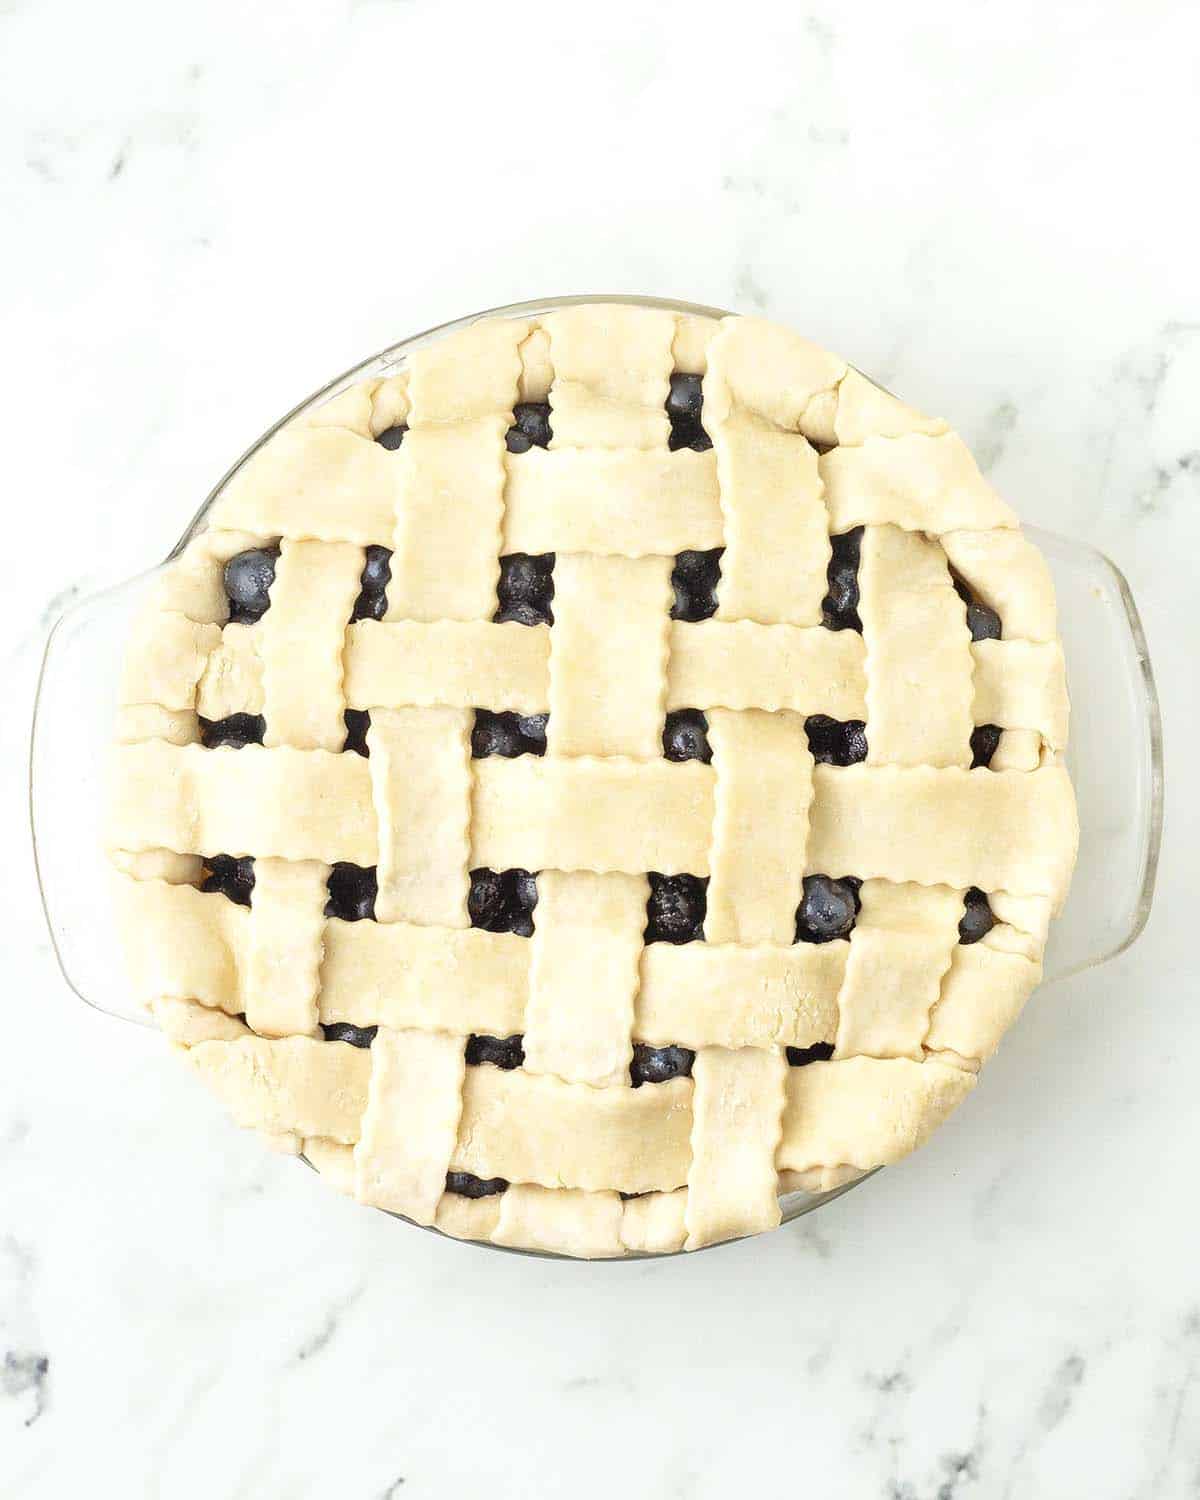
Gently press the edges of the top and bottom crust together, then fold and tuck the excess dough under.
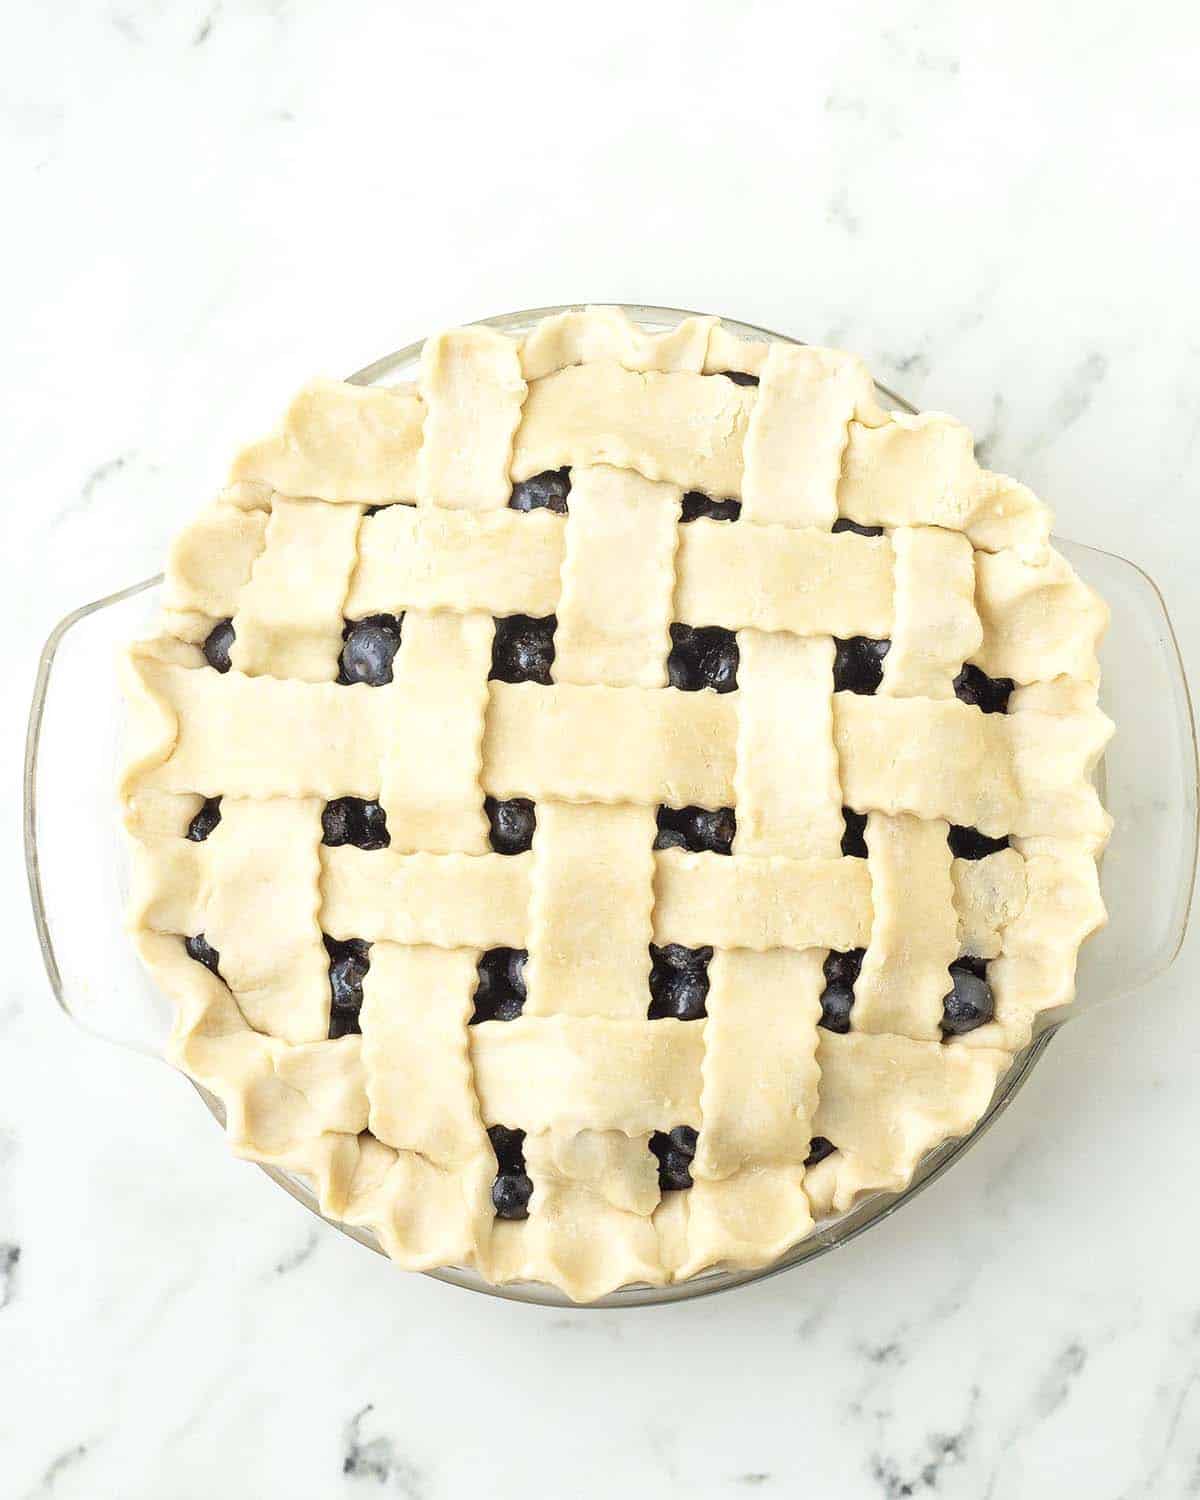
Optional: Crimp the edges. You can crimp as shown in the image above or press with a fork.
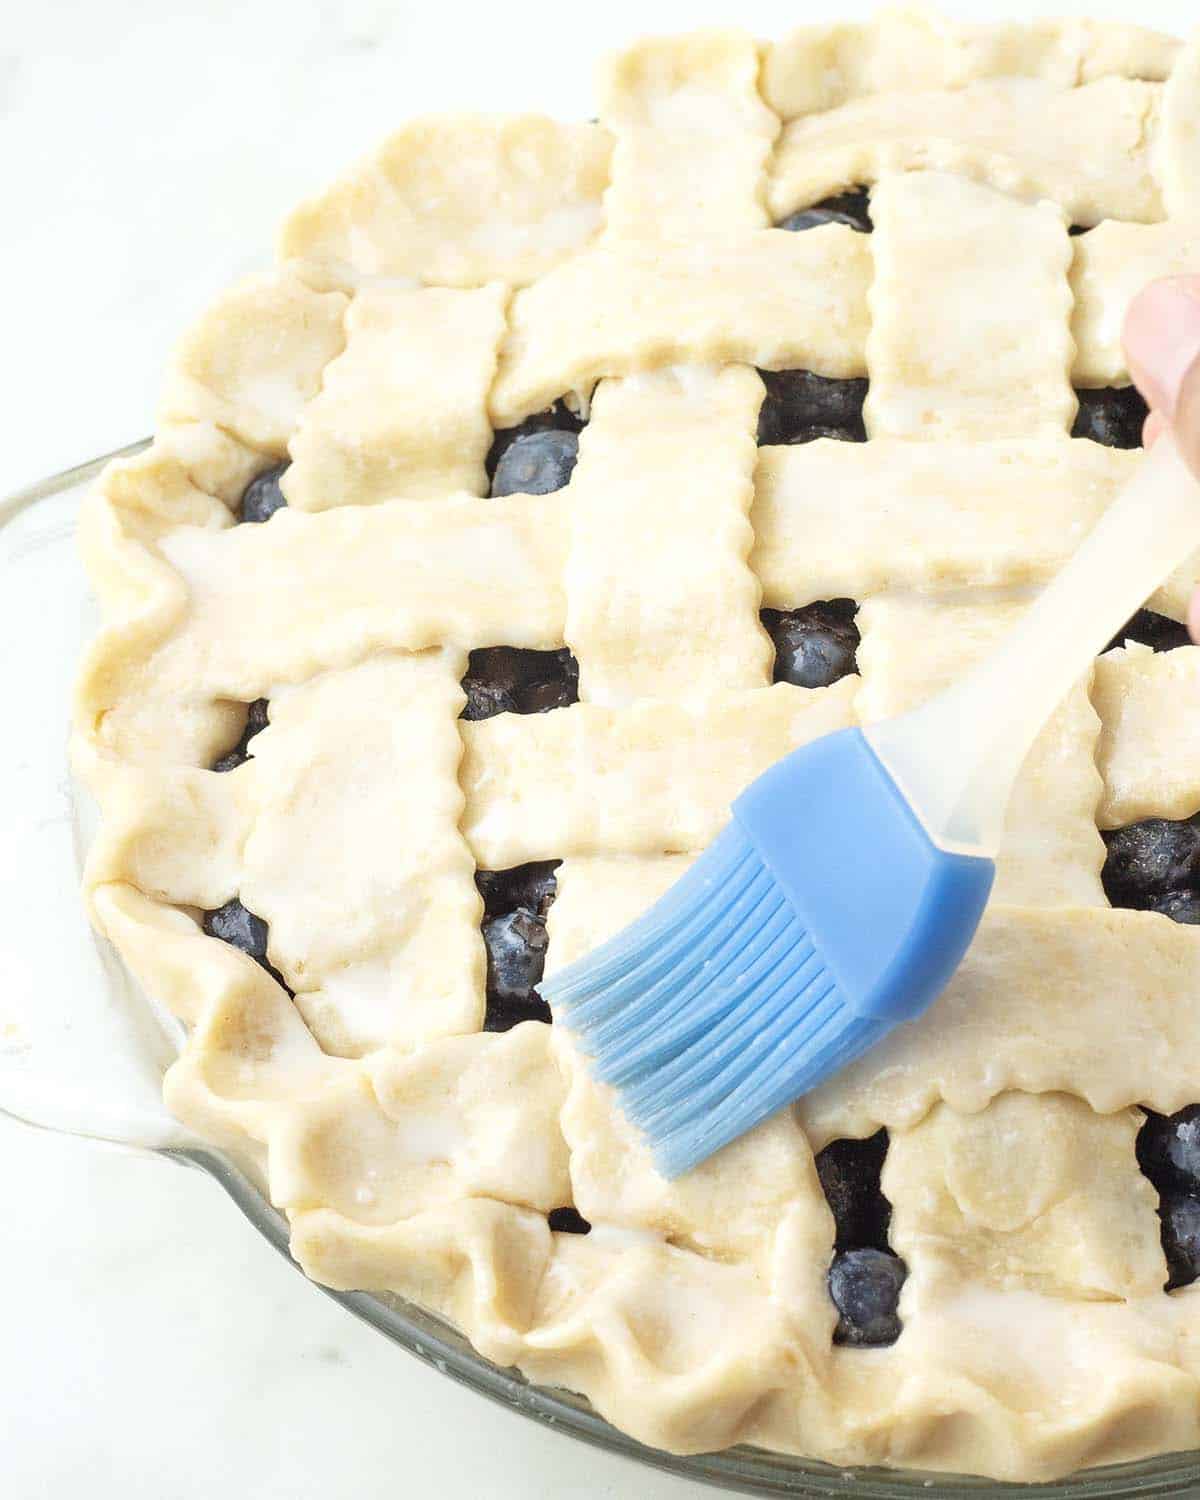
Brush the surface of the pie crust with vegan heavy cream or dairy-free milk.
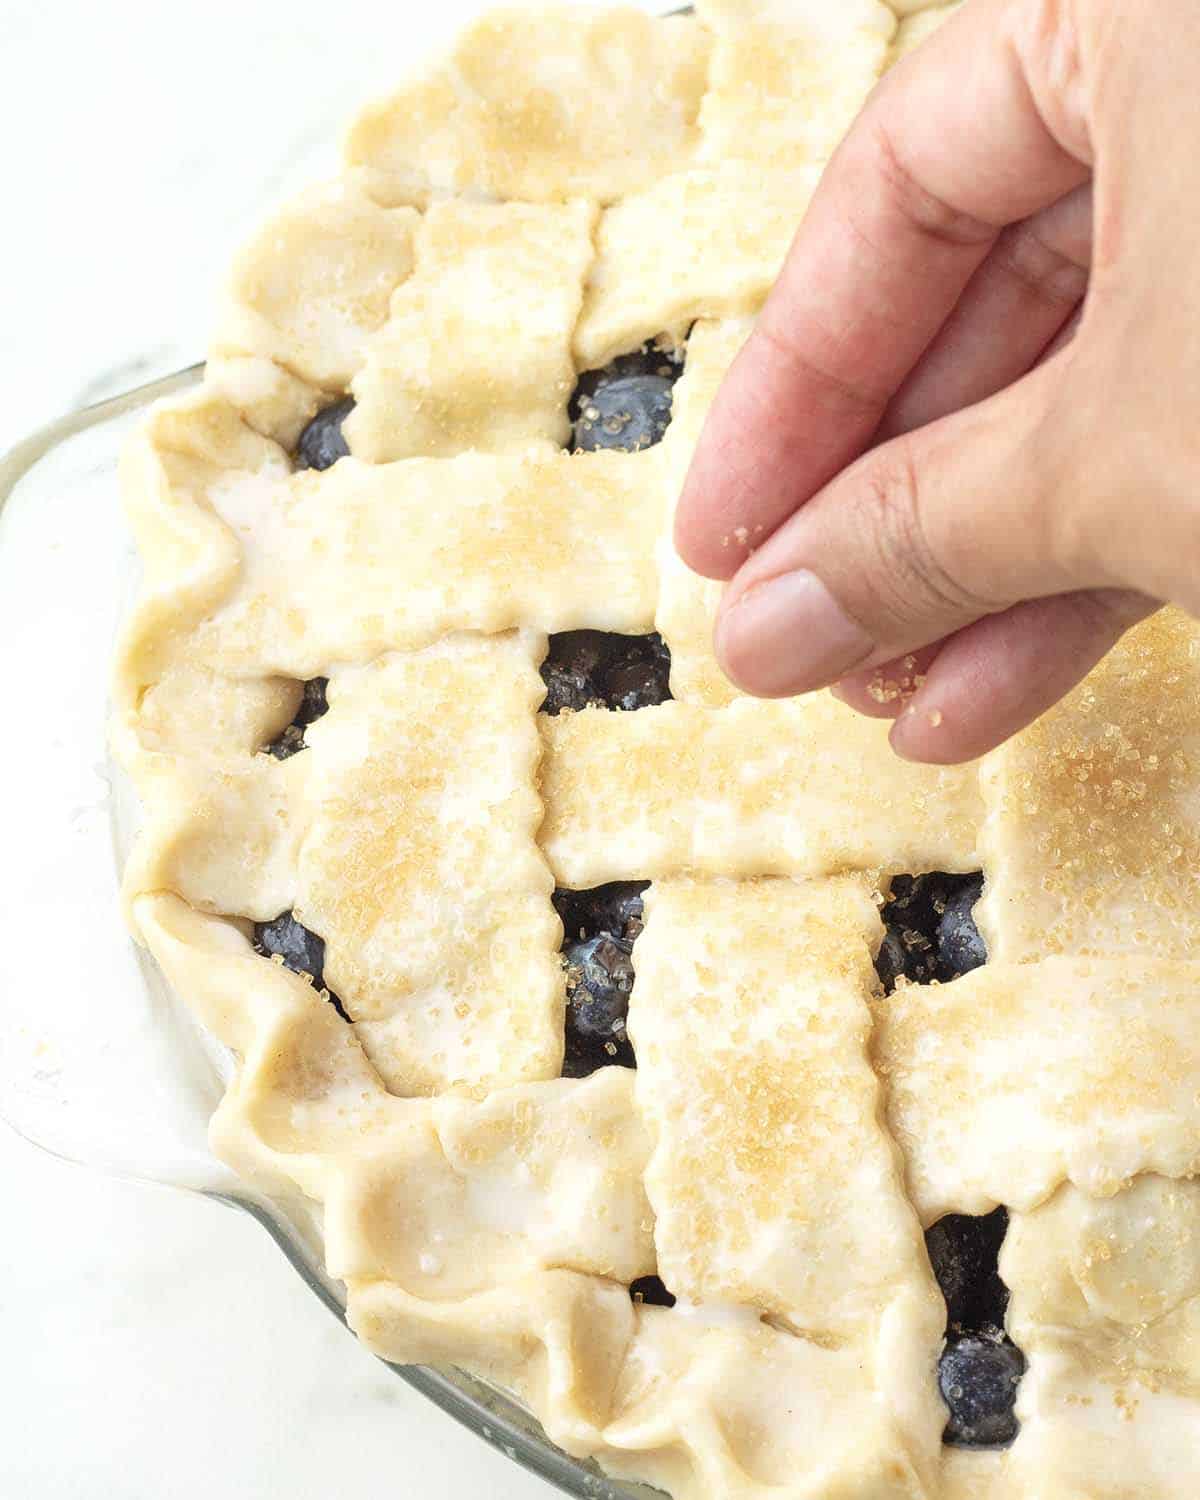
Sprinkle the top and edges with coarse sugar, then bake!
Recipe Note
The pie starts out baking at high heat. This is to melt the butter and release steam in the crust, which creates those flaky layers we all love. The temperature is then lowered so the crust and filling can bake slowly to golden, tender perfection.

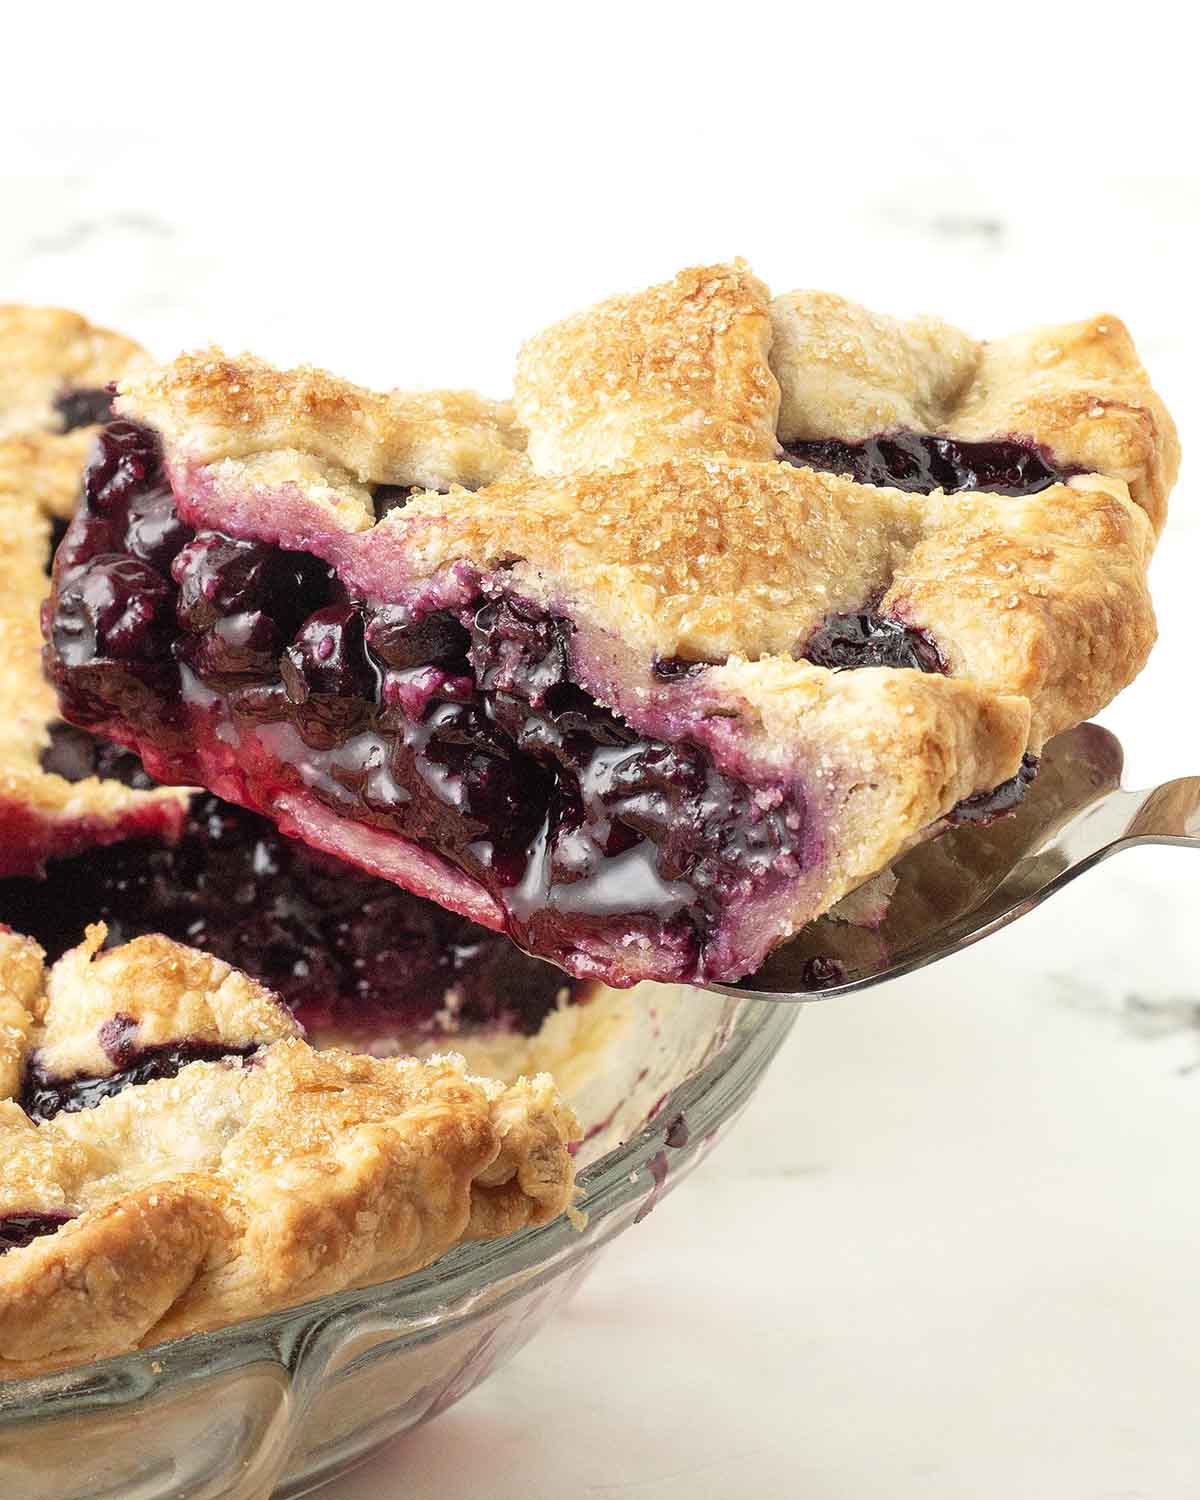
The pie is done when the filling is bubbling up through the openings and when the crust is golden brown.
Keep an eye on the crust as it bakes. If it's getting too brown, loosely cover the whole pie with foil or use a pie shield or foil to cover just the edges.
When the baking time is up, remove the pie from the oven and place it on a cooling rack.
Recipe Note
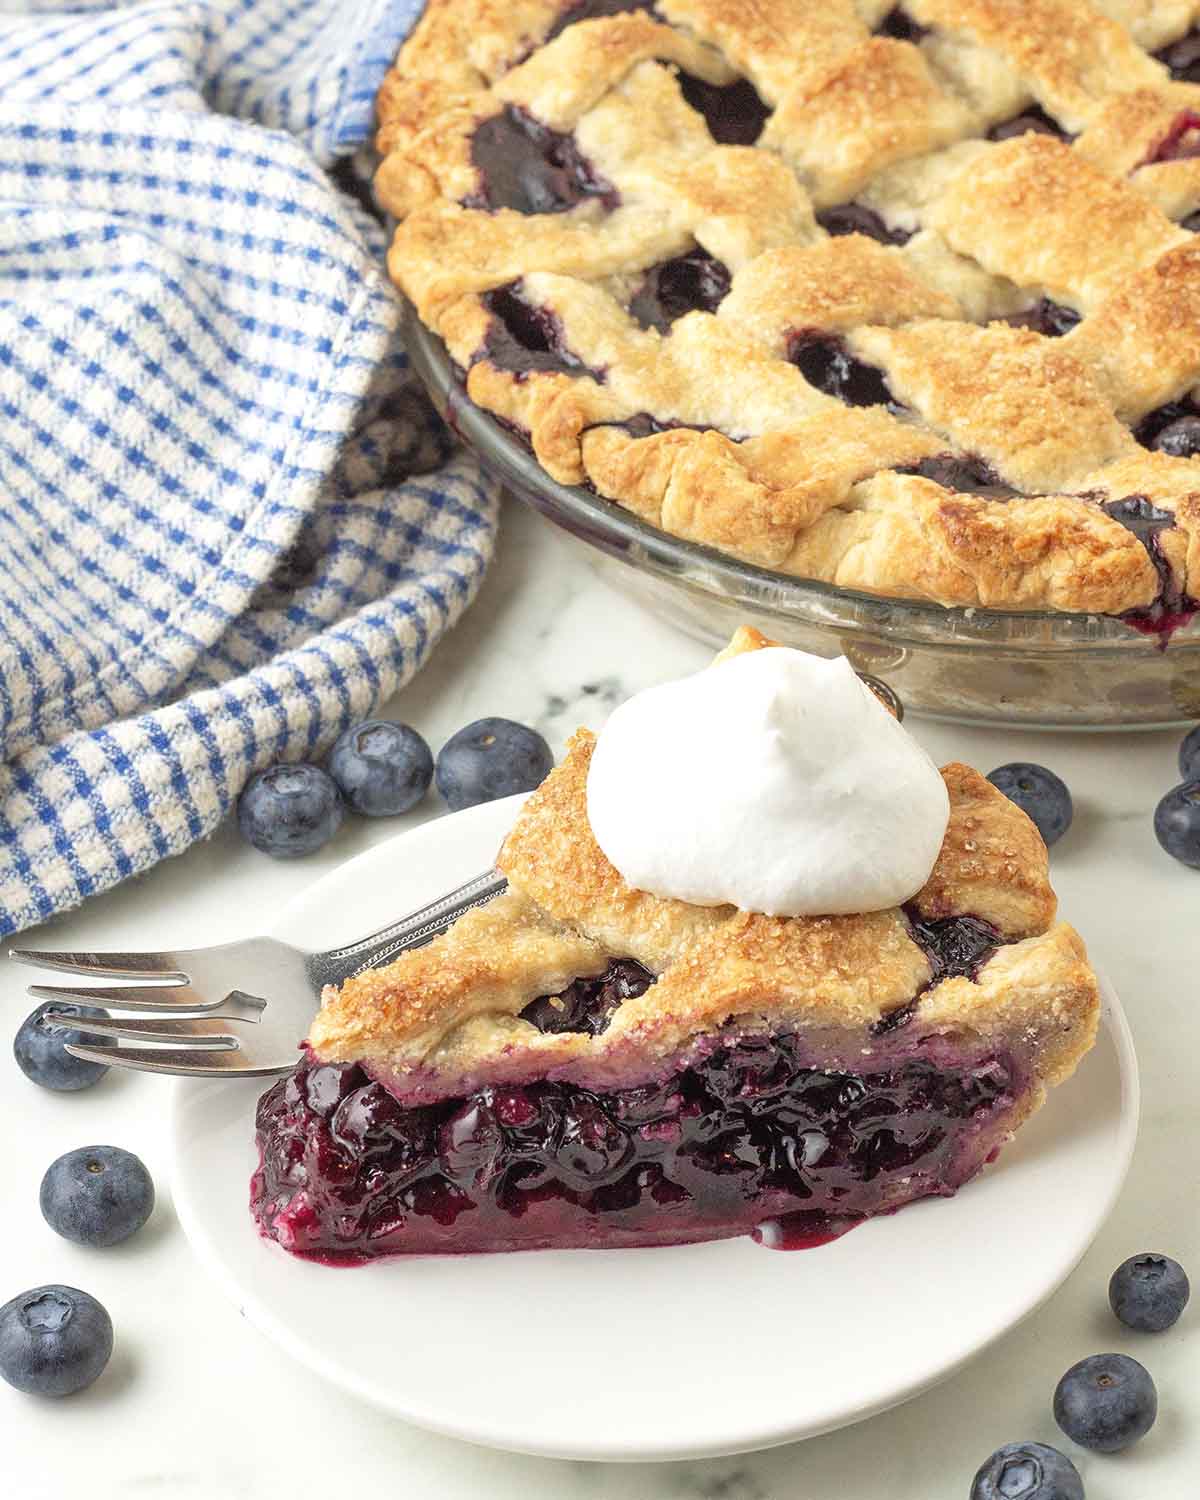
Now this is the hardest part about this recipe (it is for me, anyway!) Allow your blueberry pie to cool for at least 4 hours or until it has reached room temperature before slicing. This is so the filling sets and each piece can hold its shape without turning messy.
The Fun Part: Serving!
Serve your vegan fruit pie warm or cold from the fridge, it's up to you. Have it plain, with fresh blueberries, a scoop of creamy vegan vanilla ice cream, or dairy-free whipped cream.
A Few More Tips for the Best Results
- Measure and have all your ingredients ready to go before starting. This will make the process run smoothly, quickly, and easily.
- Measure your ingredients correctly. I highly recommend using a scale (this is the kitchen scale I have) and my weight measurements when making this recipe.
- Get the timing right. Remember that the crust needs to be made in advance, well before you start making the pie filling, so plan accordingly. The pie crust can be made days in advance to save time.
- A metal pie pan or glass pie dish will work. I prefer to use a glass pie dish because it heats evenly, and you can get a peek at the bottom and sides of the crust as it bakes. If you use a metal plate, keep an eye on the pie, it will finish quicker.
- Pay close attention when measuring your cornstarch (or arrowroot starch). They can be tricky to measure properly since they clump, so use a scale if possible. If not, use the scoop and level method (learn more in my article on how to measure flour correctly). Too much or too little will leave your pie filling too thick or too thin and runny.
- Don't skip placing the pie dish on a parchment-lined baking sheet before putting it in the oven. The pie will bubble, and there's a good chance it will drip when it's close to being done.
- Read this post from top to bottom before you start. I’ve included a lot of tips and tricks. Also, read through the full recipe before getting started.
- Follow the recipe exactly as it’s written for the very best results.
If You Give This a Try...
I’d really love to know how everything went. Please leave me a comment and rating below, and if you post your pie on Instagram, don’t forget to tag me (@delightfuladventures) so I can see it!
Homemade Vegan Blueberry Pie (Fresh or Frozen Berries)
Suggested Equipment:
Ingredients:
For the Pie Crust (Prepare In Advance):
For the Filling:
- 6 cups (900g) fresh blueberries (see note below if using frozen blueberries)
- 2 tablespoons lemon juice
- ⅔ cup (133g) sugar
- 5 tablespoons (40g) cornstarch (see note below if using frozen berries)
- ½ teaspoon ground cinnamon
- ¼ teaspoon salt
For Finishing:
- 1 tablespoon vegan heavy cream OR dairy-free milk
- 2 teaspoons (8g) turbinado sugar (or any type of coarse sugar)
Instructions:
Prepare Pie Crust:
- Make a double batch of either my vegan pie crust OR my vegan gluten-free pie crust and chill them for at least 2 hours before making the rest of this recipe.
Prepare Filling:
- Preheat oven to 425°F (218°C).
- Rinse blueberries and place them in a large bowl.
- Add the lemon juice to the bowl and gently mix until the blueberries are coated in the juice.
- Add the sugar, cornstarch, cinnamon, and salt to the bowl and mix gently until the blueberries are coated with the dry ingredients.
Roll Pie Crust:
- Remove one of the discs of chilled dough from the fridge.
- Dust a rolling mat or piece of parchment paper with flour and place the chilled dough on top of the flour. Add a little more flour on top of the dough and using a rolling pin, roll out into a 12-inch circle.
- Carefully transfer the dough to a 9-inch pie dish and gently press it into the corners of the dish. If there are any cracks, press the dough back together to mend them.
- Pour the blueberry mixture into the bottom pie crust, making sure there are no gaps and that they are spread evenly.
- Remove the second chilled dough disc from the fridge. Dust your rolling mat or dust the same piece of parchment paper with flour, and place the dough on top of the flour. Add a little more flour on top of the dough and, using a rolling pin, roll out into a 12-inch circle.
- For a Non-Lattice Top Pie: Carefully transfer the dough to the top of the pie and trim any excess pie dough until you are left with about an inch of dough coming out from the pie plate. Tuck the excess dough under and crimp the edges. Cut venting slits in the top of the pie to create space for the steam to escape.
- To Make a Lattice Top Pie: Using a pizza wheel, a pastry wheel, or a sharp knife, slice off a thin strip of the dough from the left and right sides so the sides are straight. Slice the remaining dough into 10 strips. Place 5 vertically on top of the pie and then arrange the other 5 in the opposite direction, one by one, over and under the strips to create the lattice design. (See the link above if you need a video tutorial for this.) Tuck the excess dough under and crimp the edges to seal the crust.
- Brush the surface of the pie crust with the vegan heavy cream or dairy-free milk and then sprinkle with turbinado sugar.
- Place the pie on a parchment-lined baking sheet and place it in the pre-heated oven. Bake for 20 minutes. After 20 minutes, reduce the heat to 350°F (177°C) and continue baking for another 45-55 minutes. (**If you are using frozen berries, see cooking time below**)
- Loosely cover the whole pie with foil or use a pie shield or strips of foil to cover just the edges if it's browning too much.
- Remove the pie from the oven and place it on a cooling rack. You'll know it's done when the filling is bubbling and the inner temperature checked with a thermometer is at least 203°F (95°C).
- Allow it to cool for at least 4 hours before slicing.
Recipe Notes:
- Please read all of the information above, as well as the notes below, before making this recipe.
- If using frozen blueberries: Don't thaw them. Use 7 tablespoons (56g) of cornstarch (or arrowroot starch) in the filling. Bake for 20 minutes at 425°F (218°C), and after 20 minutes, reduce the heat to 350°F (177°C). Continue baking for another 70-80 minutes. Because of the extended bake time, you'll definitely need to tent your pie with foil or use a pie shield when frozen berries are used.
- Cover and store leftovers in the fridge for up to 5 days.
- The calorie count is for 1 of 8 slices made using my easy vegan pie crust and does not include any toppings. The rough calorie count for the pie made with my vegan gluten-free crust is 501 calories per serving. Nutrition data is only to be used as a rough guide. Learn how nutrition data is determined on this website.


Did You Make This Recipe or Have a Question About It?