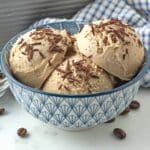
Creamy Vegan Coffee Ice Cream (No Nuts, No Bananas)
This vegan coffee ice cream is creamy and silky-smooth, with an irresistible coffee flavour. Made with just 6 ingredients, including instant coffee and vegan heavy cream (no nuts or bananas needed!), it has just the right amount of sweetness without being overly sweet, so the coffee flavour really gets to shine. It’s completely dairy-free and egg-free, and heads up: you’ll need an ice cream maker to churn it into that smooth, creamy texture I know you’re going to love.
Servings: 8
Ingredients
- ½ cup (125ml) unsweetened dairy-free milk (cold, see note below)
- 5 teaspoons instant coffee
- 2½ cups (625ml) unsweetened vegan heavy cream or vegan whipping cream (cold)
- ½ cup (100g) granulated sugar
- 2 teaspoons vanilla extract
- ¼ teaspoon salt
Instructions
At least 24 hours before starting, place the ice cream maker's bowl into the freezer.
- Add the dairy-free milk and the instant coffee to a bowl or measuring cup and whisk until all the granules have dissolved. Set aside.
- Add vegan heavy cream, sugar, vanilla extract, and salt to a mixing bowl and whisk to combine.
- Add the coffee mixture to the heavy cream mixture and whisk well until the sugar has completely dissolved before proceeding.
- Transfer the ice cream bowl from the freezer to the ice cream maker. Add the paddle and cover into place, and turn the machine on. Carefully pour the coffee ice cream base into the machine.
- Once the ice cream reaches a thick, soft-serve consistency, after about 15-20 minutes, turn the machine off.
- You can enjoy it at this point as soft-serve, but if you prefer firmer, scoopable ice cream, transfer it immediately to a freezer-safe container, cover, and freeze for 4 to 6 hours.
- Remove the ice cream from the freezer and let it sit at room temperature for 15 minutes before serving so it's easy to scoop.
Notes
- Please read the helpful info above and below before making this recipe to ensure success.
- Use unsweetened, unflavoured dairy-free milk so you can control the flavour and sweetness. Use a naturally creamy milk, such as soy or oat, for the best results.
- Churning time will vary, depending on your ice cream maker and how long you freeze your ice cream bowl.
- If any solid ice cream sticks to the sides of the churning bowl, use a hard plastic, rubber, or silicone spatula to scrape it off gently. Avoid metal to prevent scratches. Let the scraped ice cream soften in a separate bowl, then stir until smooth before adding it to the container with the rest of the ice cream.
- Store your ice cream in an airtight container for up to 2 weeks. For the best texture, press plastic wrap directly onto the surface of the ice cream before covering the container.
- Nutrition info is based on 1 serving (½ cup), and the recipe is made exactly as written using unsweetened, unflavoured soy milk for the dairy-free milk. Nutrition info is only to be used as a rough guide. Click to learn how nutrition info is calculated on this website.
Nutrition
Serving: 0.5cup | Calories: 257kcal | Carbohydrates: 8g | Protein: 1g | Fat: 25g | Saturated Fat: 15g | Sodium: 79mg | Potassium: 69mg | Fiber: 1g | Sugar: 6g | Vitamin A: 6IU | Calcium: 19mg
