Vegan Gluten-Free Pie Crust
A simple, flaky, buttery vegan gluten-free pie crust for all of your favourite pie recipes. This crust can be fully or partially blind-baked, it can be doubled for a double pie crust, AND it can be used for either sweet or savoury pies.
Servings: 8
Ingredients
- 1 ¼ cups (185g) gluten free flour **see important note about flour below**
- 1 tablespoon (13g) sugar (2 tablespoons (25g) if you prefer a sweet crust)
- ¼ teaspoon salt
- ½ cup (113g) unsalted vegan butter cold and cubed
- 4 tablespoons ice water
Instructions
- Add flour, sugar, and salt to a medium bowl and whisk together.
- Add cold cubed butter and with a pastry blender or two forks, cut the butter into the dry mixture until the butter has broken down and only pea sized chunks remain.
- Add ice cold water, one tablespoon at a time, mixing with a spoon after each addition. After all water has been added, mix again, If the dough is too dry, add more water, one teaspoon at a time. Mix until everything combines to form a loose dough.
- Using your hands, form the loose dough into a tight ball making sure that any dry patches of flour gets incorporated into the ball.
- Place the dough on a piece of plastic wrap and pat down into a disk. Wrap the dough disk and place in the refrigerator to chill for at least 2 hours.
- After the dough has chilled, remove it from the refrigerator and let it sit at room temperature for 10-15 minutes. (see note below)
- Dust a piece of parchment paper with a little gluten free flour and place the chilled dough on top of the flour. Place another piece of parchment paper on top of the dough and using a rolling pin, roll out into a 12-inch circle that is ⅛ inch thick.
- Remove the parchment paper from the top and place your pie dish upside down on top of the dough. Place one hand on top of the pie dish and slide your other hand under the parchment paper and flip over. Slowly remove the parchment paper and press the dough into the dish. Repair any cracks. If you want to have crimped edges, trim off the overhang so only a half inch remains. Save the pieces you cut off, place in a small bowl, and place the bowl in the fridge. If you don't want crimped edges, trim off all the overhang.
- Place the pie dish in the refrigerator for 15 minutes so it can chill again.
To Crimp Edges (optional)
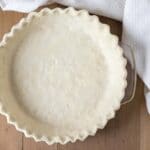
- After the dough has chilled again, roll the overhang under itself and working with one hand on the inside of the pie dish, and your other hand on the outside (see image above), use the index finger of your inside hand to push the dough between the thumb and index finger of your outside hand to form the fluted shape. Continue around the rest of the pie. Use the excess pieces of overhang you trimmed earlier to repair any spots that need extra dough.
Notes
- Please read all of the information tips, and FAQ info above, as well as the notes below before making this recipe.
- It’s important to know that different gluten-free flour blends use different ingredients and ratios, so results may vary if you substitute. I have never used any other brand of gf flour to make this recipe (other than Bob’s Red Mill Gluten Free 1 to 1 Baking Flour (Amazon link) in the blue package, NOT the red package), so please know that your results may not be the same as mine if you substitute with another gluten-free flour blend. The weight stated above is for this specific brand of flour.
- This recipe will NOT work with coconut flour or any other single gluten-free flour, it must be a blend, the one mentioned above for the best and intended results.
- If the gluten-free flour blend brand you are using does not contain xanthan gum, add ¾ teaspoon to the dry ingredients.
- You may need a little more or a little less water than what the recipe calls for if you use another brand of gluten-free flour. Add water one tablespoon at a time to ensure you add the correct amount and if you need more, add more, one teaspoon at a time.
- Don't skip letting the dough sit at room temperature for a while after the chilling time. If handled right away, it will not roll properly and will be crumbly and hard to handle. Don't let it sit for too long, though, or it will get too warm and will not handle properly.
- Leave the sugar out if you are using the crust for a savoury pie recipe.
- I always use a 9-inch glass pie dish for my pies because glass heats evenly and because you can get a peek at the bottom and sides of the crust as the pie bakes.
- Double this recipe for a recipe that calls for a top and bottom crust and bake according to the pie recipe's directions.
- To par-bake or fully blind-bake the crust follow this step-by-step that will show you how to blind-bake a pie crust.
- If you find your pie crust edges browning a little too much for your liking, use an adjustable silicone pie shield like this one (Amazon link).
- Nutrition info is based on ⅛th of the pie crust recipe only, made as written and with no filling. Nutrition info is only to be used as a rough guide. Click to learn how nutrition info is calculated on this website.
Nutrition
Serving: 1slice | Calories: 186kcal | Carbohydrates: 20g | Protein: 1g | Fat: 11g | Saturated Fat: 5.7g | Sodium: 80mg | Potassium: 37mg | Fiber: 0.6g | Sugar: 1.5g | Calcium: 2.9mg