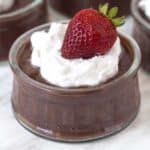
Vegan Chocolate Pudding
Rich, creamy, homemade vegan chocolate pudding that’s dairy-free, egg-free, and gluten-free. Making from-scratch pudding is easier than you may think. It’s a quick and easy dessert that calls for only a few simple ingredients (no tofu and no avocado!)
Servings: 4
Ingredients
- 6 tablespoons (75g) sugar
- 3 tablespoons (16g) unsweetened cocoa powder
- 3 tablespoons (24g) cornstarch (arrowroot starch may also be used, see note below)
- ⅛ teaspoon salt
- 2 cups (480ml) unsweetened dairy-free milk (see note below)
- 1 teaspoon vanilla extract
- 2 tablespoons (28g) unsalted vegan butter (optional) (see note below)
Instructions
- Add the sugar, cocoa powder, cornstarch, and salt to a medium saucepan. Whisk until combined and no lumps remain. You may need to break up any lumps with the back of a spoon.
- Slowly whisk in milk until combined with the dry mixture. Scrape around the corners of the pot with a spoon to be sure no dry ingredients remain.
- Place pot on medium-high heat and continuously whisk until mixture has thickened enough to coat a spoon, this will take 8 minutes. (See images above)
- Remove the pot from the heat and whisk in vanilla and if using, the vegan butter.
- Allow the pudding to sit in the pot to cool down for 15 minutes. Whisk every few minutes during the rest time so it does not start to form a skin on top.
- Pour pudding into a medium-sized glass bowl or individual serving bowls.
- Place plastic wrap directly on the surface of the pudding and place the bowl(s) in the refrigerator.
- Refrigerate pudding for at least 2 hours so it can set. If you refrigerated it in a medium bowl, remove the plastic and whisk the pudding to loosen it up and then divide between serving bowls. Serve cold, either plain or with coconut whipped cream and fresh berries.
Notes
- Please read all of the information, troubleshooting, and FAQ info above, as well as the notes below before making this recipe.
- This recipe makes 2 cups of pudding in total.
- Any type of unsweetened non-dairy milk can be used, a creamy milk will provide the best results. Make sure to use unsweetened, unflavoured milk so you have full control over the sweetness and flavour.
- If you want to make your vegan chocolate pudding without cornstarch, arrowroot starch (also referred to as arrowroot flour or arrowroot powder) can be used instead.
- I prefer to use Dutch-process cocoa powder in my recipes, but natural cocoa powder / cacao powder will work as well.
- You don't want the mixture to boil, but it will start to bubble towards the end of the cooking time. It will take roughly 8 minutes to thicken properly. No noticeable thickening will happen until the last 2 minutes or so, but keep whisking!
- The vegan butter is optional if you prefer to have an oil-free pudding, however, adding the butter will result in a richer, smoother, and creamier pudding.
- If you prefer not to use plastic wrap, you can place the pudding in an airtight container, but keep in mind that a thick layer will form on top of the pudding (also known as pudding skin) that will make the pudding lumpy when whisked. Lumps at that point will not be able to be whisked back in, so to get rid of them, pass the pudding through a sieve and it will get back to being silky smooth.
- You can also pour the pudding directly into individual serving bowls to chill rather than one large bowl, this will result in a pudding that's a little more set after chilling since you will not be able to whisk it after it has cooled to loosen it up. You'll still need to place the plastic wrap on each bowl.
- Adapted from my vegan pumpkin pudding recipe and vegan vanilla pudding recipes.
- The nutrition info listed below is for 1 of 4 servings (each serving is ½ cup) with the recipe made as written using unsweetened oat milk and no vegan butter. Nutritional data is only to be used as a rough guide. Click here for more info on how nutrition info on this website is determined.
Nutrition
Serving: 0.5cup | Calories: 161kcal | Carbohydrates: 33g | Protein: 1.7g | Fat: 2.8g | Saturated Fat: 0.5g | Sodium: 127mg | Potassium: 357mg | Fiber: 1.6g | Sugar: 22g | Vitamin A: 45IU | Calcium: 137mg | Iron: 1.7mg