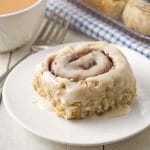
Vegan Gluten-Free Cinnamon Rolls
Soft and fluffy homemade vegan gluten-free cinnamon rolls you can serve at breakfast, brunch, on Christmas morning, or for dessert! Yes, these buns are dairy-free, egg-free and to make them even more special, they’re topped with gooey vegan icing. This recipe contains step-by-step images showing you how to make and bake them, plus, you can refrigerate the rolls overnight and bake them the next morning.
Servings: 9
Ingredients
Wet Ingredients
- 1 tablespoon ground flax seeds
- 3 tablespoons water
- 1 cup (240ml) unsweetened dairy-free milk (warmed to 100° F – 110° F (38° C – 43° C)
- 2 ¼ teaspoons active dry yeast
- 1 teaspoon granulated sugar
- ¼ cup (57g) melted unsalted vegan butter (cooled down)
- 1 teaspoon apple cider vinegar
Dry Ingredients
- 2 ½ cups + 1 tablespoon (380g) gluten free flour **see important note about flour below**
- 2 teaspoons baking powder
- ½ teaspoon salt
- ¼ cup (50g) granulated sugar
- ½ teaspoon ground cinnamon
Filling
- ½ cup (100g) brown sugar packed
- 2 teaspoons ground cinnamon
- 2 tablespoons melted unsalted vegan butter
Icing
- 1 cup (120g) powdered sugar
- 1 tablespoon melted unsalted vegan butter
- 1 tablespoon unsweetened dairy-free milk
- ½ teaspoon vanilla extract
- ⅛ teaspoon salt
Instructions
- Grease an 8-inch x 8-inch glass baking dish OR an 8-inch round cake pan, set aside.
- Prepare your flax egg by whisking together ground flax seeds and water. Set aside to thicken.
Proof the Yeast
- In a medium bowl, add the yeast, 1 teaspoon of sugar, and the warm milk. Stir and set aside for 10 minutes.
Prepare Dry Ingredients
- In a large bowl, add the gluten free flour, baking powder, salt, sugar, and ground cinnamon and whisk. Set aside.
Prepare Filling
- In a small bowl, mix the brown sugar and the cinnamon. Set aside.
Prepare Dough
- Once your yeast has been proofed, add the flax egg, melted butter, and apple cider vinegar to the yeast mixture and stir.
Prepare Rolls
- Brush some oil onto a large piece of parchment paper.
- Place the dough on top of the oiled parchment paper and using your hands, form it into a square (this helps to form it into the proper shape).
- Using your hands, press the dough into a 10-inch long x 14-inch wide rectangle. If you prefer to use a rolling pin, add a little flour to the entire top surface of the dough and place another piece of parchment paper on top of the dough and gently roll it out to the correct dimensions.
- Brush the melted butter on top of the rolled out dough.
- Sprinkle the filling on top of the dough, leaving about a 1-inch space at the top edge (as shown in the image above).
- Using the parchment paper, slowly roll the dough away from you (as shown in the image above).
- With the seam side down, using a sharp knife, slice the dough into 9 rolls (roughly x 1 ½" each) and place them in the baking dish (or cake pan). If using a cake pan, slice into 8 rolls (roughly 1 ¾") rather than 9.
- Carefully place the rolls in the baking dish.
- Cover with a kitchen towel and place in a warm area to rest for one hour. If your oven has the proof setting, you can use it here.
- Just before the one hour has passed, preheat oven to 350° F (177° C).
- Once the rise time has passed and the oven is ready, place the baking dish into the oven.
- Bake for 24 minutes. Remove from oven, place the dish on a cooling rack, and allow to cool for a few minutes.
Prepare Icing
- Add all of the icing ingredients to a small bowl and mix until smooth.
- Once the rolls are warm and no longer hot, spread the icing onto the rolls. If you aren't going to serve all of them at the same time, add the frosting only to the buns that will be served right away.
Notes
- Please read all of the information, tips and FAQ info above and the info below before making this recipe.
- It’s important to know that different gluten-free flour blends use different ingredients and ratios, so results will vary if you substitute. I have never used any other brand of gf flour to make this recipe (other than Bob’s Red Mill Gluten Free 1 to 1 Baking Flour (Amazon link) in the blue package, NOT the red package), so please know that your results may not be the same as mine if you substitute with another gluten-free flour blend. The weight listed above is for this specific brand of flour.
- If you cannot use the flour I use, be sure to use a rice based gluten-free flour blend and if the brand you’re using doesn’t contain xanthan gum in the ingredient list, add 1 ½ teaspoons to the dry ingredients, and again, your results may not be the same as mine if a different flour blend is used.
- This recipe will NOT work with coconut flour or any other single gluten-free flour, it must be made with a blend.
- Don't miss that extra tablespoon of flour. This recipe calls for 2 ½ cups PLUS 1 tablespoon of flour, and yes, it really makes a difference in the final result.
- FOR OVERNIGHT / MAKE-AHEAD ROLLS: Do all steps up to #8 and then cover the baking dish tightly with plastic wrap and put it in the fridge so the rolls can slowly rise overnight. In the morning, remove the dish from the fridge and allow it to sit on the counter for 1 hour, then start back at step #10.
- Make sure your yeast and baking powder are fresh before using; these are very important ingredients that contribute to the rolls rising properly.
- When rolling out the dough, have a measuring tape nearby or you can mark guides on the parchment paper to ensure you get it to the correct size. It's important to not roll the dough too thin.
- Melted coconut oil can be substituted for the butter in this recipe, either unrefined or refined. If unrefined is used, there may be a slight hint of coconut flavour.
- Coconut sugar can be used instead of the brown sugar for the filling.
- Use the icing recipe provided or you can make my vegan cream cheese frosting for them instead.
- Store leftover icing in a airtight container and keep in the refrigerator. Remove from the refrigerator about an hour before you need it so it can get back to room temperature.
- Store leftover rolls in an airtight container at room temperature for up to 2 days. If they're not done after 2 days, move the container to the refrigerator for up to 3 more days. When you're ready to serve them, reheat them in the oven at 300° F (150° C) for 10 minutes or the microwave for 30 seconds. Allow them to cool slightly before icing.
- You can also freeze unfrosted rolls by wrapping each one individually and storing them in an airtight container for up to two months. Defrost at room temperature, warm them up, and then add frosting when you’re ready to serve them.
- Adapted from my vegan cinnamon rolls recipe and this gluten-free cinnamon rolls recipe.
- Nutrition info is based on 1 of 9 cinnamon rolls with frosting. Nutrition info is only to be used as a rough guide. Click here to learn how nutrition info is calculated on this website.
Nutrition
Serving: 1roll | Calories: 358kcal | Carbohydrates: 66g | Protein: 3g | Fat: 9.3g | Saturated Fat: 4.4g | Polyunsaturated Fat: 0.2g | Monounsaturated Fat: 0.2g | Sodium: 266mg | Potassium: 104mg | Fiber: 1.5g | Sugar: 31.2g | Vitamin A: 59.2IU | Calcium: 87.2mg | Iron: 0.2mg