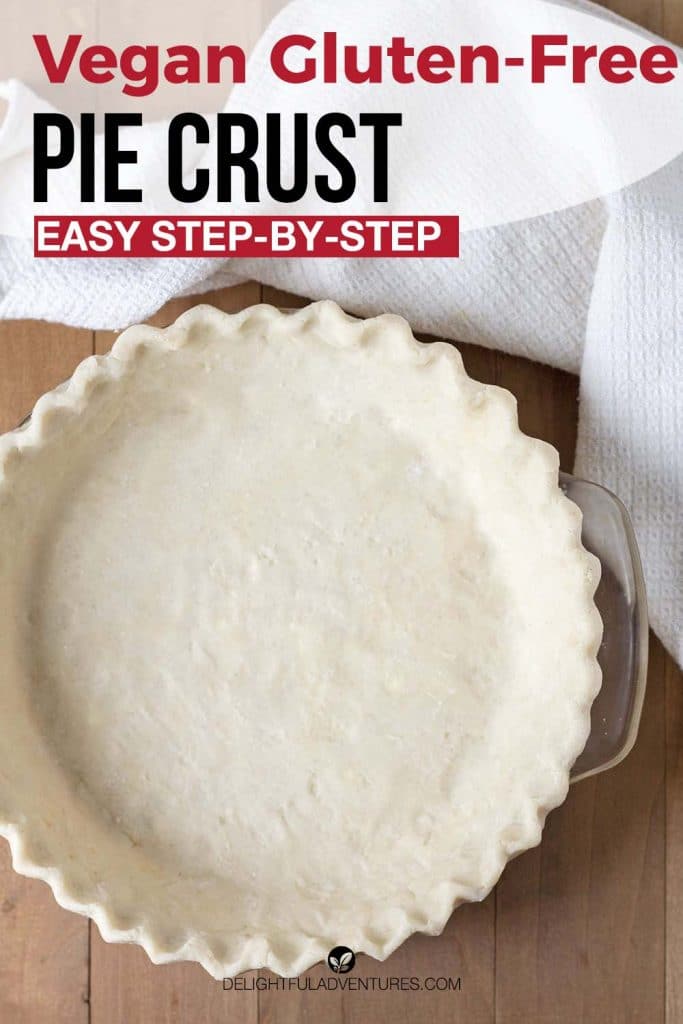
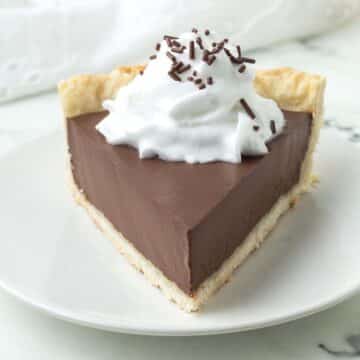
A simple, flaky, buttery vegan gluten-free pie crust for all of your favourite pie recipes. This multi-use crust can be blind-baked for pre-cooked fillings, the recipe can be doubled for a double pie crust, AND it can be used for either sweet or savoury pies.
Follow this step-by-step so you can start baking some pies for your loved ones!

Save This Recipe!
In a rush? Don't have time to scroll through this page right now? Enter your email below and this recipe/article will be sent straight to your inbox so you can come back to it when you're ready. Plus, you'll receive delicious recipes every week! You may unsubscribe at any time.
Years ago, any time I was invited to a potluck or get-together, my contribution to the food table was always a pie. Usually a pecan pie.
Back then, I was not vegan or gluten-free yet, so the crust and filling recipes weren't either, but I have taken the crust recipe I used to make over and over again and converted it to be both vegan and gluten-free. And the pecan pie filling? I'm still working on that!
Back then, my go-to pie crust recipe was a basic pie crust, it was not complicated and the ingredient list was simple, much like this one.
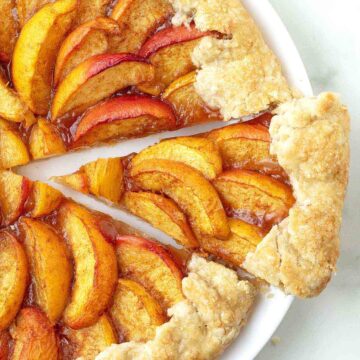
As mentioned above, this pie crust recipe is versatile. It can be used anywhere a pie crust is called for. Vegan quiche recipes, your favourite single-crust pie recipes (like my pumpkin pie, sweet potato pie, and chocolate pumpkin pie!), double-crust pie recipes, tarts, galettes, and hand pies.
It can also be used for sweet AND savoury recipes (mmm...veggie pot pie...)
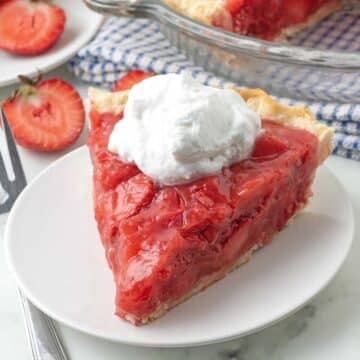
You can also use it for recipes that call for a pre-cooked pie crust, like banana cream pie, fresh strawberry pie or chocolate pie.
So let's get started! There's no longer a need to buy pre-made, store-bought pie crusts when you can make your own nut-free, egg-free, gluten-free, dairy-free pie crust at home, and no need to be intimidated, it's easy and you can do it! I foresee some delicious pie recipes in your future.
Ingredients You'll Need
To make this vegan gluten-free crust, all you'll need is FIVE ingredients.
Gluten-free flour blend, sugar, salt, COLD cubed vegan butter, and the iciest of ice water.
I use all butter for this recipe, but of course, there are different combinations like all shortening, or half butter and half shortening, and coconut oil.
My preference is an all butter crust because I prefer the taste and the lighter, flakier texture and I think you'll like it, too!
Are you new to vegan gluten-free baking? If so, be sure to read all of my vegan gluten-free baking tips!

Why Does the Butter and Water Need to Be Cold?
It's very important that your butter and water are cold and there's some interesting science behind the why. Simply put, you want to prevent the butter from melting as you're making the dough. If the butter melts, your crust won't end up flaky, as a pie crust should be.
When made correctly, your pie dough should have little visible pieces of butter. These little pieces of butter will melt as the pie crust bakes and the water from the butter creates steam that separates the dough into layers, creating the flakiness we all love.
If your butter is too warm and melts as you're making your dough, you'll end up with a tough and crunchy crust, which is not ideal for a pie.
So always be sure that your butter and water are as cold as possible before starting and only remove them from the refrigerator when you're ready to add them to the bowl.
EMAIL SIGN UP FORM
How to Make It
(Note: I’ve outlined the step-by-step on how to make this recipe here, but find the full recipe, ingredients, and directions at the end of this post.)
Making your own gluten free vegan pastry dough is not complicated at all! Follow along with the images below and you'll be a pro in no time!
1. The first step is to whisk the flour, sugar, and salt together. After that has been done, add the cold, cubed butter to the bowl.
2. Next, using a pastry blender or two forks, cut the butter into the dry mixture
3. Continue until the butter has broken down and only pea-sized chunks remain (see image #3 below).
4. Next, add the ice water. The brand of flour I use needs only four tablespoons (¼ cup), but if you use another gluten free flour blend, or if your altitude or kitchen temperature is high, you may require either slightly more or less water for the dough to come together.
When Adding the Water...
It's important to not add too much water (you'll end up with a sticky, wet dough that is hard to work with) or too little water (you'll end up with a dry, crumbly dough that will not hold together).
If you end up adding too much water, add a little more flour, if you add too little water, just add more water, a little at a time until the dough is at the proper consistency.

5. Next, mix with a spoon until large chunks of dough are formed like in image #5 below.
6. After that, get in there with your hands, working quickly so the butter pieces don't melt, and form the dough into a tight ball like in image #6.
7. Finally, flatten the dough into a disk and wrap it in plastic wrap. Refrigerate it so it can rest and chill for at least 2 hours.

Rolling Out the Dough
After the dough has chilled, it's time to roll it out.
Generously dust some of your gluten-free flour on a piece of parchment paper, unwrap and place the chilled dough disk on top of the flour.
Sprinkle some more gluten free flour on top of the dough and then place another piece of parchment paper on top. Using a rolling pin, gently roll the dough into a 12-inch circle
Your dough doesn't have to be the perfect circle (as you can see from my image below!) just try to get it as round as you can. Do this by starting to roll from the center and then rotate the dough slightly after each roll. You also want the rolled-out dough to be approximately ⅛ of an inch thick.
Once it's rolled out to the proper size, remove the top piece of parchment paper and repair any cracks around the edges by pressing them back together.

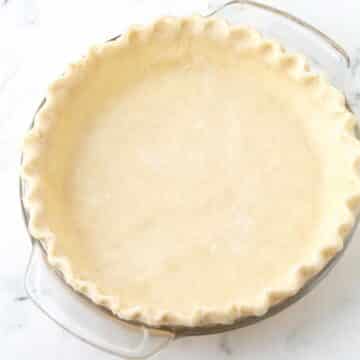
Placing the Dough In the Pie Dish
Now, this next part is the trickiest part of this recipe. Because this dough does not contain any gluten, it's less pliable than dough made with wheat flour. So just picking up the dough and placing it into the pie dish isn't going to work well for you.
What I do instead is I place my standard 9-inch glass pie dish upside down on top of the dough, like in the image below:

I then place one hand on top of the dish and the other hand under the parchment paper, and I then turn everything right side up.
I'll then remove the parchment paper and gently press the dough into the corners of the pie dish. There may be little cracks here and there, that's okay, simply repair them by pressing each side together.
At this point, I'll also trim off any overhang. If you want fancier fluted edges, leave about a half-inch of overhang. If you don't want to crimp the edges, simply slice off the overhang and you can leave it as-is or you can use a fork to press the edges to make it look pretty.
After all of these steps, I place the pie dish in the refrigerator to chill again for about 15-minutes so the butter in the dough stays nice and cold.
Crimping the Edges
This part is optional, but don't let it scare you, you probably think it's harder than it actually is.
The half-inch of overhang you left in the last step, fold it under itself and then using both hands, work your way around the edge of the pie crust, crimping it as shown in the image below.

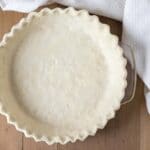
And that's it! Your gluten-free vegan pie crust is ready for a delicious filling!
FAQ
I have only use Bob’s Red Mill 1 to 1 Baking Flour Blend (the one in the blue bag) for this recipe so I can’t speak for any others. Results will vary with other blends since ingredients and ratios will differ. If you do use a different flour, you may need to add slightly more or less water for the dough to come together, see recipe notes for details.
The Bob’s 1 to 1 Baking Flour I use contains xanthan gum, so if you do try another gf blend and it doesn’t contain xanthan gum, you’ll need to add ¾ teaspoon of it to your recipe.
This recipe will work with all-purpose wheat flour if you are not gluten-free.
Use your favourite vegan butter for this recipe. Personally, I like Melt Sticks and Becel Plant-Based Sticks, but other brands like Earth Balance and Miyokos will also work well.
Yes, feel free to use ¼ cup of vegan butter and ¼ cup vegan shortening for the recipe if you don't want to use all butter.
I have not used any other fats for this recipe, so I'm not sure how any others would work well.
Yes, after wrapping your dough tightly, it can rest in the refrigerator for up to three days. You can also freeze it for up to three months by wrapping it in plastic wrap and placing it in a freezer bag or an airtight container. When you're ready to use the frozen dough, thaw in the refrigerator overnight.
Yes! After you've rolled out the dough, cut into the appropriate sizes you need for your recipe. Bake according to your recipe directions
Yes, just reduce or omit the sugar from the recipe and it can be used to make quiches, pot pies, spinach pies, etc.

Tips for Success
- Keep everything cold to ensure you end up with a deliciously flaky pie crust. Feel free to stop and chill the dough at any time during the process if you feel it has been worked with for too long and is getting warm.
- I always use a glass pie dish for my pies because it heats evenly and because you can get a peek at the bottom and sides of the crust as the pie bakes.
- If you find your pie crust edges browning a little too much for your liking, use an adjustable silicone pie shield like this one (Amazon link).
- Before you bake the crust, be sure that you've preheated the oven so the pie crust doesn't have a chance to get warm as you wait for the oven to come to temperature.
- To par-bake or fully blind-bake the crust follow this step-by-step that will show you how to blind-bake a pie crust.
- Double this recipe for a pie that calls for a top and bottom crust.
- This is optional, but you can use my vegan egg wash to make the top of your double pie crust recipes golden.
EMAIL SIGN UP FORM
If You Make This Recipe...
...tell me all about how things went! Leave a comment below and tell me what kind of pie you made 🙂
And If You Like This Recipe...
...you may also like these:
You can help others to find this vegan gluten-free pie crust recipe by pinning it to your recipe board on Pinterest. Click here to pin it now!
Vegan Gluten-Free Pie Crust
Suggested Equipment:
Ingredients:
- 1 ¼ cups (185g) gluten free flour **see important note about flour below**
- 1 tablespoon (13g) sugar (2 tablespoons (25g) if you prefer a sweet crust)
- ¼ teaspoon salt
- ½ cup (113g) unsalted vegan butter cold and cubed
- 4 tablespoons ice water
Instructions:
- Add flour, sugar, and salt to a medium bowl and whisk together.
- Add cold cubed butter and with a pastry blender or two forks, cut the butter into the dry mixture until the butter has broken down and only pea sized chunks remain.
- Add ice cold water, one tablespoon at a time, mixing with a spoon after each addition. After all water has been added, mix again, If the dough is too dry, add more water, one teaspoon at a time. Mix until everything combines to form a loose dough.
- Using your hands, form the loose dough into a tight ball making sure that any dry patches of flour gets incorporated into the ball.
- Place the dough on a piece of plastic wrap and pat down into a disk. Wrap the dough disk and place in the refrigerator to chill for at least 2 hours.
- After the dough has chilled, remove it from the refrigerator and let it sit at room temperature for 10-15 minutes. (see note below)
- Dust a piece of parchment paper with a little gluten free flour and place the chilled dough on top of the flour. Place another piece of parchment paper on top of the dough and using a rolling pin, roll out into a 12-inch circle that is ⅛ inch thick.
- Remove the parchment paper from the top and place your pie dish upside down on top of the dough. Place one hand on top of the pie dish and slide your other hand under the parchment paper and flip over. Slowly remove the parchment paper and press the dough into the dish. Repair any cracks. If you want to have crimped edges, trim off the overhang so only a half inch remains. Save the pieces you cut off, place in a small bowl, and place the bowl in the fridge. If you don't want crimped edges, trim off all the overhang.
- Place the pie dish in the refrigerator for 15 minutes so it can chill again.
To Crimp Edges (optional)
- After the dough has chilled again, roll the overhang under itself and working with one hand on the inside of the pie dish, and your other hand on the outside (see image above), use the index finger of your inside hand to push the dough between the thumb and index finger of your outside hand to form the fluted shape. Continue around the rest of the pie. Use the excess pieces of overhang you trimmed earlier to repair any spots that need extra dough.
Recipe Notes:
- Please read all of the information tips, and FAQ info above, as well as the notes below before making this recipe.
- It’s important to know that different gluten-free flour blends use different ingredients and ratios, so results may vary if you substitute. I have never used any other brand of gf flour to make this recipe (other than Bob’s Red Mill Gluten Free 1 to 1 Baking Flour (Amazon link) in the blue package, NOT the red package), so please know that your results may not be the same as mine if you substitute with another gluten-free flour blend. The weight stated above is for this specific brand of flour.
- This recipe will NOT work with coconut flour or any other single gluten-free flour, it must be a blend, the one mentioned above for the best and intended results.
- If the gluten-free flour blend brand you are using does not contain xanthan gum, add ¾ teaspoon to the dry ingredients.
- You may need a little more or a little less water than what the recipe calls for if you use another brand of gluten-free flour. Add water one tablespoon at a time to ensure you add the correct amount and if you need more, add more, one teaspoon at a time.
- Don't skip letting the dough sit at room temperature for a while after the chilling time. If handled right away, it will not roll properly and will be crumbly and hard to handle. Don't let it sit for too long, though, or it will get too warm and will not handle properly.
- Leave the sugar out if you are using the crust for a savoury pie recipe.
- I always use a 9-inch glass pie dish for my pies because glass heats evenly and because you can get a peek at the bottom and sides of the crust as the pie bakes.
- Double this recipe for a recipe that calls for a top and bottom crust and bake according to the pie recipe's directions.
- To par-bake or fully blind-bake the crust follow this step-by-step that will show you how to blind-bake a pie crust.
- If you find your pie crust edges browning a little too much for your liking, use an adjustable silicone pie shield like this one (Amazon link).
- Nutrition info is based on ⅛th of the pie crust recipe only, made as written and with no filling. Nutrition info is only to be used as a rough guide. Click to learn how nutrition info is calculated on this website.
Ray says
Hi! Thank you so much for this awesome vegan gluten free recipe! I’m trying it out and wondering what the max length of time the dough disk can sit in the fridge is. Thanks!
Gwen Leron says
Hi Ray!
I included some info about this in the faq section, here is the info you are looking for:
Yes, after wrapping your dough tightly, it can rest in the refrigerator for up to three days. You can also freeze it for up to three months by wrapping it in plastic wrap and placing it in a freezer bag or an airtight container. When you're ready to use the frozen dough, thaw in the refrigerator overnight.
I hope this helps! If you have any further questions, please don’t hesitate to ask. Enjoy the pie crust!
Nancy says
Thank you for sharing this pie crust recipe! This is the first time I’ve ever made a GF crust that actually stayed together! I look forward to making fully Vegan Gluten Free pie crust for my pies this thanksgiving!
Gwen Leron says
You're welcome, Nancy! I'm glad you gave it a try and that you like it. Enjoy all of those pies!
Denny says
I made this crust yesterday and it was as flaky and tasty as you described!I was nervous to make it because I am not the best baker, but your thorough instructions helped a lot. I made a pumpkin pie with it, we were given a bunch of pumpkins so I needed to use them before they spoiled. Thank you for this recipe, I will be making it again!
Gwen Leron says
Glad you gave it a try, Denny! I just made it myself this past weekend to test a new recipe that will be coming soon! Happy to know you enjoyed it and found my detailed instructions helpful.
Jan says
If you use real butter, it’s no longer vegan.
Gwen Leron says
Jan, IF this recipe called for real butter (which it doesn't), you're right, the recipe would no longer be vegan but the recipe clearly calls for vegan butter (there's a section in the FAQ about vegan butter brands to buy if you aren't familiar with any). So no need to worry, this pie crust (and everything else on this website) is 100% vegan 🙂
B Mc says
Can you sub cold coconut oil for the butter?
Gwen Leron says
Hi there, I have not tried it myself, but based on experience working with coconut oil in plenty of other recipes, I think your coconut oil would have to be semi solid at room temperature, but not too hard so it can cut into the flour mix and definitely not melted. You also can skip the chilling because the dough would turn solid since coconut oil hardens so much when cold. So once you cut in the coconut oil and form the dough, go straight to the step when you put it into the dish. Let me know how things go if you try it this way!
Barbara Tulli says
I am baking an apple pie with carmel sauce using this pie dough recipe. Do I need to pre bake it or just fill it and bake!...????
Gwen Leron says
It depends. Does the recipe you are using for the pie call for a pre-baked crust? Or a raw crust? Usually apple pies are made with a raw crust, but always go by what the apple pie recipe says. If the recipe has you cooking the apples before placing them in the crust, then I would assume you need to pre-bake. If the apples go into the pie crust raw, then you would use the raw crust. I hope this helps, let me know if there are any other questions, Barbara!